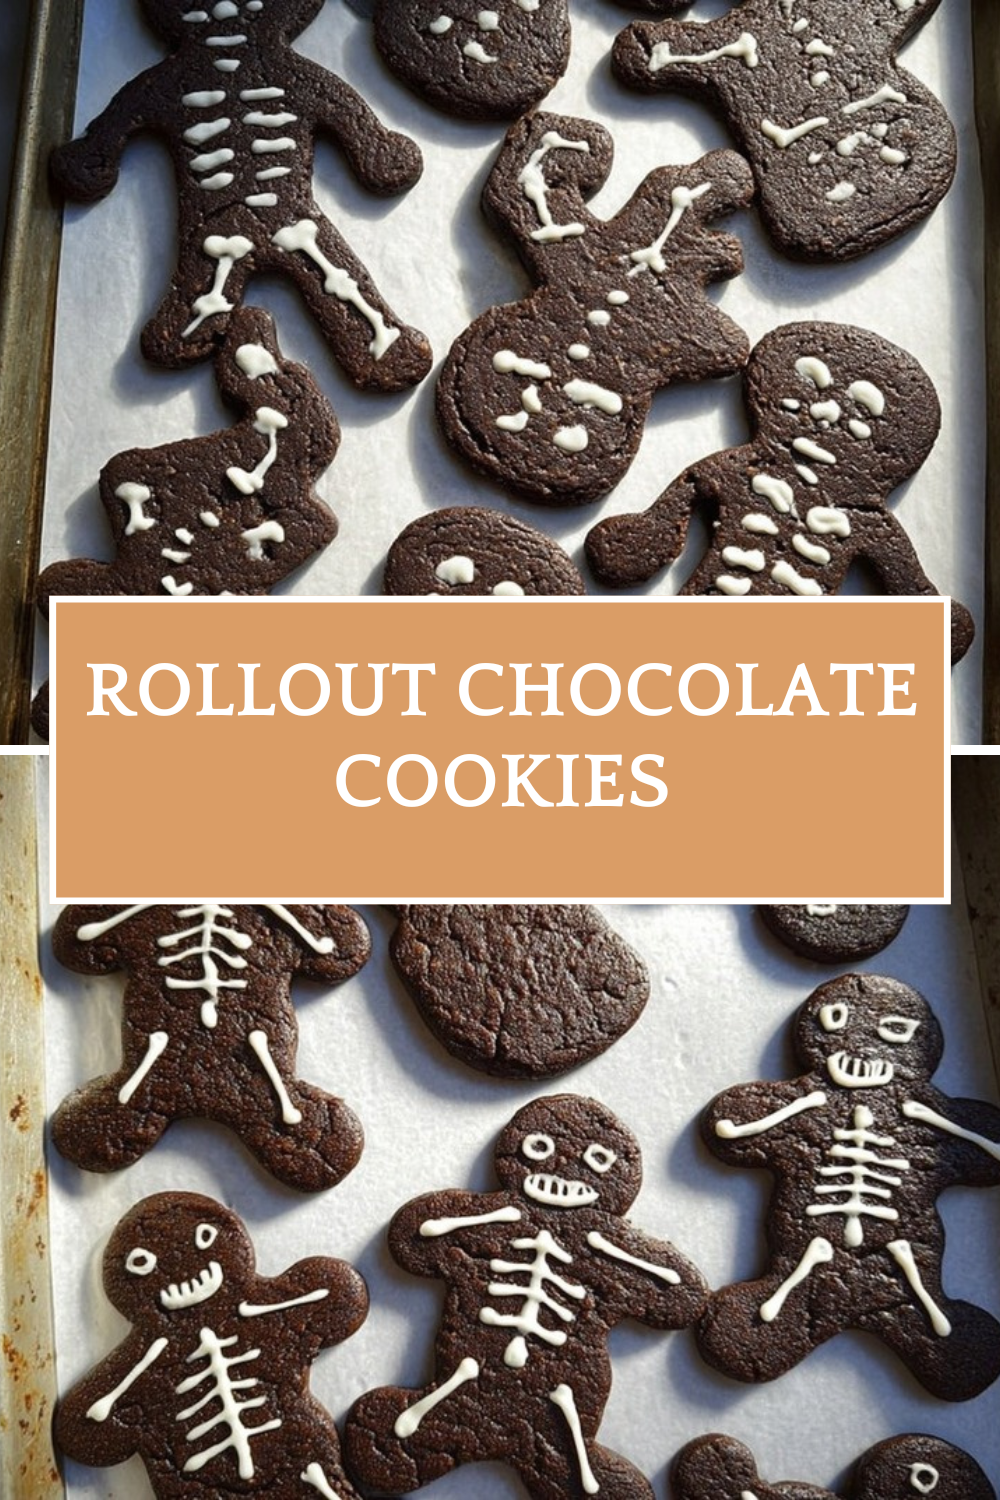
Why You’ll Love These Rollout Chocolate Cookies
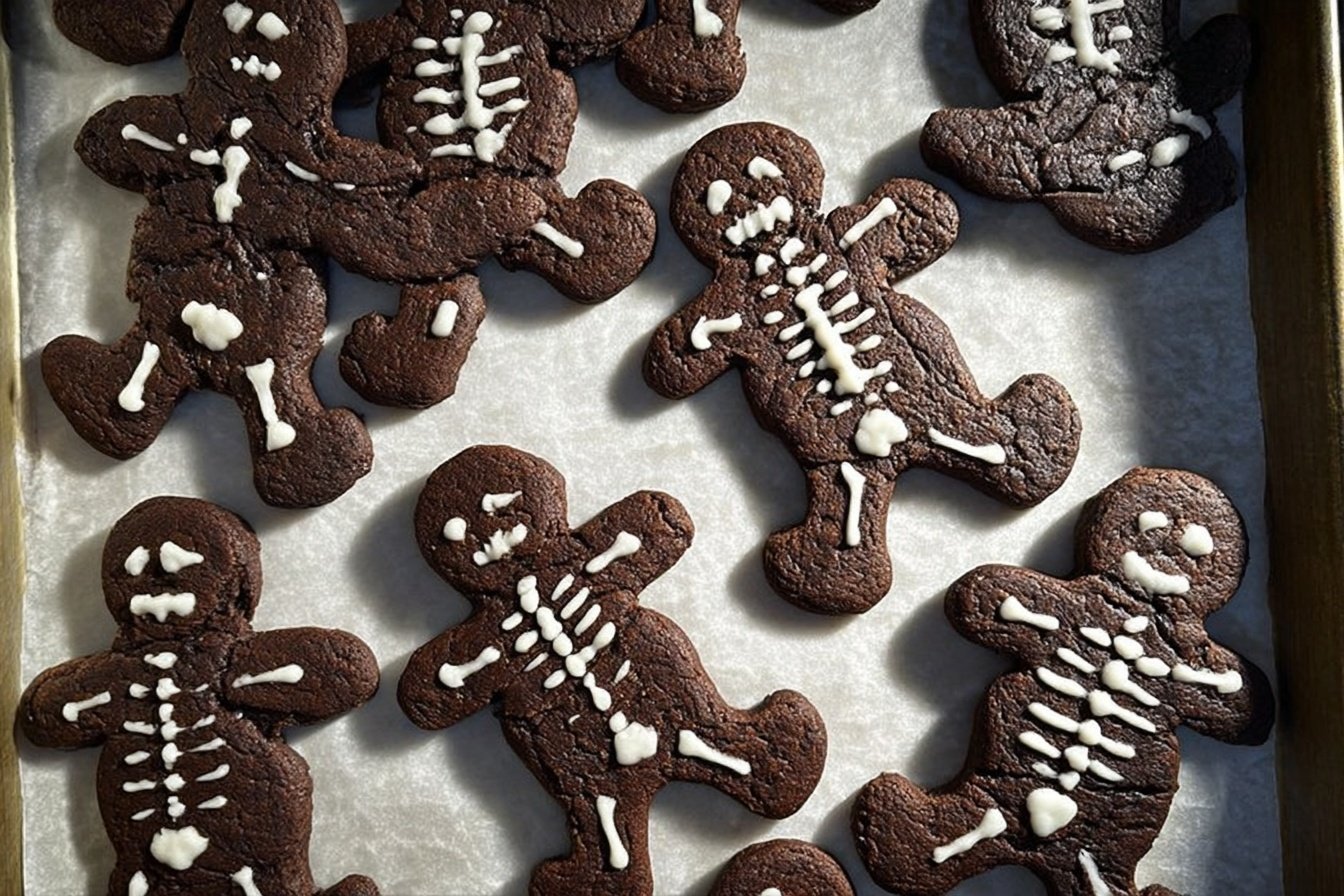
If you are looking for Rollout Chocolate Cookies that are rich, easy to shape, and fun to decorate, this recipe checks every box. These cookies bake up with a deep cocoa flavor and a soft, brownie-like bite, which makes them a hit for holidays, birthdays, school treats, or a quiet weekend baking session at home.
For busy parents, students, and working professionals, the best part is that the dough can be made ahead and kept in the fridge or freezer. That means you can prep once and bake later, which is a huge win when time is tight. If you enjoy recipes that feel classic but still a little special, this one fits right in.
- Easy to prepare: The dough comes together with simple pantry staples, and the steps are beginner-friendly. Once chilled, the dough is easy to roll, cut, and bake.
- Soft texture with great shape: These rollout chocolate cookies hold their edges well after baking, so they are perfect for stars, hearts, circles, and holiday shapes.
- Flexible for different needs: You can decorate them with icing, buttercream, or an easy glaze, then finish with sprinkles for any occasion.
- Rich cocoa flavor: The chocolate taste is bold but not too sweet, giving you a cookie that feels like a brownie in cut-out form.
Chocolate lovers may also enjoy reading about the nutrition side of cocoa from Healthline’s cocoa powder guide, which gives helpful background on why cocoa is such a valued baking ingredient.
These rollout chocolate cookies are the kind of treat that looks fancy, but still feels easy enough for an everyday baking project.
Jump To
- 1. Why You’ll Love These Rollout Chocolate Cookies
- 2. Essential Ingredients for Rollout Chocolate Cookies
- 3. How to Prepare the Perfect Rollout Chocolate Cookies: Step-by-Step Guide
- 4. Dietary Substitutions to Customize Your Rollout Chocolate Cookies
- 5. Mastering Rollout Chocolate Cookies: Advanced Tips and Variations
- 6. How to Store Rollout Chocolate Cookies: Best Practices
- 7. FAQs: Frequently Asked Questions About Rollout Chocolate Cookies
- 8. Rollout Chocolate Cookies
Essential Ingredients for Rollout Chocolate Cookies
Below is the full ingredient list for these Rollout Chocolate Cookies, with each item measured exactly as written in the recipe source. Using the right amounts matters because cut-out cookies need a dough that is sturdy, smooth, and easy to roll.
| Ingredient | Amount | Why It Matters |
|---|---|---|
| All-purpose flour | 1 1/2 cups | Gives the dough structure so the cookies hold their shape. |
| Unsweetened natural or Dutch-process cocoa powder, plus more as needed | 3/4 cup | Adds the deep chocolate flavor and helps keep the dough from sticking when rolling. |
| Baking powder | 1 teaspoon | Gives a little lift so the cookies bake up tender instead of flat. |
| Salt | 1/8 teaspoon | Balances the sweetness and sharpens the cocoa flavor. |
| Unsalted butter, softened to room temperature | 3/4 cup | Makes the dough creamy and helps create a soft bite. |
| Granulated sugar | 1 cup | Sweetens the dough and helps with texture. |
| Large egg, at room temperature | 1 | Binds the dough together and adds richness. |
| Pure vanilla extract | 1 teaspoon | Rounds out the chocolate flavor and adds warmth. |
| Icing, buttercream, or easy glaze | As needed for decorating | Adds color, sweetness, and a festive finish. |
| Assorted sprinkles | As needed for decorating | Brings texture and a fun, celebratory look. |
Ingredient Notes for Better Results
- Natural or Dutch-process cocoa powder: Either one works well here, so use what you already have.
- Cocoa powder for dusting: Dusting the surface with cocoa powder instead of flour can add more chocolate flavor.
- Room temperature butter and egg: This helps the dough mix smoothly and evenly.
- Decorating options: Icing, buttercream, or a simple glaze all work well, depending on how fancy you want the cookies to look.
If you like decorating cookies and cakes with creamy toppings, you may also enjoy this Italian meringue buttercream recipe from the site for a smooth, bakery-style finish.
How to Prepare the Perfect Rollout Chocolate Cookies: Step-by-Step Guide
These Rollout Chocolate Cookies are simple to make, but the order of each step matters. A little patience during chilling and rolling gives you clean edges, neat shapes, and cookies that bake evenly. If you have ever had dough stick to the counter or lose its shape in the oven, this method will help you avoid those common problems.
First Step: Whisk the dry ingredients
In a medium bowl, whisk together 1 1/2 cups all-purpose flour, 3/4 cup unsweetened natural or Dutch-process cocoa powder, 1 teaspoon baking powder, and 1/8 teaspoon salt. Mixing the dry ingredients first helps spread the cocoa and leavening evenly through the dough. This gives the cookies a smooth texture and a more balanced chocolate taste.
Second Step: Cream the butter and sugar
In a large bowl, beat 3/4 cup softened unsalted butter with 1 cup granulated sugar until the mixture looks smooth and creamy. This usually takes a few minutes with a hand mixer or stand mixer. The mixture should look lighter in color and feel fluffy, which helps create tender cookies.
Third Step: Add the egg and vanilla
Beat in 1 large room-temperature egg and 1 teaspoon pure vanilla extract until combined. Room temperature ingredients blend better and give the dough a smoother finish. If the mixture looks slightly separated at first, keep mixing until it comes together.
Fourth Step: Make the dough
Add the dry ingredients into the wet mixture and mix until a dough forms. It may look crumbly at first, but it will come together as you mix. Stop once the dough is uniform, because overmixing can make the cookies tougher.
Fifth Step: Roll the dough before chilling
Divide the dough in half, then roll each portion out to about 1/4-inch thickness on parchment paper or a silicone mat. Lightly dust the surface with cocoa powder or flour to keep it from sticking. Rolling before chilling is one of the best tricks for easier handling, especially if you are making shaped cookies for holidays or special events.
For the cleanest cut-outs, aim for an even 1/4-inch thickness across the whole sheet of dough.
Sixth Step: Chill the rolled dough
Place the rolled dough in the refrigerator for at least 1 to 2 hours. This is the step that helps Rollout Chocolate Cookies hold their shape during baking. If you need to pause the recipe, the dough can chill for up to 3 days, or you can freeze it for up to 3 months.
Seventh Step: Preheat the oven
When you are ready to bake, preheat the oven to 350 degrees Fahrenheit. Line baking sheets with parchment paper so the cookies release easily after baking. A properly heated oven helps the cookies bake evenly from edge to center.
Eighth Step: Cut the dough into shapes
Use cookie cutters to cut the chilled dough into your favorite shapes. Star, heart, circle, tree, and bell shapes all work well. Re-roll the scraps as needed, but work quickly so the dough does not warm up too much. If the dough gets soft, place it back in the fridge for a few minutes before cutting again.
Ninth Step: Bake the cookies
Place the cut shapes on the prepared baking sheets, leaving a little space between each one. Bake for 11 to 12 minutes. The cookies should look set around the edges and slightly soft in the center. Since cocoa dough is dark, it can be harder to judge doneness by color alone, so trust the timer and texture.
Tenth Step: Cool and decorate
Let the cookies cool on the baking sheets for 5 minutes before moving them to a wire rack. This short rest helps them firm up so they do not break. Once fully cooled, decorate with icing, buttercream, or an easy glaze, then finish with assorted sprinkles if you want a festive touch.
Timing Snapshot
- Prep time: 2 hours
- Cook time: 12 minutes
- Total time: 3 hours 30 minutes plus icing setting time
- Yield: 18 3-inch cookies

Dietary Substitutions to Customize Your Rollout Chocolate Cookies
Protein and Main Component Alternatives
These cookies are already flexible, but a few swaps can make them fit different needs. If you want a dairy-free version, use a plant-based butter that works well for baking. For an egg-free version, a commercial egg replacer may help, though the dough may be slightly softer and may need extra chilling time.
For gluten-free baking, replace the all-purpose flour with a 1-to-1 gluten-free baking flour that contains xanthan gum. Since cut-out cookies rely on structure, pick a blend that is meant for cookies rather than one that is very light. If the dough feels too soft, chill it a little longer before rolling.
Vegetable, Sauce, and Seasoning Modifications
While this recipe does not use vegetables or sauce in the dough, you can still change the finish in simple ways. Swap standard icing for a lighter glaze if you want a thinner topping, or use a small amount of melted chocolate for a richer finish. You can also add a pinch of cinnamon or espresso powder to the dough for a deeper flavor profile, though the original chocolate taste is already strong.
For lower-sugar decorating, use a thin glaze and fewer sprinkles. If you are baking for different ages or events, separate a few cookies and decorate them in different styles so everyone gets something they like. That little detail makes these rollout chocolate cookies feel custom without making the recipe harder.
Mastering Rollout Chocolate Cookies: Advanced Tips and Variations
Once you have made these Rollout Chocolate Cookies a time or two, small technique changes can make a big difference. The dough is forgiving, but the better you handle the chilling and rolling, the cleaner your shapes will look.
Pro cooking techniques
- Roll the dough before chilling so it is easier to move and cut later.
- Use cocoa powder for dusting instead of flour when you want extra chocolate flavor.
- Keep re-rolled scraps moving fast so the dough stays cool and neat.
- If your kitchen is warm, chill the cut cookies on the baking sheet for a few minutes before baking.
Flavor variations
Try a little orange zest in the dough for a chocolate orange feel, or add peppermint extract to make holiday cookies. A light dusting of powdered sugar after baking can give them a softer look, while a shiny glaze makes them feel more festive. If you like cookie recipes with a rich chocolate base, you might also enjoy this triple chocolate cake recipe for another deep cocoa dessert.
Presentation tips
For a bakery-style look, decorate cookies in groups by shape and color. A simple white glaze with red and green sprinkles feels perfect for Christmas, while pastel icing works well for birthdays and baby showers. You can also stack a few cookies in a clear bag tied with ribbon for an easy homemade gift.
Make-ahead options
This dough is great for planning ahead. Chill it for up to 3 days in the refrigerator, or freeze it for up to 3 months. You can also cut shapes first and freeze them on a tray, then bake straight from frozen with a minute or two added to the bake time.
How to Store Rollout Chocolate Cookies: Best Practices
Storing Rollout Chocolate Cookies the right way keeps them soft, fresh, and ready for snacking or gifting. Once they are fully cooled and decorated, place them in an airtight container. At room temperature, they stay soft for about 5 days, which makes them great for lunch boxes, weekend treats, or cookie trays.
Refrigeration
If your cookies are decorated with buttercream or a soft glaze, the fridge is a smart short-term option. Place them in a single layer when possible, or separate layers with parchment paper. Let them sit at room temperature before serving so the texture softens.
Freezing
You can freeze the baked cookies for up to 3 months. Wrap them well or place them in a freezer-safe bag with parchment between layers. The dough also freezes very well, which is helpful if you want fresh cookies later without starting from scratch.
Reheating
To bring back a just-baked feel, let frozen cookies thaw at room temperature. If you want them slightly warm, a few seconds in the microwave works, but do it carefully so the icing does not melt too much. Unfrosted cookies can also be warmed briefly in a low oven.
Meal prep considerations
These cookies fit meal prep and holiday baking schedules nicely because the dough can be made ahead and stored. That means you can cut, chill, bake, and decorate in stages instead of doing everything in one long stretch. For many home bakers, that is the easiest way to handle a big batch without stress.
FAQs: Frequently Asked Questions About Rollout Chocolate Cookies
Do rollout chocolate cookies spread when baked?
Rollout chocolate cookies are formulated to hold their shape well during baking, spreading only minimally. This comes from a balance of flour, butter, and cocoa that keeps the dough sturdy. For best results, chill the dough for at least 1-2 hours (or overnight) before rolling and cutting—this prevents excess spreading. Bake at 350°F on parchment-lined sheets, spacing cookies 2 inches apart. If they still spread slightly, your kitchen might be warm or dough not chilled enough; simply adjust next time by working in a cooler space. Users report perfect cutouts every time with this method, ideal for holiday shapes or monograms. (78 words)
Can I make rollout chocolate cookie dough ahead of time?
Yes, you can prepare rollout chocolate cookie dough up to 3 days in advance. Wrap it tightly in plastic wrap and store in an airtight container in the fridge. The chilling time also firms up the dough, making it easier to roll without cracking. When ready to bake, let it sit at room temperature for 10-15 minutes to soften slightly for smooth rolling. This make-ahead step is perfect for busy holidays—dough flavor even improves after a day. Avoid keeping it longer than 3 days to prevent drying out. (92 words)
Can I freeze rollout chocolate cookie dough?
Absolutely, rollout chocolate cookie dough freezes beautifully for up to 3 months. Portion it into disks, wrap each tightly in plastic wrap, then foil or a freezer bag to prevent freezer burn. Thaw overnight in the fridge before rolling and cutting—no need to defrost fully. You can also freeze pre-cut shapes on a tray for 1 hour, then transfer to bags for baking straight from frozen (add 1-2 minutes to bake time). This method saves time for last-minute events; label bags with dates for easy tracking. (89 words)
How do I roll out chocolate cookie dough without it sticking?
To roll out chocolate cookie dough smoothly, start with well-chilled dough (1-2 hours minimum). Dust your surface and rolling pin lightly with flour or cocoa powder to avoid sticking without altering taste. Roll between two sheets of parchment paper for zero mess—peel off the top sheet, cut shapes, then slide the bottom sheet onto a baking tray. Aim for 1/4-inch thickness for crisp edges. If dough warms up, re-chill for 10 minutes. This technique yields even shapes and clean cuts every time, perfect for intricate designs. (94 words)
How long do baked rollout chocolate cookies last?
Baked rollout chocolate cookies stay fresh for up to 1 week at room temperature in an airtight container, layered with parchment to prevent sticking. For longer storage, freeze them in a single layer first, then bag for up to 3 months—they thaw quickly and retain crunch. Avoid humid spots to keep them crisp. If frosting them, store frosted ones in the fridge for 4-5 days. Pro tip: add a slice of bread to the container to soften if they get too hard. Great for gifting or meal prep. (87 words)

Rollout Chocolate Cookies
- Total Time: 3 hours
- Yield: 18 3-inch cookies
- Diet: Vegetarian
Description
🍫 Craft perfect chocolate cut-out sugar cookies that hold intricate shapes flawlessly – rich, fudgy cocoa taste ideal for holidays and parties!
🎨 Endless decorating creativity with icing and sprinkles; soft-chewy texture stays fresh for days, bakery-quality from your kitchen.
Ingredients
– 1 1/2 cups All-purpose flour
– 3/4 cup Unsweetened natural or Dutch-process cocoa powder, plus more as needed
– 1 teaspoon Baking powder
– 1/8 teaspoon Salt
– 3/4 cup Unsalted butter, softened to room temperature
– 1 cup Granulated sugar
– 1 Large egg, at room temperature
– 1 teaspoon Pure vanilla extract
– As needed for decorating Icing, buttercream, or easy glaze
– As needed for decorating Assorted sprinkles
Instructions
1-First Step: Whisk the dry ingredients In a medium bowl, whisk together 1 1/2 cups all-purpose flour, 3/4 cup unsweetened natural or Dutch-process cocoa powder, 1 teaspoon baking powder, and 1/8 teaspoon salt. Mixing the dry ingredients first helps spread the cocoa and leavening evenly through the dough. This gives the cookies a smooth texture and a more balanced chocolate taste.
2-Second Step: Cream the butter and sugar In a large bowl, beat 3/4 cup softened unsalted butter with 1 cup granulated sugar until the mixture looks smooth and creamy. This usually takes a few minutes with a hand mixer or stand mixer. The mixture should look lighter in color and feel fluffy, which helps create tender cookies.
3-Third Step: Add the egg and vanilla Beat in 1 large room-temperature egg and 1 teaspoon pure vanilla extract until combined. Room temperature ingredients blend better and give the dough a smoother finish. If the mixture looks slightly separated at first, keep mixing until it comes together.
4-Fourth Step: Make the dough Add the dry ingredients into the wet mixture and mix until a dough forms. It may look crumbly at first, but it will come together as you mix. Stop once the dough is uniform, because overmixing can make the cookies tougher.
5-Fifth Step: Roll the dough before chilling Divide the dough in half, then roll each portion out to about 1/4-inch thickness on parchment paper or a silicone mat. Lightly dust the surface with cocoa powder or flour to keep it from sticking. Rolling before chilling is one of the best tricks for easier handling, especially if you are making shaped cookies for holidays or special events.
6-Sixth Step: Chill the rolled dough Place the rolled dough in the refrigerator for at least 1 to 2 hours. This is the step that helps Rollout Chocolate Cookies hold their shape during baking. If you need to pause the recipe, the dough can chill for up to 3 days, or you can freeze it for up to 3 months.
7-Seventh Step: Preheat the oven When you are ready to bake, preheat the oven to 350 degrees Fahrenheit. Line baking sheets with parchment paper so the cookies release easily after baking. A properly heated oven helps the cookies bake evenly from edge to center.
8-Eighth Step: Cut the dough into shapes Use cookie cutters to cut the chilled dough into your favorite shapes. Star, heart, circle, tree, and bell shapes all work well. Re-roll the scraps as needed, but work quickly so the dough does not warm up too much. If the dough gets soft, place it back in the fridge for a few minutes before cutting again.
9-Ninth Step: Bake the cookies Place the cut shapes on the prepared baking sheets, leaving a little space between each one. Bake for 11 to 12 minutes. The cookies should look set around the edges and slightly soft in the center. Since cocoa dough is dark, it can be harder to judge doneness by color alone, so trust the timer and texture.
10-Tenth Step: Cool and decorate Let the cookies cool on the baking sheets for 5 minutes before moving them to a wire rack. This short rest helps them firm up so they do not break. Once fully cooled, decorate with icing, buttercream, or an easy glaze, then finish with assorted sprinkles if you want a festive touch.
Notes
❄️ Chill rolled dough 1-2 hours for sharp edges that hold shapes perfectly.
🌿 Dust with cocoa powder instead of flour to boost chocolate flavor.
🧈 Room temp butter and egg ensure smooth dough without cracks.
- Prep Time: 30 minutes + 2 hours chilling
- Cook Time: 12 minutes
- Category: Desserts
- Method: Baking
- Cuisine: American
Nutrition
- Serving Size: 1 cookie
- Calories: 140 kcal
- Sugar: 10g
- Sodium: 50mg
- Fat: 7g
- Saturated Fat: 4g
- Unsaturated Fat: 2.5g
- Trans Fat: 0g
- Carbohydrates: 18g
- Fiber: 1g
- Protein: 2g
- Cholesterol: 25mg
Keywords: cut out chocolate sugar cookies, chocolate cutout cookies, roll out cookie recipe, decorated chocolate cookies