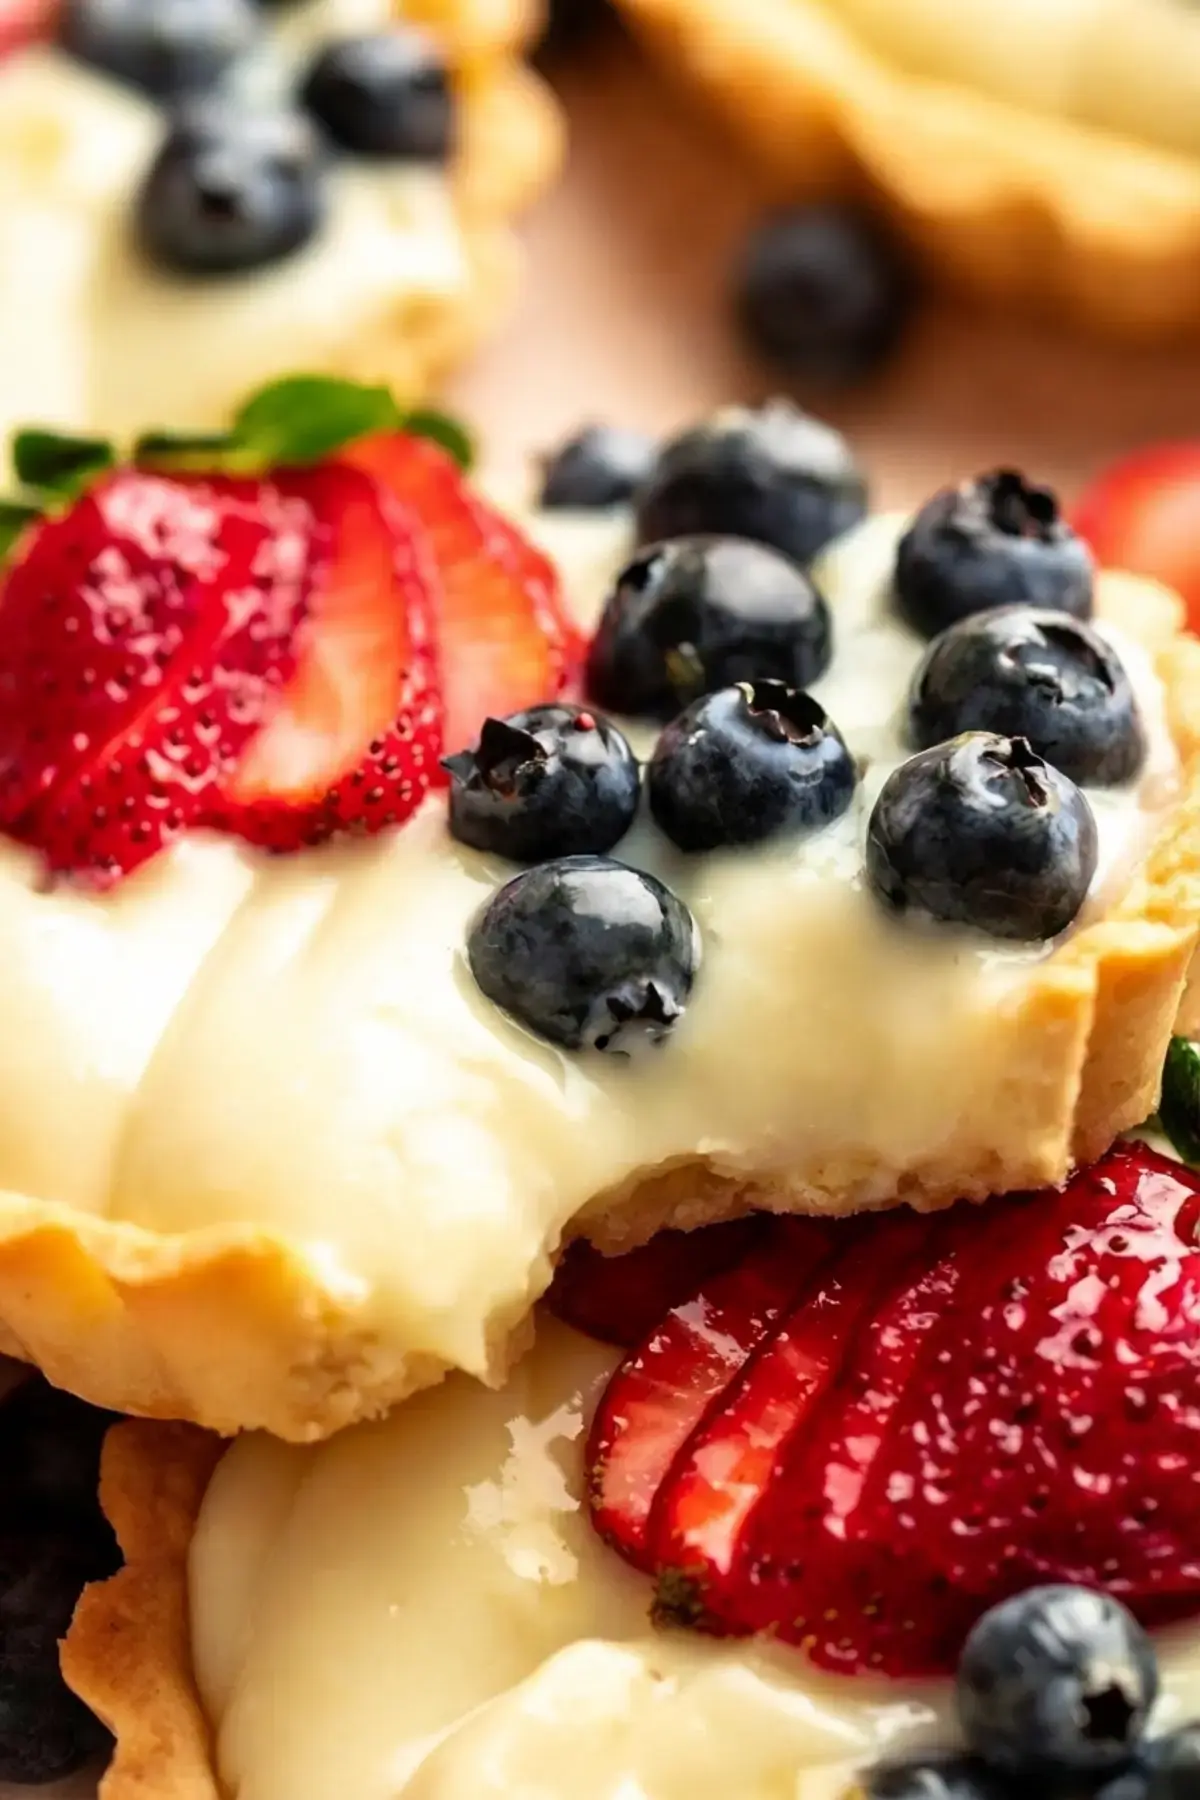
Three simple components come together into something that looks like it came from a French bakery. A buttery tart shell bakes up crisp and tender, sturdy enough to hold its shape once filled. The homemade pastry cream is smooth and velvety, rich without being heavy, and it plays beautifully against the bright, juicy fruit on top.
Because the fruit is flexible, you can lean into whatever looks best at the market. Berries, kiwi, and peaches all work well, and the colors change with the season. Each bite gives you a little crunch from the shell, a little creaminess from the custard, and a burst of juice from the fruit.
Individual portions are another reason to love them. There is no slicing a large tart, no tough dough to cut through, and no runny filling spilling across the plate. Everyone simply picks up a tart and enjoys it.
This recipe makes 8 mini tarts from three short lists: the crust, the vanilla pastry cream, and the fruit topping. I suggest measuring and prepping everything before you start so the process stays calm and organized. Full measurements are in the recipe card below.
Strawberries, blueberries, optional apricot jam and water for a glaze
For the crust
You need 2 cups all purpose flour, ½ cup powdered sugar, and ¼ teaspoon kosher salt. Pastry flour is an optional swap if you want an even more delicate crumb, but all purpose flour works beautifully here.
The fat is ½ cup cold, unsalted butter cut into small cubes. Keep it in the fridge until the moment you need it, because cold butter is what gives you a flaky crust. 1 large egg, whisked with a fork before it goes in, binds the dough, and ½ teaspoon vanilla extract adds flavor.
No powdered sugar in the pantry? You can make your own by blending granulated sugar in a blender or food processor until it is fine.
For the pastry cream
The filling starts with 1 ¾ cups milk. Whole milk gives you a rich, creamy base, and half and half can be used if you want it even richer. 5 egg yolks thicken the custard and give it that classic smooth texture, while ½ cup granulated sugar sweetens it and balances the richness.
3 tablespoons cornstarch is what sets the cream, so this one is not a swap you want to make. 2 teaspoons vanilla extract brings the flavor, and ¼ teaspoon kosher salt keeps everything tasting balanced rather than flat.
Instructions
The tart dough comes together quickly in a food processor, and from there most of the work is waiting while the dough chills and the baked shells cool. This method follows the original mini fruit tarts recipe from Rich and Delish, with notes on what to watch for along the way.
In a food processor, add the flour, powdered sugar, and salt, and mix until combined.
Add the cold cubed butter and blend until there are small pieces of butter about the size of peas. No food processor? Cut the cold butter into the flour mixture by hand, and make sure your hands are cold.
Add the egg and the vanilla extract and mix until a dough forms. Try not to overmix the dough.
Cover the dough with plastic wrap and chill it in the fridge for at least 1 hour. Chilling keeps the dough easy to roll and helps it hold its shape in the oven.
Transfer the dough to a clean, floured surface and roll it with a rolling pin into a rectangle.
Use a cookie cutter or a round bowl about 1 inch larger than the mini tart pans to cut small rounds of pastry.
Place the pastry inside the mini tart pans and press it down with clean hands, then trim off the extra edges.
Prick the bottoms with a fork and place the pans in the freezer for at least 20 minutes. This step keeps the shells from collapsing or shrinking.
Bake in a 350F (180C) preheated oven for about 15 to 20 minutes, until the crust is a light golden brown. Remove from the oven and let the shells cool while you make the filling.
Make the pastry cream
Pastry cream needs your attention at the stove, but the method itself is simple. If you want a deeper walkthrough of the technique, this homemade pastry cream recipe covers the basics in more detail, and this easy pastry cream recipe is a helpful reference for a slightly different custard style.
Place a saucepan over high heat with the milk and vanilla extract. Let it simmer, then remove it from the heat and scoop out ¼ cup of the milk to set aside.
In a small mixing bowl, whisk the sugar and cornstarch until combined, then add the egg yolks and mix.
Gradually add the reserved ¼ cup of milk, whisking constantly. This tempers the egg yolks so they do not cook too quickly.
Return the saucepan with the milk to the stovetop over low heat and pour in the egg yolk mixture, whisking constantly.
Cook over medium low heat, whisking constantly, until the mixture thickens. Do not raise the heat. Be patient, it is worth it.
Transfer the cream to a bowl, cover it tightly with plastic wrap, and refrigerate for a few hours until it is set and cool.
To assemble, transfer the chilled pastry cream to a piping bag fitted with a round tip. Pipe the custard into the cooled mini tart shells and top with washed and dried berries or the fruit of your choice.
Optional: mix 1 tablespoon apricot jam with ½ teaspoon water and brush the fruit with the glaze for shine.
Expert Tips
These small details make the difference between good tarts and great ones.
Keep the butter cold. Cube it and return it to the fridge until you are ready to use it. Cold butter means a flaky shell.
Freeze the shaped crusts for 20 minutes before baking. Chilled dough holds its shape and does not collapse in the oven.
Chill the dough for at least an hour. It rolls more evenly and handles much better.
If the crust puffs up while baking, press it back down gently with a cup.
Pastry cream too thick? Loosen it with a splash or two of milk and whisk until smooth.
Use a piping bag. Piping the cooled cream into the shells gives you a neat, even fill with tidy edges.
Choose ripe, in season fruit. Wash it and dry it thoroughly before arranging, since extra water can soften the shells.
Glaze for shine. Warm and strain apricot jam, or use a neutral glaze, and brush it over the fruit. It adds gloss and helps the fruit hold up.
Use a tartlet pan with a removable bottom. An easy release pan makes taking the shells out simple and keeps their edges intact.
Cool everything completely. Both the shells and the pastry cream must be cool before assembling, or the cream will melt.
Chill the assembled tarts for at least 30 minutes before serving so the cream sets and the flavors meld.
Assemble close to serving time. The longer the fruit sits on the cream, the more likely the shells are to soften.
Storing
Keep the finished tarts in the refrigerator in an airtight container so they do not pick up other aromas from the fridge. Stored this way, they stay fresh for up to 5 days.
Freezing
These tarts freeze well. Wrap them tightly in a few layers of plastic wrap, place them in an airtight, freezer friendly container, and freeze for up to 2 months. Freeze them without the fruit topping. Thaw overnight in the fridge, then add fresh fruit just before serving.
Make Ahead Instructions
You can split this recipe across a couple of days. Make the pastry cream up to 3 days ahead and bake the tart shells a day or two in advance. Store both in the fridge, then assemble the tarts just before serving so the crust stays crisp.
Substitutions
For a gluten free version, replace the flour with a gluten free flour blend or use your favorite gluten free crust recipe. For a dairy free version, prepare a vegan pastry cream and swap the butter in the crust for vegan butter, keeping the rest of the method the same.
Variations
The fruit is where you can really make these your own. Clementines, berries, apples, pears, passion fruit, kiwi, and grapes all work as toppings, so pick whatever looks best at the store or the farmers market.
If you would rather not make the crust, a graham cracker crust is an easy alternative: combine 1 ½ cups graham cracker crumbs, 1 teaspoon sugar, and ⅓ cup melted unsalted butter, press it into the pans, and chill before filling. Store bought pastry shells work too.
For the filling, homemade pastry cream is the classic choice, but instant pudding mix, freshly whipped cream, or mascarpone whipped cream are all options when you are short on time.
Equipment
Here is what you need to make the process smooth:
A tartlet pan with a removable bottom, which shapes and bakes the shells and makes them easy to release
Mixing bowls for the tart dough and the pastry cream
A food processor for the crust, unless you are using store bought shells
A saucepan for cooking the pastry cream
A rubber spatula for folding, mixing, and transferring the cream
A whisk for smooth, lump free stirring
A cooling rack for the baked shells
A set of measuring cups
Optional: a fine mesh sieve for straining the cream and a piping bag for filling the shells
If you liked this recipe
If you enjoy baking in small portions, these mini pecan tarts are another fun one to try next. The pastry cream method here also works as a filling for larger tarts, layered desserts, and cream puffs, so it is a technique worth keeping in your back pocket.
FAQs
How do you keep mini fruit tarts from getting soggy?
To prevent soggy mini fruit tarts, bake the tart shells until they are a light golden brown, which ensures they are fully set and crisp. Assemble the tarts by filling the baked and cooled shells with pastry cream and topping with fruit right before serving to maintain the crunch of the crust. Thoroughly washing and drying the fruit before adding it also helps prevent excess moisture from making the pastry cream or shell weep.
What is the small tart called?
A small tart is called a tartlet. Mini fruit tarts, which are individually sized, are a classic example of tartlets. They are often made with a buttery pâte sucrée crust and filled with pastry cream and fresh fruit, making them perfect for parties and special occasions.
Can I use store-bought pastry shells for mini tarts?
Yes, you can substitute store-bought pastry shells for the homemade pâte sucrée crust to save time. The shells should still be pre-baked according to the package directions until lightly golden and fully firm. This alternative works well, though the homemade crust offers a richer, flakier buttery flavor and texture.
Can mini fruit tarts be made a day ahead?
For best results, it is not recommended to assemble mini fruit tarts a full day ahead, as the pastry cream can soften the crust over time. However, you can prepare the components in advance: bake the tart shells and store them in an airtight container at room temperature for up to 2 days, and make the pastry cream up to 3 days ahead, keeping it refrigerated with plastic wrap pressed directly onto the surface. Assemble the tarts just before serving to maintain the crisp shell.
Why this recipe works Three simple components come together into something that looks like it came from a French bakery. A buttery tart shell bakes up crisp and tender, sturdy enough to hold its shape once filled.
Ingredients
Scale
Mini tart crust ½ cup Butter, unsalted, cold 1 Egg ½ teaspoon Vanilla extract ½ cup Powder sugar ¼ teaspoon Kosher salt 2 cups Flour
Vanilla pastry cream 1 ¾ cups Milk 2 teaspoon Vanilla extract 5 Egg yolks ¼ teaspoon Kosher salt ½ cup Granulated sugar 3 tablespoon Cornstarch
Toppings Strawberries Blueberries 1 tablespoon Apricot jam ½ teaspoon Water
Instructions
Make the pastry cream 1-Place a saucepan over high heat and: Place a saucepan over high heat and fill it with the milk and vanilla extract. Let it simmer, and remove it from the heat. Scoop ¼ cup of the milk and set aside. 2-In a small mixing bowl, add the: In a small mixing bowl, add the sugar and cornstarch. Mix with a whisk until combined. Add the egg yolks and mix. 3-Gradually add the ¼ cup of milk: Gradually add the ¼ cup of milk and mix constantly with a whisk. This step is used to temper the egg yolks and avoid them from cooking too fast. 4-Move the saucepan with the milk to: Move the saucepan with the milk to the stovetop over low heat and add the egg yolk mixture into the milk mixing constantly with a whisk. 5-Mix over medium-low heat and mix constantly: Mix over medium-low heat and mix constantly with a whisk until the mixture thickens. Don’t increase the heat, be patient it will be worth it! 6-Transfer the mixture to a bowl and: Transfer the mixture to a bowl and cover it with plastic wrap tightly. Place the bowl in the fridge. Allow it to set and cool for a few hours. 7-Now it’s time to assemble the tarts: Now it’s time to assemble the tarts! Transfer the pastry cream into a piping bag with a round tip. Pipe the custard inside the mini tart shells, and top the cream with washed and dried berries or fruit of your choice. 8-Optional: Optional: Make a simple glaze by mixing 1 tablespoon of apricot jam with ½ teaspoon of water and brush the fruit with the glaze.
9-Start by making the tart dough: Start by making the tart dough. In a food processor, add the flour, powdered sugar, and salt, and mix until combined. 10-Add the cold cubed butter, and blend: Add the cold cubed butter, and blend until there are pea-sized pieces of butter. If you don’t have a food processor, you can do it by hand, mixing the cold butter into the flour mixture. Make sure that your hands are cold. 11-Then, add the egg, and the vanilla: Then, add the egg, and the vanilla extract and mix until a dough forms. Try not to overmix the dough. 12-Cover the dough with plastic wrap and: Cover the dough with plastic wrap and let it chill in the fridge for at least an hour. 13-Transfer the dough onto a clean floured: Transfer the dough onto a clean floured surface and roll it with a rolling pin into a rectangle. 14-Use a cookie cutter or a round: Use a cookie cutter or a round bowl (1 inch larger than the mini tart pans) and cut small rounds of the pastry. 15-Place the pastry inside the mini tart: Place the pastry inside the mini tart pans and press it down using your clean hands. 16-Cut off the extra edges: Cut off the extra edges. Make holes in the bottom of the pan with a fork and place them in the freezer for at least 20 minutes. 17-Bake in a 180c (350f) preheated oven: Bake in a 180c (350f) preheated oven for about 15-20 minutes or until the crust is a light golden brown color. Remove from the oven and let it cool while making the filling.
Notes
Additional time: follow the resting and cooling steps (180 min).