Description
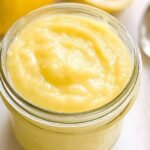
🍋 Lemon curd silky smooth: velvety tangy citrus filling for tarts, cakes or spoons—versatile pantry gem!
☀️ 15-min stovetop whisk; fridge-stable 10 days for effortless desserts anytime!
Instructions
1-First Step: Set up your double boiler Fill the bottom of a double boiler with 1 to 2 inches of water and bring it to a gentle simmer. If you do not have a double boiler, a heatproof glass bowl set over a saucepan works well too. Keep the water at a steady simmer, not a hard boil, so the curd cooks gently and does not scorch. This low-and-slow method is the secret behind how to make silky lemon curd. Direct heat can make the eggs scramble, and that is not the dreamy texture we want here.
2-Second Step: Mix the base ingredients In the top pot or bowl, combine the 4 large egg yolks, 2/3 cup granulated sugar, 1 tablespoon lemon zest, 1/3 cup fresh lemon juice, and 1/8 teaspoon salt. Whisk until everything looks smooth and well blended. The mixture will be pale yellow and a little loose at this stage. Be sure to use fresh lemon juice, not bottled. Fresh juice gives the curd a cleaner, brighter taste and helps it shine as a creamy homemade lemon curd.
3-Third Step: Cook while whisking constantly Place the bowl over the simmering water and whisk constantly. This part matters a lot because constant whisking keeps the eggs from curdling and helps the sugar dissolve fully. Use a silicone whisk if you have one, since it is safer for nonstick or glass bowls. Cook the mixture for about 10 minutes, or until it thickens to a hollandaise-like texture and reaches about 170 degrees Fahrenheit. If you are using a thermometer, this is the sweet spot where the eggs thicken safely without turning into scrambled bits.
4-Fourth Step: Add the butter Once the curd has thickened, remove it from the heat. Add the 6 tablespoons of softened butter, a piece at a time, and whisk until fully melted and smooth. The butter gives the curd its glossy finish and rich flavor, so do not skip this part. If you prefer a firmer curd for piping or layering, remember that you can swap in 1 whole egg for 2 egg yolks at the start. That little change gives the filling a sturdier set.
5-Fifth Step: Strain if needed If you want an extra smooth texture, pour the curd through a fine-mesh sieve into a clean bowl or jar. This step is optional, but it is helpful if you want to remove zest bits or any tiny cooked egg pieces. It is especially nice when the curd will be used as a polished lemon curd filling for cakes or tart shells.
6-Final Step: Chill until set Cover the curd with plastic wrap pressed directly onto the surface so a skin does not form. Refrigerate it until fully chilled and thicker, which usually takes about 1 hour. After cooling, it will be spoonable, spreadable, and ready to use. This lemon curd without cornstarch gets its thickness from egg yolks and butter alone, so the texture stays lush and natural. That makes it a wonderful choice for bakers who want classic flavor without extra starch.
Notes
🔥 Double boiler prevents eggs curdling—whisk nonstop!
🍋 Fresh lemons only; zest first for max bright tang.
🧊 Fridge 10 days or freeze 3 months—thaw overnight.
- Prep Time: 5 minutes
- Chill: 1 hour
- Cook Time: 10 minutes
- Category: Dessert
- Method: Stovetop
- Cuisine: British
Nutrition
- Serving Size: 2 tablespoons
- Calories: 120 calories
- Sugar: 11 grams
- Sodium: 50 milligrams
- Fat: 8 grams
- Saturated Fat: 4 grams
- Unsaturated Fat: 3 grams
- Trans Fat: 0 grams
- Carbohydrates: 12 grams
- Fiber: 0 grams
- Protein: 1 gram
- Cholesterol: 100 milligrams
Keywords: lemon curd recipe, silky smooth lemon curd, tangy homemade lemon curd, easy lemon curd