Description
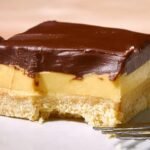
🍰 Savor the iconic Boston cream pie in easy bar form – buttery cookie crust, silky vanilla cream filling, and fudgy chocolate ganache for pure indulgence!
🥛 No-bake bliss ready in minutes plus chill time, perfect for effortless desserts that wow at parties or cravings.
Ingredients
– 6 ounces Vanilla wafer cookies Makes the sweet crust
– 2 tablespoons Sugar Adds flavor and sweetness
– 6 tablespoons Melted butter Binds the crust
– 2 packages 3.4-ounce boxes Instant vanilla pudding mix Creates the creamy filling
– 2 1/2 cups Cold cream Thickens the filling
– 1 teaspoon optional Vanilla extract Boosts vanilla flavor
– 1 cup Semi-sweet chocolate chips Forms the ganache topping
– 2/3 cup Hot heavy cream Melts the chocolate smoothly
Instructions
1-First step: Get your pan and crust ready Start by lining a 9 by 13 inch baking dish with parchment paper or lightly greasing it. This makes it easier to lift the bars out later and slice them cleanly. Crush the vanilla wafer cookies until they look like fine crumbs, then place them in a medium bowl with the sugar. Stir in the melted butter until the mixture feels like wet sand. If it looks too dry, add a tiny splash more melted butter, but only if needed. Press the crumb mixture firmly into the bottom of the pan. Use the bottom of a measuring cup or glass to pack it down so the crust stays together. This is the part that gives your Boston cream pie bars recipe a sturdy base, so do not rush it. Chill the crust while you make the filling, or bake it briefly if you want a firmer texture. A short chill works well for most home bakers and keeps this recipe nice and easy.
2-Second step: Mix the creamy filling In a large bowl, whisk the instant vanilla pudding mix with the cold cream until it thickens. This usually takes about 2 minutes. If you are using the optional vanilla, stir that in now. The filling should be smooth, thick, and spreadable. If it seems a little loose at first, give it another minute or two to set before spreading it over the crust. Spread the pudding evenly over the cooled crust with a spatula. Try to get the filling all the way to the edges so each bite has a good balance of crust and cream. This step is where the bars start to look like a true Boston cream pie dessert. For a lighter spin, you can use a lighter cream option, but the texture may be softer.
3-Third step: Make the easy ganache Place the semi-sweet chocolate chips in a heat-safe bowl. Warm the heavy cream until it is hot but not boiling, then pour it over the chocolate chips. Let it sit for a minute so the chocolate starts to melt. After that, stir slowly until the mixture becomes smooth and shiny. If there are still a few lumps, let it sit another minute and stir again. This ganache is what gives the bars their classic bakery look. It does not need complicated steps or special equipment. If you want a slightly sweeter topping, milk chocolate chips can work, but semi-sweet keeps the flavor balanced. Pour the ganache over the pudding layer and gently spread it into an even coat.
4-Fourth step: Chill until set Once the ganache is spread on top, cover the pan and place it in the refrigerator. Chill for at least 2 hours, though 4 hours is even better if you want neat slices. The bars need time for the pudding and ganache to firm up. This is one of the biggest reasons homemade Boston cream pie bars are so practical for parties and gatherings. You can make them early in the day or even the night before. If you are in a hurry, a shorter chill may still work, but the bars may be softer when sliced. For the cleanest cuts, patience pays off here. The longer rest also helps the flavors come together so every layer tastes more like one complete dessert.
5-Final step: Slice and serve Lift the bars out of the pan if you used parchment, then slice them with a sharp knife. For the neatest edges, wipe the knife clean between cuts. You can serve the bars cold straight from the fridge or let them sit for 10 minutes at room temperature if you like a softer bite. Either way, these easy homemade Boston cream pie bars are creamy, rich, and easy to share. If you want to dress them up, add a few cookie crumbs, a light dusting of cocoa, or a small drizzle of melted chocolate. For a party tray, cut them into smaller squares so people can grab one without needing a fork. That makes them especially nice for birthdays, potlucks, and family get-togethers.
Notes
🧈 Press crust firmly for sturdy base that holds creamy layers without crumbling.
⏳ Chill filling at least 1 hour before ganache to prevent melting.
🍫 Use room-temp tools for ganache to avoid seizing; stir gently for silky shine.
- Prep Time: 20 minutes
- Chill Time: 3 hours
- Category: Desserts
- Method: No Bake
- Cuisine: American
Nutrition
- Serving Size: 1 bar
- Calories: 350 kcal
- Sugar: 25g
- Sodium: 250mg
- Fat: 25g
- Saturated Fat: 14g
- Unsaturated Fat: 10g
- Trans Fat: 0g
- Carbohydrates: 30g
- Fiber: 1g
- Protein: 4g
- Cholesterol: 60mg
Keywords: boston cream pie bars, easy homemade bars, no bake dessert, chocolate pudding bars