
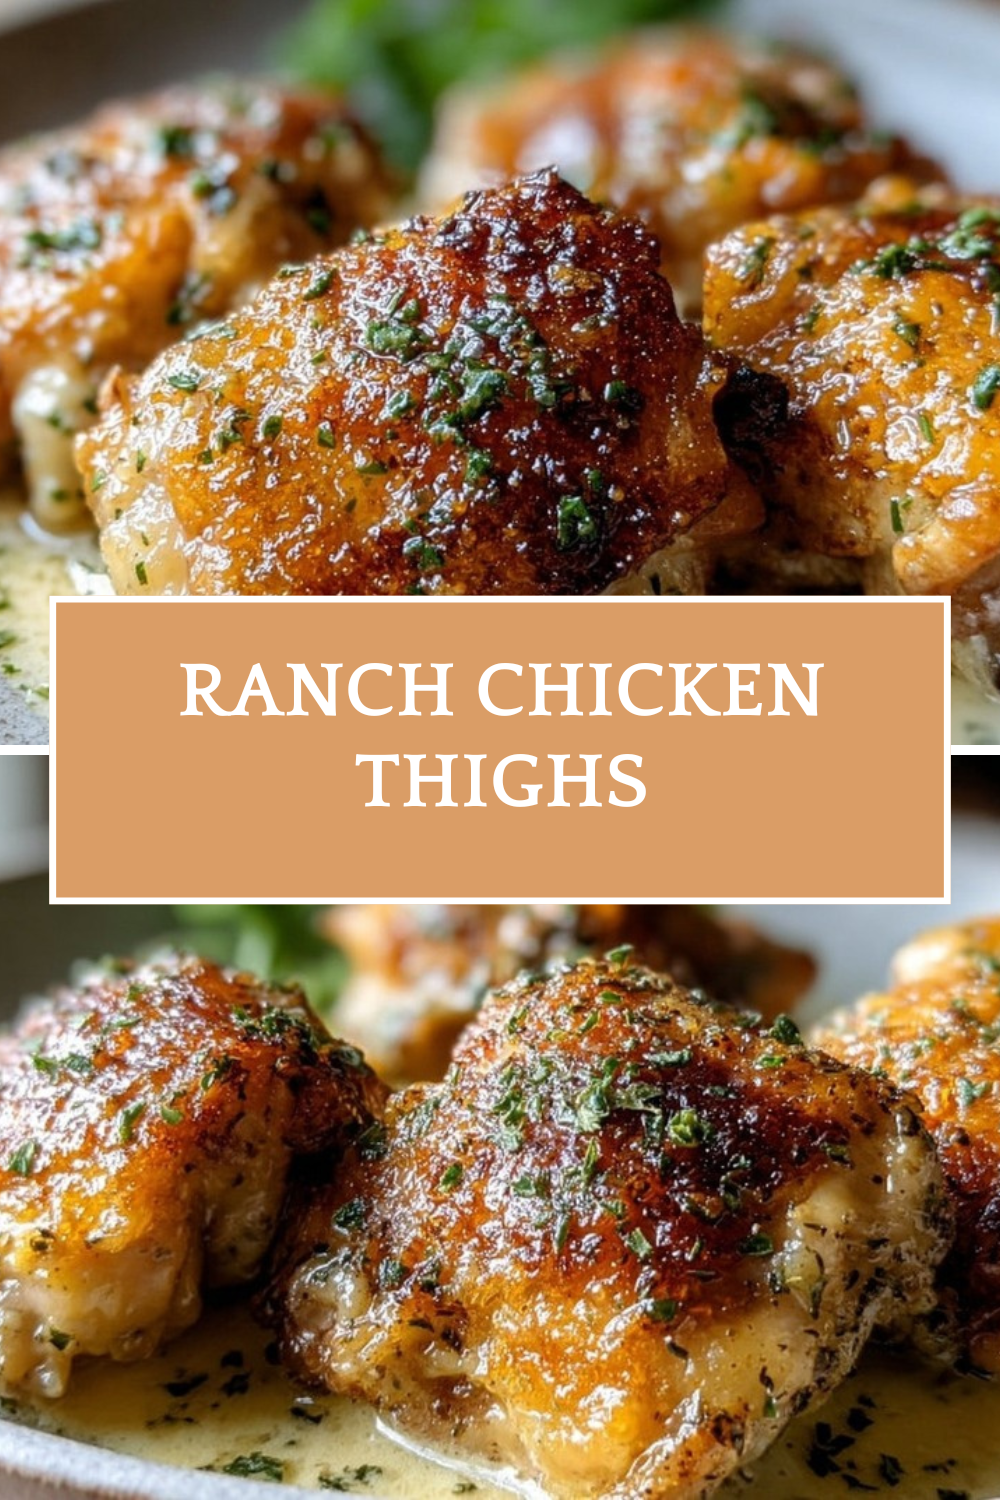
Why You’ll Love These Ranch Chicken Thighs
If you want a dinner that feels comforting, tastes great, and does not leave you stuck in the kitchen all night, these Ranch Chicken Thighs are a smart choice. The mix of ranch seasoning, garlic, lemon juice, and olive oil gives the chicken a bold, savory coating that bakes up beautifully. Bone-in, skin-on thighs stay juicy in the oven, which makes this a reliable ranch chicken recipe for busy nights.
- Easy to prepare: This recipe uses simple pantry ingredients and only a few steps, so it works well for beginners, busy parents, and students who need a fast dinner idea.
- Great flavor: The dry ranch mix brings a creamy, herby taste, while garlic and black pepper add a little bite. The skin gets nicely browned in the oven for extra texture.
- Juicy and satisfying: Bone-in, skin-on chicken thighs hold moisture well, so you get tender meat even if you are not an expert cook.
- Flexible for meals: Serve them with potatoes, rice, salad, or vegetables for a balanced plate that fits many eating styles.
If you like easy chicken dinners, you may also enjoy this crispy baked chicken dinner idea for another family-friendly meal. And if you are curious about why chicken thighs are such a smart choice, this article from EatingWell on the nutrition of chicken thighs is a helpful read.
These baked ranch chicken thighs are the kind of meal that feels simple enough for a weeknight, but tasty enough to make again and again.
Jump To
- 1. Why You’ll Love These Ranch Chicken Thighs
- 2. Essential Ingredients for Ranch Chicken Thighs
- 3. How to Prepare the Perfect Ranch Chicken Thighs: Step-by-Step Guide
- 4. Dietary Substitutions to Customize Your Ranch Chicken Thighs
- 5. Mastering Ranch Chicken Thighs: Advanced Tips and Variations
- 6. How to Store Ranch Chicken Thighs: Best Practices
- 7. FAQs: Frequently Asked Questions About Ranch Chicken Thighs
- 8. Ranch Chicken Thighs
Essential Ingredients for Ranch Chicken Thighs
Here is everything you need for this easy baked ranch chicken thighs recipe. Each ingredient plays a role in flavor, moisture, or texture, so it is worth keeping the measurements as written.
- 6 bone-in skin-on chicken thighs – The main protein. Bone-in thighs stay juicy, while the skin helps create a crisp, golden finish.
- 1 ounce packet dry ranch salad dressing mix – Gives the chicken its classic ranch flavor with herbs, seasoning, and a creamy savory taste.
- 2 tablespoons olive oil – Helps the seasoning stick to the chicken and encourages browning in the oven.
- 1 clove garlic, pressed – Adds fresh garlic flavor that deepens the overall taste of the dish.
- Black pepper to taste – Brings a little sharpness and balances the creamy ranch seasoning.
- 1 tablespoon lemon juice, if needed to thin mixture – Helps loosen the seasoning mix if it feels too thick, and adds a light pop of brightness.
| Ingredient | Purpose | Best Result |
|---|---|---|
| Bone-in, skin-on chicken thighs | Main protein | Juicy meat and crisp skin |
| Dry ranch mix | Primary seasoning | Classic ranch flavor |
| Olive oil | Coating and browning | Better roasting and moisture |
| Pressed garlic | Fresh flavor | Savory depth |
| Lemon juice | Texture and brightness | Smoother coating |
| Black pepper | Seasoning balance | More flavor contrast |
Special Dietary Options
- Vegan: Swap the chicken for thick cauliflower steaks or king oyster mushrooms, and use a vegan ranch seasoning blend.
- Gluten-free: Check that your ranch packet is certified gluten-free, since some seasoning mixes may contain additives or wheat-based ingredients.
- Low-calorie: Use less olive oil and serve with steamed vegetables or a fresh salad instead of heavier sides.
For another comforting chicken dish, you might also like this stuffed chicken recipe from the blog.
How to Prepare the Perfect Ranch Chicken Thighs: Step-by-Step Guide
These baked ranch chicken thighs are simple, but a few small details make a big difference. Patting the chicken dry, coating it well, and baking at the right temperature all help the skin turn out better and the meat stay juicy. If you are new to cooking chicken thighs, do not worry. This easy ranch chicken thighs recipe is very beginner-friendly and forgiving.
First Step: Get the oven and pan ready
Start by preheating your oven to 400°F. While the oven heats, line a baking sheet with foil or parchment paper for easier cleanup. If you want extra browning, place a wire rack on top of the baking sheet so air can circulate around the chicken. This small step helps the skin crisp instead of steaming.
Next, lightly grease the rack or baking sheet with a little olive oil so the chicken does not stick. Set the pan aside while you prepare the seasoning mixture.
Second Step: Mix the ranch coating
In a small bowl, combine the 1 ounce packet dry ranch salad dressing mix, 2 tablespoons olive oil, 1 pressed garlic clove, and black pepper to taste. Stir until it forms a thick, spoonable mixture. If it seems too thick to spread, add 1 tablespoon lemon juice to loosen it slightly. The lemon juice is optional, but it can help the mixture spread more evenly over the chicken.
For the best coating, taste the mixture before using it if you are comfortable doing so. The ranch packet already brings salt and seasoning, so you usually will not need much extra.
Third Step: Prep the chicken thighs
Take the 6 bone-in skin-on chicken thighs out of the package and pat them dry with paper towels. This part matters because dry skin browns better in the oven. If the chicken is wet, the seasoning may slide off and the skin may not crisp as well.
Place the chicken thighs on the prepared baking sheet with the skin side facing up. Arrange them with a little space between each piece so the heat can move around them evenly. Crowding the pan can lead to softer skin and uneven cooking.
Fourth Step: Season and coat the chicken
Spoon the ranch mixture over each chicken thigh and spread it across the top and sides. You can use the back of the spoon or clean hands to coat the chicken more evenly. Focus on the top side first since that is the part that will brown the most. Some seasoning will drip down, and that is fine.
If you want a stronger ranch flavor, let the coated chicken sit for 10 to 15 minutes before baking. This gives the seasoning time to cling to the surface. If you are short on time, you can bake it right away and it will still taste great.
Fifth Step: Bake until the chicken is cooked through
Place the pan in the preheated oven and bake for about 40 to 50 minutes. The exact time depends on the size of the thighs and whether they are very cold from the fridge. Bone-in chicken usually needs a little longer than boneless pieces, so it is always smart to check the thickest part with a thermometer.
For even better color, you can spoon a little of the pan juices over the chicken halfway through baking. If the skin starts browning too fast, loosely tent the pan with foil. That helps protect the top while the meat finishes cooking.
Sixth Step: Check the temperature
The chicken is done when the thickest part reaches 165°F. Use an instant-read thermometer and avoid touching the bone, because that can give you a false reading. If the thighs are not there yet, keep baking and check again in a few minutes. Do not rush this part, since properly cooked chicken is both safer and juicier.
If you love meal planning, this recipe pairs nicely with sides you can make ahead, like rice, roasted vegetables, or a simple salad. It also works well with a comforting dish such as loaded baked potato chicken casserole when you want a cozy dinner spread.
Final Step: Rest and serve
Once the chicken reaches temperature, remove it from the oven and let it rest for 5 minutes. Resting helps the juices settle back into the meat so each bite stays tender. After that, serve the ranch chicken thighs hot with your favorite sides.
Try spooning a little pan juice over the top before serving for extra flavor. This simple step makes the chicken taste even better without adding any extra work.
For the best results, always check the internal temperature instead of relying on color alone.

Dietary Substitutions to Customize Your Ranch Chicken Thighs
Protein and Main Component Alternatives
If you do not have chicken thighs on hand, you still have options. Chicken breasts can work in this chicken thighs recipe, but they cook faster and dry out more easily, so watch them closely. Boneless, skinless thighs are another solid choice if you want a slightly lighter dish and shorter bake time. You can also use drumsticks if that is what you have in the fridge.
For a plant-based version, large cauliflower steaks or thick portobello mushrooms can carry the ranch flavor well. They will not give you the same texture as chicken, but they can still make a satisfying meal when paired with rice, potatoes, or salad.
Vegetable, Sauce, and Seasoning Modifications
You can also change the seasoning based on what you like. Add a pinch of paprika for a little color, or mix in dried parsley, onion powder, or chili flakes if you want more depth. If you prefer a stronger citrus note, a bit more lemon juice works well.
For vegetables, roasted carrots, potatoes, or green beans are easy choices that fit right in beside the chicken. If you are cutting carbs, serve the thighs with cauliflower rice or a green salad instead. These swaps keep the meal flexible for different schedules, budgets, and eating goals while still keeping the ranch flavor front and center.
Mastering Ranch Chicken Thighs: Advanced Tips and Variations
Pro cooking techniques
A few small habits can make this recipe even better. First, always pat the chicken dry before seasoning. Second, give each thigh room on the pan so the skin can crisp. Third, use a thermometer instead of guessing. These basics matter more than fancy tricks, especially when you want consistent results.
If you want extra browning, place the chicken on a wire rack and bake it on the middle oven rack. That lets hot air move around the thighs more evenly. You can also finish the chicken under the broiler for 1 to 2 minutes, but watch it closely so the ranch coating does not burn.
Flavor variations
There are many ways to change the flavor without making the recipe harder. A little smoked paprika gives the chicken a warmer taste. A pinch of cayenne adds heat. Fresh chopped parsley on top at the end adds color and freshness. If you love garlic, try serving the dish with garlic butter vegetables or warm bread on the side.
For more garlic-forward dinner ideas, take a look at this helpful list from Simply Recipes garlic lovers’ recipes.
Presentation tips
To make the plate look inviting, serve the chicken on a large platter with lemon wedges and fresh parsley. Add roasted potatoes or steamed green beans around the edges. The bright green and golden brown colors make the meal feel special without much effort.
Make-ahead options
You can mix the ranch coating a day ahead and keep it covered in the fridge. You can also season the chicken earlier in the day and let it sit covered until dinner time. This makes the recipe helpful for working professionals, parents, and anyone who likes to prep dinner before the busy part of the day starts.
How to Store Ranch Chicken Thighs: Best Practices
Leftovers are easy to manage if you store them the right way. Let the chicken cool slightly before packing it away, but do not leave it out too long.
- Refrigeration: Store the cooled chicken thighs in an airtight container in the fridge for up to 3 to 4 days.
- Freezing: Wrap each thigh individually, then place them in a freezer-safe bag or container. They keep well for 2 to 3 months.
- Reheating: Reheat in the oven at 350°F until warmed through, or use the microwave in short bursts with a splash of water to keep the meat from drying out.
- Meal prep: These thighs work well for lunches, sandwiches, salads, and rice bowls during the week.
If you plan to freeze them, cool the chicken completely before wrapping. That helps prevent ice crystals and keeps the texture better when you reheat it later. For food safety, do not leave cooked chicken at room temperature for more than 2 hours.
FAQs: Frequently Asked Questions About Ranch Chicken Thighs
What kind of chicken thighs work best for ranch chicken thighs?
Bone-in, skin-on chicken thighs are ideal for ranch chicken thighs because they stay juicy and flavorful during baking, with crispy skin. Skinless or boneless thighs also work well and cook faster—adjust time as needed. Bone-in thighs take longer, so check the thickest part with a thermometer. Both fresh and thawed frozen thighs are fine, but pat them dry before seasoning for better adhesion of the ranch mix. This recipe serves 4-6 people with 8 thighs. Expect about 45-60 minutes total bake time at 400°F, depending on size and bone-in status. (78 words)
What internal temperature should ranch chicken thighs reach?
Cook ranch chicken thighs until the thickest part reaches 165°F internal temperature for safety and juiciness. Use an instant-read thermometer inserted without touching bone. At 400°F oven temp, boneless skinless thighs take 25-35 minutes; bone-in skin-on need 40-50 minutes. Flip halfway for even cooking. Rest 5 minutes post-bake to redistribute juices. Undercooked chicken risks foodborne illness; overcooking dries it out. This applies to oven, air fryer, or slow cooker methods. Always verify temp, not just time. (92 words)
Can you cook ranch chicken thighs in a slow cooker or air fryer?
Yes, adapt ranch chicken thighs for slow cooker or air fryer. For slow cooker: Mix ranch seasoning, oil, and thighs; cook skinless on low 6-8 hours or high 4 hours—no crispiness here. Shred for tacos if desired. Air fryer: Preheat to 400°F on bake, cook skin-on thighs 20-25 minutes, flipping halfway for crisp skin and juicy meat. Both methods hit 165°F safely. Oven remains best for browning. Serves same as original. (84 words)
How do you store leftover ranch chicken thighs?
Store leftover ranch chicken thighs in an airtight container in the fridge up to 3-4 days. For freezing, cool completely, wrap individually in plastic then foil, or use freezer bags—lasts 2-3 months. Thaw overnight in fridge. Reheat to 165°F in oven at 350°F for 10-15 minutes, microwave in covered dish with splash of water, or air fry 5 minutes. Avoid room temp longer than 2 hours to prevent bacteria. Perfect for salads or wraps. (89 words)
Can I add vegetables or use chicken breasts in ranch chicken thighs recipe?
Add potatoes, carrots, or green beans to the pan—toss in oil, season lightly, bake alongside uncovered at 400°F for 45-50 minutes until veggies tender. Space them out to roast, not steam. For chicken breasts: Substitute equal weight, but breasts dry faster—bake 25-35 minutes to 165°F, check early. Pound to even thickness. Ranch mix works, though thighs juicier. Great one-pan meal for 4. Pairs with rice or salad. (82 words)

Ranch Chicken Thighs
- Total Time: 50 minutes
- Yield: 6 servings
- Diet: High Protein
Description
🐔 Crispy, golden ranch-seasoned skin locks in juicy chicken thighs – effortless flavor boost for weeknight dinners the whole family craves!
🔥 Healthier baked alternative to fried, using simple pantry staples for tender, herby perfection in under an hour.
Ingredients
– 6 bone-in skin-on chicken thighs for main protein
– 1 ounce packet dry ranch salad dressing mix for primary seasoning
– 2 tablespoons olive oil for coating and browning
– 1 clove garlic, pressed for fresh flavor
– Black pepper to taste for seasoning balance
– 1 tablespoon lemon juice, if needed to thin mixture for texture and brightness
Instructions
1-First Step: Get the oven and pan ready Start by preheating your oven to 400°F. While the oven heats, line a baking sheet with foil or parchment paper for easier cleanup. If you want extra browning, place a wire rack on top of the baking sheet so air can circulate around the chicken. This small step helps the skin crisp instead of steaming. Next, lightly grease the rack or baking sheet with a little olive oil so the chicken does not stick. Set the pan aside while you prepare the seasoning mixture.
2-Second Step: Mix the ranch coating In a small bowl, combine the 1 ounce packet dry ranch salad dressing mix, 2 tablespoons olive oil, 1 pressed garlic clove, and black pepper to taste. Stir until it forms a thick, spoonable mixture. If it seems too thick to spread, add 1 tablespoon lemon juice to loosen it slightly. The lemon juice is optional, but it can help the mixture spread more evenly over the chicken. For the best coating, taste the mixture before using it if you are comfortable doing so. The ranch packet already brings salt and seasoning, so you usually will not need much extra.
3-Third Step: Prep the chicken thighs Take the 6 bone-in skin-on chicken thighs out of the package and pat them dry with paper towels. This part matters because dry skin browns better in the oven. If the chicken is wet, the seasoning may slide off and the skin may not crisp as well. Place the chicken thighs on the prepared baking sheet with the skin side facing up. Arrange them with a little space between each piece so the heat can move around them evenly. Crowding the pan can lead to softer skin and uneven cooking.
4-Fourth Step: Season and coat the chicken Spoon the ranch mixture over each chicken thigh and spread it across the top and sides. You can use the back of the spoon or clean hands to coat the chicken more evenly. Focus on the top side first since that is the part that will brown the most. Some seasoning will drip down, and that is fine. If you want a stronger ranch flavor, let the coated chicken sit for 10 to 15 minutes before baking. This gives the seasoning time to cling to the surface. If you are short on time, you can bake it right away and it will still taste great.
5-Fifth Step: Bake until the chicken is cooked through Place the pan in the preheated oven and bake for about 40 to 50 minutes. The exact time depends on the size of the thighs and whether they are very cold from the fridge. Bone-in chicken usually needs a little longer than boneless pieces, so it is always smart to check the thickest part with a thermometer. For even better color, you can spoon a little of the pan juices over the chicken halfway through baking. If the skin starts browning too fast, loosely tent the pan with foil. That helps protect the top while the meat finishes cooking.
6-Sixth Step: Check the temperature The chicken is done when the thickest part reaches 165°F. Use an instant-read thermometer and avoid touching the bone, because that can give you a false reading. If the thighs are not there yet, keep baking and check again in a few minutes. Do not rush this part, since properly cooked chicken is both safer and juicier.
7-Final Step: Rest and serve Once the chicken reaches temperature, remove it from the oven and let it rest for 5 minutes. Resting helps the juices settle back into the meat so each bite stays tender. After that, serve the ranch chicken thighs hot with your favorite sides. Try spooning a little pan juice over the top before serving for extra flavor. This simple step makes the chicken taste even better without adding any extra work.
Notes
🧻 Pat chicken dry thoroughly before seasoning for ultra-crispy skin.
🌡️ Use a meat thermometer to ensure perfect doneness without overcooking.
⏰ No need to flip – bake undisturbed for even browning and juiciness.
- Prep Time: 10 minutes
- Cook Time: 35-45 minutes
- Category: Main Course
- Method: Baked
- Cuisine: American
Nutrition
- Serving Size: 1 chicken thigh
- Calories: 450 kcal
- Sugar: 1 g
- Sodium: 850 mg
- Fat: 35 g
- Saturated Fat: 9 g
- Unsaturated Fat: 25 g
- Trans Fat: 0 g
- Carbohydrates: 2 g
- Fiber: 0 g
- Protein: 28 g
- Cholesterol: 150 mg
Keywords: baked ranch chicken thighs, ranch chicken recipe, crispy chicken thighs, oven baked chicken