Why You’ll Love This Oreo Ice Cream Cake
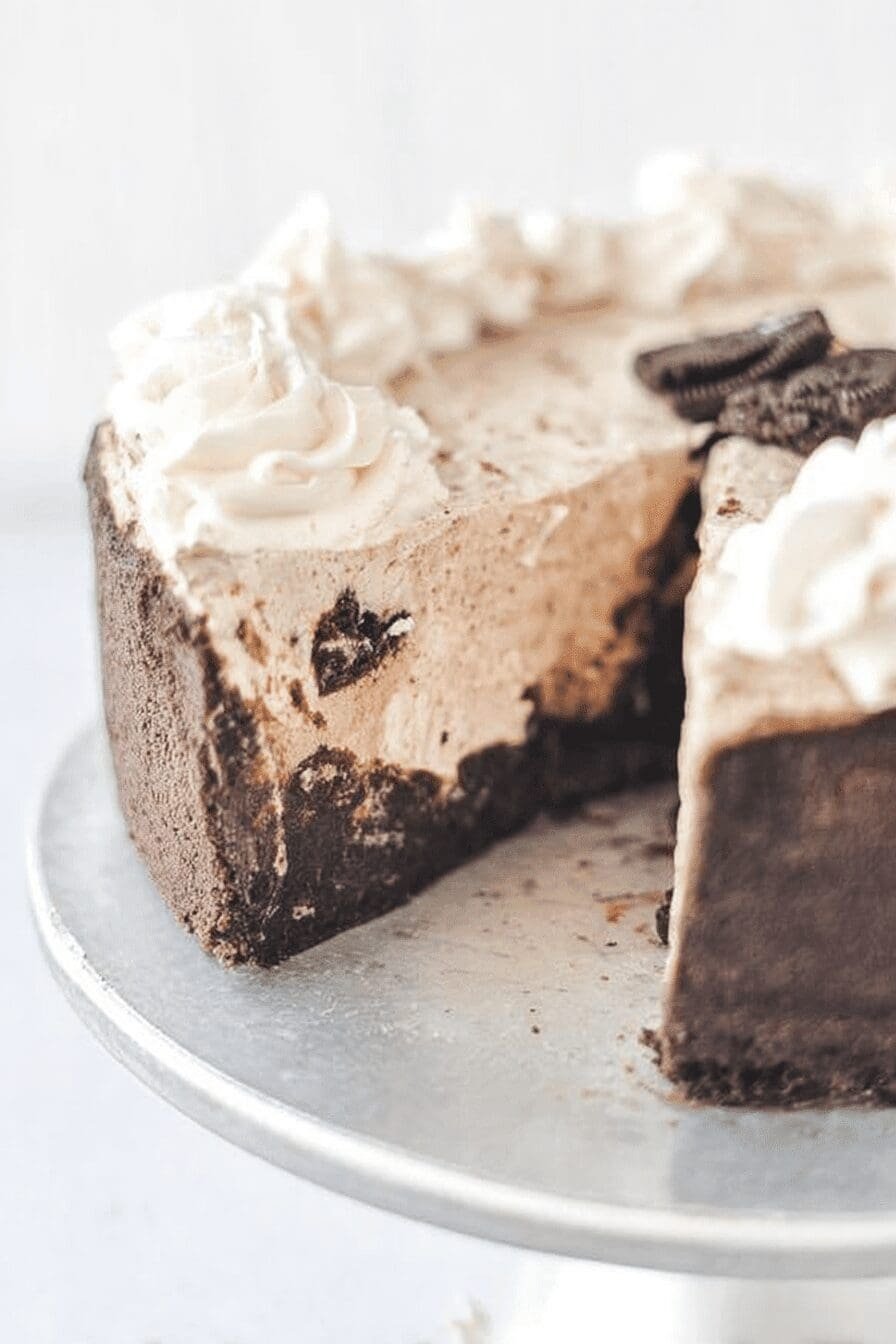
This Oreo ice cream cake is a fantastic treat that brings together creamy layers and crunchy cookies for a dessert everyone can enjoy. It’s perfect for hot summer days when you don’t want to turn on the oven, and it comes together in no time at all. With its simple steps and delicious taste, it’s ideal for families and beginners alike.
One big reason to try this Oreo ice cream cake is how easy it is to make. It requires minimal ingredients and no baking, which fits perfectly into busy schedules without any hassle. You can also swap in healthier options like low-calorie ice cream to keep things light while still satisfying your sweet cravings.
This recipe shines with its adaptability, letting you tweak it for different diets such as vegan or gluten-free. The mix of classic Oreo flavor and smooth ice cream creates a unique delight that feels special every time. Plus, it’s a fun way to bond with loved ones over dessert, making memories around the table.
Health Benefits and Versatility
Using lower-calorie ice cream not only helps with wellness goals but also keeps the treat enjoyable. You can easily make it vegan by choosing plant-based alternatives, so it’s inclusive for all. This Oreo ice cream cake stands out for its balance of flavors, offering a creamy texture that pairs well with the crunch of cookies.
To explore more no-bake options, check out our no-bake chocolate eclair cake recipe for another quick favorite.
Whether you’re a busy parent or a baking enthusiast, this cake’s flexibility makes it a go-to choice. Imagine serving it at a family gathering; it’s sure to impress with its layers of goodness. Let’s dive into why this treat hits the spot for so many.
Jump To
- 1. Why You’ll Love This Oreo Ice Cream Cake
- 2. Essential Ingredients for Oreo Ice Cream Cake
- 3. How to Prepare the Perfect Oreo Ice Cream Cake: Step-by-Step Guide
- 4. Dietary Substitutions to Customize Your Oreo Ice Cream Cake
- 5. Mastering Oreo Ice Cream Cake: Advanced Tips and Variations
- 6. How to Store Oreo Ice Cream Cake: Best Practices
- 7. FAQs: Frequently Asked Questions About Oreo Ice Cream Cake
- 8. Oreo Ice Cream Cake
Essential Ingredients for Oreo Ice Cream Cake
Gathering the right ingredients is key to making a perfect Oreo ice cream cake. This recipe focuses on simple items that create layers of flavor and texture. Below, you’ll find a structured list of everything needed, based on the exact recipe details.
Main Ingredients
- 13.29 ounces (approximately one package) of crushed chocolate sandwich cookies
- 1/4 cup (about 57 grams) of melted butter
- 1/2 gallon (1.9 liters) of softened cookies and cream ice cream
- 16 ounces (450 grams) of warmed hot fudge
- 8 ounces (227 grams) of thawed whipped topping
These ingredients form the base of your Oreo ice cream cake, ensuring each layer is just right. The crushed cookies add that classic crunch, while the ice cream brings creamy goodness.
Special Dietary Options
For those with specific needs, you can adapt this recipe easily. Use plant-based cookies and ice cream for vegan versions, or swap in gluten-free cookies to keep things tasty and accessible.
Low-calorie options like reduced-sugar ice cream work well too, so everyone can enjoy without worry. For more ideas on similar desserts, visit our cookies and cream Oreo cake page.
| Ingredient | Quantity | Purpose |
|---|---|---|
| Crushed chocolate sandwich cookies | 13.29 ounces | Creates the crunchy base |
| Melted butter | 1/4 cup | Binds the crust together |
| Softened cookies and cream ice cream | 1/2 gallon | Forms the creamy layers |
| Warmed hot fudge | 16 ounces | Adds rich chocolate flavor |
| Thawed whipped topping | 8 ounces | Provides a light, fluffy finish |
This table helps you see how each part plays a role in the final dish. Remember, precise measurements make all the difference for the best results.
How to Prepare the Perfect Oreo Ice Cream Cake: Step-by-Step Guide
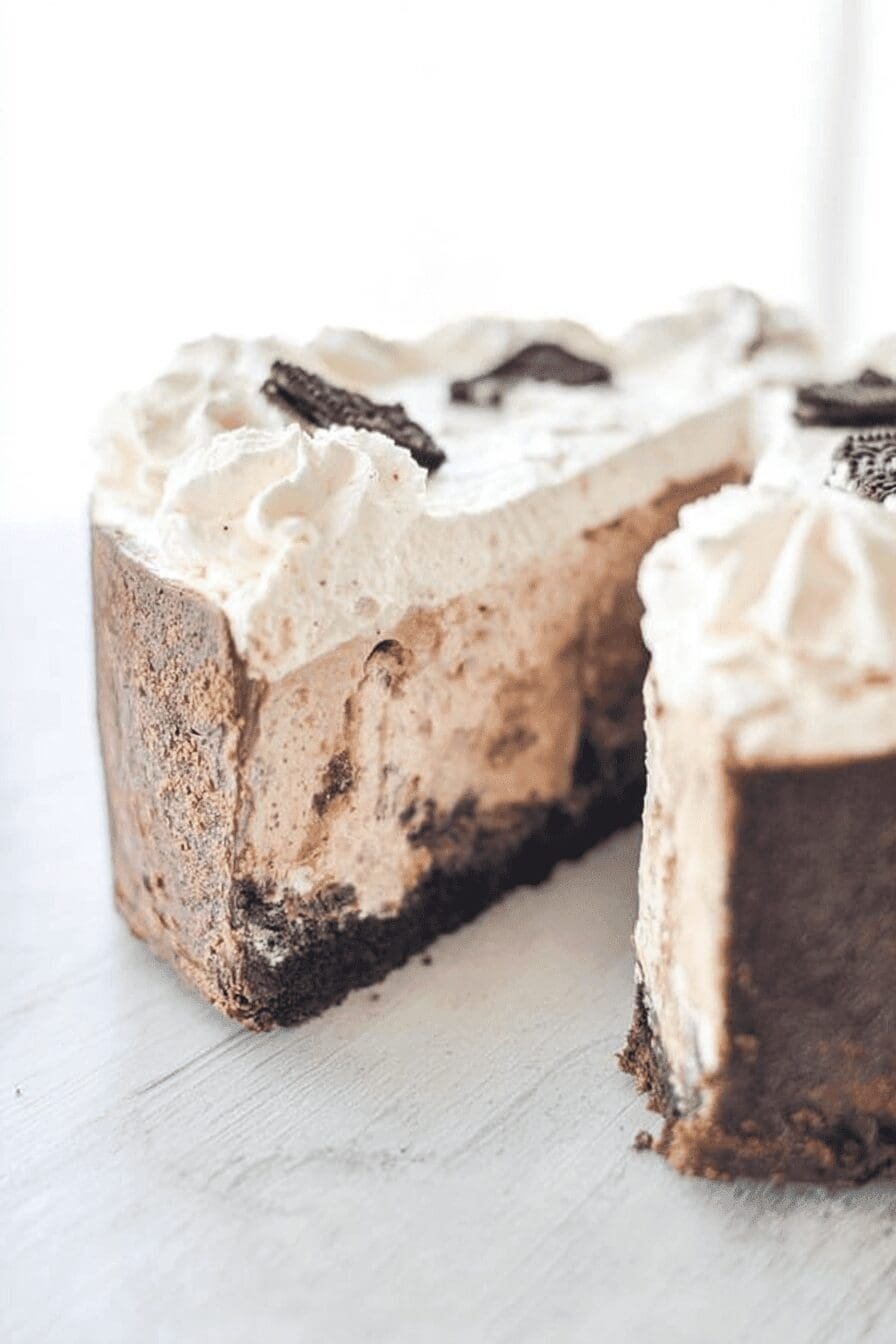
Making an Oreo ice cream cake is straightforward and fun, with steps that anyone can follow. Start by preparing the crust to set a solid base for the layers. This no-bake treat comes together quickly, perfect for a last-minute dessert idea.
- First, crush the chocolate sandwich cookies finely and mix them with the melted butter. Press this mixture evenly into the base of a cake pan to form a firm crust.
- Next, soften the cookies and cream ice cream just a bit, then spread it smoothly over the crust for a creamy layer.
- Add a generous layer of the warmed hot fudge on top of the ice cream to bring in that rich chocolate taste.
- Spread the thawed whipped topping over the fudge layer for a light and airy finish.
- Finally, pop the cake into the freezer and let it set for at least 4 hours until it’s firm and ready to slice.
For a twist, try adding extra cookie pieces between layers for more crunch. If you’re adapting for dietary needs, swap in vegan ice cream as you go. This step-by-step approach ensures your Oreo ice cream cake turns out great every time.
Tips for Smooth Preparation
Always let the ice cream soften at room temperature for easier spreading, but don’t let it melt completely. Use a springform pan for neat slices, as it makes removal simple. Once assembled, cover the cake well to avoid freezer burn and keep flavors fresh.
This method works well for busy families, and you can even prepare it ahead for parties. For more inspiration on layered desserts, check out tips from the ice cream baking tips site.

Dietary Substitutions to Customize Your Oreo Ice Cream Cake
Customizing your Oreo ice cream cake lets you make it fit any diet without losing the fun. Start with simple swaps for the main ingredients to keep things tasty and inclusive. Whether you’re avoiding dairy or gluten, these changes help everyone enjoy the dessert.
- For dairy-free options, use coconut or almond milk-based ice cream instead of traditional ones.
- Swap regular cookies with gluten-free versions to maintain that crunch.
- Add sauces like berry compote for a fresh twist or fresh fruits as toppings for extra nutrition.
- Opt for low-calorie ice cream to lighten up the recipe while keeping the creamy feel.
These adjustments ensure your Oreo ice cream cake stays delicious and adaptable. For example, adding peanut butter to the layers can create a unique flavor that surprises your guests. It’s all about making the cake your own while sticking to what works best for you.
More Ideas for Variations
You can also experiment with seasonings or extra toppings to enhance the cake. Fresh berries add color and a tart note that balances the sweetness. This flexibility makes the recipe a hit for food enthusiasts and health-conscious eaters alike. Remember, the goal is to have fun and create something memorable.
This adaptability is what makes Oreo ice cream cake a favorite it’s easy to tweak for any occasion or dietary need.
Mastering Oreo Ice Cream Cake: Advanced Tips and Variations
Taking your Oreo ice cream cake to the next level involves some clever techniques and creative ideas. Use a springform pan for easy release, which helps you get clean, professional-looking slices. Layering different ice cream flavors with Oreos adds excitement and personalization to the cake.
Flavor and Presentation Enhancements
Try mixing in peppermint extract for a cool twist or peanut butter for a nutty depth in the ice cream layers. For presentation, top with chocolate shavings or cookie crumbs to make it visually appealing. You can even prepare the crust and layers ahead of time to save effort on the day of your event.
These tips help optimize your Oreo ice cream cake for any gathering. Incorporating the key flavors naturally boosts the overall experience. Don’t forget, practicing these steps will make you a pro in no time.
Make-Ahead Strategies
Prepare the base a day early and freeze it, then add layers just before serving. This approach works great for busy professionals or students. For more advanced recipes, the official Oreo website has useful ideas.
Experimenting with variations keeps things fresh and engaging for baking enthusiasts. Whether it’s adding fruits or sauces, the possibilities are endless with this versatile treat.
How to Store Oreo Ice Cream Cake: Best Practices
Proper storage keeps your Oreo ice cream cake tasting fresh and maintaining its texture. Keep it in the refrigerator for short-term use, ideally within a day, to preserve the creamy layers. For longer storage, freezing is the way to go to lock in flavors.
Wrap the cake tightly with plastic wrap and foil to prevent freezer burn, and it can last up to a month. When you’re ready to serve, let it sit at room temperature for a bit to soften without reheating. This method ensures each bite is as good as the first.
Meal Prep Tips
For batch cooking, divide the cake into portions before freezing for easy grab-and-go treats. This is perfect for families or working pros who need quick desserts. Following these practices keeps your Oreo ice cream cake convenient and delicious.
FAQs: Frequently Asked Questions About Oreo Ice Cream Cake
How do you make an Oreo ice cream cake at home?
To make an Oreo ice cream cake at home, start by crushing Oreo cookies to create a crust. Press the crushed cookies into the bottom of a springform pan or baking dish. Soften your favorite ice cream slightly and spread a layer over the crust. Add a layer of chopped Oreos or cookie pieces if desired. Freeze the cake for at least 30 minutes, then repeat layers of softened ice cream and Oreo pieces until the pan is full. Finish with a layer of whipped cream and crushed Oreos on top. Freeze the cake for several hours or overnight before serving for best texture and flavor.
What type of ice cream works best for Oreo ice cream cake?
Vanilla ice cream is the most popular choice for Oreo ice cream cake because it complements the chocolatey Oreo flavor without overpowering it. However, cookies and cream ice cream or chocolate ice cream are also great options to intensify the taste. For a dairy-free option, you can use coconut milk-based ice cream. Just make sure the ice cream is softened enough to spread easily but not melted when assembling the cake.
Can I prepare an Oreo ice cream cake in advance?
Yes, Oreo ice cream cake is perfect for making ahead. After assembling, cover it tightly with plastic wrap or an airtight lid and freeze for up to one week. Make sure to remove it from the freezer about 10-15 minutes before serving to allow it to soften slightly for easier slicing. This makes it a convenient dessert option for parties or special occasions.
How do I prevent the Oreo crust from getting soggy in the ice cream cake?
To avoid a soggy Oreo crust, press the crushed cookies firmly and compactly into the pan to create a solid base. You can also mix melted butter with the crushed Oreos before pressing them down; this helps bind the crust and repel moisture. Once assembled, keep the cake well covered in the freezer to prevent ice crystals from forming, which can make the crust soggy over time.
Can I decorate an Oreo ice cream cake and what are good toppings?
Absolutely! Decorating an Oreo ice cream cake adds visual appeal and extra flavor. Popular toppings include crushed Oreo pieces, dollops of whipped cream, chocolate chips, chocolate syrup drizzle, or even mini chocolate candies. Fresh berries like strawberries or raspberries can add color and a tart contrast. When decorating, add these toppings just before serving to maintain their freshness and texture.

Oreo Ice Cream Cake
- Total Time: 4 hours 15 minutes
- Yield: 10-12 servings
Description
🍪 Indulge in a delightful Oreo ice cream cake featuring creamy layers and crunchy cookies for the perfect treat.
🍨 This no-bake recipe is easy to prepare and combines rich ice cream and chocolate flavors that everyone will love.
Ingredients
– 13.29 ounces crushed chocolate sandwich cookies Creates the crunchy base
– 1/4 cup melted butter Binds the crust together
– 1/2 gallon softened cookies and cream ice cream Forms the creamy layers
– 16 ounces warmed hot fudge Adds rich chocolate flavor
– 8 ounces thawed whipped topping Provides a light, fluffy finish
Instructions
1-First, crush the chocolate sandwich cookies finely and mix them with the melted butter. Press this mixture evenly into the base of a cake pan to form a firm crust.
2-Next, soften the cookies and cream ice cream just a bit, then spread it smoothly over the crust for a creamy layer.
3-Add a generous layer of the warmed hot fudge on top of the ice cream to bring in that rich chocolate taste.
4-Spread the thawed whipped topping over the fudge layer for a light and airy finish.
5-Finally, pop the cake into the freezer and let it set for at least 4 hours until it’s firm and ready to slice.
Notes
🍦 Use softened ice cream for easier spreading and layering.
🍫 Warm the hot fudge slightly to drizzle smoothly over the ice cream.
❄️ Freeze the cake thoroughly to maintain its shape before slicing.
- Prep Time: 15 minutes
- Freezing Time: 4 hours
- Category: Dessert
- Method: No-bake assembly
- Cuisine: American
Nutrition
- Serving Size: 1 slice
Keywords: Oreo Ice Cream Cake, Cookies and Cream Dessert, No-bake Ice Cream Cake, Crunchy Cookies