Why You’ll Love This Lemon Curd
Lemon Curd is one of those little kitchen miracles that feels fancy but is surprisingly simple to make. With just a few pantry staples and fresh lemons, you get a silky spread that tastes bright, buttery, and wonderfully tangy. If you love sweet and citrusy treats, this recipe is about to become a favorite.
- Easy to make: This Lemon Curd comes together in about 10 minutes of cooking time, and the double boiler method keeps things calm and gentle. No tricky steps, no special equipment beyond a pot and bowl.
- Bright flavor with simple ingredients: Fresh lemon juice, lemon zest, sugar, egg yolks, and butter create a smooth, bold citrus flavor that tastes much fresher than store-bought versions.
- So versatile: Spread it on toast, spoon it over yogurt, layer it in cakes, or fill tart shells. It also works beautifully in desserts like key lime pie trifle or paired with soft cookies such as lemon oatmeal cookies.
- Great for many lifestyles: This Lemon Curd is naturally gluten-free since it uses no flour or cornstarch, and it can be adjusted with other citrus fruits like limes, oranges, or grapefruit.
When life gives you lemons, make Lemon Curd and let your breakfast feel a little more sunny.
It is a lovely make-ahead treat for busy parents, students, bakers, and anyone who wants a quick homemade spread with a bakery-style finish.
Jump To
- 1. Why You’ll Love This Lemon Curd
- 2. Essential Ingredients for Lemon Curd
- 3. How to Prepare the Perfect Lemon Curd: Step-by-Step Guide
- 4. Dietary Substitutions to Customize Your Lemon Curd
- 5. Mastering Lemon Curd: Advanced Tips and Variations
- 6. How to Store Lemon Curd: Best Practices
- 7. FAQs: Frequently Asked Questions About Lemon Curd
- 8. Lemon Curd
Essential Ingredients for Lemon Curd
Here is the ingredient list for this silky Lemon Curd recipe. Every item plays an important role in flavor, texture, and that glossy finish everyone loves.
- 4 large egg yolks – These create the rich, custardy base. For thicker curd, replace 2 yolks with 1 whole egg.
- 2/3 cup granulated sugar – Sweetens the curd and balances the tart lemon juice.
- 1 tablespoon lemon zest from about 1 lemon – Adds a fresh citrus aroma and deeper lemon flavor.
- 1/3 cup fresh lemon juice from about 2 to 3 lemons – Gives the curd its bright, tangy taste. Fresh juice is essential for the best flavor.
- 1/8 teaspoon salt – Sharpens the flavor and helps the sweetness taste more balanced.
- 6 tablespoons unsalted butter, softened and cut into 6 pieces – Makes the curd silky, smooth, and glossy.
If you use salted butter, simply leave out the added salt. That is an easy swap for whatever you already have in the fridge.
Special Dietary Options
- Vegan: Replace the egg yolks and butter with plant-based lemon curd ingredients such as dairy-free butter and a thickening base like cornstarch or aquafaba, though the texture will change.
- Gluten-free: This Lemon Curd recipe is already gluten-free because it contains no flour or wheat ingredients.
- Low-calorie: Use slightly less sugar if you prefer a lighter version, but keep in mind that sugar helps with texture and balance.
| Ingredient | Purpose | Easy Swap |
|---|---|---|
| Egg yolks | Create a thick, custard-like base | Use 1 whole egg with 2 yolks for a firmer curd |
| Fresh lemon juice | Adds tang and brightness | Try lime, orange, or grapefruit juice |
| Butter | Provides smoothness and shine | Use salted butter and skip the salt |
How to Prepare the Perfect Lemon Curd: Step-by-Step Guide
First Step: Set up the double boiler
Fill the bottom of a double boiler with 1 to 2 inches of water and bring it to a gentle simmer. If you do not have a double boiler, place a heatproof glass bowl over a pot of simmering water. The key here is gentle heat, not a rolling boil. Direct heat can scramble the eggs fast, and nobody wants lemony scrambled eggs.
This method keeps the Lemon Curd smooth and helps it cook slowly and evenly. If you are making dessert for a gathering, this is a nice calm recipe that lets you multitask while still feeling like a kitchen pro.
Second Step: Whisk the base ingredients
In the top pot or bowl, whisk together the egg yolks, granulated sugar, lemon zest, fresh lemon juice, and salt until everything looks blended. The mixture may seem thin at first, and that is perfectly normal. Keep whisking until the sugar starts to dissolve and the color looks pale and even.
Use non-metal tools if you want to avoid any metallic taste. A silicone whisk or rubber spatula works well here. Fresh lemon juice is the star of this recipe, so skip bottled juice if you can. The fresh stuff brings a brighter, cleaner flavor that bottled juice just cannot match.
Third Step: Cook the curd slowly
Place the bowl over the simmering water and whisk constantly for about 10 minutes. Keep the heat steady and gentle. The mixture will slowly thicken into a texture that feels a lot like hollandaise sauce. You are aiming for about 170 degrees Fahrenheit, or until the curd coats the back of a spoon.
Do not rush this part. The Lemon Curd needs steady whisking so the eggs cook evenly and the mixture stays silky. If you stop whisking, the curd can stick to the bowl or cook unevenly. If it is not thickening, raise the heat just a little while continuing to whisk.
Think of this step like making a cozy lemon custard. Slow and steady wins the race.
Fourth Step: Add the butter
Once the curd has thickened, remove it from the heat. Add the butter pieces one at a time and whisk until each piece melts into the mixture. This is where the curd turns glossy, rich, and velvety. The butter also softens the tart edge and gives the spread that spoonable, dreamy texture.
Keep whisking until no butter streaks remain. If you want a smoother finish, you can strain the curd through a fine mesh sieve before chilling it. That extra step is optional, but it can be helpful if you want a very polished texture for tart shells or cake filling.
Final Step: Chill and set
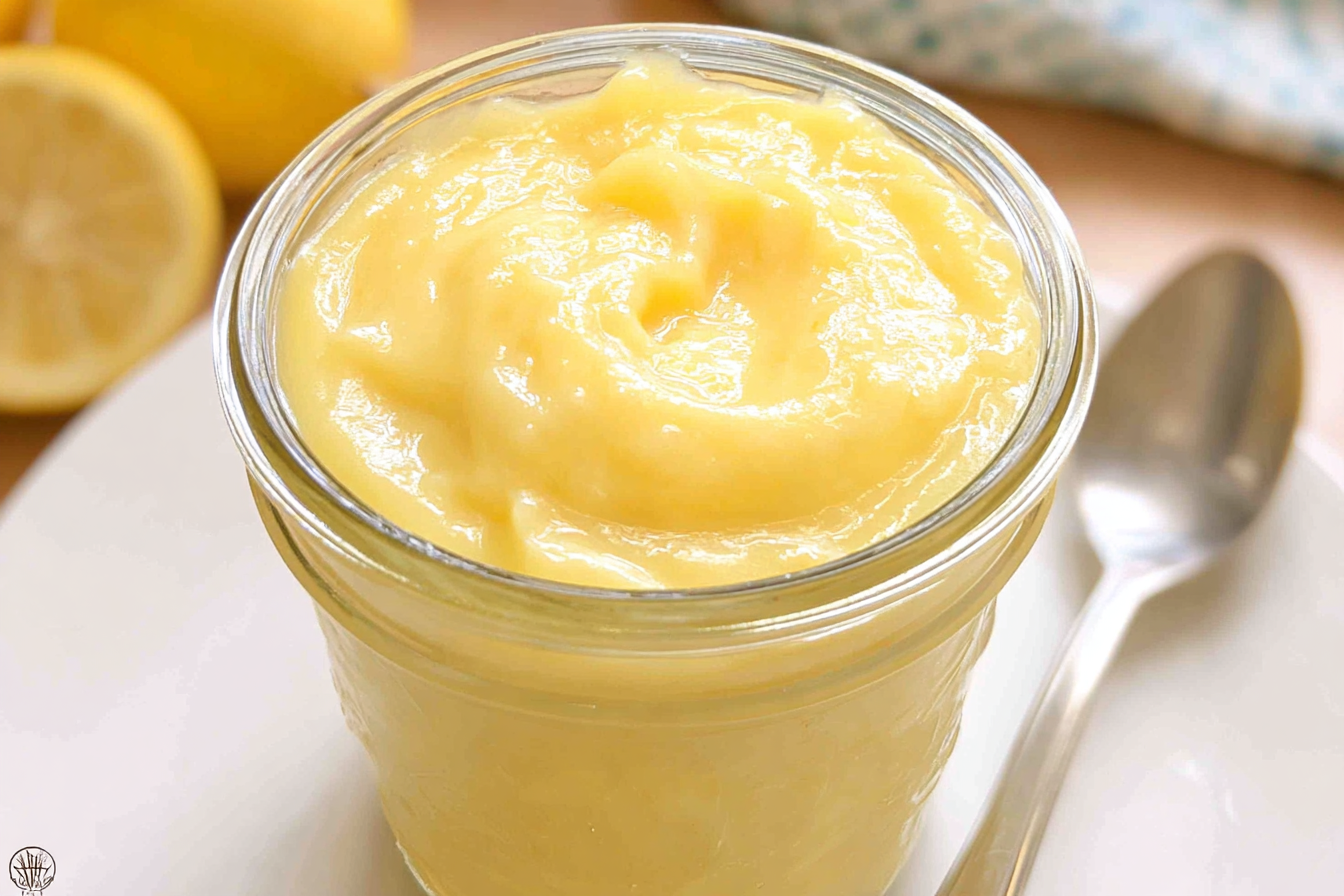
Pour the warm Lemon Curd into a clean jar or bowl. Cover it with plastic wrap so the wrap touches the surface of the curd. This prevents a skin from forming on top while it cools. Then refrigerate it until fully chilled and thicker.
The total time is about 1 hour and 15 minutes, including cooling time. The prep time is 5 minutes, the cook time is 10 minutes, and the yield is about 1 to 1.5 cups. Once chilled, it is ready for toast, scones, pastries, or a spoon straight from the jar. No judgment here.

Dietary Substitutions to Customize Your Lemon Curd
Protein and Main Component Alternatives
If you want to adjust the structure of this Lemon Curd, there are a few easy paths. For a thicker curd, replace 2 egg yolks with 1 whole egg. This gives the mixture a slightly firmer set, which can be handy for tart filling. If eggs are off your menu, you can try a plant-based curd style made with dairy-free butter and a thickener, though the texture will be different from classic curd.
For dairy-free cooking, replace the butter with a vegan butter substitute. Choose one that melts smoothly and has a mild flavor. Since butter is what gives the curd its shine and rich body, this swap works best when paired with careful cooking and a little extra whisking.
Vegetable, Sauce, and Seasoning Modifications
Lemon Curd is also a fun recipe to bend toward the seasons. Swap the lemons for limes, oranges, or grapefruit for a fresh citrus twist. You can even make pineapple or cranberry versions if you want something fruity and festive. For grapefruit, strain out the pulp to keep bitterness in check. For pineapple, simmer the juice first so it sets better.
If you are watching sugar, reduce the granulated sugar slightly, but remember that sweetness helps the curd balance the tart lemon flavor. Salted butter can be used if you leave out the extra salt. That small change is handy when you want to keep ingredients simple.
Mastering Lemon Curd: Advanced Tips and Variations
Pro cooking techniques
For the smoothest Lemon Curd, keep the heat low and whisk nonstop. A double boiler is best, but a heatproof bowl over a pot works just as well. Avoid boiling water under the bowl, since strong heat can scramble the eggs. A good curd should thicken in a slow, steady way, not rush into a lumpy mess.
If your curd is still loose after cooking, keep whisking over gentle heat a bit longer. The mixture should reach a hollandaise-like texture and hold on a spoon. For a silky finish, strain it after cooking. That little move helps remove bits of zest or any tiny cooked egg pieces.
Flavor variations
This recipe is a great base for all kinds of citrus ideas. Try lime curd for a key lime style dessert, orange curd for something sweeter, or grapefruit curd for a more grown-up tang. You can also swirl a little Lemon Curd into yogurt, cheesecake, or frosting for a bright pop of flavor. If you like recipes with a sunny citrus theme, you might also enjoy lemon cream cheese dump cake.
Presentation tips
Spoon the curd into a pretty glass jar, a small bowl, or a tart shell for a simple but lovely presentation. Top it with fresh berries, a little whipped cream, or extra lemon zest. It looks especially charming on brunch boards and dessert tables.
Make-ahead options
Lemon Curd is a dream for make-ahead baking. Make it a few days before you need it, then chill it until serving time. It keeps well, freezes beautifully, and makes busy weeknights or holiday baking feel much easier.
How to Store Lemon Curd: Best Practices
Store Lemon Curd in an airtight jar or container in the refrigerator for up to 10 days, though many home cooks find it lasts 1 to 2 weeks if handled well. Press plastic wrap directly on the surface before sealing to prevent a skin from forming. Always keep it chilled because it contains eggs and butter.
For longer storage, freeze it for 3 to 6 months. Use freezer-safe containers or bags, and leave a little room for expansion. Thaw it overnight in the fridge, then stir well before serving. If the texture seems slightly looser after thawing, that is normal and usually improves once chilled again.
There is no need to reheat Lemon Curd unless you are gently warming it for another dessert. If you do warm it, use low heat and stir often so it does not curdle. For meal prep, portion it into small jars so you can grab just what you need without opening the whole batch again and again.

FAQs: Frequently Asked Questions About Lemon Curd
What is lemon curd and what is it made of?
Lemon curd is a thick, creamy spread with a bright, tangy flavor, similar to a custard or lemon butter. It’s made from simple ingredients: fresh lemon juice, lemon zest, sugar, eggs, and butter. The eggs and gentle heat create a smooth, velvety texture without cooking the eggs fully. No flour or cornstarch is needed, making it naturally gluten-free. A standard batch uses about 3/4 cup lemon juice, zest from 4 lemons, 1 cup sugar, 3 whole eggs plus 1 yolk, and 1/2 cup butter. Cook it slowly over a double boiler or low heat, stirring constantly until it thickens to coat the back of a spoon (around 160-170°F). Cool it completely before jarring. This homemade version beats store-bought with fresher taste and no preservatives. Use it as a filling for tarts, on scones, or swirled into yogurt. (112 words)
How long does homemade lemon curd last in the fridge?
Homemade lemon curd lasts 1-2 weeks in the fridge when stored properly in an airtight jar or container. Keep it covered with plastic wrap pressed directly on the surface to prevent a skin from forming, then seal tightly. Always refrigerate it due to the eggs and butter. Check for spoilage: if it smells off, changes color, or shows mold, discard it. For best quality, use within 7-10 days. It can develop separation or watery texture over time from the acidity breaking down the emulsion. Pro tip: sterilize jars by boiling them first for longer shelf life. If you’re making a big batch, portion into smaller jars to avoid repeated opening. Freezing extends it further—see the freezing question below for details. This makes it perfect for prepping ahead for desserts or breakfasts. (128 words)
Can you freeze lemon curd and how?
Yes, you can freeze lemon curd for up to 3-6 months, preserving its flavor and texture well. Portion it into freezer-safe bags or containers, leaving headspace for expansion. Flatten bags for quick thawing. To freeze: cool completely first, then press plastic wrap onto the surface before sealing to block air and ice crystals. Thaw overnight in the fridge—avoid microwaving to prevent curdling. After thawing, stir vigorously; it may loosen slightly but firms up when chilled. One thawed batch equals about 2 cups, ideal for pies or cakes. Freezing works because the high fat from butter stabilizes it. Label with dates for rotation. Test a small amount first if concerned about texture. This method saves time for holiday baking, letting you make curd in summer when lemons are cheap and peak-fresh. (124 words)
Can I make lemon curd with other citrus fruits?
Absolutely! Swap lemons for limes, grapefruits, oranges, or even pineapple juice or cranberries using the same recipe. Adjust sugar slightly for tartness—limes need a bit more (add 2-3 tbsp), while sweet oranges take less (reduce by 1/4 cup). Use 3/4 cup juice and zest from 3-4 fruits always. For grapefruit, strain pulp to avoid bitterness. Pineapple juice gives a tropical twist; simmer it first to mellow enzymes that could prevent setting. Cranberry version: blend 1 cup cooked cranberries with 1/2 cup lemon juice. Cook as usual over low heat until thickened. Results stay creamy and spreadable. These variations shine in tarts (lime for key lime pie) or on toast. Experiment with blood oranges in winter for vibrant color. Always taste-test before finalizing sugar. (118 words)
What are common mistakes when making lemon curd and how to avoid them?
Common pitfalls include curdling from high heat, grainy texture from overcooking, or runny results from undercooking. Fix by using a double boiler or bain-marie: simmer water below the bowl, keeping curd under 170°F. Stir constantly with a whisk for smoothness. Undercooked curd won’t set—test by drawing a line on a spoon; it should hold without running. Use room-temperature eggs to emulsify better; cold ones seize. Zest finely to avoid chewiness, and strain the final curd through a sieve for silkiness. Don’t boil—gentle bubbling is enough, about 8-12 minutes. If it scrambles slightly, blend with an immersion blender post-cook. Acid from lemons cooks eggs safely if pasteurized. Fresh lemons matter; bottled juice dulls flavor. Practice once, and you’ll nail perfect curd every time for fillings, meringues, or straight from the jar. (126 words)
Lemon Curd
- Total Time: 1 hour 15 minutes
- Yield: 1.5 cups
- Diet: Vegetarian
Description
🍋 Revel in the silky smooth, tangy lemon curd that’s perfect for tarts, cakes, or toast – a burst of sunshine in every spoonful!
🥄 Effortless stovetop method delivers luxurious results with minimal ingredients – try it for an easy homemade treat!
Ingredients
– 4 large egg yolks for rich, custardy base
– 2/3 cup granulated sugar for sweetening and balancing tart lemon juice
– 1 tablespoon lemon zest from about 1 lemon for fresh citrus aroma and deeper lemon flavor
– 1/3 cup fresh lemon juice from about 2 to 3 lemons for bright, tangy taste
– 1/8 teaspoon salt for sharpening flavor and balancing sweetness
– 6 tablespoons unsalted butter, softened and cut into 6 pieces for silky, smooth, and glossy
Instructions
1-First Step: Set up the double boiler Fill the bottom of a double boiler with 1 to 2 inches of water and bring it to a gentle simmer. If you do not have a double boiler, place a heatproof glass bowl over a pot of simmering water. The key here is gentle heat, not a rolling boil. Direct heat can scramble the eggs fast, and nobody wants lemony scrambled eggs.
2-Second Step: Whisk the base ingredients In the top pot or bowl, whisk together the egg yolks, granulated sugar, lemon zest, fresh lemon juice, and salt until everything looks blended. The mixture may seem thin at first, and that is perfectly normal. Keep whisking until the sugar starts to dissolve and the color looks pale and even.
3-Third Step: Cook the curd slowly Place the bowl over the simmering water and whisk constantly for about 10 minutes. Keep the heat steady and gentle. The mixture will slowly thicken into a texture that feels a lot like hollandaise sauce. You are aiming for about 170 degrees Fahrenheit, or until the curd coats the back of a spoon.
4-Fourth Step: Add the butter Once the curd has thickened, remove it from the heat. Add the butter pieces one at a time and whisk until each piece melts into the mixture. This is where the curd turns glossy, rich, and velvety. The butter also softens the tart edge and gives the spread that spoonable, dreamy texture.
5-Final Step: Chill and set Pour the warm Lemon Curd into a clean jar or bowl. Cover it with plastic wrap so the wrap touches the surface of the curd. This prevents a skin from forming on top while it cools. Then refrigerate it until fully chilled and thicker.
Notes
🍋 Always use fresh lemon juice and zest for the brightest, most authentic flavor – skip bottled!
🔥 Whisk constantly and use a double boiler to avoid curdling or scrambling the eggs.
❄️ Refrigerate up to 10 days or freeze for 3-6 months; stir before using if needed.
- Prep Time: 5 minutes
- Chilling Time: 1 hour
- Cook Time: 10 minutes
- Category: Desserts
- Method: Stovetop
- Cuisine: British
Nutrition
- Serving Size: 2 tablespoons
- Calories: 110 kcal
- Sugar: 12g
- Sodium: 50mg
- Fat: 7g
- Saturated Fat: 4g
- Unsaturated Fat: 2.5g
- Trans Fat: 0g
- Carbohydrates: 12g
- Fiber: 0g
- Protein: 1g
- Cholesterol: 80mg
Keywords: Lemon Curd, Silky Lemon Curd, Easy Lemon Curd, Homemade Lemon Curd