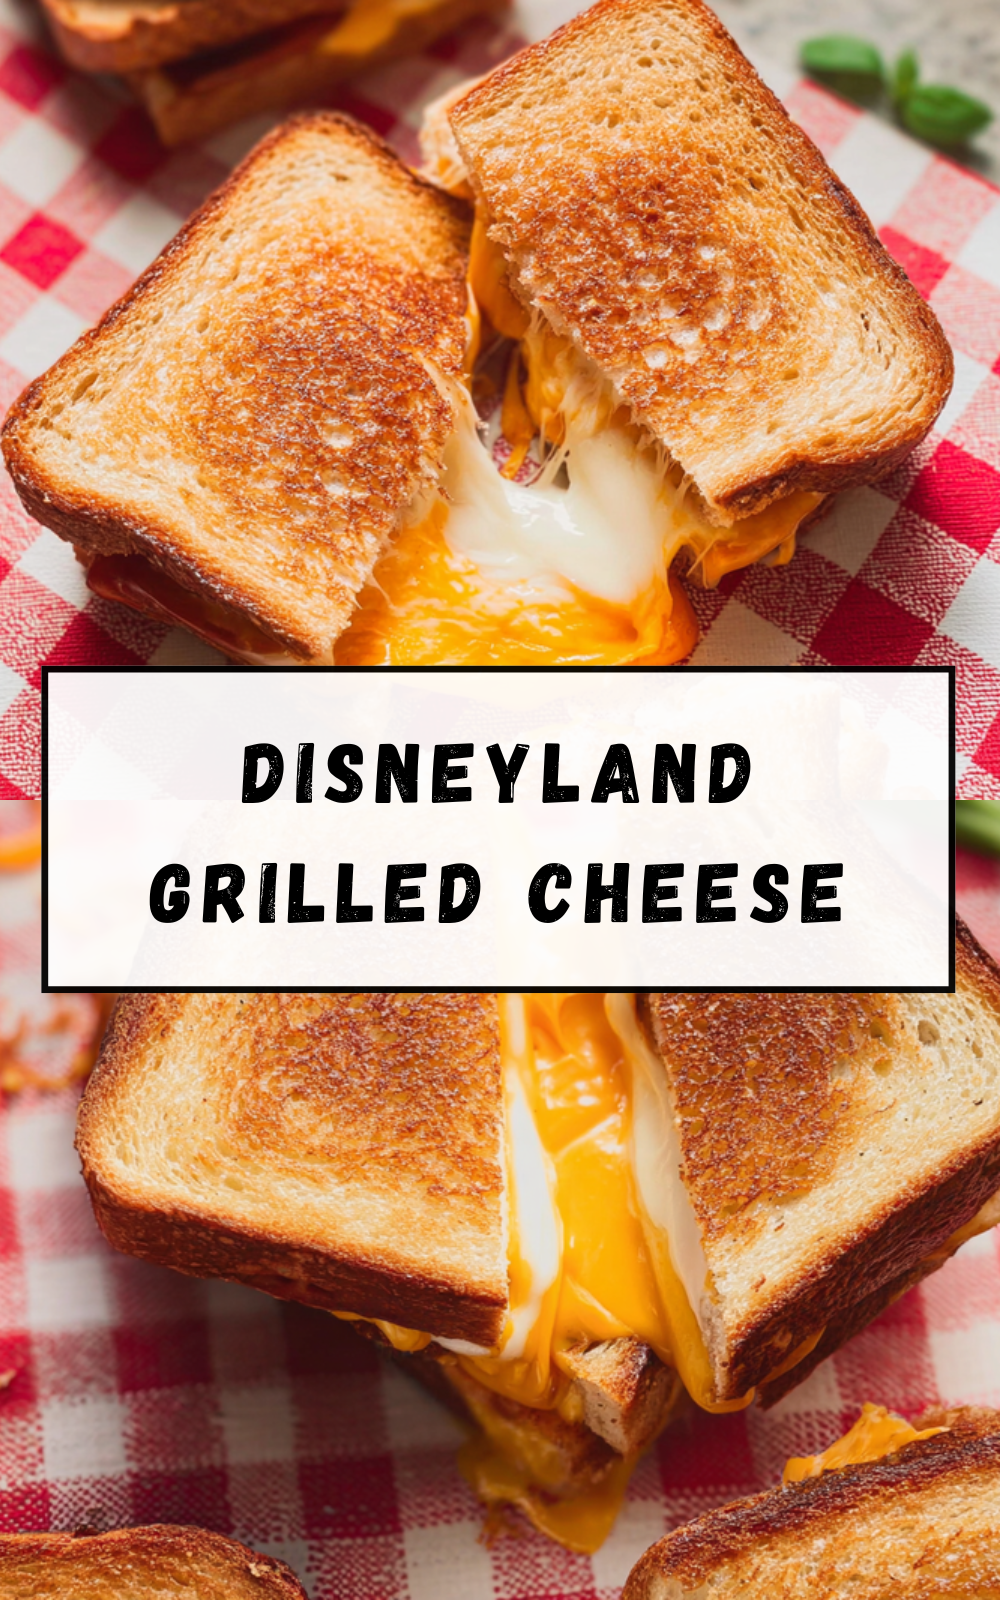
Why You’ll Love This Disneyland Grilled Cheese
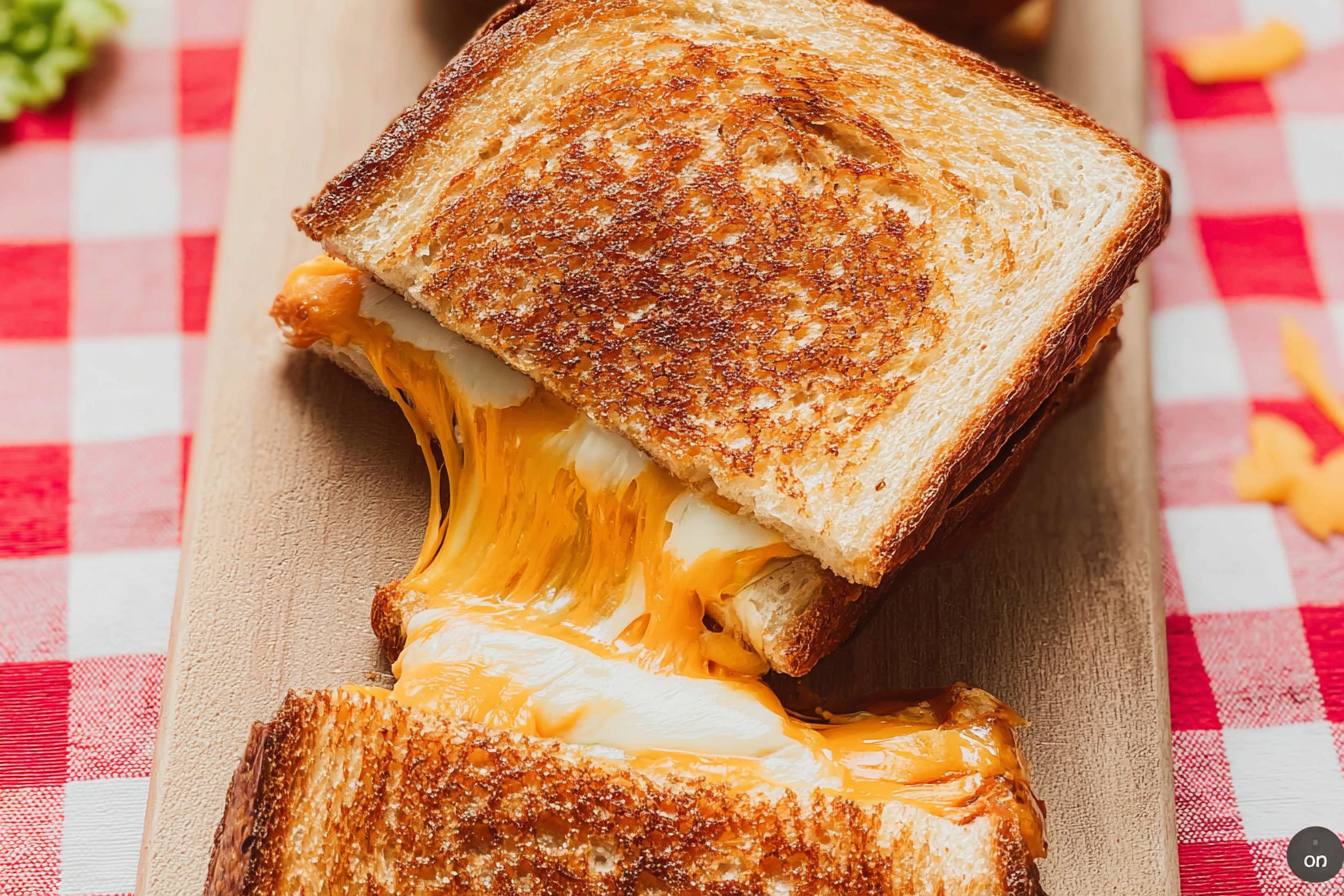
If you have been craving the famous Disneyland Grilled Cheese at home, this recipe brings that cozy park-style comfort right to your kitchen. It is warm, gooey, buttery, and packed with cheesy flavor that feels fun enough for a weekend lunch yet simple enough for a busy weeknight.
For more kitchen inspiration from my blog, you can also browse my favorite easy recipes on Recipes Isabella while you plan your next family meal.
- Easy to make: This Disneyland Grilled Cheese uses simple pantry ingredients and comes together fast. You can have a golden, melty sandwich ready in under 20 minutes, which makes it a great pick for busy parents, students, and working professionals.
- Comforting and filling: With rich cheeses, buttery bread, and creamy spreads, this sandwich feels hearty and satisfying. It works well for lunch, dinner, or even a late snack after a long day.
- Flexible for many eaters: The recipe can be adjusted for vegetarian needs, lighter eating, or gluten-free plans with easy swaps. That makes the Disneyland Grilled Cheese a good fit for families with different preferences at the same table.
- Disney-style flavor at home: The mix of cheddar, provolone, creamy spreads, and crisp bread gives you that park-inspired taste people love. It has the same fun, indulgent feeling as the Disneyland Grilled Cheese served in themed food spots.
The best part about making a Disneyland Grilled Cheese at home is how quickly it turns an ordinary day into something special.
If you enjoy cheesy comfort food like this, you may also love my crab stuffed cheddar bay biscuits for another rich and satisfying treat.
Jump To
- 1. Why You’ll Love This Disneyland Grilled Cheese
- 2. Essential Ingredients for Disneyland Grilled Cheese
- 3. How to Prepare the Perfect Disneyland Grilled Cheese: Step-by-Step Guide
- 4. Dietary Substitutions to Customize Your Disneyland Grilled Cheese
- 5. Mastering Disneyland Grilled Cheese: Advanced Tips and Variations
- 6. How to Store Disneyland Grilled Cheese: Best Practices
- 7. FAQs: Frequently Asked Questions About Disneyland Grilled Cheese
- 8. Disneyland Grilled Cheese
Essential Ingredients for Disneyland Grilled Cheese
To make this Disneyland Grilled Cheese, you will use three separate parts: the cream cheese spread, the garlic spread, and the grilled four-cheese sandwich build. Each piece helps create that rich, layered flavor people expect from a Disney-inspired grilled cheese.
Cream Cheese Spread
- 1/2 cup cream cheese
- 1/2 cup shredded sharp cheddar cheese
- 2 tablespoons heavy cream
- 1/4 teaspoon coarse salt
This creamy mixture adds tang, richness, and a smooth texture that melts beautifully inside the sandwich.
Garlic Spread
- 1 cup mayonnaise
- 1 1/2 teaspoons minced garlic
- 1/2 teaspoon coarse salt
The garlic spread gives the bread a savory kick and helps it brown nicely in the pan.
Grilled Four-Cheese Sandwich
- 8 slices of bread
- 8 medium cheddar cheese slices
- 8 provolone slices
These are the main sandwich layers. The cheddar brings bold flavor, while the provolone adds a soft, melty finish that makes every bite extra satisfying.
Special Dietary Options
- Vegan: Use plant-based cream cheese, vegan cheddar and provolone style slices, and egg-free mayonnaise.
- Gluten-free: Swap in your favorite gluten-free sandwich bread and confirm all packaged cheeses are certified gluten-free if needed.
- Low-calorie: Use light mayonnaise, reduced-fat cheese, and thin-sliced bread for a lighter version of this Disneyland Grilled Cheese.
| Component | Main Job | Texture or Flavor |
|---|---|---|
| Cream cheese spread | Adds richness inside the sandwich | Creamy and tangy |
| Garlic spread | Browns the bread and adds flavor | Buttery, savory, bold |
| Cheddar and provolone | Creates the classic melty center | Sharp, smooth, gooey |
How to Prepare the Perfect Disneyland Grilled Cheese: Step-by-Step Guide
Making this Disneyland Grilled Cheese at home is easier than it looks. The secret is to prep the spreads first, build the sandwich carefully, and cook it low and slow so the cheese melts before the bread gets too dark. This method gives you that crisp outside and soft, gooey middle that people love about park-style grilled cheese.
First Step: Mix the cream cheese spread
In a medium bowl, combine 1/2 cup cream cheese, 1/2 cup shredded sharp cheddar cheese, 2 tablespoons heavy cream, and 1/4 teaspoon coarse salt. Stir until the mixture is smooth and easy to spread. If the cream cheese feels too firm, let it sit at room temperature for a few minutes before mixing.
This filling gives the sandwich a rich center and helps the Disneyland Grilled Cheese taste extra creamy. If you are making a lighter version, you can use reduced-fat cream cheese and still get a nice texture.
Second Step: Stir together the garlic spread
In another bowl, mix 1 cup mayonnaise, 1 1/2 teaspoons minced garlic, and 1/2 teaspoon coarse salt. Blend until the garlic is evenly mixed through the mayo. This spread will go on the outside of the bread and help the sandwich brown with a savory, garlicky finish.
If you prefer a milder flavor, use a little less garlic. If you love garlic, let the mixture sit for 5 minutes before spreading so the flavor can deepen a bit.
Third Step: Build the sandwich layers
Lay out 8 slices of bread on a clean surface. Spread the cream cheese mixture on the inside of 4 slices. On top of that filling, add 8 medium cheddar cheese slices and 8 provolone slices, dividing them evenly among the sandwiches. Cover with the remaining bread slices to form 4 full sandwiches.
Press each sandwich gently so the layers hold together. If you are making this for kids or picky eaters, you can keep the filling simple, but the full mix gives you the best Disneyland Grilled Cheese flavor.
Fourth Step: Coat the outside
Spread the garlic mayo mixture on the outer sides of each sandwich. Make sure the bread is coated from edge to edge for even browning. This layer is what gives the sandwich that golden finish and savory taste.
For a gluten-free version, use sturdy gluten-free bread that can handle grilling without falling apart. For a lower-fat version, use a thinner coating of the garlic spread.
Fifth Step: Heat the pan
Set a skillet or griddle over medium-low heat. Add the sandwiches to the pan once it is warm. The lower heat is important because it gives the cheese time to melt while the bread slowly turns golden. If the heat is too high, the outside can burn before the center gets soft.
If you are cooking more than one round, keep the first batch warm on a baking sheet in a low oven at about 200°F while you finish the rest.
Sixth Step: Grill until golden and melty
Cook each side for about 3 to 5 minutes, or until the bread turns deep golden brown and the cheese is melted. Use a spatula to flip carefully. You can press lightly on the top of the sandwich for a few seconds to help the cheese settle and the bread crisp up evenly.
Watch the pan closely, because every stove cooks a little differently. If the bread browns too fast, lower the heat and keep going slowly.
Final Step: Rest, slice, and serve
Transfer the grilled sandwiches to a cutting board and let them rest for 1 minute. This short pause helps the cheese settle so it does not spill out too quickly when you cut it. Slice in half and serve right away while the center is still gooey.
For that full Disney-inspired meal, serve your Disneyland Grilled Cheese with tomato soup, fries, or a simple side salad. It is also great with fruit if you want a lighter plate.

Dietary Substitutions to Customize Your Disneyland Grilled Cheese
One reason people love the Disneyland Grilled Cheese is how easy it is to adjust. You can make it fit different diets, family needs, and pantry situations without losing the fun, cheesy feel.
Protein and Main Component Alternatives
If you want to change the cheese filling, try plant-based cream cheese and vegan slices for a dairy-free version. For a richer flavor, add mozzarella, fontina, or a mild white cheddar to the filling. If you need something heartier, you can add sliced tomato, cooked bacon, or thin avocado inside the sandwich. These swaps work well whether you are cooking for adults or kids, and they still keep the spirit of a classic Disneyland Grilled Cheese.
Vegetable, Sauce, and Seasoning Modifications
For more flavor, mix chopped chives, a pinch of black pepper, or a tiny bit of smoked paprika into the cream cheese spread. If garlic is too strong, cut the minced garlic in half or swap it for garlic powder. You can also replace the garlic mayo with softened butter if you want a more traditional grilled cheese taste. For a lighter sandwich, use a thin layer of spread and pair it with sliced tomatoes or spinach on the inside.
When you want more Disney-style fun at home, try serving it with a soup or side dish from my easy pasta salad recipe for a simple lunch combo that works well for families and meal prep.
Mastering Disneyland Grilled Cheese: Advanced Tips and Variations
Once you have made this Disneyland Grilled Cheese once, it is easy to tweak it for even better results. A few small tricks can make the bread crispier, the cheese melt more evenly, and the final sandwich look more polished on the plate.
Pro cooking techniques
Use room-temperature cheese spread so it layers more smoothly. Cook on medium-low heat, not high heat, because slow grilling gives you more control. If you want extra even browning, cover the skillet for the first minute or two to help trap heat and melt the center faster. A cast-iron skillet works especially well because it keeps heat steady.
Flavor variations
You can mix in a little mozzarella for extra stretch or swap one cheese slice for pepper jack if you want a mild kick. For a rich brunch version, add crispy bacon. For a herb-forward twist, sprinkle dried oregano or Italian seasoning into the garlic spread. If you love a sweet and savory bite, a thin layer of caramelized onions fits beautifully.
Presentation tips
Cut the sandwich diagonally for that classic diner look. Serve it on a plate with tomato soup in a small bowl for dipping. A little chopped parsley on the side adds color without much effort. If you want a park-style lunch feel, stack the halves slightly and serve with pickles or chips.
Make-ahead options
You can mix both spreads ahead of time and keep them in the fridge for up to 3 days. That makes this Disneyland Grilled Cheese much easier on busy nights. You can also assemble the sandwiches a few hours early, wrap them, and grill them right before eating.
Small prep steps ahead of time can turn this into a fast, stress-free meal that still feels special.
How to Store Disneyland Grilled Cheese: Best Practices
Leftover Disneyland Grilled Cheese can still taste great if you store and reheat it the right way. The key is to keep the bread from getting soggy and to warm it gently so the cheese stays soft.
Refrigeration
Wrap leftover sandwiches tightly in foil or place them in an airtight container. Store in the refrigerator for up to 3 days. If possible, keep the sandwich halves separate so they do not trap too much steam.
Freezing
You can freeze grilled cheese, but the bread texture may change a little. For best results, cool the sandwich completely, wrap it well, and freeze for up to 1 month. Freeze individual portions so you can reheat only what you need.
Reheating
Reheat in a skillet over low heat or in a toaster oven until warm and crisp again. A microwave works in a pinch, but the bread will soften. If you want the best texture, avoid high heat and give it a few extra minutes to warm through gently.
Meal prep considerations
If you are making several sandwiches at once, prep the spreads ahead of time and keep them chilled. You can also pre-slice the bread and cheese so assembly is quick. This makes the Disneyland Grilled Cheese a smart option for lunches, road trips, and easy family dinners.
FAQs: Frequently Asked Questions About Disneyland Grilled Cheese
Where can I find grilled cheese at Disneyland?
Grilled cheese sandwiches are available at several spots in Disneyland Park and Disney California Adventure. The most popular is at Pym Test Kitchen in Avengers Campus (Disney California Adventure), offering oversized sandwiches like the Pym-ini Grilled Cheese with multiple cheeses and tomato soup for dipping. In Disneyland Park, check the carts near the Matterhorn Bobsleds or Red Rose Taverne for classic versions. Downtown Disney has a dedicated Grilled Cheese stand with gourmet options like bacon-avocado or buffalo chicken. Lines can be long during peak hours (11 AM-2 PM), so use the Disneyland app for mobile ordering where available. Prices range from $12-18. Arrive early or visit during parades for shorter waits.
What does Disneyland grilled cheese taste like?
Disneyland grilled cheese features gooey melted cheeses like cheddar, mozzarella, and American on buttery sourdough bread, grilled to crispy perfection. Standouts include Pym Test Kitchen’s massive version with provolone, muenster, and cheddar, served with creamy tomato bisque—rich, comforting, and indulgent. Flavors vary: truffle oil adds earthiness at gourmet carts, while buffalo chicken brings spice. Reviewers rate it 4.5/5 on apps like Yelp for its nostalgic appeal and generous portions (one sandwich feeds two). It’s not gourmet fine dining but hits the spot for quick park fuel. Pair with a Mickey pretzel for the full experience. Vegetarians love the plain cheese option.
How much does grilled cheese cost at Disneyland?
Expect to pay $12-$18 for a Disneyland grilled cheese, depending on location and toppings. Basic cheese melts at carts start at $12, while loaded versions at Pym Test Kitchen (like the Shrinking Steak Grilled Cheese) hit $16-$18, including soup. Add $3-5 for drinks or sides like fries. Prices rose 5-10% in 2023 due to inflation. Use the Genie+ app for wait times and check for combo deals. It’s pricier than home but comparable to other park quick-service. Kids’ portions are $8-10. Pro tip: Split one with a park buddy to save—portions are huge and satisfying for lunch.
Is there a vegetarian or gluten-free grilled cheese at Disneyland?
Yes, Disneyland offers vegetarian grilled cheese everywhere it’s sold, using standard cheese and bread—no meat by default. Gluten-free options exist at Pym Test Kitchen (request Udi’s bread for +$2) and select carts; confirm with cast members as availability varies. Dairy-free? Try the plant-based cheese melt at Pym (Beyond Meat-inspired, $15). All locations note allergens, and nut-free prep is standard. For celiacs, avoid shared grills at busy carts. Download the Disneyland app for full menus and allergy filters. Over 80% of guests with dietary needs find suitable options per Disney surveys. Always ask for modifications on-site.
Can I make Disneyland grilled cheese at home?
Recreate Disneyland grilled cheese with simple ingredients: thick sourdough bread, 3-4 slices each of cheddar, mozzarella, and provolone, butter for grilling, and optional tomato soup. Butter bread slices, layer cheeses, grill medium heat 3-4 minutes per side until golden and melty. For Pym-style, use 8 slices total on giant bread. Yields 1 massive sandwich (600-900 calories). Key tips: low heat prevents burning, press with spatula for crispiness, rest 1 minute before cutting. Disney-inspired recipes from blogs like Disney Food Blog match park taste 90%. Serve with Campbell’s tomato soup. Total cost: under $5 per serving—perfect for game nights. Experiment with bacon or pesto for variety.
Disneyland Grilled Cheese
- Total Time: 25 minutes
- Yield: 4 sandwiches
- Diet: Vegetarian
Description
🧀 Dive into Disney magic with this indulgent grilled cheese, packed with four types of cheese for ultimate meltiness and flavor!
🍞 Recreate Toy Story Land’s famous sandwich at home – crispy, gooey perfection that’s a hit with kids and adults alike!
Ingredients
– 1/2 cup cream cheese
– 1/2 cup shredded sharp cheddar cheese
– 2 tablespoons heavy cream
– 1/4 teaspoon coarse salt
– 1 cup mayonnaise
– 1 1/2 teaspoons minced garlic
– 1/2 teaspoon coarse salt
– 8 slices of bread
– 8 medium cheddar cheese slices
– 8 provolone slices
Instructions
1-First Step: Mix the cream cheese spread In a medium bowl, combine 1/2 cup cream cheese, 1/2 cup shredded sharp cheddar cheese, 2 tablespoons heavy cream, and 1/4 teaspoon coarse salt. Stir until the mixture is smooth and easy to spread. If the cream cheese feels too firm, let it sit at room temperature for a few minutes before mixing.
2-Second Step: Stir together the garlic spread In another bowl, mix 1 cup mayonnaise, 1 1/2 teaspoons minced garlic, and 1/2 teaspoon coarse salt. Blend until the garlic is evenly mixed through the mayo. This spread will go on the outside of the bread and help the sandwich brown with a savory, garlicky finish.
3-Third Step: Build the sandwich layers Lay out 8 slices of bread on a clean surface. Spread the cream cheese mixture on the inside of 4 slices. On top of that filling, add 8 medium cheddar cheese slices and 8 provolone slices, dividing them evenly among the sandwiches. Cover with the remaining bread slices to form 4 full sandwiches.
4-Fourth Step: Coat the outside Spread the garlic mayo mixture on the outer sides of each sandwich. Make sure the bread is coated from edge to edge for even browning. This layer is what gives the sandwich that golden finish and savory taste.
5-Fifth Step: Heat the pan Set a skillet or griddle over medium-low heat. Add the sandwiches to the pan once it is warm. The lower heat is important because it gives the cheese time to melt while the bread slowly turns golden. If the heat is too high, the outside can burn before the center gets soft.
6-Sixth Step: Grill until golden and melty Cook each side for about 3 to 5 minutes, or until the bread turns deep golden brown and the cheese is melted. Use a spatula to flip carefully. You can press lightly on the top of the sandwich for a few seconds to help the cheese settle and the bread crisp up evenly.
7-Final Step: Rest, slice, and serve Transfer the grilled sandwiches to a cutting board and let them rest for 1 minute. This short pause helps the cheese settle so it does not spill out too quickly when you cut it. Slice in half and serve right away while the center is still gooey.
Notes
🍞 Use sturdy, thick-sliced bread to hold all the cheesy goodness without falling apart.
🧀 Allow the cheese to fully melt for that signature gooey texture – low and slow is key!
🔥 A non-stick skillet or griddle works best to get even browning on both sides.
- Prep Time: 15 minutes
- Cook Time: 10 minutes
- Category: Sandwiches
- Method: Pan-Fry
- Cuisine: American
Nutrition
- Serving Size: 1 sandwich
- Calories: 950 kcal
- Sugar: 3g
- Sodium: 1800mg
- Fat: 80g
- Saturated Fat: 35g
- Unsaturated Fat: 30g
- Trans Fat: 1g
- Carbohydrates: 45g
- Fiber: 2g
- Protein: 35g
- Cholesterol: 150mg
Keywords: Disney, Grilled Cheese, Toy Story Land, Four-Cheese Sandwich