Why You’ll Love This Cherry Cheesecake Bars
Let’s face it, who doesn’t crave a treat that’s as easy as pie literally? These Cherry Cheesecake Bars are my go-to for those days when I want something delicious without turning the kitchen into a disaster zone. Picture this: they’re simple to whip up in no time, packing in flavors that hit all the right spots.
- Ease of preparation: You won’t break a sweat here, folks. This recipe comes together in under 30 minutes of hands-on time, perfect for busy parents or students who need a quick win in the kitchen. No fancy tools needed just mix, layer, and chill for hassle-free results that still feel impressive.
- Health benefits: Cherries bring a burst of antioxidants and vitamins to the table, making these bars a sneaky way to sneak in some goodness. They’re lighter on the sugar than most desserts, so diet-conscious folks can enjoy them without guilt, plus they offer a bit of that satisfying creaminess that feels like a treat for your soul.
- Versatility: Whether you’re gluten-free, vegan, or just experimenting, these bars adapt like champs. Swap in your favorite alternatives and you’ve got a base for endless tweaks, ideal for food enthusiasts or newlyweds hosting dinner parties. It’s all about making it your own without losing that creamy magic.
- Distinctive flavor: The mix of tart cherries and smooth cheesecake is like a party in your mouth sweet, tangy, and oh-so-irresistible. I love how it stands out from plain old desserts, giving travelers or seniors a taste of home with a fun twist that keeps everyone coming back for more.
Trust me, once you try these, they’ll become your new favorite. They bring joy to any gathering, whether it’s a family night or a quick snack between work calls.
Jump To
- 1. Why You’ll Love This Cherry Cheesecake Bars
- 2. Essential Ingredients for Cherry Cheesecake Bars
- 3. How to Prepare the Perfect Cherry Cheesecake Bars: Step-by-Step Guide
- 4. Dietary Substitutions to Customize Your Cherry Cheesecake Bars
- 5. Mastering Cherry Cheesecake Bars: Advanced Tips and Variations
- 6. How to Store Cherry Cheesecake Bars: Best Practices
- 7. FAQs: Frequently Asked Questions About Cherry Cheesecake Bars
- 8. Cherry Cheesecake Bars
Essential Ingredients for Cherry Cheesecake Bars
Gathering the right ingredients is half the fun, and for these Cherry Cheesecake Bars, it’s all about that perfect balance of creamy and fruity goodness. I’ll walk you through everything you need, straight from the recipe details we have. Let’s keep it simple so you can get baking without any confusion.
- 1 1/2 cups graham cracker crumbs – This forms the base of the crust, providing that classic crunch we all love.
- 1/2 cup melted butter – Helps bind the crust together for a sturdy layer that holds up to the creamy filling.
- 1/4 cup sugar – Adds just the right sweetness to the crust, balancing the tartness from the cherries.
- 2 packages (8 ounces each) softened cream cheese – The heart of the filling, giving it that ultra-smooth texture everyone craves.
- 3/4 cup sugar – Sweetens the filling perfectly, making sure it’s not too overpowering.
- 1 teaspoon vanilla extract – Infuses a warm, comforting flavor that ties the whole recipe together.
- 2 large eggs – Adds structure and richness to the cheesecake layer, helping it set just right.
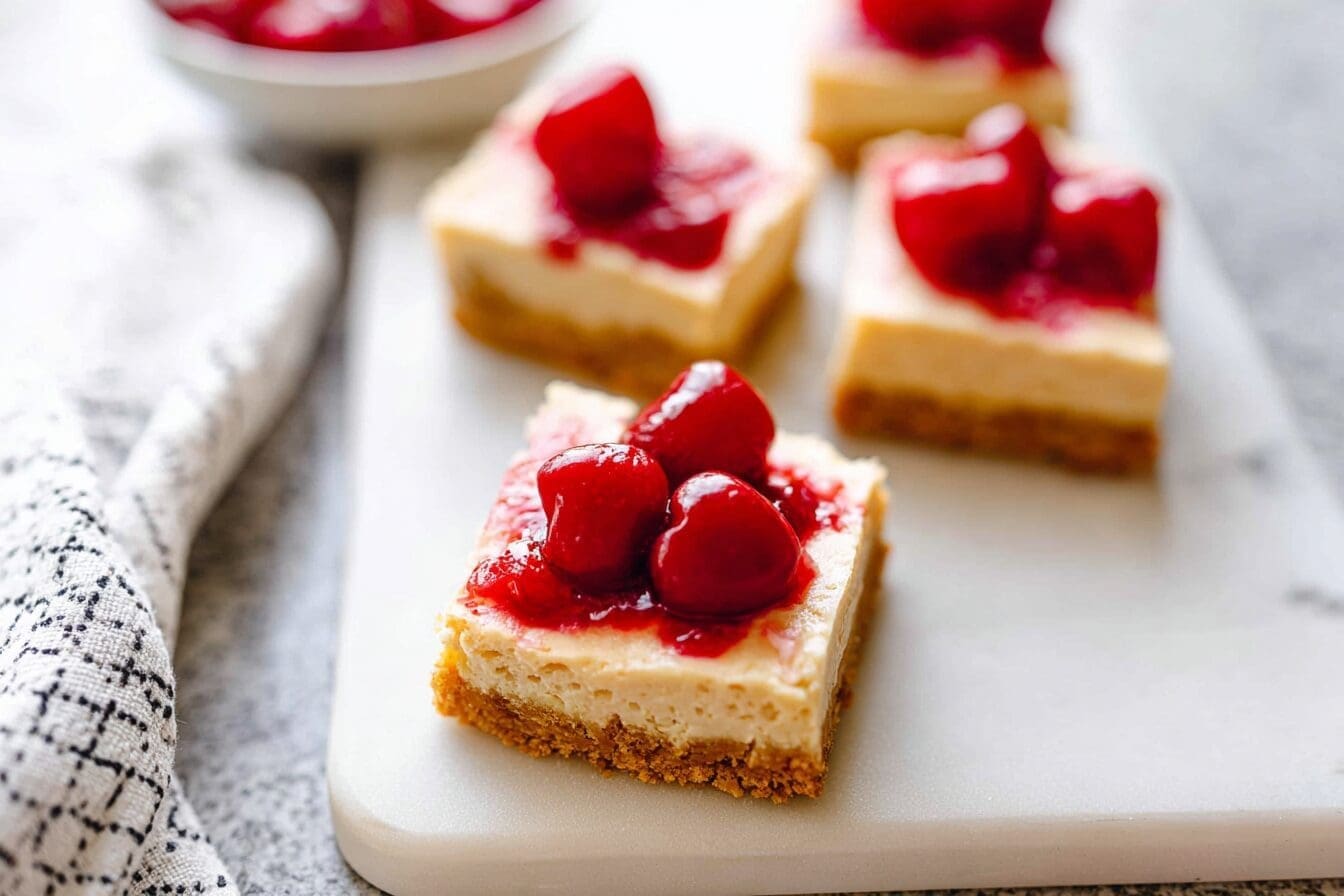
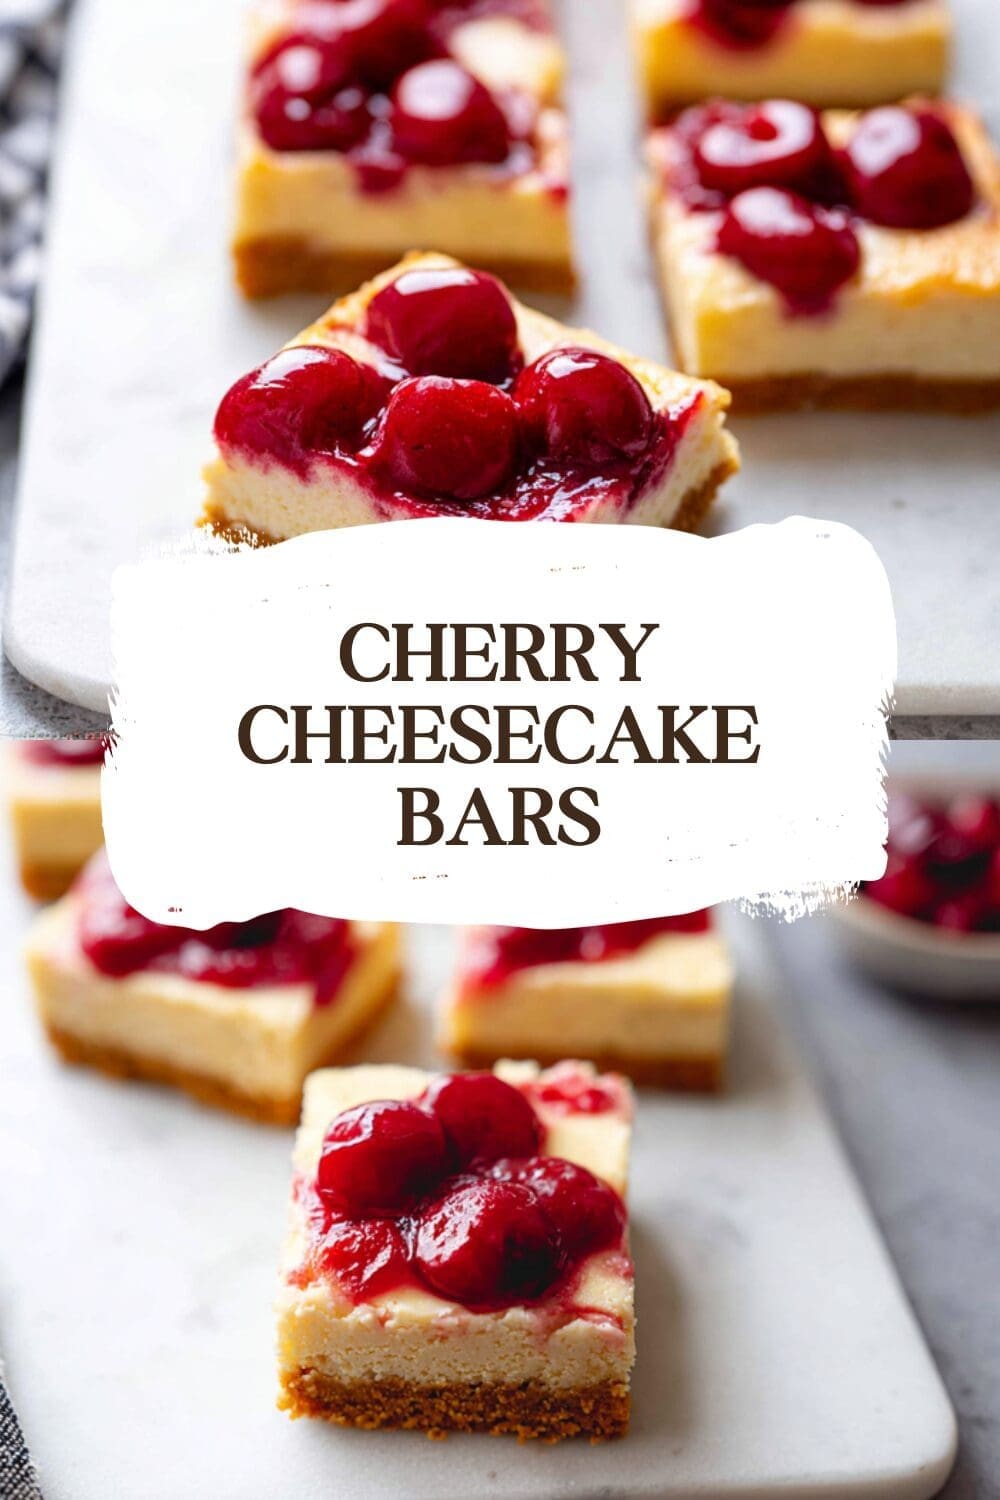
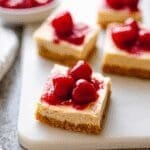
- 1 can (21 ounces) cherry pie filling – Tops it off with that burst of fruity goodness, providing the star element of the bars.
Special Dietary Options
- Vegan: Swap the cream cheese for a plant-based version like cashew cream cheese, and use melted vegan butter instead of regular butter. Replace eggs with flax eggs (1 tablespoon ground flaxseed mixed with 3 tablespoons water per egg) to keep it creamy and cruelty-free.
- Gluten-free: Opt for gluten-free graham cracker crumbs to avoid any issues, ensuring the crust is just as tasty without the gluten. Everything else in the recipe stays the same for that familiar flavor.
- Low-calorie: Use low-fat cream cheese and reduce the sugar by half, or choose a sugar-free cherry pie filling to lighten things up. This way, you can enjoy the bars without worrying about the calorie count.
| Ingredient Category | Standard Amount | Dietary Swap |
|---|---|---|
| Crust Base | 1 1/2 cups graham cracker crumbs | Gluten-free crumbs for gluten-free option |
| Filling Creaminess | 2 packages cream cheese | Plant-based cream cheese for vegan option |
| Topping | 1 can cherry pie filling | Sugar-free version for low-calorie option |
Remember, these ingredients make enough for a crowd, so you can share the love or keep it all for yourself. For more ideas on adapting recipes, check out my post on variations of cheesecake bars that might spark your creativity.
How to Prepare the Perfect Cherry Cheesecake Bars: Step-by-Step Guide
Alright, let’s dive into making these bars it’s easier than you think, and I’ll guide you every step of the way. First off, get your ingredients lined up so everything goes smoothly; I call this my “kitchen prep dance” to avoid any last-minute scrambles.
First Step: Preheat your oven to 350°F (175°C) and grease a 9×13 inch pan to get things started. This ensures your bars release easily and bake evenly without any sticking drama.
Second Step: In a bowl, mix 1 1/2 cups graham cracker crumbs, 1/2 cup melted butter, and 1/4 cup sugar until it clumps together. Press this mixture firmly into the bottom of your prepared pan for a solid base that holds everything in place.
Third Step: Bake the crust for 10 minutes, then let it cool slightly while you prepare the filling. This step gives it a nice toast that adds extra flavor without overwhelming the rest.
Fourth Step: In another bowl, beat 2 packages of softened cream cheese with 3/4 cup sugar and 1 teaspoon vanilla extract until smooth. Add 2 large eggs one at a time, mixing just until combined to keep the filling airy and perfect.
Fifth Step: Pour the cream cheese mixture over the cooled crust, then spoon 1 can of cherry pie filling evenly on top. Gently swirl it for that beautiful marbled look, but don’t overdo it we want distinct layers.
Final Step: Bake for 35-45 minutes until the center is almost set, then cool at room temperature before chilling in the fridge for at least 4 hours. Once set, cut into bars and serve with a big smile; they’re best enjoyed cold for that creamy texture that melts in your mouth.
I always say, the key to great baking is patience letting these chill is like giving them time to “ripen” into something amazing. For more baking tips, you might enjoy my recipe on blueberry cream cheese treats.

Dietary Substitutions to Customize Your Cherry Cheesecake Bars
Protein and Main Component Alternatives
If you’re swapping out the main elements, think about what works for your needs. For instance, replace the cream cheese with Greek yogurt for a protein boost, which makes the bars tangier and lighter I do this when I’m feeling extra health-focused.
Other options include using ricotta cheese for a fluffier texture, ideal for those watching their intake or experimenting with flavors. Always taste as you go to keep that balance just right.
Vegetable, Sauce, and Seasoning Modifications
For a fresher twist, swap the canned cherry pie filling with homemade cherry compote using fresh cherries. You could also add a dash of cinnamon or nutmeg to the filling for a seasonal vibe, perfect for fall gatherings.
If sauces are your thing, try a berry reduction instead of cherries to mix it up, or go for lemon zest in the seasoning to cut the richness. These changes make the bars adaptable for any diet or preference without losing that wow factor.
Mastering Cherry Cheesecake Bars: Advanced Tips and Variations
Pro Cooking Techniques
To take your bars to the next level, focus on even mixing and gentle baking. Use a water bath for a smoother finish, which helps prevent cracks and keeps things creamy.
Flavor Variations
Play around with add-ins like chocolate chips or nuts for a crunch. You could swap cherries for berries to create fun seasonal versions that surprise your taste buds.
Presentation Tips
Garnish with fresh fruit or a dusting of powdered sugar to make them pop. Serve on a platter for that Instagram-worthy look that impresses guests.
Make-Ahead Options
Prep the crust ahead and store it in the fridge for busy days. This way, you can assemble quickly when life gets hectic, saving time without sacrificing flavor.
How to Store Cherry Cheesecake Bars: Best Practices
Storing these bars keeps them fresh and tasty, so let’s cover the basics. Start with refrigeration for short-term needs, as it helps maintain that creamy texture.
- Refrigeration: Keep them in an airtight container for up to 5 days to lock in freshness and prevent drying out.
- Freezing: Wrap individually and freeze for up to 2 months; thaw overnight for the best results.
- Reheating: No need to reheat just let them sit at room temperature for a bit to soften up.
- Meal prep considerations: Make a big batch and portion them out for easy grabs during the week.
FAQs: Frequently Asked Questions About Cherry Cheesecake Bars
Howdo you make cherry cheesecake bars from scratch?
To make cherry cheesecake bars, start by preheating your oven to 350°F (175°C). Mix graham cracker crumbs, melted butter, and sugar, then press firmly into the bottom of a greased 9×13 inch pan. Bake for 10 minutes. For the filling, beat softened cream cheese, sugar, vanilla extract, and eggs until smooth. Pour over the crust. Spoon canned cherry pie filling evenly over the batter. Bake for 35-45 minutes until the center is almost set. Cool completely at room temperature, then refrigerate for at least 4 hours before cutting into bars. This ensures clean slices and perfect texture.
How long do cherry cheesecake bars need to chill before serving?
Cherry cheesecake bars must chill in the refrigerator for a minimum of 4 hours, but overnight chilling (8 hours) is ideal. This extended chilling time is crucial as it allows the cream cheese filling to set completely, develop its full flavor, and firm up properly. Cutting the bars too soon will result in a messy, soft texture that doesn’t hold its shape. Chilling overnight significantly improves both the taste and the structural integrity, making them much easier to slice cleanly and serve. Always cover them tightly with plastic wrap or aluminum foil while chilling.
Can I use fresh cherries instead of canned pie filling for cheesecake bars?
Yes, you can use fresh cherries, but it requires preparation. Pit about 3 cups of fresh cherries and cook them in a saucepan with 1/4 cup sugar, 1 tablespoon lemon juice, and 1 tablespoon cornstarch mixed with 2 tablespoons water. Simmer until the mixture thickens into a jam-like consistency, about 10-15 minutes. Cool completely before spooning over the cheesecake batter. Using fresh cherries provides a brighter, less sweet flavor compared to canned filling, but adds extra preparation time. Ensure the topping is cool to avoid sinking into the unbaked cheesecake layer.
What are the best tips for preventing cracks in cherry cheesecake bars?
To prevent cracks, avoid overmixing the filling once eggs are added – mix just until combined. Bake at a slightly lower temperature (325°F/160°C) for a longer time if needed, ensuring the center is almost set but still slightly jiggly. Use a water bath by placing the baking pan inside a larger pan filled with 1 inch of hot water; this creates steam for even, gentle cooking. Cool the bars gradually in the turned-off oven with the door ajar for 30 minutes before moving to room temperature. Finally, never skip the essential chilling step; rapid temperature changes cause cracking.
How should I store leftover cherry cheesecake bars?
Store leftover cherry cheesecake bars in an airtight container in the refrigerator for up to 5 days. Place parchment paper between layers if stacking to prevent sticking. For longer storage, freeze them. Wrap individual bars tightly in plastic wrap, then place in a freezer-safe bag or container. They will keep well for up to 2 months. Thaw frozen bars overnight in the refrigerator before serving. Always keep them chilled until ready to serve, as the cream cheese filling is perishable and will soften at room temperature after about 30 minutes.
Cherry Cheesecake Bars
- Total Time: 2 hours 15 minutes
- Yield: 12 bars 1x
- Diet: Vegetarian
Description
🧁 Savor a quick and effortless dessert that’s ideal for satisfying sweet cravings without any oven hassle.
🍒 Delight in the rich, creamy texture and burst of fresh cherry flavor that makes it a crowd-pleasing treat.
Ingredients
1 1/2 cups graham cracker crumbs for the base of the crust
1/2 cup melted butter for binding the crust
1/4 cup sugar for the crust
2 packages (8 ounces each) softened cream cheese for the filling
3/4 cup sugar for the filling
1 teaspoon vanilla extract
2 large eggs for structure and richness
1 can (21 ounces) cherry pie filling for the topping
Instructions
1-First Step: Preheat your oven to 350°F (175°C) and grease a 9×13 inch pan to get things started. This ensures your bars release easily and bake evenly without any sticking drama.
2-Second Step: In a bowl, mix 1 1/2 cups graham cracker crumbs, 1/2 cup melted butter, and 1/4 cup sugar until it clumps together. Press this mixture firmly into the bottom of your prepared pan for a solid base that holds everything in place.
3-Third Step: Bake the crust for 10 minutes, then let it cool slightly while you prepare the filling. This step gives it a nice toast that adds extra flavor without overwhelming the rest.
4-Fourth Step: In another bowl, beat 2 packages of softened cream cheese with 3/4 cup sugar and 1 teaspoon vanilla extract until smooth. Add 2 large eggs one at a time, mixing just until combined to keep the filling airy and perfect.
5-Fifth Step: Pour the cream cheese mixture over the cooled crust, then spoon 1 can of cherry pie filling evenly on top. Gently swirl it for that beautiful marbled look, but don’t overdo it we want distinct layers.
6-Final Step: Bake for 35-45 minutes until the center is almost set, then cool at room temperature before chilling in the fridge for at least 4 hours. Once set, cut into bars and serve with a big smile; they’re best enjoyed cold for that creamy texture that melts in your mouth.
Notes
❄️ Chill the bars longer for a firmer texture, ideally 4 hours or overnight.
🍒 Use fresh cherries if available, as they add a brighter flavor compared to canned.
🧁 Experiment with different toppings like chocolate drizzle to customize the bars.
- Prep Time: 15 minutes
- Chilling: 2 hours
- Cook Time: 0 minutes
- Category: Dessert
- Method: No-bake
- Cuisine: American
Nutrition
- Serving Size: 1 bar
- Calories: Approximately 350 per bar
- Sugar: 25g
- Sodium: 200mg
- Fat: 22g
- Saturated Fat: 13g
- Unsaturated Fat: 7g
- Trans Fat: 0g
- Carbohydrates: 35g
- Fiber: 1g
- Protein: 4g
- Cholesterol: 60mg
Keywords: NoBake, CherryCheesecake, Bars, EasyRecipe