Why You’ll Love This Berry Cobbler
This berry cobbler recipe is a delightful treat that brings together the best of fresh flavors and simple baking. It’s straightforward, perfect for anyone new to homemade desserts, and delivers a warm, fruity goodness that feels like a hug in a bowl. Let’s dive into what makes this recipe a favorite for home cooks everywhere.
What stands out most is the ease of preparation; this berry cobbler comes together in just about 10 minutes of prep time and bakes in around 50 minutes, fitting seamlessly into a busy day or a casual gathering. Packed with antioxidants and vitamins from fresh berries, it supports wellness without skimping on that sweet indulgence we all crave. Plus, its versatility means you can adapt it for different dietary needs, making it a go-to for families with varied preferences.
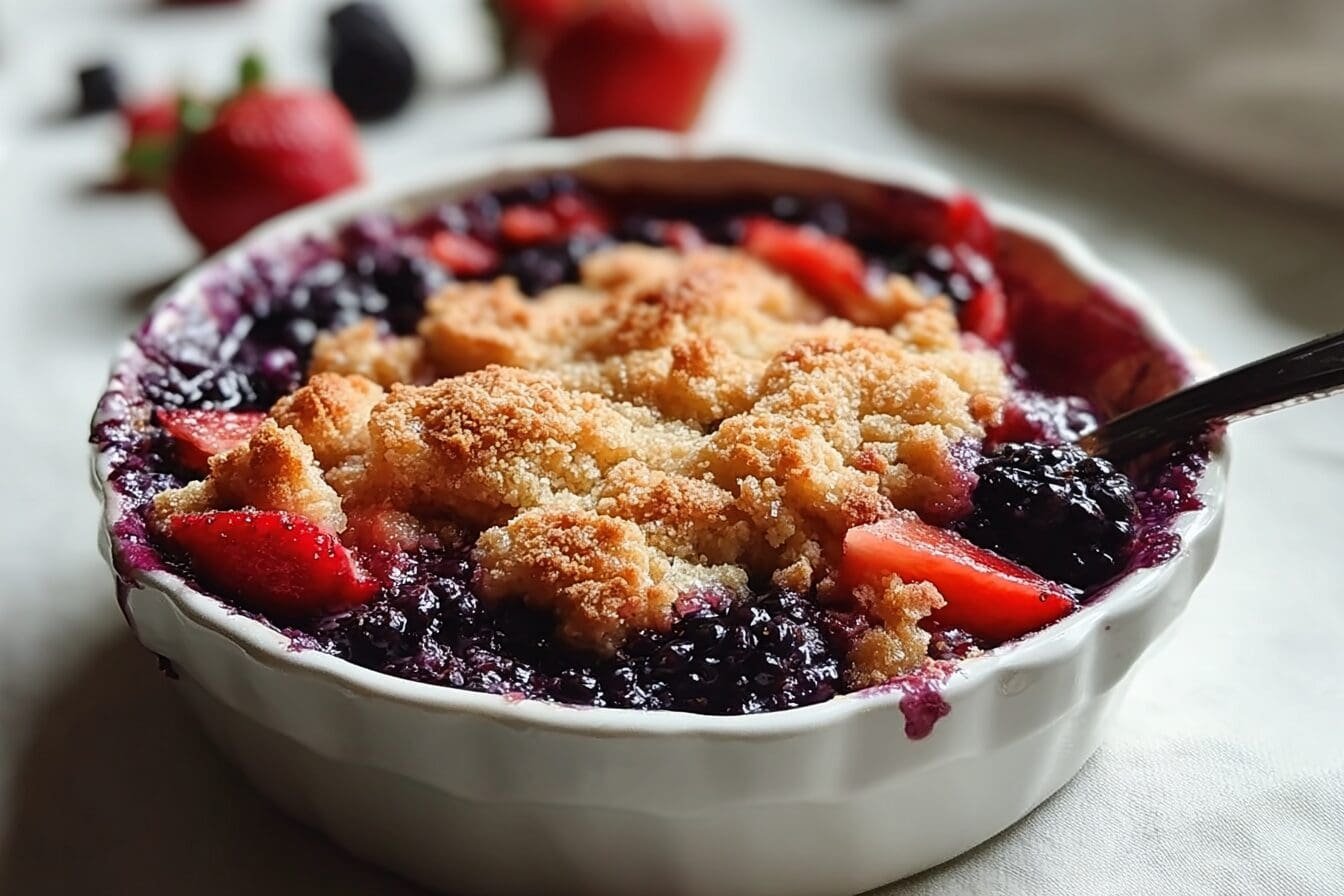
Another reason you’ll adore this berry cobbler is its distinctive flavor profile the tartness of the berries paired with a golden, buttery crust creates a mouthwatering balance that’s hard to resist. Whether you’re baking for a weeknight dinner or a weekend party, this recipe inspires joy in the kitchen and brings people together. It’s not just dessert; it’s a simple way to make memories around the table.
To learn more about the amazing health perks of berries, check out this resource on health benefits of berries. This adds to why this cobbler is more than just tasty it’s nourishing too. Expanding on its appeal, it’s adaptable for those watching their sugar intake or exploring gluten-free options, ensuring everyone can enjoy a slice.
Health Benefits and Adaptability
Let’s not forget the health angle: berries are loaded with natural fiber and nutrients that promote digestive health and provide a satisfying treat with less processed sugar. For busy parents or students, this means a quick dessert that feels wholesome. Baking enthusiasts will appreciate how it encourages creativity, like mixing in seasonal fruits for a fresh twist.
Overall, this berry cobbler stands out as a reliable, comforting choice that fits into many lifestyles. From working professionals needing a fast fix to seniors enjoying familiar flavors, it’s versatile and forgiving. That’s why it’s become a staple in so many homes simple, delicious, and full of heart.
Jump To
- 1. Why You’ll Love This Berry Cobbler
- 2. Essential Ingredients for Berry Cobbler
- 3. How to Prepare the Perfect Berry Cobbler: Step-by-Step Guide
- 4. Dietary Substitutions to Customize Your Berry Cobbler
- 5. Mastering Berry Cobbler: Advanced Tips and Variations
- 6. How to Store Berry Cobbler: Best Practices
- 7. FAQs: Frequently Asked Questions About Berry Cobbler
- 8. Berry Cobbler
Essential Ingredients for Berry Cobbler
Creating the perfect berry cobbler starts with gathering the right ingredients, which are straightforward and easy to find. This section breaks down everything you need, ensuring your baking adventure is a success. We’ll format these as a clear, structured list so you can follow along without any confusion.
Filling Ingredients
- 8 cups mixed berries (fresh or frozen; if frozen, do not thaw)
- 1/2 cup granulated sugar
- 2 tablespoons cornstarch
- 1 teaspoon lemon juice
- 1/2 teaspoon pure vanilla extract
Biscuit Topping Ingredients
- 1 1/2 cups all-purpose flour
- 1/3 cup granulated sugar
- 1 1/2 teaspoons baking powder
- 1/4 teaspoon salt
- 6 tablespoons cold unsalted butter (cubed)
- 1/2 cup cold buttermilk
For Topping Before Baking
- 1 tablespoon buttermilk
- Coarse sugar (amount as needed for sprinkling)
This list covers every item from the recipe summary, making it simple to measure and prepare. Each ingredient plays a key role in achieving that perfect balance of sweet and tart flavors. For those looking for more inspiration, try checking out our blueberry cream cheese crumb cake recipe for a similar berry-based delight.
Remember, special options like using plant-based butter for vegans or gluten-free flour blends add flexibility. This ensures your berry cobbler can suit various needs while keeping the taste spot-on.
| Ingredient Category | Purpose | Dietary Notes |
|---|---|---|
| Filling | Provides the fruity base | Use fresh for peak flavor, frozen if needed |
| Biscuit Topping | Creates the golden crust | Keep butter cold for flakiness |
| Topping | Enhances finish and texture | Sprinkle for a sweet crunch |
How to Prepare the Perfect Berry Cobbler: Step-by-Step Guide
Getting ready to bake this berry cobbler is exciting and simple, with steps that guide you from start to finish. Follow along for a straightforward process that results in a warm, inviting dessert. The total preparation time is about 10 minutes of prep and 50 minutes of baking, making it around 1 hour and 5 minutes overall.
- Preheat your oven to 350°F (177°C) and grease a 9×13-inch baking pan. You can use cooking spray as an alternative to make this step even easier.
- In a large bowl, gently mix together the berries, 1/2 cup granulated sugar, 2 tablespoons cornstarch, 1 teaspoon lemon juice, and 1/2 teaspoon pure vanilla extract. Spread this mixture evenly in the prepared pan.
- In a separate bowl, whisk together 1 1/2 cups all-purpose flour, 1/3 cup granulated sugar, 1 1/2 teaspoons baking powder, and 1/4 teaspoon salt.
- Cut 6 tablespoons of cold unsalted butter (cubed) into the flour mixture until coarse crumbs form. Gradually add 1/2 cup cold buttermilk and stir gently until just combined don’t overmix to keep it light and flaky.
- Divide the dough into sections and place them randomly over the berry filling. Brush the dough pieces with 1 tablespoon of buttermilk and sprinkle with coarse sugar.
- Bake for 45 to 55 minutes until the biscuit topping is golden brown and cooked through. Let the cobbler cool for 5 minutes before serving it’s best warm, perhaps with a scoop of vanilla ice cream.
These steps incorporate the directions from the recipe summary, ensuring you get that perfect bake every time. If you’re experimenting with variations, our peach cobbler recipe offers similar techniques for a fruity twist. Remember, using frozen berries might need a bit more time in the oven, so keep an eye on it.
Tips for Success
Keep the butter and buttermilk cold to achieve the best biscuit texture, as mentioned in the tips. Adjusting the berry mixture based on juiciness can help control the filling’s liquid, and you can even bake individual portions in ramekins for a fun presentation.

Dietary Substitutions to Customize Your Berry Cobbler
Making this berry cobbler work for your needs is all about smart swaps that keep the flavor intact. Whether you’re vegan, gluten-free, or cutting calories, these changes make it accessible for everyone. Let’s explore how to tailor this recipe to fit various preferences.
- For vegan options, replace unsalted butter with plant-based butter and use almond milk instead of buttermilk.
- If you’re gluten-free, swap all-purpose flour with a gluten-free blend in the biscuit topping.
- To reduce calories, opt for a sugar substitute like stevia and cut back on butter quantityConnections.
As noted in the summary, homemade buttermilk can be made by adding 1 teaspoon of vinegar or lemon juice to 1/2 cup of milk. This flexibility ensures the cobbler remains delicious while accommodating diets. You can also add protein-rich toppings like nuts for extra nutrition.
Mastering Berry Cobbler: Advanced Tips and Variations
Once you’re comfortable with the basics, elevating your berry cobbler becomes fun and rewarding. Here are some pro techniques and ideas to make your dessert stand out. For instance, chilling the butter before mixing can lead to a flakier crust, just as using a food processor helps with even dough texture.
Flavor variations might include adding lemon zest to the berry mix for a zesty kick or incorporating spices like cinnamon. Presentation is key too try serving in ramekins with a garnish of fresh mint for a polished look. Make-ahead options, such as preparing the filling in advance, can save time, but remember, as per the tips, avoid refrigerating the full cobbler before baking to ensure the topping rises properly.
One useful tip: The uncooked berry filling can be frozen for up to three months, making it easy to whip up this dessert on a whim.
Experimenting with the amount of biscuit topping lets you control the berry-to-topping balance, as suggested in the recipe tips. This approach keeps things fresh and personalized for your taste.
How to Store Berry Cobbler: Best Practices
Proper storage keeps your berry cobbler tasting great for days. Store it in an airtight container in the fridge for up to 3 days to lock in freshness. For longer keep, freezing in a freezer-safe dish works well wrap tightly and it can last up to 2 months.
Reheating is simple: Pop it in a 350°F oven for about 15 minutes to keep that texture. As per the summary, the baked cobbler freezes effectively, so meal prep becomes a breeze with individual portions. This method helps avoid moisture loss and keeps everything ready for quick enjoyment.
FAQs: Frequently Asked Questions About Berry Cobbler
What is the difference between a berry cobbler, crumble, and crisp?
Berry cobblers typically have a biscuit or cake-like topping baked over the fruit filling. Crumbles feature a crumbly streusel topping often made with butter, sugar, and flour but without oats. Crisps include a crunchy oat-based topping mixed with nuts or spices. Unlike pies, none have a bottom crust. The biscuit topping in cobblers creates a soft, layered texture that sets them apart from the crumbly or crunchy texture of crumbles and crisps.
Can I use frozen berries to make berry cobbler, and do I need to thaw them first?
Yes, frozen berries work well in berry cobblers and do not need to be thawed before baking. Using frozen berries may result in a wetter berry filling as they release more juice while baking. To balance the liquid, you can add a little extra thickener like cornstarch or flour to the fruit mix. Baking time remains typically the same.
How should I handle biscuit dough for the topping to keep it tender and flaky?
To keep biscuit topping fluffy and tender, mix the dough gently and avoid overworking it, which can make it tough. Use cold butter and cold buttermilk or its substitute to create pockets of fat that melt during baking, producing a flaky texture. Cut the butter into the flour until the mixture resembles coarse crumbs before adding liquid for best results.
Can I prepare any parts of the berry cobbler ahead of time?
The berry filling can be prepared a day in advance and stored in the refrigerator or frozen for longer storage. However, it’s best to bake the cobbler right before serving because the biscuit topping rises and browns best when baked fresh. If needed, you can bake it ahead and reheat just before serving, covering it to keep moisture.
Is it possible to freeze berry cobbler after baking, and how do I reheat it?
Yes, baked berry cobbler freezes well for up to three months. To freeze, cool it completely, then wrap tightly in plastic wrap and foil or use an airtight container. When ready to serve, thaw overnight in the refrigerator and reheat covered with foil in a 350°F (175°C) oven for about 20 minutes until heated through. This helps maintain moisture and texture.
Berry Cobbler
- Total Time: 1 hour 5 minutes
- Yield: 8 servings 1x
- Diet: Non-Vegetarian
Description
🍓 Create a warm, comforting dessert that showcases the natural sweetness of fresh berries with a golden, flaky biscuit topping
🥧 Enjoy an easy-to-make crowd-pleasing dessert that’s perfect for summer gatherings or cozy family dinners
Ingredients
8 cups mixed berries
1/2 cup granulated sugar
2 tablespoons cornstarch
1 teaspoon lemon juice
1/2 teaspoon pure vanilla extract
1 1/2 cups all-purpose flour
1/3 cup granulated sugar
1 1/2 teaspoons baking powder
1/4 teaspoon salt
6 tablespoons cold unsalted butter
1/2 cup cold buttermilk
1 tablespoon buttermilk
Coarse sugar
Instructions
1-Preheat your oven to 350°F (177°C) and grease a 9×13-inch baking pan. You can use cooking spray as an alternative to make this step even easier.
2-In a large bowl, gently mix together the berries, 1/2 cup granulated sugar, 2 tablespoons cornstarch, 1 teaspoon lemon juice, and 1/2 teaspoon pure vanilla extract. Spread this mixture evenly in the prepared pan.
3-In a separate bowl, whisk together 1 1/2 cups all-purpose flour, 1/3 cup granulated sugar, 1 1/2 teaspoons baking powder, and 1/4 teaspoon salt.
4-Cut 6 tablespoons of cold unsalted butter (cubed) into the flour mixture until coarse crumbs form. Gradually add 1/2 cup cold buttermilk and stir gently until just combined don’t overmix to keep it light and flaky.
5-Divide the dough into sections and place them randomly over the berry filling. Brush the dough pieces with 1 tablespoon of buttermilk and sprinkle with coarse sugar.
6-Bake for 45 to 55 minutes until the biscuit topping is golden brown and cooked through. Let the cobbler cool for 5 minutes before serving it’s best warm, perhaps with a scoop of vanilla ice cream.
Notes
🥛 Keep the butter and buttermilk cold for the best flaky biscuit texture
🫐 Do not overmix the biscuit dough to keep it light and tender
⏰ Using frozen berries may require a slightly longer baking time and may produce more liquid filling
- Prep Time: 10 minutes
- Cook Time: 50 minutes
- Category: Dessert
- Method: Baking
- Cuisine: American
Nutrition
- Serving Size: 1 serving
- Calories: 420
- Sugar: 32g
- Sodium: 300mg
- Fat: 18g
- Saturated Fat: 11g
- Unsaturated Fat: 6g
- Trans Fat: 0.5g
- Carbohydrates: 58g
- Fiber: 4g
- Protein: 4g
- Cholesterol: 35mg
Keywords: Berry Cobbler, Fresh Fruit, Easy Topping, Dessert Recipe