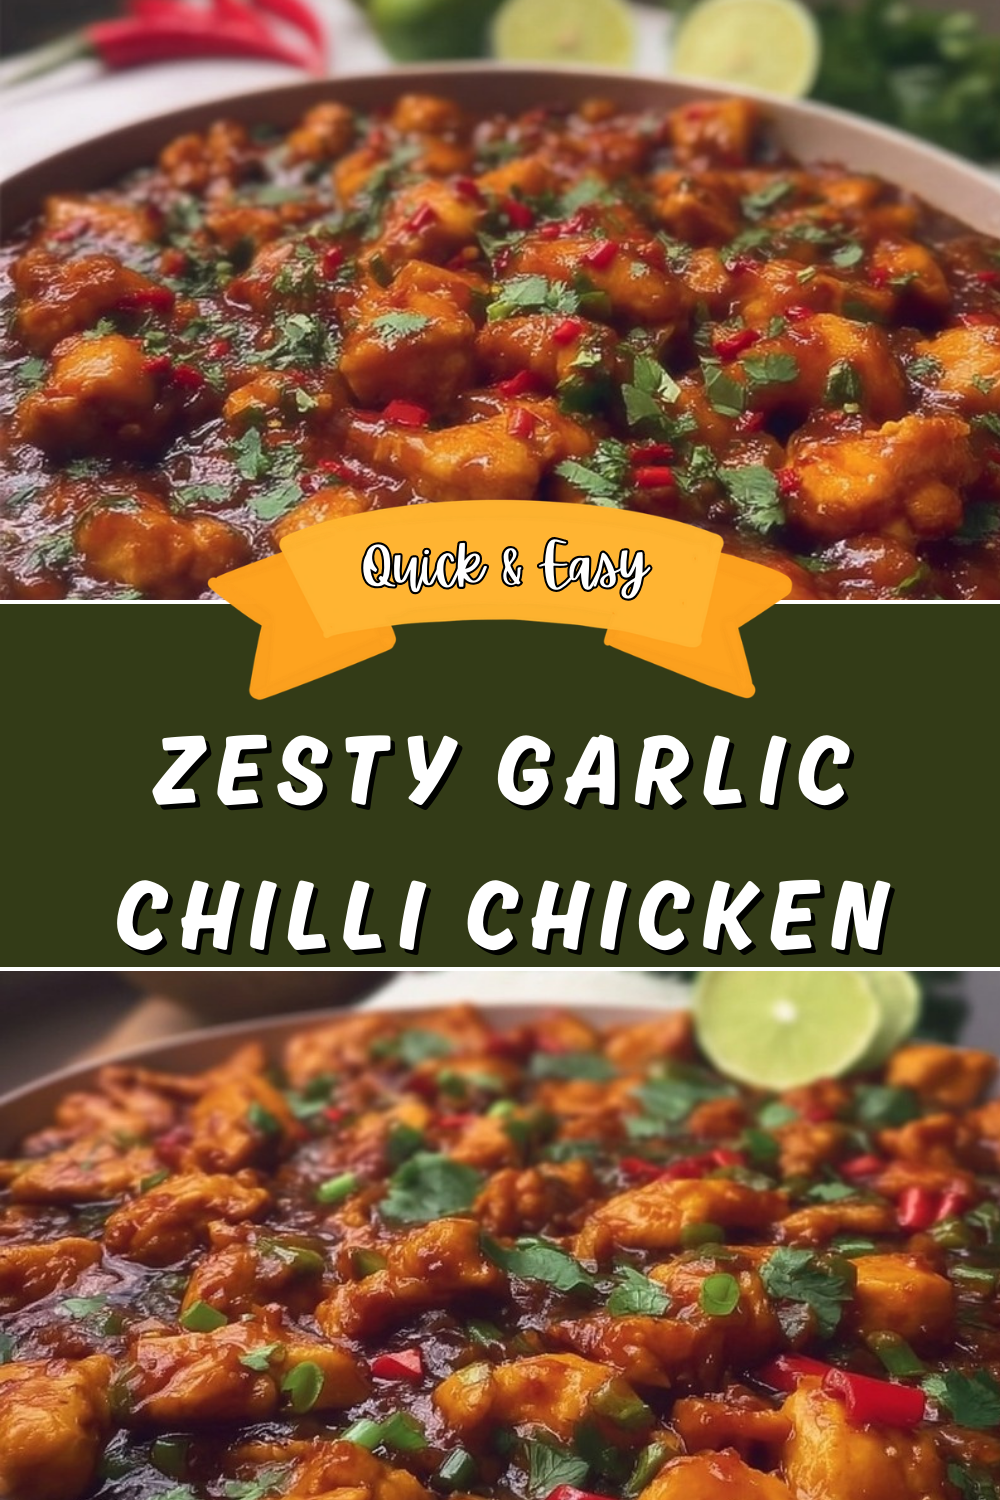
Why You’ll Love This Zesty Garlic Chilli Chicken
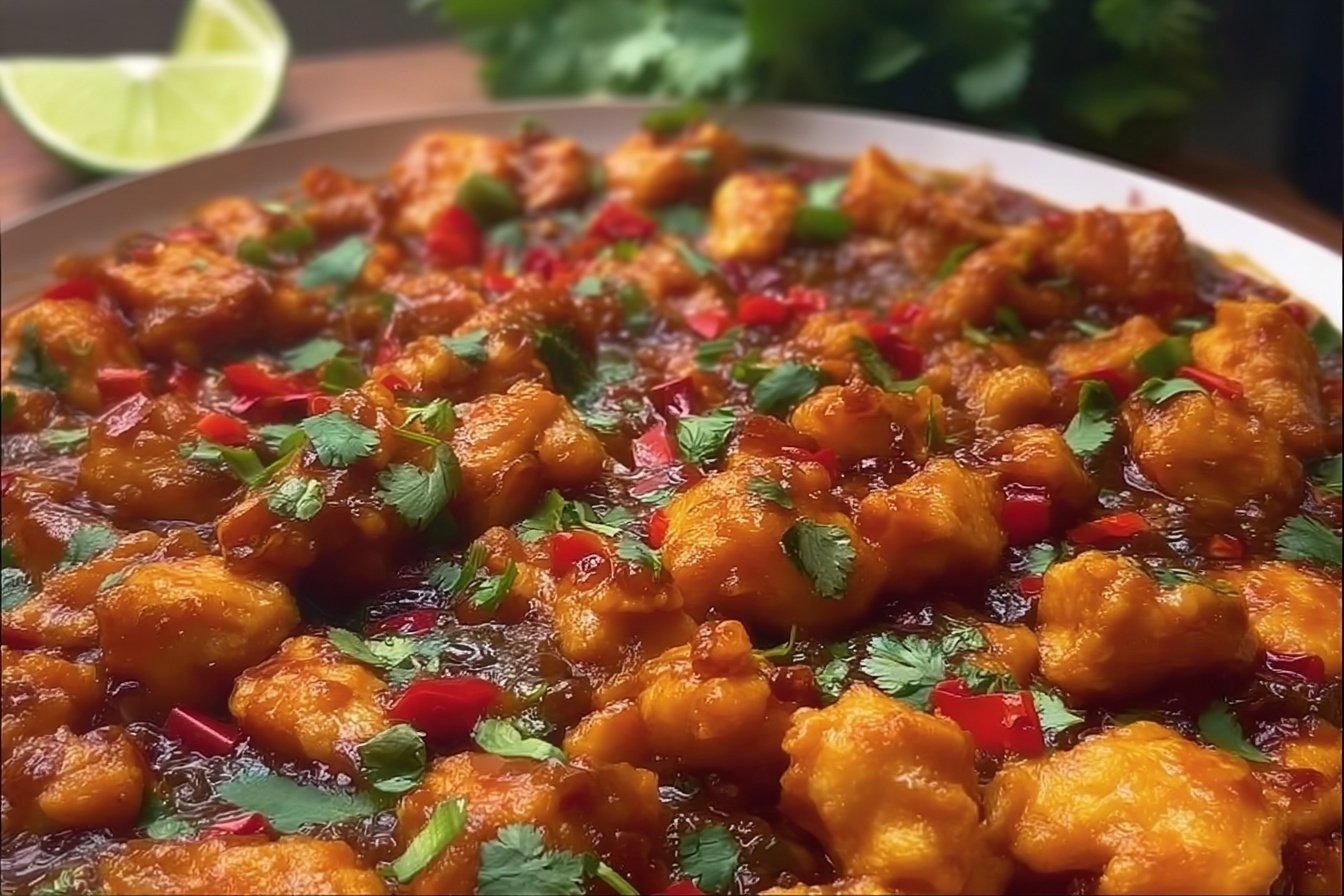
If you’re looking for a curry that delivers bold flavors without requiring hours in the kitchen, this Zesty Garlic Chilli Chicken is about to become your new favorite. This restaurant-style dish brings together aromatic spices, crispy golden garlic, and a rich tomato-based sauce that will have everyone asking for seconds.
Here’s why this recipe stands out from the rest:
- Ease of preparation: With just 25 minutes of prep time and 30 minutes on the stove, you can have a complete, satisfying meal ready in under an hour. No complicated techniques or hard-to-find ingredients required.
- Health benefits: This dish features lean protein from chicken, which supports muscle health and keeps you feeling full. Plus, the generous amount of garlic offers immune-boosting properties that are especially welcome during colder months.
- Versatility: Whether you prefer mild heat or want to turn up the spice, this recipe adapts beautifully to your preferences. Serve it with steamed rice, naan bread, or even over cauliflower rice for a lower-carb option.
- Distinctive flavor: The combination of crispy fried garlic, sweet golden onions, and a smooth, spiced tomato sauce creates layers of flavor that taste like they came from your favorite Indian restaurant.
This recipe recreates restaurant-style curry without base gravies for quicker prep and authentic taste that will impress family and friends alike.
Jump To
- 1. Why You’ll Love This Zesty Garlic Chilli Chicken
- 2. Essential Ingredients for Zesty Garlic Chilli Chicken
- 3. How to Prepare the Perfect Zesty Garlic Chilli Chicken: Step-by-Step Guide
- 4. Dietary Substitutions to Customize Your Zesty Garlic Chilli Chicken
- 5. Mastering Zesty Garlic Chilli Chicken: Advanced Tips and Variations
- 6. How to Store Zesty Garlic Chilli Chicken: Best Practices
- 7. FAQs: Frequently Asked Questions About Zesty Garlic Chilli Chicken
- 8. Zesty Garlic Chilli Chicken
Essential Ingredients for Zesty Garlic Chilli Chicken
Gathering your ingredients beforehand makes the cooking process smooth and enjoyable. Here’s everything you’ll need to create this flavorful curry:
Main Ingredients
- 4 tbsp vegetable oil – Provides the cooking medium and helps achieve crispy golden garlic
- 12 garlic cloves, sliced – The star ingredient that gives this dish its signature aromatic punch
- 3 white onions, sliced – Create a sweet, caramelized base and crispy topping
- 1 tbsp garlic paste – Intensifies the garlic flavor throughout the sauce
- 1 tbsp ginger paste – Adds warmth and depth to the spice blend
- 4 green finger chillis – Bring fresh heat and a pop of color
- 2 tsp chilli powder – Provides the main heat level; adjust to taste
- ½ tsp paprika powder – Adds a subtle smokiness and rich red color
- ½ tsp cumin powder – Contributes earthy, warm notes
- 1 tbsp madras curry powder – The backbone of the curry flavor profile
- 300 g blended vine ripened tomatoes – Creates a fresh, vibrant sauce base (tinned tomatoes work too)
- 450 ml chicken stock – Builds a flavorful, silky sauce consistency
- 1 tsp kasoori methi (fenugreek leaves) – Adds an authentic, slightly bitter aromatic note
- 1 tsp garam masala – A warming spice blend added at the end
- Freshly chopped coriander for garnish – Fresh, bright finish
- Salt to taste – Season throughout to build layers of flavor
Special Dietary Options
| Dietary Need | Substitution |
|---|---|
| Vegan | Replace chicken stock with vegetable stock; skip any meat additions |
| Gluten-free | Use certified gluten-free chicken stock and check spice blends |
| Low-calorie | Reduce oil to 2 tbsp and use low-sodium stock |
How to Prepare the Perfect Zesty Garlic Chilli Chicken: Step-by-Step Guide
Follow these detailed instructions to create a curry that rivals your favorite restaurant’s version. Take your time with each step, and you’ll be rewarded with incredible depth of flavor.
Step 1: Crisp the Garlic
Heat the vegetable oil in a large pan over medium heat. Add the sliced garlic cloves and cook them gently until they turn a beautiful golden brown. This usually takes about 2-3 minutes, but watch them closely because garlic can go from golden to burnt very quickly. You want them crispy and aromatic, not dark or bitter.
Once golden, remove the garlic slices from the oil and set them aside on a paper towel. These crispy garlic pieces will become a delicious garnish that adds texture and intense garlic flavor to your finished dish. The oil is now infused with garlic essence, which will flavor everything else you cook.
Step 2: Caramelize the Onions
Add the sliced onions to the same garlic-infused oil with a generous pinch of salt. The salt helps draw out moisture and speeds up the browning process. Cook the onions over medium heat for about 6-8 minutes, stirring occasionally, until they develop a deep golden brown color.
You want your onions to turn a nice golden brown here. Don’t rush this step, as it really builds the flavor base for your curry and makes all the difference in the final dish. Once caramelized, remove about one-third of the onions and set them aside. These will be added back later for texture and visual appeal.
Step 3: Build the Aromatic Base
With the remaining onions still in the pan, add the garlic paste and ginger paste. Cook these for about 30 seconds, stirring constantly. The raw smell should disappear, replaced by a fragrant, appetizing aroma. Be careful not to let the pastes stick or burn.
Next, add all your dry spices: the chilli powder, paprika powder, cumin powder, and madras curry powder. Stir them into the onion mixture and cook for 1 minute. Add a small splash of water if the spices start to stick or look like they might burn. This step blooms the spices, releasing their essential oils and deepening their flavors.
Step 4: Create the Tomato Sauce
Pour in the blended vine-ripened tomatoes and 150 ml of the chicken stock. Stir everything together, scraping up any bits from the bottom of the pan. Let this mixture simmer for 5 minutes, stirring occasionally to prevent sticking. The tomatoes will break down and meld with the spices, creating a rich, aromatic base.
After simmering, remove the pan from heat and carefully blend the mixture until completely smooth. You can use an immersion blender directly in the pan or transfer to a regular blender. Return the smooth sauce to the pan.
Step 5: Finish the Curry
Pour in the remaining 300 ml of chicken stock and add the whole green finger chillis. Bring everything to a gentle simmer and let it cook for another 5 minutes. The chillis will infuse the sauce with fresh heat and look beautiful in the finished dish.
Add the reserved caramelized onions and most of the crispy garlic slices, holding back a small handful for garnish. Let everything cook together for 2 minutes so the flavors combine. Stir in the kasoori methi, crushing it slightly between your fingers as you add it to release its aroma. Finally, sprinkle in the garam masala and adjust salt to taste.
Step 6: Serve and Enjoy
Transfer your Zesty Garlic Chilli Chicken to a serving dish and garnish with the reserved crispy garlic slices and freshly chopped coriander. Serve hot with steamed basmati rice, warm naan, or your favorite flatbread.
Blended vine-ripened tomatoes provide a fresher flavor and better integration than canned, making this curry taste brighter and more vibrant.
For another delicious chicken dish that’s perfect for weeknight dinners, check out my balsamic chicken breast recipe for more inspiration.

Dietary Substitutions to Customize Your Zesty Garlic Chilli Chicken
Protein and Main Component Alternatives
While this recipe creates a flavorful sauce that pairs beautifully with chicken, you can easily adapt it for different proteins or make it vegetarian. For a classic chicken curry, add bite-sized chicken pieces after blending the sauce and simmer until cooked through, about 15-20 minutes.
Vegetarians can substitute the chicken stock with vegetable stock and add paneer, chickpeas, or even tofu. For seafood lovers, this sauce works wonderfully with shrimp or firm white fish, though add these in the last 5-7 minutes of cooking to prevent overcooking.
If you want a heartier dish, try adding diced potatoes or cooked lentils along with the stock for a more substantial meal that still delivers all those amazing garlic and spice flavors.
Vegetable, Sauce, and Seasoning Modifications
This curry welcomes plenty of vegetable additions. Diced bell peppers, peas, or spinach all work beautifully. Add heartier vegetables like peppers with the stock, and delicate ones like spinach in the final minute of cooking.
For a creamier sauce, stir in a few tablespoons of heavy cream or coconut milk at the end. This also helps tame the heat if you’ve gone a bit overboard with the chillis. For a tangier profile, add a squeeze of fresh lemon juice just before serving.
Spice adjustments are simple. Use Kashmiri chilli powder for a milder heat and vibrant red color. If you love heat, add an extra green finger chilli or include the seeds. For those who prefer very mild dishes, reduce the chilli powder to 1 teaspoon and deseed the green chillis.
The health benefits of garlic are numerous, so feel free to add even more if you’re a garlic lover.
Mastering Zesty Garlic Chilli Chicken: Advanced Tips and Variations
Pro Cooking Techniques
The secret to restaurant-quality curry lies in patience and proper technique. When frying the garlic, use medium heat rather than high. Low and slow gives you control and prevents burning. If the garlic does burn, start over with fresh oil and garlic because burnt garlic will make your entire dish bitter.
When caramelizing onions, don’t stir them constantly. Let them sit undisturbed for a minute or two between stirs. This allows proper browning to develop. A pinch of baking soda can speed up the process if you’re short on time, but use just a tiny pinch.
Blooming spices is crucial. When you add dry spices to hot oil or the onion mixture, cook them until fragrant. This step takes just a minute but transforms raw, flat flavors into complex, aromatic notes that define great curry.
Flavor Variations
For a smokier curry, add a small piece of charcoal to the finished dish. Heat a piece of natural charcoal on the stove until glowing, place it in a small metal bowl, add a teaspoon of ghee, and place the bowl in the curry. Cover immediately and let the smoke infuse for 5 minutes.
Lemon or lime juice added at the end brings brightness that cuts through the rich sauce. For a sweeter profile, a teaspoon of honey or sugar balances the heat and acidity.
Presentation Tips
Curry tastes better when it looks beautiful. Always reserve some of your garnishes for the top. A swirl of cream, bright green coriander leaves, and those crispy golden garlic slices create visual appeal that makes the dish feel special.
Serve in warmed bowls with rice on the side. This lets everyone control their rice-to-curry ratio and keeps the curry from getting cold too quickly.
Make-Ahead Options
The sauce base freezes beautifully. Double the recipe through the blending step, then freeze half for a quick dinner another night. Thaw, add stock, and finish with fresh garnishes for a meal in 15 minutes.
You can also prep the garlic and onions a day ahead. Fry them and store in separate airtight containers in the refrigerator. This cuts your active cooking time significantly.
How to Store Zesty Garlic Chilli Chicken: Best Practices
Refrigeration
Allow your curry to cool completely before storing. Transfer to an airtight container and refrigerate for up to 3 days. The flavors actually develop and improve after a night in the fridge, making this a great dish for meal prep.
Store rice separately to prevent it from becoming mushy. When you’re ready to eat, you’ll have components that reheat beautifully.
Freezing
This curry freezes well for up to 3 months. Portion into freezer-safe containers or bags, leaving some room for expansion. Label with the date so you know when to use it by.
For best results, undercook the vegetables slightly if you plan to freeze, as they’ll soften when reheated. Thaw overnight in the refrigerator before reheating.
Reheating
Reheat gently over medium-low heat on the stove, adding a splash of water or stock if the sauce has thickened too much. Stir occasionally until heated through. You can also microwave in 1-minute intervals, stirring between each, until hot throughout.
Avoid high heat when reheating, as this can cause the sauce to separate and the garlic garnishes to become bitter. Gentle, even heating preserves the texture and flavor you worked so hard to create.
FAQs: Frequently Asked Questions About Zesty Garlic Chilli Chicken
What is zesty garlic chilli chicken?
Zesty garlic chilli chicken is a bold Asian-inspired dish featuring tender chicken pieces stir-fried with fresh garlic, fiery red chillies, zesty lemon or lime, and soy sauce for umami depth. It’s quick to prepare in under 30 minutes, perfect for weeknight dinners. The “zesty” comes from citrus notes that cut through the heat, while garlic and chillies deliver punchy flavor. Serve it over steamed rice or noodles with veggies like bell peppers and onions. This recipe serves 4 and uses pantry staples: 500g chicken thigh fillets, 6 garlic cloves, 4-6 fresh chillies, juice of 1 lemon, 2 tbsp soy sauce, 1 tbsp honey, and oil for frying. Slice chicken thinly for even cooking, and adjust chillies for spice level. It’s gluten-free if using tamari.
How do you make zesty garlic chilli chicken at home?
Start by marinating 500g sliced chicken thighs in 2 tbsp soy sauce, 1 tbsp cornstarch, and 1 tsp ginger for 15 minutes. Heat 2 tbsp oil in a wok over high heat. Add 6 minced garlic cloves and 4-6 sliced chillies; stir-fry 30 seconds until fragrant. Add chicken; cook 5-7 minutes until browned. Stir in juice of 1 lemon, 1 tbsp honey, and 1 tsp sesame oil. Toss for 2 minutes to coat. Garnish with green onions and sesame seeds. Total time: 25 minutes. Pro tip: Use high heat for wok hei flavor, and don’t overcrowd the pan. Pair with jasmine rice to soak up the sauce. This yields crispy edges and juicy meat every time.
What ingredients do I need for zesty garlic chilli chicken?
Core ingredients for zesty garlic chilli chicken include 500g boneless chicken thighs (sliced), 6 garlic cloves (minced), 4-6 fresh red chillies (sliced, seeds removed for less heat), juice and zest of 1 lemon or lime, 2 tbsp light soy sauce, 1 tbsp honey or brown sugar, 1 tbsp cornstarch (for coating), 2 tbsp vegetable oil, and optional ginger or sesame seeds. Veggies like 1 onion and 1 bell pepper add crunch. No exotic items needed—most are fridge staples. For authenticity, use bird’s eye chillies. Prep time: 10 minutes. Scales easily for 2 or 6 servings. Always taste the sauce before adding chicken to balance sweet, sour, spicy, and salty.
Can I adjust the spice level in zesty garlic chilli chicken?
Yes, customize spice easily. For mild, use 1-2 chillies with seeds removed or substitute with chilli flakes (1 tsp). Medium heat: 3-4 chillies, half-seeded. Fiery: 6+ bird’s eye chillies with seeds. Add chilli sauce like sriracha (1-2 tsp) post-cooking for control. Balance with extra honey or lemon juice to mellow heat. Test by tasting marinade first. This dish suits all palates—kids love the milder version with rice. Nutrition note: Chillies boost metabolism with capsaicin. Store leftovers in fridge up to 3 days; reheat gently to retain crispiness. Experiment in small batches to find your perfect kick.
How do I store and reheat zesty garlic chilli chicken?
Cool completely, then store in an airtight container in the fridge for up to 3 days or freeze for 1 month (portion into bags). Avoid storing with rice to prevent sogginess. Reheat in a hot wok or skillet with a splash of water or oil for 2-3 minutes to restore crispiness—microwave works but softens texture. Thaw frozen portions overnight in fridge. It tastes even better next day as flavors meld. Safety tip: Reheat to 75°C (165°F). Makes great meal prep; add fresh veggies when reheating. Per serving (1/4 recipe): ~350 calories, 30g protein. Link to full recipe for batch cooking variations.

Zesty Garlic Chilli Chicken
- Total Time: 55 minutes
- Yield: 4 servings
- Diet: Gluten-Free, High-Protein
Description
🐔 Dive into tender chicken in a zesty garlic-chili sauce bursting with bold Indian spices – high-protein comfort in every bite!
🌶️ Quick 55-minute recipe with fresh flavors, perfect as a healthier takeout alternative for weeknight feasts.
Ingredients
– 4 tbsp vegetable oil
– 12 garlic cloves, sliced
– 3 white onions, sliced
– 1 tbsp garlic paste
– 1 tbsp ginger paste
– 4 green finger chillis
– 2 tsp chilli powder
– ½ tsp paprika powder
– ½ tsp cumin powder
– 1 tbsp madras curry powder
– 300 g blended vine ripened tomatoes
– 450 ml chicken stock
– 1 tsp kasoori methi (fenugreek leaves)
– 1 tsp garam masala
– Freshly chopped coriander for garnish
– Salt to taste
Instructions
1-Step 1: Crisp the Garlic Heat the vegetable oil in a large pan over medium heat. Add the sliced garlic cloves and cook them gently until they turn a beautiful golden brown. This usually takes about 2-3 minutes, but watch them closely because garlic can go from golden to burnt very quickly. You want them crispy and aromatic, not dark or bitter. Once golden, remove the garlic slices from the oil and set them aside on a paper towel. These crispy garlic pieces will become a delicious garnish that adds texture and intense garlic flavor to your finished dish. The oil is now infused with garlic essence, which will flavor everything else you cook.
2-Step 2: Caramelize the Onions Add the sliced onions to the same garlic-infused oil with a generous pinch of salt. The salt helps draw out moisture and speeds up the browning process. Cook the onions over medium heat for about 6-8 minutes, stirring occasionally, until they develop a deep golden brown color. You want your onions to turn a nice golden brown here. Don’t rush this step, as it really builds the flavor base for your curry and makes all the difference in the final dish. Once caramelized, remove about one-third of the onions and set them aside. These will be added back later for texture and visual appeal.
3-Step 3: Build the Aromatic Base With the remaining onions still in the pan, add the garlic paste and ginger paste. Cook these for about 30 seconds, stirring constantly. The raw smell should disappear, replaced by a fragrant, appetizing aroma. Be careful not to let the pastes stick or burn. Next, add all your dry spices: the chilli powder, paprika powder, cumin powder, and madras curry powder. Stir them into the onion mixture and cook for 1 minute. Add a small splash of water if the spices start to stick or look like they might burn. This step blooms the spices, releasing their essential oils and deepening their flavors.
4-Step 4: Create the Tomato Sauce Pour in the blended vine-ripened tomatoes and 150 ml of the chicken stock. Stir everything together, scraping up any bits from the bottom of the pan. Let this mixture simmer for 5 minutes, stirring occasionally to prevent sticking. The tomatoes will break down and meld with the spices, creating a rich, aromatic base. After simmering, remove the pan from heat and carefully blend the mixture until completely smooth. You can use an immersion blender directly in the pan or transfer to a regular blender. Return the smooth sauce to the pan.
5-Step 5: Finish the Curry Pour in the remaining 300 ml of chicken stock and add the whole green finger chillis. Bring everything to a gentle simmer and let it cook for another 5 minutes. The chillis will infuse the sauce with fresh heat and look beautiful in the finished dish. Add the reserved caramelized onions and most of the crispy garlic slices, holding back a small handful for garnish. Let everything cook together for 2 minutes so the flavors combine. Stir in the kasoori methi, crushing it slightly between your fingers as you add it to release its aroma. Finally, sprinkle in the garam masala and adjust salt to taste.
6-Step 6: Serve and Enjoy Transfer your Zesty Garlic Chilli Chicken to a serving dish and garnish with the reserved crispy garlic slices and freshly chopped coriander. Serve hot with steamed basmati rice, warm naan, or your favorite flatbread.
Notes
🍅 Use blended fresh vine-ripened tomatoes for superior fresh flavor over canned.
🔥 Opt for Kashmiri chilli powder for vibrant color and milder heat.
⚠️ Cook garlic carefully to golden without burning to avoid bitterness.
- Prep Time: 25 minutes
- Cook Time: 30 minutes
- Category: Main Course
- Method: Stovetop
- Cuisine: Indian
Nutrition
- Serving Size: 1 serving
- Calories: 400 kcal
- Sugar: 5g
- Sodium: 800mg
- Fat: 20g
- Saturated Fat: 5g
- Unsaturated Fat: 14g
- Trans Fat: 0g
- Carbohydrates: 15g
- Fiber: 3g
- Protein: 30g
- Cholesterol: 100mg
Keywords: Garlic Chili Chicken, Spicy Chicken Curry, Indian Garlic Chicken, Zesty Chili Chicken