Why You’ll Love This Vareniki Dough
This vareniki dough recipe is a game-changer for anyone who loves making homemade dumplings at home. It’s straightforward, uses everyday ingredients, and turns into a soft, pliable dough that wraps around fillings like a hug. Imagine whipping up vareniki filled with blueberries or ground pork and turkey in no time at all that’s the magic of this simple formula.
One reason you’ll adore this dough is its ease of preparation. This vareniki dough recipe is simple and quick, requiring minimal ingredients and a straightforward process that saves time in the kitchen. Its quick cooking time also means you can enjoy fresh, homemade vareniki without long waits. Plus, it’s made from wholesome ingredients that offer health benefits such as essential carbohydrates for energy.
Beyond that, the dough’s versatility shines through in how it adapts to various dietary needs. You can tweak it for vegan, gluten-free, or low-calorie options, making it perfect for busy parents, students, or anyone exploring new flavors. The subtle, rich taste of the dough enhances fillings like potato and onion, blueberry, cherry, or ground pork and turkey, creating a dish that’s both comforting and exciting.
Let me share a quick story: when I first tried this dough with fresh cherries, it reminded me of family gatherings where we’d fill vareniki with whatever was in season. Oh, and don’t forget the toppings like zazharka for potato-filled vareniki, which is sautéed bacon and onion in butter for a burst of flavor. Overall, this dough helps you create memorable meals that bring people together around the table.
Health and Adaptability Perks
The dough’s health benefits come from ingredients like eggs and milk, which provide nutrients such as protein and calcium. For instance, eggs add binding power and a nutritional boost. According to health benefits of eggs, they support energy and overall wellness. This makes the dough ideal for food enthusiasts and diet-conscious folks looking for balanced recipes.
Preparation takes about 2 hours total, including resting time, with active cooking around 10 minutes per batch. Tips like freezing uncooked vareniki for months add convenience, so you can meal-prep like a pro. If you’re a baking enthusiast or working professional, this dough fits into your routine effortlessly.
Jump To
- 1. Why You’ll Love This Vareniki Dough
- 2. Essential Ingredients for Vareniki Dough
- 3. How to Prepare the Perfect Vareniki Dough: Step-by-Step Guide
- 4. Dietary Substitutions to Customize Your Vareniki Dough
- 5. Mastering Vareniki Dough: Advanced Tips and Variations
- 6. How to Store Vareniki Dough: Best Practices
- 7. FAQs: Frequently Asked Questions About Vareniki Dough
- 8. Vareniki Dough
Essential Ingredients for Vareniki Dough
Getting the ingredients right is key to perfect vareniki dough, and this recipe keeps things simple yet effective. You’ll need a mix of basic pantry staples and a few extras to achieve that tender texture. Let’s break down what goes into this vareniki dough, focusing on the precise measurements to make your cooking smooth and successful.
Core Ingredients List
Here is the comprehensive list of ingredients for the dough, based on the traditional recipe. Remember, use these exact quantities to ensure the best results:
- 1 large egg
- 2 tablespoons sour cream
- 3/4 cup water
- 1 1/4 cups 2% or whole milk
- 5 cups all-purpose flour, plus about 1 cup more for dusting
This list covers everything you need for the base dough. For the fillings, you’ll prepare separate items like potato and onion, blueberry, cherry, or ground pork and turkey. The flour, as noted in flour nutrition facts, provides essential structure and energy, making it a cornerstone of this recipe.
Additional Options for Fillings and Toppings
Besides the dough ingredients, consider these for your vareniki:
- Potato and onion (amounts vary by preference, typically 2 cups mashed potatoes mixed with 1 chopped onion)
- Blueberry (1 cup fresh or frozen berries)
- Cherry (1 cup pitted cherries)
- Ground pork and turkey (1/2 pound each, mixed with seasonings)
For toppings, try these: for potato-filled vareniki, use zazharka made from sautéed bacon and onion in butter; for meat-filled options, melted butter, vinegar, or ketchup as a dip; and for fruit fillings, dust with sugar and serve with sour cream to enhance the flavor.
How to Prepare the Perfect Vareniki Dough: Step-by-Step Guide
Making vareniki dough from scratch is easier than you might think, and this guide walks you through it with clear steps. Follow along, and you’ll end up with dough that’s ready for a variety of fillings like blueberry or ground pork and turkey. Let’s dive in and get those hands floury!
First, gather all your ingredients and set up your workspace. Start by whisking together 1 large egg and 2 tablespoons sour cream until well combined. This base helps create a rich texture that makes the dough easy to work with.
Next, add 1 1/4 cups 2% or whole milk and 3/4 cup water, then whisk again to blend everything smoothly. Now, mix in 5 cups all-purpose flour one cup at a time using a spatula, which keeps the dough from getting lumpy. Once mixed, place the dough on a floured surface and knead it by turning and folding for about 6-8 minutes until it’s soft and not sticky; add flour as needed, but don’t overdo it to avoid a hard result.
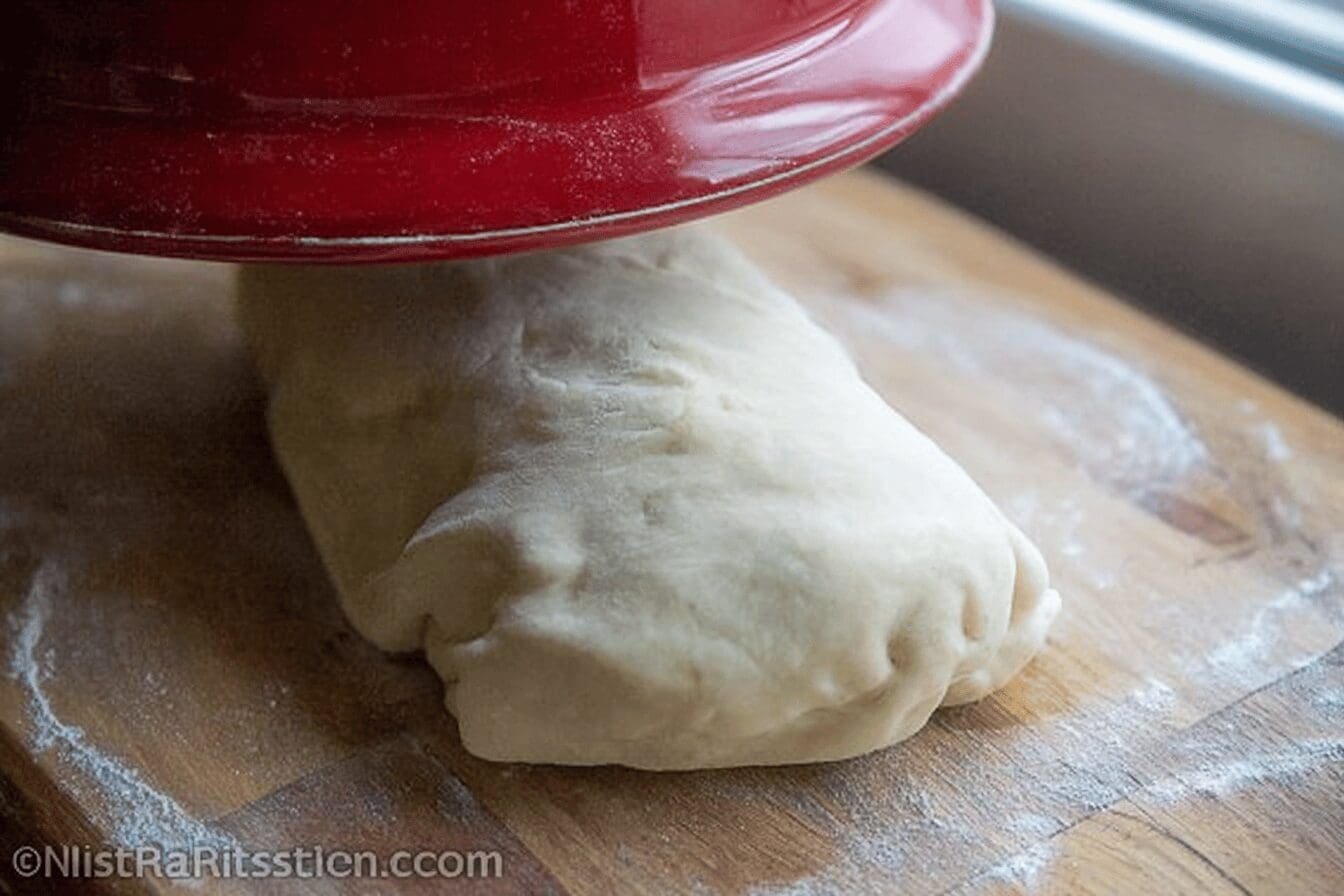
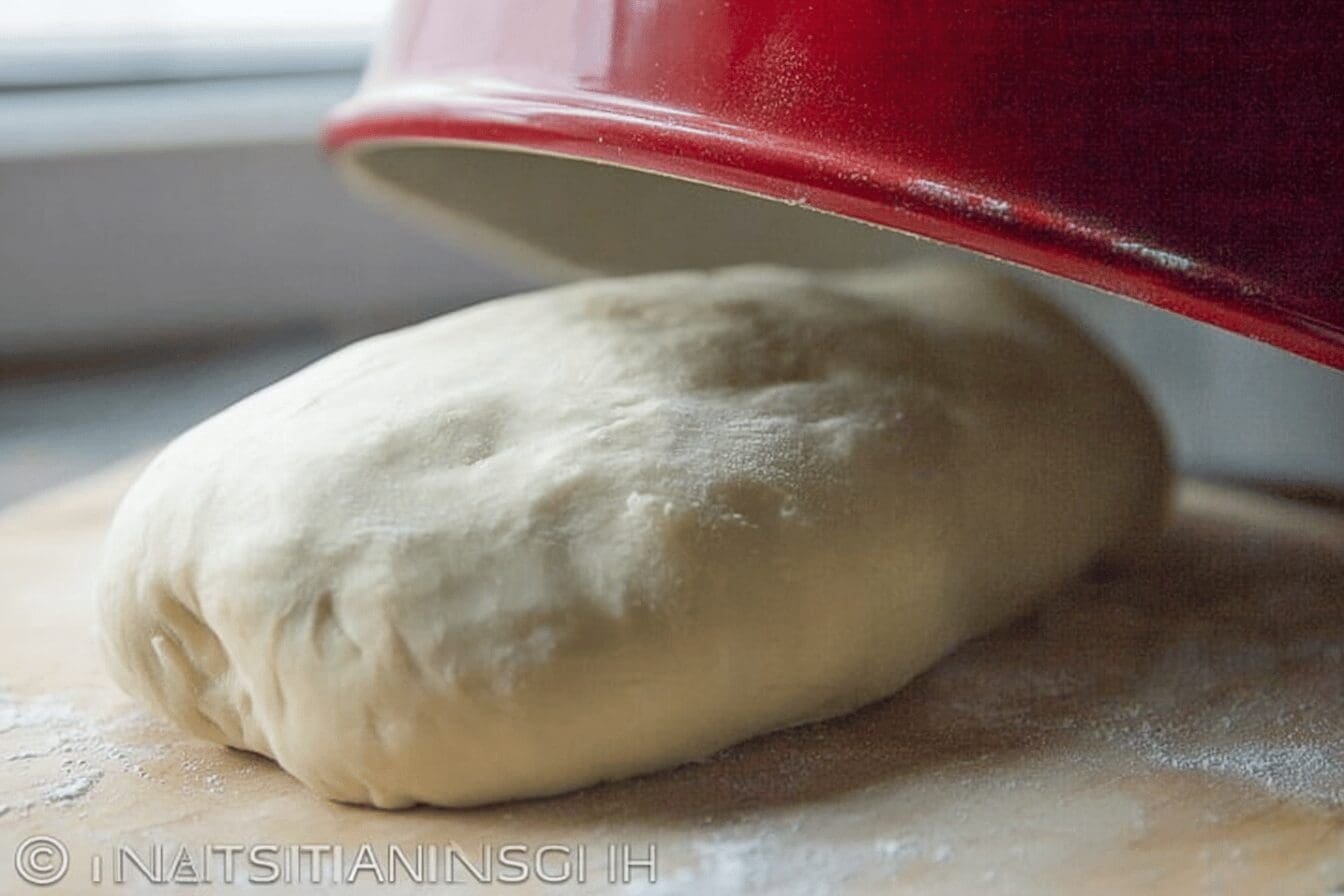
Resting and Shaping the Dough
After kneading, cover the dough with a bowl and let it rest at room temperature for 1 hour this step is optional but helps with elasticity. Cut the dough into 4 to 6 pieces and work with one piece at a time, keeping the others covered to prevent drying.
Form each piece into a log, then cut it into small pieces slightly larger than a gumball. Roll each piece into a 3-inch diameter circle that’s about 1/8 inch thick. Place your filling in the center, fold it over to a crescent shape, and seal the edges tightly; for meat pelmeni, pinch the edges into a diaper shape.
Once shaped, place the formed vareniki on a floured board until you’re ready to cook. Boil a large pot of salted water and cook them in batches until they float, then add 2-3 minutes more. Remove with a slotted spoon and drizzle with melted butter. Repeat for the remaining dough and fillings, and your vareniki will be ready to enjoy!
| Step Number | Action | Tips |
|---|---|---|
| 1-2 | Whisk egg and sour cream, then add liquids | Use fresh ingredients for best results |
| 3-4 | Mix in flour and knead dough | Avoid over-kneading to keep it soft |
| 5-6 | Rest and cut dough | Cover dough to maintain moisture |

Dietary Substitutions to Customize Your Vareniki Dough
One of the best parts of this vareniki dough is how it adapts to different diets, making it perfect for home cooks with specific needs. Whether you’re vegan or gluten-free, you can tweak the recipe without losing that tender texture. Let’s explore some easy swaps that keep the fun in cooking.
For protein and main components, use mashed potatoes or tofu instead of traditional cheese fillings to fit vegetarian or vegan diets. If you’re avoiding gluten, swap in alternative flours like buckwheat or sorghum to maintain the dough’s structure. These changes make the dough versatile for busy parents or seniors watching their intake.
When it comes to vegetables, sauces, and seasonings, try leeks or scallions in place of onions for a milder taste. For dairy-free options, opt for vegan sour cream or almond-based dips, especially with fruit fillings like blueberry or cherry. Adjust seasonings with fresh dill or garlic to match your preferences, and pair it with toppings like sugar-dusted fruit vareniki served with sour cream.
Mastering Vareniki Dough: Advanced Tips and Variations
Once you’re comfortable with the basics, take your vareniki dough to the next level with these pro tips and creative twists. This will help you impress friends and family, whether you’re using fillings like potato and onion or ground pork and turkey. Remember, practice makes perfect, and a little experimentation goes a long way.
To boost dough elasticity, use a dough hook for kneading or try stretch and fold techniques during resting. For flavor variations, mix in herbs like chives or add sugar and cinnamon for sweet versions that pair well with cherry fillings. Use a food scraper to handle the dough effectively, and avoid adding too much flour to keep it soft that’s a tip that ensures your vareniki turn out just right.
Presentation is key, so shape your vareniki with fluted edges or braids for a fancy look, and garnish with melted butter or fried onions. For make-ahead options, prepare dough in bulk and freeze raw vareniki on a cutting board before bagging them; they last for months. If you’re into meal prep, check out this loaded baked potato casserole recipe for more ideas on handling fillings like potatoes.
- Tip: Dust fruit vareniki with sugar and serve with sour cream for extra appeal.
- Variation: For meat pelmeni, use melted butter or ketchup as a dip.
- Pro hack: Zazharka adds rich flavor to potato-filled vareniki.
How to Store Vareniki Dough: Best Practices
Storing your vareniki dough properly means you can enjoy fresh dumplings anytime, even on the busiest days. This section covers simple methods that work for students, working professionals, or anyone with a packed schedule. Follow these steps to keep your dough fresh and ready for fillings like blueberry or ground pork and turkey.
For refrigeration, wrap the dough tightly and store it in the fridge for up to 2 days. Freezing is great for long-term use shape the raw vareniki first, freeze them on a baking sheet, then transfer to bags to avoid sticking. When reheating, boil or steam from frozen, adding a bit more time to ensure even cooking.
Meal prep tips include batch cooking and portioning for the week, which aligns with freezing uncooked vareniki as mentioned earlier. This approach keeps the texture intact and makes mealtime a breeze, especially when paired with toppings like zazharka for potato varieties.
FAQs: Frequently Asked Questions About Vareniki Dough
What ingredients do I need to make traditional vareniki dough?
Traditional vareniki dough requires just a few simple ingredients: all-purpose flour, warm water or milk, a pinch of salt, and sometimes an egg. The flour provides structure, while the liquid hydrates the dough for elasticity. Adding an egg is optional but can make the dough richer and easier to handle. Avoid using baking powder or yeast, as vareniki dough should be soft and tender but not leavened.
How do I make vareniki dough soft and easy to work with?
To achieve soft, pliable dough, start by gradually mixing flour with warm water or milk until the dough comes together smoothly. Knead for 8 to 10 minutes until elastic and soft but not sticky. Let the dough rest covered for at least 30 minutes to relax the gluten. Resting improves rollability and prevents shrinkage during cooking.
Can I make vareniki dough without eggs?
Yes, you can make excellent vareniki dough without eggs. Use warm water or milk combined with flour and a pinch of salt. The key is kneading thoroughly and allowing the dough to rest. Egg-free dough tends to be lighter and more tender, which works well with most traditional fillings like potatoes, sauerkraut, or sweet cherries.
How should I store vareniki dough if I want to prepare it in advance?
To store vareniki dough, wrap it tightly in plastic wrap or place it in an airtight container. It can be refrigerated for up to 2 days without losing quality. Before use, let it rest at room temperature for 20-30 minutes to regain elasticity. For longer storage, you can freeze the dough in portions; thaw overnight in the fridge before using.
What common mistakes should I avoid when making vareniki dough?
Common mistakes include using cold water, which makes the dough hard to knead, over-flouring the dough resulting in a tough texture, and skipping the resting step. Avoid adding too much flour during kneading; the dough should be slightly sticky but manageable. Also, rolling the dough too thin or thick can affect cooking time and filling integrity—aim for about 2-3 mm thickness.

Vareniki Dough
- Total Time: 2 hours
- Yield: Makes dozens of vareniki or pelmeni depending on size
- Diet: Vegetarian option available depending on filling
Description
🥟 Basic Russian Vareniki and Pelmeni Dough Recipe provides an authentic foundation for delicious homemade pierogi with tender, soft dough.
🍽️ This versatile dough works perfectly with savory or sweet fillings, offering a traditional and satisfying meal experience.
Ingredients
– 1 large egg
– 2 tablespoons sour cream
– 3/4 cup water
– 1 1/4 cups 2% or whole milk
– 5 cups all-purpose flour, plus about 1 cup more for dusting
– 2 cups mashed potatoes mixed with 1 chopped onion
– 1 cup fresh or frozen blueberries
– 1 cup pitted cherries
– 1/2 pound ground pork and turkey mixed with seasonings
Instructions
1-First, gather all your ingredients and set up your workspace. Start by whisking together 1 large egg and 2 tablespoons sour cream until well combined. This base helps create a rich texture that makes the dough easy to work with.
2-Next, add 1 1/4 cups 2% or whole milk and 3/4 cup water, then whisk again to blend everything smoothly. Now, mix in 5 cups all-purpose flour one cup at a time using a spatula, which keeps the dough from getting lumpy. Once mixed, place the dough on a floured surface and knead it by turning and folding for about 6-8 minutes until it’s soft and not sticky; add flour as needed, but don’t overdo it to avoid a hard result.
3-Resting and Shaping the Dough: After kneading, cover the dough with a bowl and let it rest at room temperature for 1 hour this step is optional but helps with elasticity. Cut the dough into 4 to 6 pieces and work with one piece at a time, keeping the others covered to prevent drying.
4-Form each piece into a log, then cut it into small pieces slightly larger than a gumball. Roll each piece into a 3-inch diameter circle that’s about 1/8 inch thick. Place your filling in the center, fold it over to a crescent shape, and seal the edges tightly; for meat pelmeni, pinch the edges into a diaper shape.
5-Once shaped, place the formed vareniki on a floured board until you’re ready to cook. Boil a large pot of salted water and cook them in batches until they float, then add 2-3 minutes more. Remove with a slotted spoon and drizzle with melted butter. Repeat for the remaining dough and fillings, and your vareniki will be ready to enjoy!
Notes
❄️ Freeze uncooked vareniki on a cutting board uncovered, then transfer to flour-dusted freezer-safe bags for months of storage.
🌾 Avoid adding too much flour during kneading to keep the dough soft and tender.
🛠️ Use a food scraper to manage the dough efficiently while kneading and forming shapes.
- Prep Time: 15 minutes
- Resting Time: 1 hour
- Cook Time: 10 minutes per batch
- Category: Main Dish, Dumpling
- Method: Kneading, Boiling, Filling
- Cuisine: Russian
Nutrition
- Serving Size: 6-8 vareniki or pelmeni
Keywords: Russian Vareniki,Pelmeni Dough,Homemade Pierogi,Traditional Dumplings