Why You’ll Love This Tuna Salad
This tuna salad recipe is a kitchen staple that belongs in every home cook’s collection. Whether you need a quick lunch, a protein-packed snack, or a versatile dish for meal prep, this classic tuna salad delivers on all fronts. It comes together in just 5 minutes, making it perfect for busy weeknights or lazy weekend afternoons when you want something satisfying without the fuss.
Here’s why this recipe stands out:
- Ease of Preparation: This easy tuna salad requires no cooking whatsoever. Simply open a few cans, chop a couple of vegetables, mix everything in one bowl, and you’re done. The total prep time is just 5 minutes, which means you can have a delicious meal ready faster than ordering takeout.
- Health Benefits: Tuna is an excellent source of lean protein, providing 19g per serving. It’s also rich in omega-3 fatty acids, which support heart health and brain function. This recipe delivers essential nutrients like Vitamin D, selenium, and B vitamins while remaining naturally low in carbohydrates.
- Versatility: This creamy tuna salad adapts to countless serving options. Pile it on sandwich bread, scoop it onto crackers, wrap it in lettuce leaves, stuff it in tomatoes, or toss it with pasta for a completely different experience. The recipe works for low-carb diets, keto lifestyles, or anyone watching their carb intake.
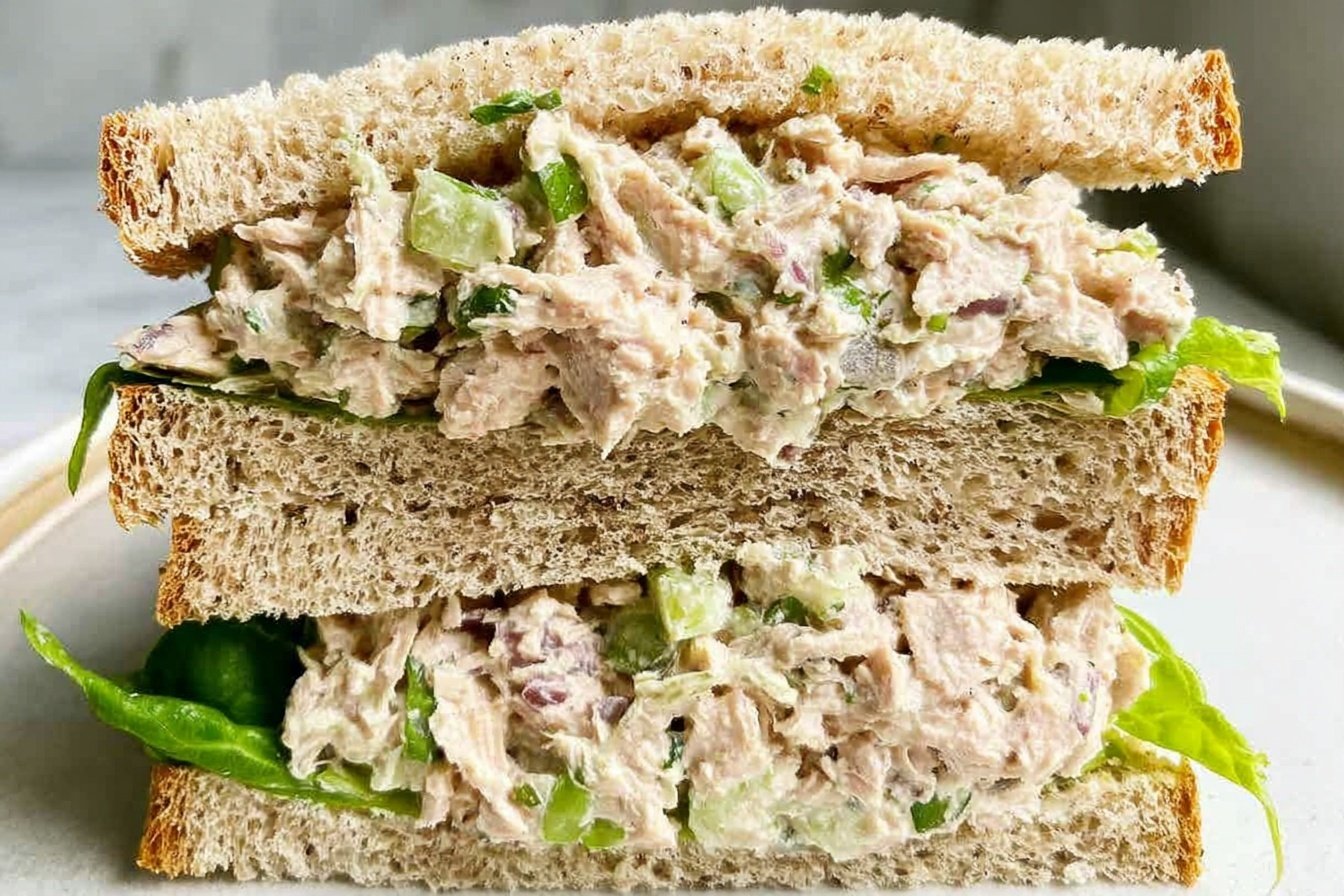
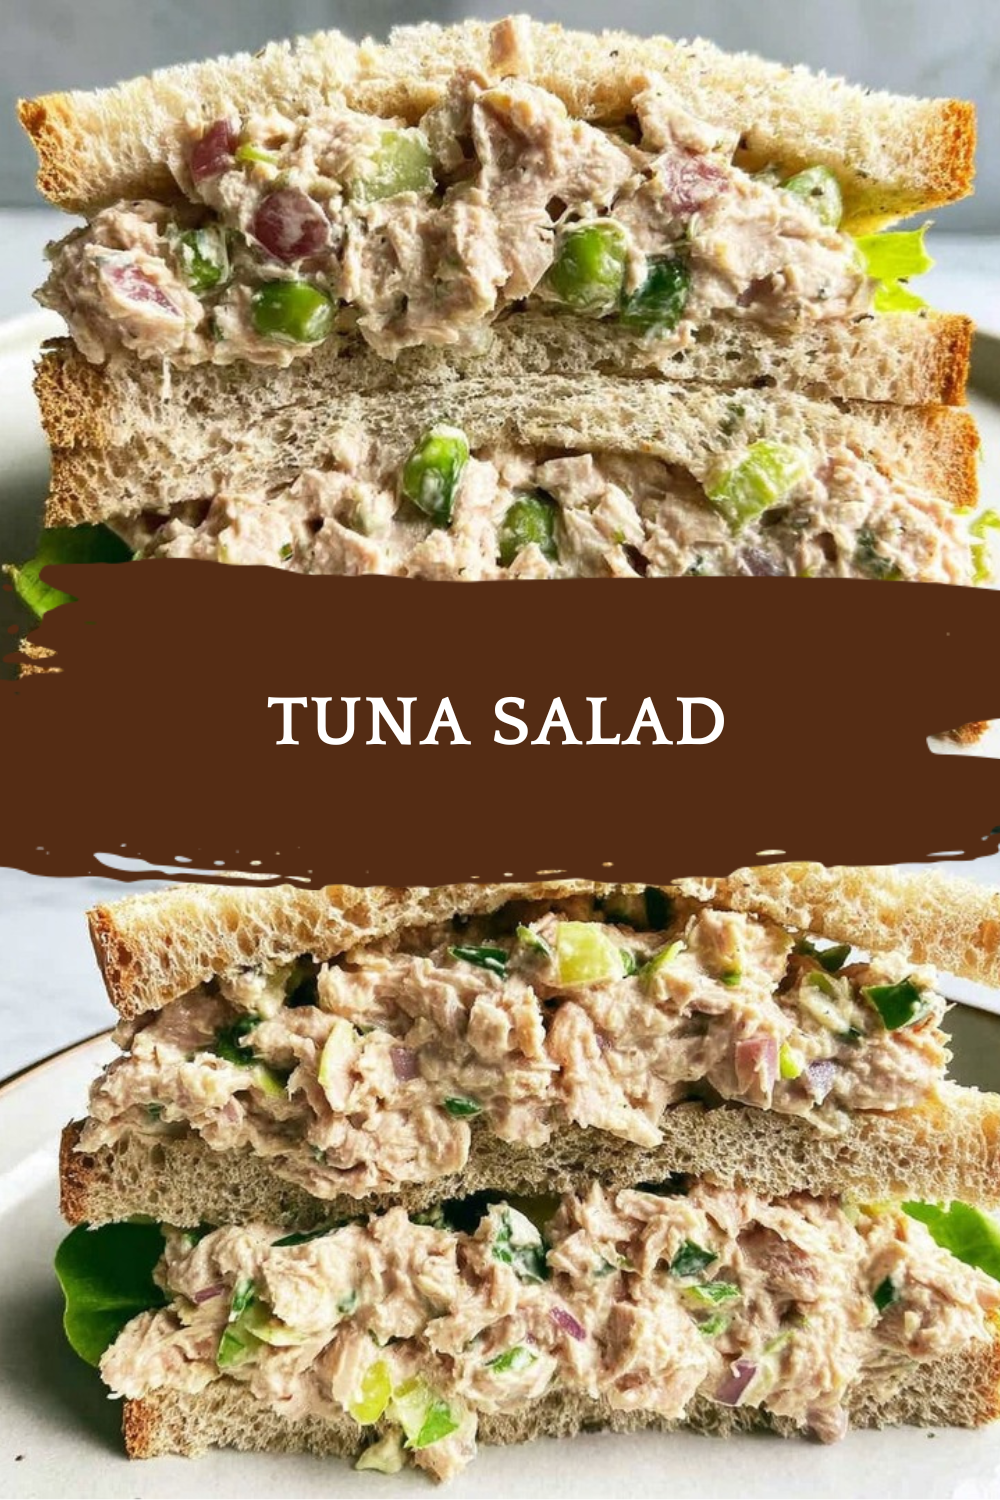
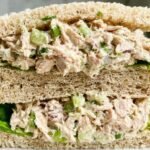
- Distinctive Flavor: The combination of sweet pickle relish, fresh celery, and a hint of garlic creates a flavor profile that’s both familiar and special. The lemon juice brightens everything up, while the mayonnaise provides that classic creamy texture everyone loves in a delicious tuna salad recipe.
Jump To
- 1. Why You’ll Love This Tuna Salad
- 2. Essential Ingredients for Tuna Salad
- 3. How to Prepare the Perfect Tuna Salad: Step-by-Step Guide
- 4. Dietary Substitutions to Customize Your Tuna Salad
- 5. Mastering Tuna Salad: Advanced Tips and Variations
- 6. How to Store Tuna Salad: Best Practices
- 7. FAQs: Frequently Asked Questions About Tuna Salad
- 8. Tuna Salad
Essential Ingredients for Tuna Salad
Creating the perfect tuna salad starts with gathering the right ingredients. Each component plays a specific role in building flavor, texture, and creaminess. Here’s everything you’ll need to make this simple tuna salad recipe:
Main Ingredients:
- 4 cans (5-ounce) tuna, drained – The star of the dish. Water-packed tuna keeps the calorie count lower, while oil-packed tuna offers richer flavor. Choose high-quality brands for the best taste, and drain thoroughly to avoid watery salad.
- 1 cup mayonnaise or less to taste – Creates the signature creamy texture. Start with less and add more as needed. Full-fat mayo delivers classic flavor, but light versions work well for calorie-conscious cooks.
- 1/3 cup finely chopped celery (about 1 rib) – Adds essential crunch and fresh flavor. Celery also provides fiber and vitamins while lightening the texture of the salad.
- 2 tablespoons minced onion (about 2 small slices) – Brings subtle bite and aromatic depth. White or yellow onions work well, while red onion adds a pop of color and slightly sharper taste.
- 2 tablespoons sweet pickle relish – Contributes tangy sweetness and textural interest. Dill relish or minced dill pickles make excellent substitutes if you prefer a less sweet profile.
- 1 tablespoon lemon juice – Brightens all flavors and helps preserve freshness. Fresh-squeezed lemon juice delivers the best taste, but bottled works in a pinch.
- 1 clove garlic, minced – Adds savory depth without overwhelming the delicate tuna. Fresh garlic makes a noticeable difference compared to garlic powder.
- Salt and pepper to taste (½ teaspoon salt and ¼ teaspoon pepper recommended) – Essential seasonings that bring all flavors together. Adjust to your personal preference.
Special Dietary Options:
- Vegan Alternative: Replace tuna with mashed chickpeas or hearts of palm, swap mayonnaise for vegan mayo or whipped silken tofu, and follow the same preparation method.
- Gluten-Free: All core ingredients are naturally gluten-free. Just ensure your serving vessel (bread, crackers) matches your dietary needs.
- Low-Calorie: Use light mayonnaise, plain Greek yogurt, or a mixture of both to significantly reduce calories while maintaining creaminess.
How to Prepare the Perfect Tuna Salad: Step-by-Step Guide
Learning how to make tuna salad couldn’t be easier. This straightforward method ensures consistent, delicious results every time. Follow these steps for the best classic tuna salad recipe you’ve ever tasted.
Step 1: Drain the Tuna Properly
Open all four cans of tuna and drain them thoroughly. For water-packed tuna, simply press the lid against the tuna while tilting the can to remove excess liquid. If you’re using oil-packed tuna and want to reduce the oiliness, rinse the tuna under cold running water for 20-30 seconds, then press firmly with a fork or spatula to extract remaining moisture. Proper draining prevents a soggy salad and allows the flavors to shine through without dilution. Transfer the drained tuna to a medium-sized mixing bowl.
Step 2: Prepare the Vegetables
While the tuna drains, prepare your fresh ingredients. Wash one rib of celery and trim the ends. Finely chop the celery into small, even pieces about 1/8 to 1/4 inch in size. Uniform pieces ensure consistent texture and distribution throughout the salad. Peel and mince one clove of garlic using a sharp knife or garlic press. For the onion, remove 2 small slices and mince them finely. If using fresh pickle instead of relish, mince it to match the texture. These tuna salad ingredients should be prepped and ready before mixing begins.
Step 3: Combine All Ingredients
In your medium bowl with the drained tuna, add the mayonnaise, finely chopped celery, minced onion, sweet pickle relish, lemon juice, and minced garlic. The order doesn’t matter much, but starting with the mayonnaise helps coat the tuna and prevents the other ingredients from clumping together. Use a fork or wooden spoon to begin mixing. Break up any large chunks of tuna while folding all ingredients together. The goal is a relatively uniform mixture where every bite contains a bit of everything, but the tuna should still retain some texture rather than becoming completely smooth.
Step 4: Season to Taste
Add the recommended ½ teaspoon of salt and ¼ teaspoon of black pepper to start. Stir well to incorporate the seasonings throughout the salad. Now comes the important part: taste your creation. Use a clean spoon to sample the creamy tuna salad and assess the flavor balance. You might want more salt, additional pepper, or even a splash more lemon juice. Remember that flavors will meld and intensify if you refrigerate the salad before serving. Add seasonings gradually, as it’s much easier to add more than to correct an over-seasoned dish.
Step 5: Serve or Chill
Your tuna salad is now ready to enjoy! You can serve it immediately at room temperature, or cover the bowl and refrigerate it for 30 minutes to allow flavors to develop further. Chilled tuna salad often tastes even better because the ingredients have time to marry. When serving, consider the presentation. For sandwiches, toast your bread lightly and add crisp lettuce or juicy tomato slices. For appetizers, serve with crackers or cucumber rounds. The versatility of this dish means you can adapt it to any occasion or craving.
Nutritional Information per 0.5 Cup Serving
Understanding the nutritional content helps you make informed dietary choices:
| Nutrient | Amount |
|---|---|
| Calories | 345 |
| Carbohydrates | 3g |
| Protein | 19g |
| Fat | 29g |
| Saturated Fat | 5g |
| Cholesterol | 50mg |
| Sodium | 516mg |
| Potassium | 202mg |
| Fiber | 1g |
| Sugar | 2g |
This recipe yields approximately 3 cups, which equals 6 servings of ½ cup each. Perfect for making 6 sandwiches or serving a crowd at your next gathering.

Dietary Substitutions to Customize Your Tuna Salad
One of the best things about this easy tuna salad is how adaptable it is. Whether you’re working with dietary restrictions, ingredient availability, or personal preferences, there are plenty of ways to customize this recipe while keeping it delicious.
Protein and Main Component Alternatives
While canned tuna creates the classic version, several alternatives work beautifully for different dietary needs:
- Cooked Flaked Ahi Tuna: For a premium upgrade, use fresh Ahi tuna that’s been grilled or seared, then flaked. This creates an elegant version perfect for special occasions.
- Canned Salmon: A great alternative with similar preparation. Salmon offers different nutritional benefits, including more omega-3s and Vitamin D.
- Canned Chicken: Creates a tasty chicken salad variation using the same mixing method and similar ingredient ratios.
- Mashed Chickpeas: For a plant-based version, mash two cans of drained chickpeas with a fork until flaky. The texture mimics tuna surprisingly well, and the seasonings make it delicious.
Vegetable, Sauce, and Seasoning Modifications
The vegetables and seasonings in this recipe are flexible. Consider these variations based on what you have on hand or what flavors you enjoy:
- Crunchy Add-ins: Replace celery with diced bell peppers, chopped water chestnuts, or grated carrots for different textures and flavors.
- Onion Alternatives: Use green onions (scallions) for a milder flavor, shallots for sophistication, or skip onions entirely if you prefer.
- Mayonnaise Substitutes: Plain Greek yogurt makes an excellent lower-calorie option with added protein. Whip silken tofu for a vegan alternative with a similar creamy texture. For a lighter approach, create an olive oil-lemon-Dijon-herb dressing that coats the tuna without heaviness.
- Relish Alternatives: Sweet pickle relish can be swapped for dill relish, chopped cornichons, or even diced fresh cucumber for a different flavor profile.
According to WebMD’s guide on tuna benefits, this fish provides high-quality protein with essential nutrients while remaining low in calories, making these substitutions even more valuable for health-conscious meal planning.
Mastering Tuna Salad: Advanced Tips and Variations
Once you’ve mastered the basic tuna salad recipe, it’s time to explore creative variations and professional techniques that take your dish to the next level.
Pro Cooking Techniques
Restaurant-quality tuna salad starts with proper technique. Always use fresh ingredients rather than pre-minced jarred options for the best flavor. Let ingredients come to room temperature before mixing, as cold ingredients don’t blend as smoothly. When mixing, use a folding motion rather than vigorous stirring to maintain texture. For the smoothest consistency, let the finished salad rest in the refrigerator for at least 30 minutes before serving.
Flavor Variations
Transform your classic tuna salad with these delicious variations:
- Mediterranean Style: Add chopped Kalamata olives, crumbled feta cheese, diced cucumber, and dried oregano. Serve in pita pockets with tzatziki sauce.
- Southwestern Twist: Mix in diced avocado, corn kernels, chopped cilantro, and a dash of cumin. Serve in tortilla wraps with salsa.
- Apple Walnut: Add chopped Granny Smith apples and toasted walnuts for sweetness and crunch. This pairs wonderfully with whole grain bread.
- Spicy Kick: Add diced jalapeños, a dash of hot sauce, or a teaspoon of prepared horseradish for those who like heat.
Presentation Tips
Beautiful presentation elevates even simple dishes. For an elegant appetizer, hollow out tomatoes and stuff them with tuna salad. Create a stunning platter by serving the salad in endive leaves or on cucumber rounds. For sandwiches, cut them diagonally and arrange on a plate with a small salad or pickle spear. A sprinkle of fresh herbs like dill, parsley, or chives adds color and freshness to the finished dish.
Make-Ahead Options
This easy tuna salad is perfect for meal prep. Make a batch on Sunday and portion it into individual containers for grab-and-go lunches throughout the week. Store in airtight containers with tight-fitting lids. The flavors often improve after a day in the refrigerator. For best results, add any crunchy ingredients like nuts or fresh herbs just before serving to maintain their texture.
If you’re looking for more make-ahead meal ideas, check out our pasta salad recipe which pairs wonderfully with tuna salad for a complete picnic spread.
How to Store Tuna Salad: Best Practices
Proper storage ensures your tuna salad stays fresh and safe to eat. Follow these guidelines to maximize shelf life while maintaining quality.
Refrigeration Guidelines
Transfer your tuna salad to an airtight container with a secure lid. Glass containers work best as they don’t absorb odors and clean easily, though plastic containers with tight seals work well too. Press a piece of plastic wrap directly against the surface of the salad before sealing to minimize air exposure, which can cause the mayonnaise to separate and the surface to discolor. Store in the coldest part of your refrigerator, typically the back of a middle shelf, rather than the door where temperature fluctuates.
Properly stored homemade tuna salad remains fresh for 3 to 4 days. Mark the container with the date it was made so you know when to use it by. For food safety, never leave tuna salad at room temperature for more than 2 hours, or 1 hour if the ambient temperature exceeds 90°F.
Freezing Considerations
Freezing tuna salad is generally not recommended. The mayonnaise separates when frozen and thawed, creating an unappetizing texture. Celery and other crisp vegetables become limp and watery. If you must freeze it, use within 2 months and expect some texture changes. Thaw overnight in the refrigerator and stir well before serving. You may need to add fresh mayonnaise to restore creaminess.
Meal Prep Strategies
For efficient meal prep, prepare the tuna salad base (tuna, mayonnaise, and seasonings) and store it separately from the crunchy vegetables. Mix in the celery, onion, and relish just before serving. This approach prevents the vegetables from becoming soggy and keeps everything fresh longer. You can also portion the salad into individual serving containers for quick weekday lunches.
FAQs: Frequently Asked Questions About Tuna Salad
What can I use instead of mayo in tuna salad?
If you’re avoiding mayo for health reasons or taste, try plain Greek yogurt for creaminess with added protein, or whipped silken tofu for a vegan option that mimics mayo’s texture. For a lighter dressing, mix 2 tablespoons olive oil, juice of 1 lemon, 1 teaspoon Dijon mustard, 1 tablespoon chopped fresh dill or parsley, salt, and pepper. Start with drained canned tuna (about 5 oz), fold in 2-3 tablespoons of your chosen base, and add crunch with diced celery, onion, or pickles. This keeps the salad moist without heaviness. Yogurt version: 1/2 cup yogurt per 12 oz tuna. Oil dressing: Whisk and drizzle gradually. Taste and adjust acidity with more lemon. These swaps cut calories by 50-70% while boosting flavor—perfect for sandwiches or lettuce wraps. Store in fridge up to 3 days.
Can I use oil-packed tuna for tuna salad?
Yes, oil-packed tuna works well in tuna salad and often tastes richer due to the infused flavors from quality olive oil. Opt for brands like Ortiz or Wild Planet for premium taste. Use about 1-2 cans (5 oz each) for 4 servings. Reduce mayo or dressing by half—say 2 tablespoons instead of 1/4 cup—since the tuna adds moisture and fat. Drain first if you want less oiliness (see draining tip below), but a light rinse preserves flavor. Mix with celery, red onion, capers, and lemon for balance. This version shines in Niçoise-inspired salads. Pro tip: Room temperature tuna blends better. Nutrition bonus: Oil-packed retains more omega-3s than water-packed. Prep time: 5 minutes. Pairs great with crackers or greens—total calories around 250 per serving.
How do I drain oil from canned tuna for tuna salad?
Draining oil-packed tuna properly prevents a greasy salad. Open the can, transfer tuna to a fine-mesh sieve or colander over a bowl. Rinse under cold running water for 20-30 seconds while stirring gently with a fork to remove excess oil without breaking flakes too much. Press firmly with a spatula or spoon for 1 minute to squeeze out remaining liquid—aim for tuna that’s moist but not dripping. Pat dry lightly with paper towels if needed. This method takes 2 minutes total and works for 1-2 cans. For best results, use high-quality tuna where oil enhances flavor. Avoid over-rinsing to keep omega-3s intact. Now mix into salad with yogurt or vinaigrette. Links to full recipe in our easy tuna salad post.
How long does tuna salad last in the fridge?
Homemade tuna salad stays fresh in the fridge for 3-5 days when stored properly in an airtight container. Mayo-based versions last up to 5 days; yogurt or oil-dressed ones might go 3-4 days due to acidity. Always keep below 40°F (4°C). Signs it’s bad: off smell, slimy texture, or mold—discard immediately. For safety, don’t leave out over 2 hours (1 hour if above 90°F). Freezing works for up to 2 months: portion into freezer bags, thaw overnight in fridge, but texture may soften. Tip: Add fresh lemon juice daily to extend freshness. Per USDA guidelines, mayo’s acidity helps preserve, but consume promptly. Ideal for meal prep—make Sunday for weekday lunches. Check our storage tips for other salads.
What are the best add-ins for tuna salad?
Classic tuna salad starts with 12 oz drained tuna, 1/4 cup mayo (or alternative), salt, and pepper. Amp it up with 1/2 cup diced celery for crunch, 1/4 cup finely chopped red onion or green onions for bite, sweet pickles or relish (2 tbsp) for tang, and hard-boiled eggs (2 chopped) for protein. Fresh herbs like dill (1 tbsp) or parsley elevate taste. For variety, add avocado for creaminess, chopped apples or grapes for sweetness, or jalapeños for heat. Greek-style: feta and olives. Mix gently to keep tuna flaky. Serves 4; 220 calories per serving with standard mayo. Adjust ratios to taste—start light on add-ins. Great on toast, in wraps, or stuffed tomatoes. See our variations post for 10 more ideas.
Tuna Salad
- Total Time: 5 minutes
- Yield: 6 servings
- Diet: Low-Carb, Gluten-Free
Description
🐟 Whip up a high-protein classic tuna salad in just 5 minutes, creamy and packed with fresh crunch for satisfying lunches.
🥪 Versatile for sandwiches, wraps, or salads, it’s a simple, delicious staple that’s healthier and tastier than store-bought!
Ingredients
– 4 cans (5-ounce) tuna, drained
– 1 cup mayonnaise or less to taste
– 1/3 cup finely chopped celery (about 1 rib)
– 2 tablespoons minced onion (about 2 small slices)
– 2 tablespoons sweet pickle relish
– 1 tablespoon lemon juice
– 1 clove garlic, minced
– Salt and pepper to taste (½ teaspoon salt and ¼ teaspoon pepper recommended)
Instructions
1-Step 1: Drain the Tuna Properly Open all four cans of tuna and drain them thoroughly. For water-packed tuna, simply press the lid against the tuna while tilting the can to remove excess liquid. If you’re using oil-packed tuna and want to reduce the oiliness, rinse the tuna under cold running water for 20-30 seconds, then press firmly with a fork or spatula to extract remaining moisture. Proper draining prevents a soggy salad and allows the flavors to shine through without dilution. Transfer the drained tuna to a medium-sized mixing bowl.
2-Step 2: Prepare the Vegetables While the tuna drains, prepare your fresh ingredients. Wash one rib of celery and trim the ends. Finely chop the celery into small, even pieces about 1/8 to 1/4 inch in size. Uniform pieces ensure consistent texture and distribution throughout the salad. Peel and mince one clove of garlic using a sharp knife or garlic press. For the onion, remove 2 small slices and mince them finely. If using fresh pickle instead of relish, mince it to match the texture. These tuna salad ingredients should be prepped and ready before mixing begins.
3-Step 3: Combine All Ingredients In your medium bowl with the drained tuna, add the mayonnaise, finely chopped celery, minced onion, sweet pickle relish, lemon juice, and minced garlic. The order doesn’t matter much, but starting with the mayonnaise helps coat the tuna and prevents the other ingredients from clumping together. Use a fork or wooden spoon to begin mixing. Break up any large chunks of tuna while folding all ingredients together. The goal is a relatively uniform mixture where every bite contains a bit of everything, but the tuna should still retain some texture rather than becoming completely smooth.
4-Step 4: Season to Taste Add the recommended ½ teaspoon of salt and ¼ teaspoon of black pepper to start. Stir well to incorporate the seasonings throughout the salad. Now comes the important part: taste your creation. Use a clean spoon to sample the creamy tuna salad and assess the flavor balance. You might want more salt, additional pepper, or even a splash more lemon juice. Remember that flavors will meld and intensify if you refrigerate the salad before serving. Add seasonings gradually, as it’s much easier to add more than to correct an over-seasoned dish.
5-Step 5: Serve or Chill Your tuna salad is now ready to enjoy! You can serve it immediately at room temperature, or cover the bowl and refrigerate it for 30 minutes to allow flavors to develop further. Chilled tuna salad often tastes even better because the ingredients have time to marry. When serving, consider the presentation. For sandwiches, toast your bread lightly and add crisp lettuce or juicy tomato slices. For appetizers, serve with crackers or cucumber rounds. The versatility of this dish means you can adapt it to any occasion or craving.
Notes
❄️ Store leftovers covered in the refrigerator for up to 4 days.
🍎 Mix in chopped Granny Smith apples or thawed peas for extra crunch and flavor.
🧀 For tuna melts, top with cheese and tomatoes on grilled buttered bread.
- Prep Time: 5 minutes
- Cook Time: 0 minutes
- Category: Salad
- Method: No Cook
- Cuisine: American
Nutrition
- Serving Size: 1/2 cup
- Calories: 345
- Sugar: 2g
- Sodium: 516mg
- Fat: 29g
- Saturated Fat: 5g
- Unsaturated Fat: 23g
- Trans Fat: 1g
- Carbohydrates: 3g
- Fiber: 1g
- Protein: 19g
- Cholesterol: 50mg
Keywords: tuna salad recipe, simple tuna salad, classic tuna salad, delicious tuna salad