Introduction to Tiramisu Cheesecake
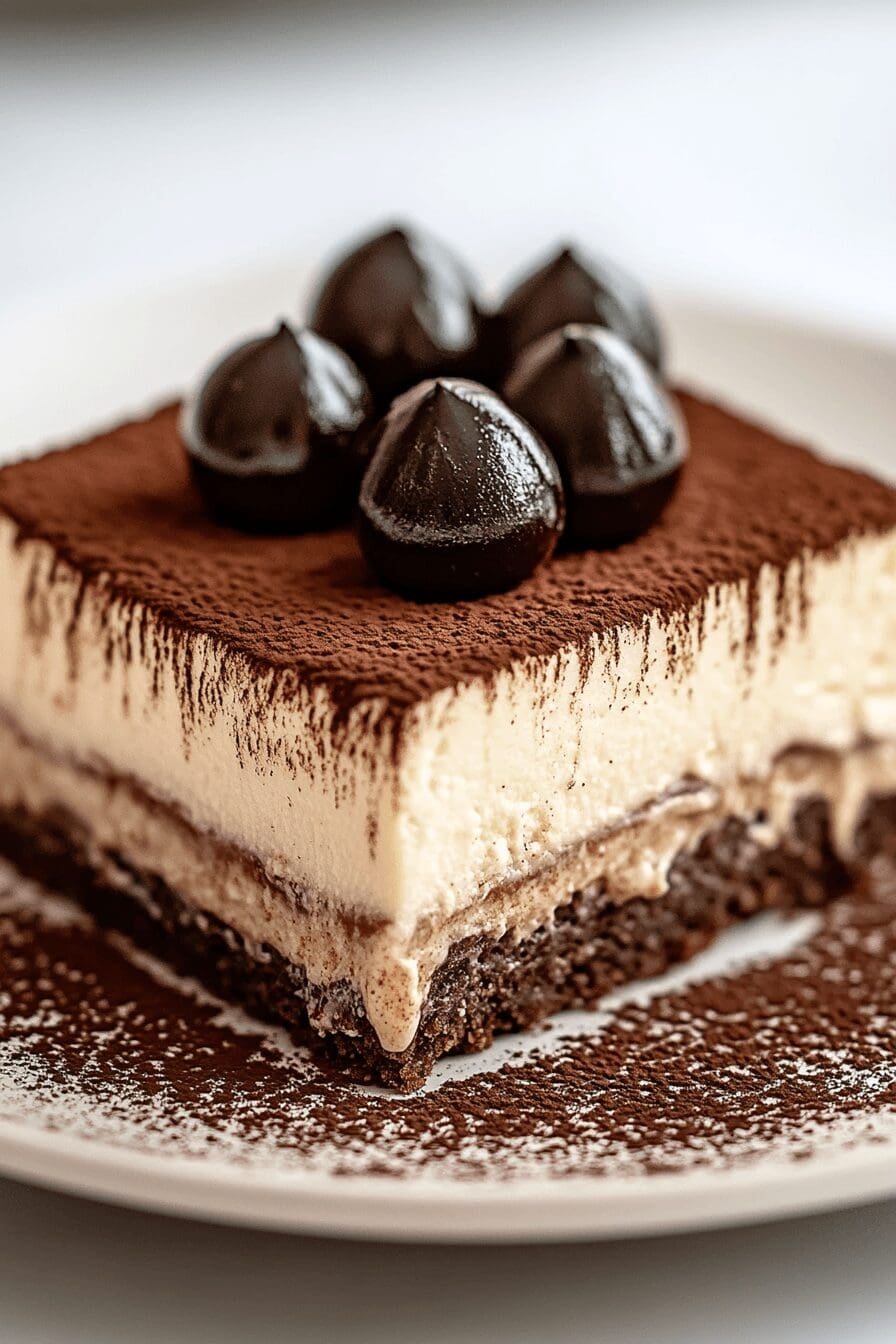
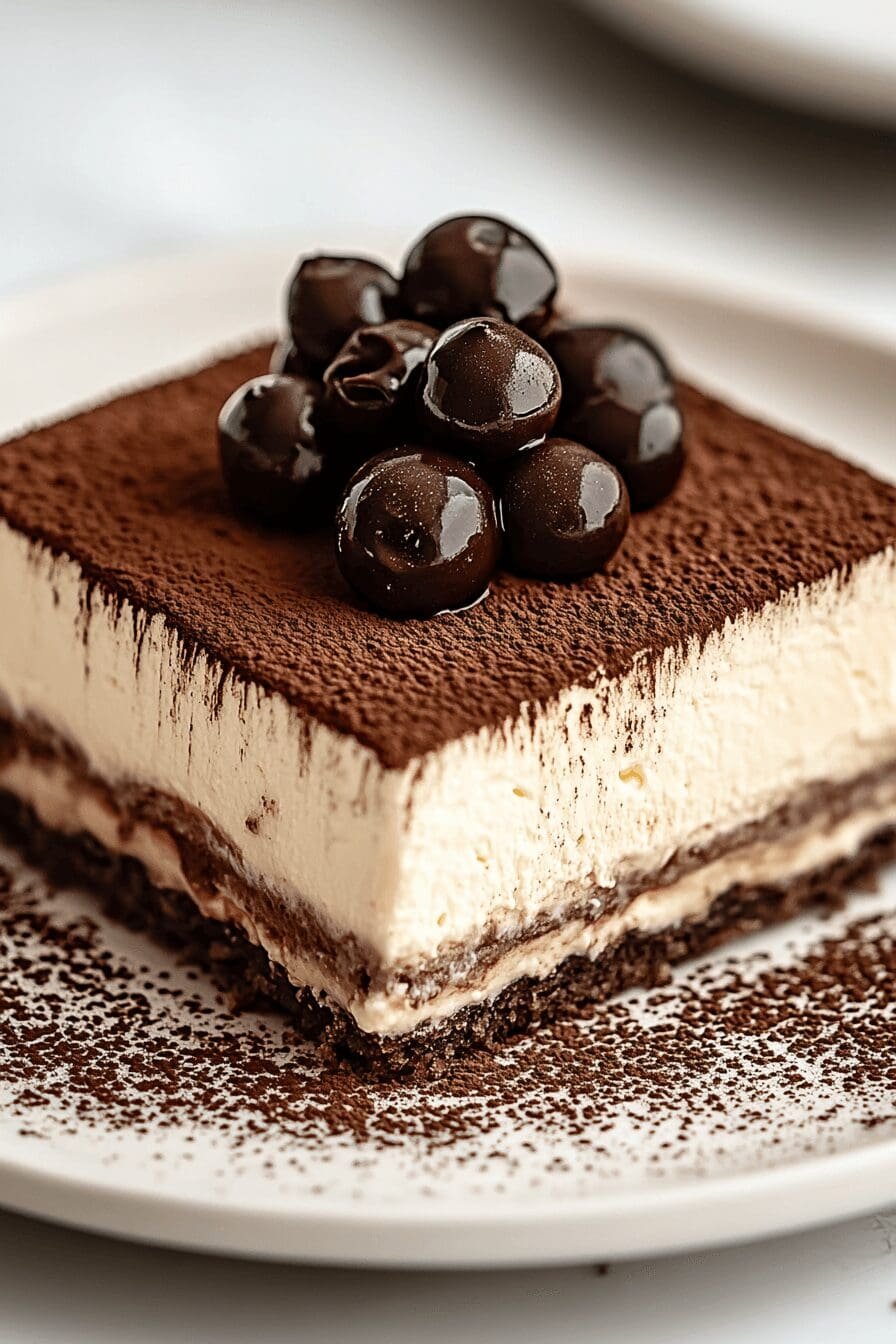
If you’re as obsessed with the creamy richness of tiramisu as I am, you’ll love this decadent Tiramisu Cheesecake with Coffee Swirls, which combines the best of both worlds. The silky mascarpone, rich espresso, and a buttery crust make this dessert a perfect choice for home cooks, busy parents, and food enthusiasts alike. Imagine savoring a sinful slice of cake that features the luxurious taste of mascarpone and the boldness of espresso, all encased in a luscious cheesecake. This delightful recipe is so simple and accessible, you’ll find yourself returning to it for every special occasion.
Jump To
- 1. Introduction to Tiramisu Cheesecake
- 2. Benefits and Advantages of Tiramisu Cheesecake
- 3. Ingredients Overview
- 4. How to Prepare the Perfect Tiramisu Cheesecake: Step-by-Step Guide
- 5. Mastering Tiramisu Cheesecake: Advanced Tips and Variations
- 6. How to Store Tiramisu Cheesecake: Best Practices
- 7. Nutritional Value of Tiramisu Cheesecake
- 8. FAQs: Frequently Asked Questions About Tiramisu Cheesecake
- 9. Tiramisu Cheesecake with Coffee Swirls
Benefits and Advantages of Tiramisu Cheesecake
Tiramisu Cheesecake stands out as a unique twist on traditional desserts, offering both the soothing flavors of a classic tiramisu and the creamy satisfaction of a cheesecake. One of its primary benefits is its ease of preparation, making it ideal for students and busy professionals seeking a show-stopping dessert. This no-bake cheesecake can be crafted quickly, offering convenience without compromising taste. Moreover, it allows flexibility for dietary needs with options for vegan and gluten-free adaptations, ensuring everyone can indulge. The harmonious blend of creamy textures and rich coffee infusion makes this dessert a memorable experience around any table.

Ingredients Overview
Essential Ingredients for Tiramisu Cheesecake
- Mascarpone Cheese – 1 cup. Known for its creamy texture, mascarpone provides authentic Italian flavor.
- Cream Cheese – 1 cup. Adds richness and stability to the filling.
- Heavy Cream – 1 cup. Whipped to add lightness and volume.
- Sugar – 1 cup. Enhances the sweetness and balances the tang of the cheeses.
- Coffee or Espresso – 1/2 cup. Imparts the classic tiramisu taste.
- Kahlua Liqueur (optional) – 1/4 cup. Adds a depth of flavor and a subtle kick.
- Ladyfingers – 24 pieces. Absorb the coffee mixture and provide structure to the cheesecake.
- Chocolate Cookie or Graham Cracker Crust – pre-baked and cooled. Offers a crunchy contrast to the creamy filling.
- Cocoa Powder – for dusting. Provides a bitter, chocolaty finish on top.
For our health-conscious and diet-sensitive readers, consider these substitutions:
- Vegan Cream Cheese and Cashew Cream as alternatives for the cheeses.
- Date Sugar or Coconut Sugar to replace the regular sugar if you’re looking for low-glycemic options.
- Gluten-Free Ladyfingers or cake slices instead of the traditional ladyfingers for those avoiding gluten.
Dietary Substitutions to Customize Your Tiramisu Cheesecake
Here are some ways to adapt the traditional tiramisu cheesecake for various dietary preferences and ingredient availabilities:
- Vegan Alternatives: Use vegan mascarpone and cream cheese options available in stores, and substitute almond milk for heavy cream.
- Gluten-Free Option: Opt for gluten-free cookies or ladyfingers available in many supermarkets, ensuring everyone can enjoy this delightful dessert.
- Low-Calorie Version: Replace sugar with a substitute like erythritol or stevia, and use low-fat cream cheese to cut down on calories.
With these ingredients and options at your fingertips, you’re all set to create a customized tiramisu cheesecake that’s perfect for your taste and dietary needs!
How to Prepare the Perfect Tiramisu Cheesecake: Step-by-Step Guide
Creating a luscious tiramisu cheesecake is simpler than you might think. Follow these steps to make a dessert that will impress even the most discerning palates:
- First Step: Make the Base
Use a combination of crushed cookies (chocolate or graham crackers work well) mixed with melted butter to form a firm crust in a springform pan. Press this mixture evenly into the bottom of the pan and bake it at 350°F for 10 minutes, then let it cool.
- Second Step: Prepare the Coffee Layer
Brew a strong cup of coffee or espresso, then mix in Kahlua liqueur if you’re using it. Dip each ladyfinger quickly into this liquid and arrange them in a single layer over the crust.
- Third Step: Whip the Cream
In a large bowl, whip the heavy cream until stiff peaks form. This will make your cheesecake filling light and airy.
- Fourth Step: Mix the Cheeses
In another bowl, blend mascarpone cheese, cream cheese, and sugar until smooth. Ensure there are no lumps, as this mixture forms the heart of your cheesecake’s creamy texture.
- Fifth Step: Combine and Layer the Filling
Fold the whipped cream gently into the cheese mixture to maintain its volume. Pour half of this mixture over the coffee-soaked ladyfingers in the pan, spreading evenly.
- Sixth Step: Repeat Layers
Add another layer of coffee-dipped ladyfingers over the cheese mixture. Pour the remaining cheese filling on top, smoothing out the surface with a spatula.
- Seventh Step: Chill the Cheesecake
Cover the pan with plastic wrap and refrigerate for at least four hours or overnight. This chilling time allows the flavors to meld and the cheesecake to set firmly.
Once set, your tiramisu cheesecake is ready to serve. Remove the sides of the springform pan, dust the top of the cheesecake with cocoa powder, and add chocolate shavings or ladyfingers as a garnish if desired. Enjoy with a cup of your favorite coffee for the full tiramisu experience!
If you’re fascinated by dessert recipes, feel free to visit my Black Forest Cheesecake Delight recipe, which brings another classic cake into the world of cheesecakes for another round of delight.
Mastering Tiramisu Cheesecake: Advanced Tips and Variations
Creating the perfect tiramisu cheesecake with coffee swirls involves not just understanding the basics but also mastering advanced techniques and variations that can take your dessert to the next level. Let’s delve into some expert tips for enhancing your tiramisu cheesecake experience.
Achieving the Ideal Texture and Flavor Balance
A successful tiramisu cheesecake relies heavily on the balance between creamy mascarpone, the tang of cream cheese, and the rich notes of espresso. Here’s how to perfect these elements:
- Opt for Fresh Ingredients: Using freshly brewed espresso and high-quality mascarpone ensures a rich, vibrant flavor that stands out.
- Temper the Egg Mixture: If your recipe includes eggs, gently temper them by slowly adding warm ingredients to avoid scrambling, ensuring a silky filling.
- Don’t Overmix: While ensuring all ingredients are well-blended, avoid overmixing to maintain a light and airy texture.
Creative Variations to Experiment With
For those who love to experiment, consider these exciting variations that add unique twists to your tiramisu cheesecake:
- Liqueur Alternatives: Substitute Kahlua with Baileys or Amaretto for different flavor profiles.
- Flavor Infusions: Add a hint of vanilla or almond extract to complement the coffee and chocolate notes.
- Layering Technique: Experiment with the traditional layering process by incorporating crumbled ladyfingers directly into the filling for added texture.
Additionally, engage with chocolate enthusiasts by introducing chocolate shavings or a dark chocolate ganache layer atop your cheesecake. These not only enhance visual appeal but also deepen the flavor contrast.
Taking your skills further, why not try a cinnamon roll cheesecake for a spiced twist on traditional desserts? Explore pairing ideas and tweak these to personalize your dessert creations.
How to Store Tiramisu Cheesecake: Best Practices
Proper storage of your tiramisu cheesecake ensures it maintains its delightful flavor and texture. Whether preparing in advance for a special occasion or saving leftovers, here are the best storage techniques to keep in mind:
Refrigeration for Optimal Freshness
Tiramisu cheesecake should be refrigerated due to its dairy content:
- Wrap Appropriately: Cover the cheesecake with plastic wrap or aluminum foil to prevent it from absorbing odors from other foods in the fridge.
- Use an Airtight Container: For added protection, store your wrapped cheesecake in an airtight container to maintain moisture and freshness.
Freezing Tips for Prolonged Shelf Life
If you need to store your cheesecake for an extended period, freezing is a viable option:
- Pre-Freeze Slices: Cut the cheesecake into slices, and initially place on a baking sheet to freeze individually. Once solid, wrap each slice in plastic wrap and place it in a freezer-safe bag.
- Label and Date: Always label the freezer bag with the date of freezing so you can track freshness.
When you’re ready to enjoy your frozen cheesecake, do so by allowing it to thaw in the refrigerator overnight. This slow thawing process will help maintain the dessert’s creamy texture.
For other delightful dessert ideas, check out our recipe for white chocolate raspberry cake, a perfect companion to tiramisu cheesecake at any gathering.
Understanding how to store your tiramisu cheesecake not only preserves its flavor but also ensures that each bite is just as delicious as the day it was made.
Learn more about the history of traditional tiramisu and its journey to becoming a beloved dessert. This can enhance your appreciation for the unique fusion of cheesecake flavors.
Nutritional Value of Tiramisu Cheesecake
Tiramisu cheesecake not only satisfies your sweet cravings, but it also provides a moderate nutritional profile that can fit into various dietary plans when consumed mindfully. Understanding the nutritional aspects can assist both diet-conscious individuals and those who simply enjoy indulging mindfully.
Caloric Content and Macronutrients
- Calories: A standard serving of tiramisu cheesecake generally contains around 350-450 calories, primarily due to the high fat and sugar content.
- Fats: Expect about 25 grams of fat per slice, largely from the creamy mascarpone and cream cheese. Opting for a lower-fat version using reduced-fat ingredients can be a wise alterative.
- Carbohydrates: The dessert typically has about 40-50 grams of carbs, attributed to sugar and ladyfingers.
- Protein: Each serving supplies approximately 5-7 grams of protein, mainly from cheese components.
Vitamins and Minerals
- Calcium and Vitamin D: The rich cheese content provides a small amount of calcium and vitamin D, beneficial for bone health.
- Iron: While not abundant, the inclusion of cocoa powder can add a touch of iron to your diet.
Potential Dietary Adjustments
Diet-conscious consumers can consider making some simple swaps:
- Vegan Options: Replace mascarpone and cream cheese with dairy-free alternatives to cater to a vegan diet, as outlined in our Gingerbread Cheesecake Dip post.
- Low-Sugar Variants: Opt for natural sugar substitutes like stevia or erythritol to reduce sugar content.
FAQs: Frequently Asked Questions About Tiramisu Cheesecake
Can I make tiramisu cheesecake ahead of time?
Yes, making tiramisu cheesecake ahead of time is actually beneficial, as the flavors meld beautifully. Prepare it a day before serving and refrigerate overnight to enhance taste and texture.
Can I make this tiramisu cheesecake without a biscuit layer?
Absolutely! If you prefer a lighter version or have dietary restrictions, you can skip the biscuit layer. Simply create the creamy filling and allow it to set in a dessert dish or individual cups.
Can I store tiramisu cheesecake in the freezer?
Yes, tiramisu cheesecake can be stored in the freezer for up to a month. Ensure it’s wrapped tightly in plastic wrap or aluminum foil to maintain quality. For detailed storage methods, refer to our guide on the history and mystery of tiramisu.
Can I make mini tiramisu cheesecakes using this recipe?
Creating mini tiramisu cheesecakes is a delightful way to serve individual portions. Use muffin tins lined with cupcake liners for easy removal and adjust the setting time accordingly.
For a twist, you can also explore our Cheesecake Crescent Rolls Casserole for another variation.
Print
Tiramisu Cheesecake with Coffee Swirls
- Total Time: 30 minutes
Description
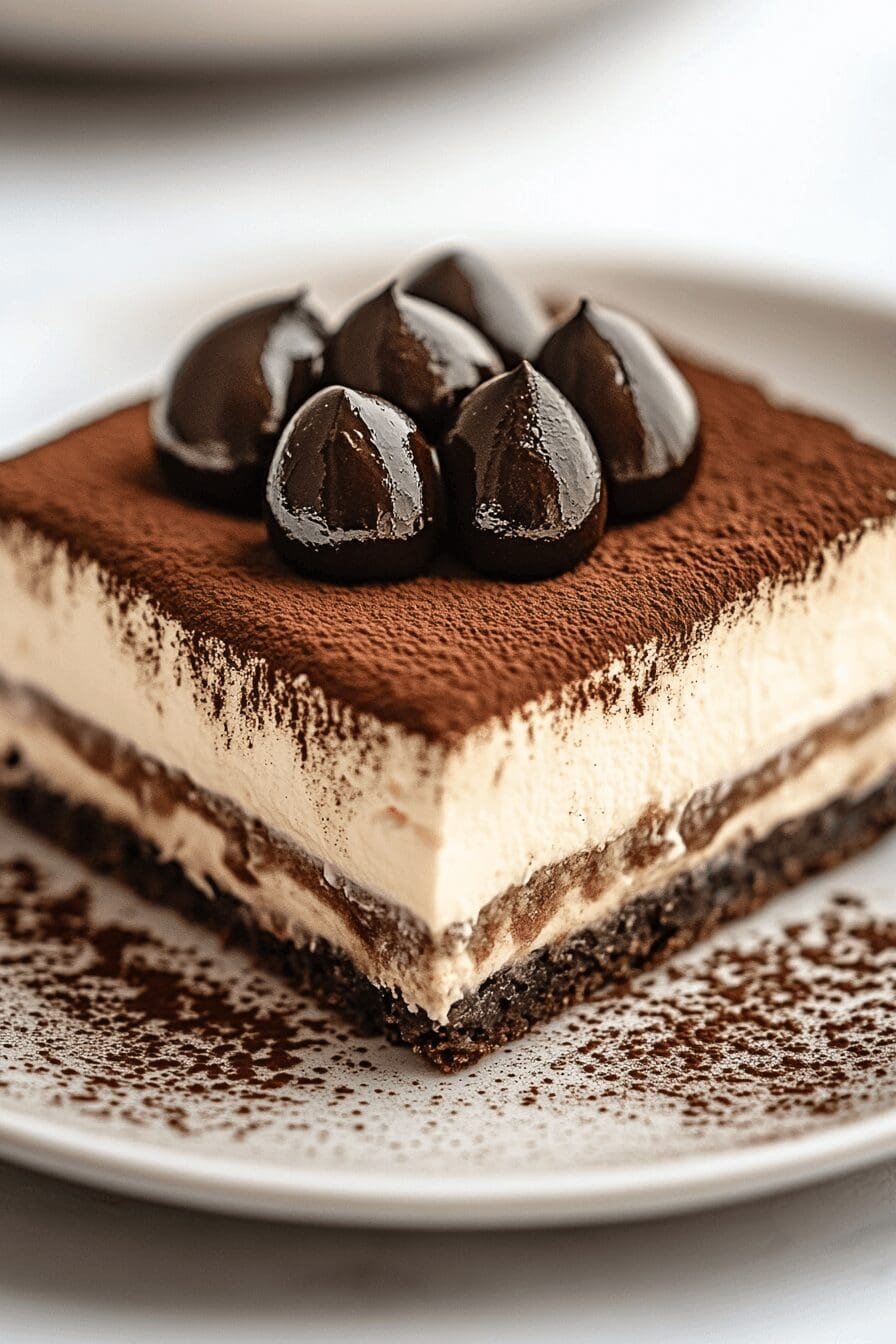
🍰 Indulge in the rich, velvety fusion of tiramisu and cheesecake, combining creamy mascarpone, coffee-soaked ladyfingers, and a luscious no-bake filling for the ultimate dessert experience! ☕✨
🎂 Perfect for any occasion, this irresistible treat delivers the bold flavors of espresso, Kahlua, and cocoa with a delectably smooth texture—no baking required! 🍫🥄
Ingredients
Chocolate cookies or graham crackers (for crust)
Unsalted butter (melted, for crust)
Cream cheese (softened)
Mascarpone cheese
Granulated sugar
Heavy cream
Vanilla extract
Instant espresso powder or strong brewed coffee
Kahlua liqueur (optional)
Ladyfingers
Unflavored gelatin (optional, for stability)
Whipped cream (for topping)
Cocoa powder (for dusting)
Chocolate shavings (optional, for garnish)
Instructions
1. Prepare the crust by crushing chocolate cookies or graham crackers and mixing with melted butter.
2. Press the crust mixture into the bottom of a springform pan and bake for a few minutes if desired, then let it cool.
3. Brew strong coffee or espresso and mix it with Kahlua liqueur if using.
4. Dip ladyfingers briefly into the coffee mixture and set them aside.
5. In a large bowl, beat cream cheese, mascarpone cheese, and sugar until smooth and creamy.
6. Whip heavy cream separately until stiff peaks form, then gently fold it into the cheese mixture.
7. If using gelatin, dissolve it in hot water and mix it into the filling to help set.
8. Spread a layer of the cheesecake filling over the crust.
9. Arrange a layer of coffee-soaked ladyfingers over the filling.
10. Repeat layering with more cheesecake filling and another layer of soaked ladyfingers if desired.
11. Finish by spreading the remaining cheesecake filling on top.
12. Cover and refrigerate for several hours or overnight to allow the cheesecake to set.
13. Before serving, top with whipped cream and dust with cocoa powder.
14. Optionally, garnish with chocolate shavings or additional ladyfingers for decoration.
15. Carefully remove the cheesecake from the springform pan and slice to serve.
Notes
Let the cheesecake chill overnight to achieve the perfect creamy texture and firm consistency.
Soak the ladyfingers briefly in coffee or Kahlua to prevent them from becoming too soggy while still absorbing the rich flavor.
Use a springform pan for easy removal and a professional-looking presentation.
- Prep Time: 30
- Category: Dessert
- Method: No Bake
- Cuisine: Italy
1 thought on “Tiramisu Cheesecake with Coffee Swirls”