Why You’ll Love This Tiramisu
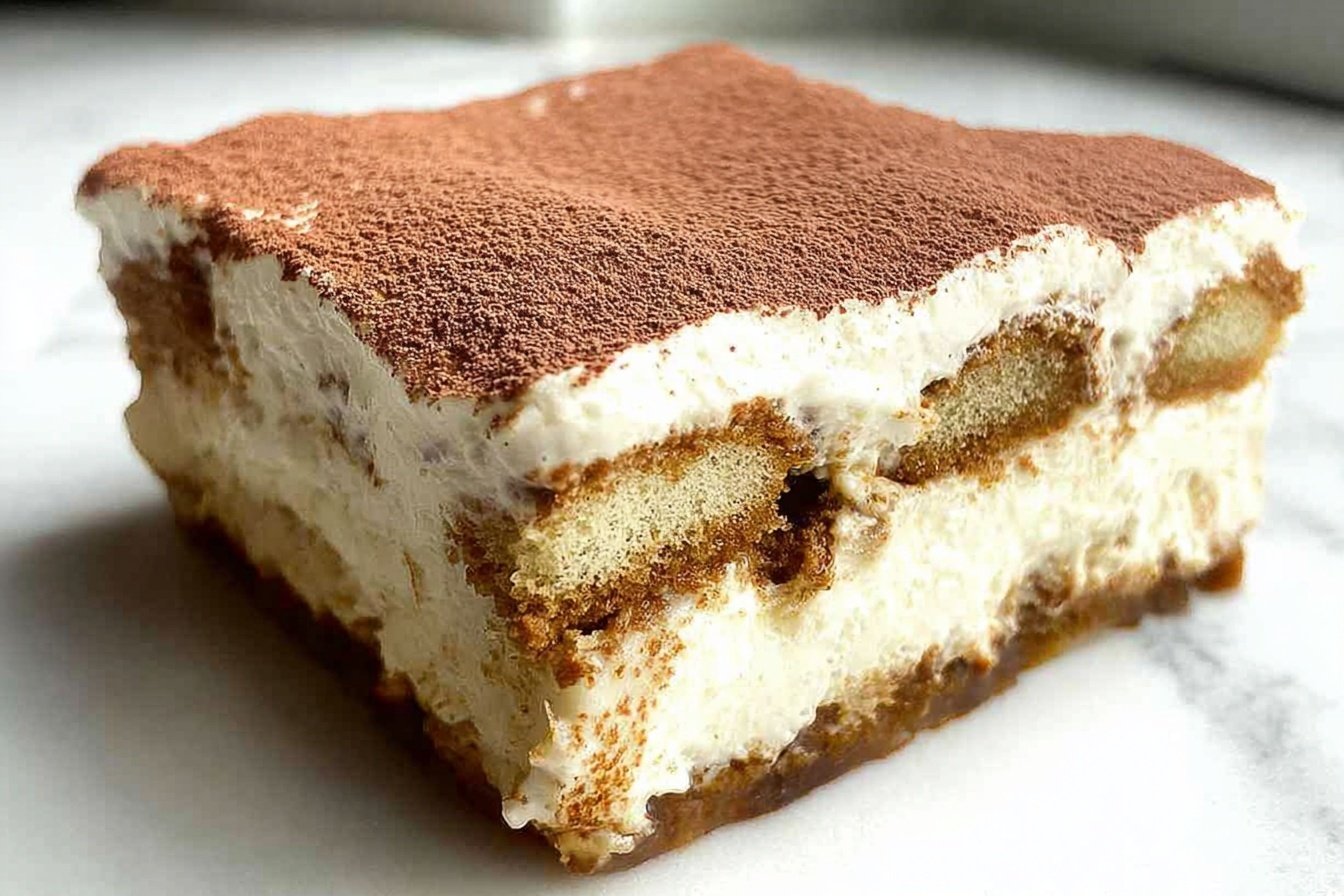
There’s something truly magical about a well-made tiramisu. This classic Italian dessert brings together the boldness of coffee, the richness of mascarpone cheese, and the delicate sweetness of ladyfingers in layers that melt in your mouth. Whether you’re a seasoned baker or just starting out in the kitchen, this recipe offers a foolproof path to dessert success.
Here’s why this tiramisu deserves a spot in your recipe collection:
- Ease of preparation: This recipe comes together in just 10 minutes of active prep time. There’s no baking required, no complicated techniques, and no special equipment beyond an electric mixer. The chilling time does all the work for you, making it perfect for busy weeknights or when you need a make-ahead dessert for entertaining.
- Safe and egg-free: Traditional tiramisu often calls for raw eggs, which can be a concern for many home cooks. This version uses whipped heavy cream instead, giving you that same luscious, airy texture without any food safety worries. It’s a win for families, pregnant women, and anyone who prefers to skip raw eggs.
- Incredible versatility: Whether you want to keep it classic with espresso or use regular coffee, add a splash of liqueur or keep it alcohol-free, this tiramisu adapts to your preferences. You can even make it with decaf for a family-friendly treat that everyone can enjoy after dinner.
- Make-ahead convenience: Tiramisu actually tastes better the longer it sits in the refrigerator. The flavors meld together beautifully, and the dessert becomes even more tender. This makes it an ideal choice for dinner parties, holidays, or any occasion where you want to get dessert done early and focus on other preparations.
Jump To
- 1. Why You’ll Love This Tiramisu
- 2. Essential Ingredients for Tiramisu
- 3. How to Prepare the Perfect Tiramisu: Step-by-Step Guide
- 4. Dietary Substitutions to Customize Your Tiramisu
- 5. Mastering Tiramisu: Advanced Tips and Variations
- 6. How to Store Tiramisu: Best Practices
- 7. Nutritional Information
- 8. FAQs: Frequently Asked Questions About Tiramisu
- 9. Tiramisu
Essential Ingredients for Tiramisu
The beauty of tiramisu lies in its simplicity. With just a handful of quality ingredients, you can create a dessert that rivals any Italian restaurant. Here’s everything you’ll need:
Main Ingredients List
- 1 1/2 cups espresso or strong coffee forms the soaking liquid for ladyfingers and provides that signature coffee flavor throughout the dessert
- 8 ounces mascarpone cheese at room temperature the star ingredient that creates the creamy, rich filling
- 1/3 cup granulated sugar adds just the right amount of sweetness to the mascarpone mixture
- 1 teaspoon vanilla extract or imitation vanilla enhances the overall flavor profile with warm, aromatic notes
- 1 1/2 cups heavy whipping cream whips up light and fluffy to create the airy texture without using raw eggs
- 3 tablespoons coffee-flavored liqueur (optional) deepens the coffee flavor and adds complexity to the soaking liquid
- 1 package ladyfingers (about 7 ounces or 24 cookies) the structural layers that soak up all that delicious coffee
- Cocoa powder for dusting the finishing touch that adds a bittersweet contrast to the creamy layers
Special Dietary Options
For those with dietary restrictions, tiramisu can still be on the menu:
- Gluten-free: Look for gluten-free ladyfingers at specialty stores, or substitute with gluten-free vanilla cake sliced thin.
- Lower sugar: Use a sugar substitute that measures 1:1 in the mascarpone mixture, and choose sugar-free cocoa powder for dusting.
- Non-alcoholic: Simply omit the coffee liqueur and use plain espresso or strong coffee for dipping the ladyfingers.
How to Prepare the Perfect Tiramisu: Step-by-Step Guide
Making tiramisu is like building a delicious puzzle, one layer at a time. Follow these detailed steps to create a dessert that looks stunning and tastes even better.
Step 1: Whip the Cream to Stiff Peaks
Start by pouring the heavy whipping cream into a large mixing bowl. Using an electric mixer on medium speed, begin beating the cream. As it starts to thicken slightly, gradually add the granulated sugar and vanilla extract in a steady stream. Continue beating until stiff peaks form, which typically takes about 3 to 4 minutes. You’ll know you’ve reached the right consistency when the cream holds its shape firmly when you lift the beaters. Be careful not to overbeat, as the cream can quickly turn grainy and separate into butter.
This step is crucial because the whipped cream replaces traditional egg whites in this recipe. It creates that light, airy texture that makes tiramisu so appealing. The cream needs to be firm enough to hold its shape when folded with the mascarpone cheese, but still soft enough to spread smoothly over the ladyfingers.
Step 2: Fold in the Mascarpone Cheese
Once your whipped cream reaches stiff peaks, it’s time to add the mascarpone cheese. Make sure your mascarpone is at room temperature, as cold cheese will create lumps and won’t incorporate smoothly. Add the mascarpone to the whipped cream and use a rubber spatula to gently fold it in.
Folding is a technique where you cut through the center of the mixture, scrape along the bottom of the bowl, and flip the mixture over itself. Rotate the bowl a quarter turn after each fold. Continue this motion until the mascarpone is completely combined and the mixture is uniform in color and texture. This usually takes about 8 to 10 folds. Work gently to preserve the air bubbles you created when whipping the cream.
Step 3: Prepare the Coffee Mixture
In a shallow bowl, combine the espresso or strong coffee with the coffee-flavored liqueur if you’re using it. The shallow bowl makes it easy to dip the ladyfingers quickly and evenly. If you brewed your coffee hot, let it cool to room temperature before dipping, as hot liquid can cause the ladyfingers to disintegrate.
According to research from Johns Hopkins Medicine, coffee contains antioxidants and may offer various health benefits when consumed in moderation. Using it as the primary flavoring in tiramisu gives you both taste and a small nutritional boost.
Step 4: Dip and Layer the Ladyfingers
This is where technique matters most. Take each ladyfinger and quickly dip it into the coffee mixture, turning it once to coat both sides. The key word here is quickly. You want the ladyfinger to absorb some liquid but not become soaked through. A dip of about 1 to 2 seconds per side is perfect. If the ladyfingers get too wet, your tiramisu will turn mushy rather than tender.
Arrange the dipped ladyfingers in a single layer in an 8×8 inch pan or a similar-sized dish. Place them close together but not overlapping. You may need to break some ladyfingers in half to fit them into the corners and create a complete layer.
Step 5: Add the First Layer of Mascarpone Cream
Scoop half of your mascarpone mixture over the layer of ladyfingers. Use an offset spatula or the back of a spoon to spread it evenly to the edges of the pan. Work gently so you don’t disturb the ladyfingers underneath. The cream layer should be about 1/4 to 1/2 inch thick, completely covering the coffee-soaked cookies.
Step 6: Build the Second Layer
Repeat the dipping process with the remaining ladyfingers and arrange them in a second layer over the mascarpone cream. This time, try to position the ladyfingers perpendicular to the first layer. This crosshatch pattern helps the tiramisu hold together better when sliced and ensures every bite has a good distribution of textures.
Once your second layer of ladyfingers is complete, spread the remaining mascarpone mixture over the top. Again, work carefully to spread it evenly across the entire surface.
Step 7: Chill and Set
Cover the pan with plastic wrap and place it in the refrigerator. Tiramisu needs at least 3 to 4 hours to set properly, but overnight is even better. During this time, the flavors will meld together, and the ladyfingers will soften to that perfect tender consistency. The mascarpone cream will firm up, making the dessert easier to slice and serve.
Step 8: Dust with Cocoa and Serve
Just before serving, remove the tiramisu from the refrigerator. Place cocoa powder in a fine mesh strainer and tap it gently to create an even dusting across the entire surface. The cocoa powder adds a bittersweet finish that contrasts beautifully with the sweet, creamy layers below.
For cleanest slices, run a sharp knife under hot water, wipe it dry, and cut through the tiramisu in one smooth motion. Repeat between each slice for picture-perfect servings.

Dietary Substitutions to Customize Your Tiramisu
One of the best things about tiramisu is how easily it adapts to different dietary needs and ingredient availability. Here are some thoughtful substitutions to consider:
Protein and Main Component Alternatives
If you want to experiment with the main filling, there are several options. Some home cooks substitute part of the mascarpone with ricotta cheese for a lighter version. Simply blend the ricotta until completely smooth before folding it with the whipped cream. You can also use a combination of cream cheese and sour cream as a mascarpone substitute, though the flavor profile will be slightly different.
For a protein boost, consider adding a layer of chopped nuts between the ladyfinger layers. Toasted hazelnuts or almonds complement the coffee flavor beautifully and add a pleasant crunch. According to nutrition experts at Verywell Fit, mascarpone provides calcium and vitamin A, making it more than just empty calories in your dessert.
Variations for Different Preferences
The soaking liquid offers plenty of room for creativity. While espresso is traditional, you can experiment with different flavor profiles. Try adding a cinnamon stick to your coffee as it cools for a warm spice note. A drop or two of almond extract in the coffee mixture creates an interesting marzipan-like undertone.
For those avoiding caffeine entirely, decaf espresso works perfectly well. You can even use chocolate milk as a dipping liquid for a mocha-style tiramisu that kids will love. Just skip the cocoa powder dusting or replace it with shaved chocolate.
If you’re looking for more no-bake dessert inspiration, check out this no-bake chocolate eclair cake for another crowd-pleasing option that’s just as easy to prepare.
Mastering Tiramisu: Advanced Tips and Variations
Once you’ve mastered the basic technique, it’s time to get creative. Here are some pro tips and variations to take your tiramisu to the next level.
Pro Techniques for Perfect Results
Temperature matters more than you might think. Both the mascarpone cheese and the heavy cream should be at refrigerator temperature when you start. However, let the mascarpone sit at room temperature for about 30 minutes before using it. This softens it just enough to fold smoothly without creating lumps.
The quality of your ingredients shows in the final product. Use the best mascarpone you can find, ideally imported from Italy. Fresh espresso from a coffee shop will give you better flavor than instant coffee. And real vanilla extract makes a noticeable difference compared to imitation.
Creative Flavor Variations
While coffee is the star of traditional tiramisu, you can create exciting variations by changing the soaking liquid:
- Chocolate tiramisu: Add melted chocolate to the mascarpone mixture and use chocolate milk for dipping the ladyfingers.
- Fruit tiramisu: Skip the coffee entirely and use fruit juice or liqueur. Berry juices work beautifully, topped with fresh fruit between the layers.
- Nutella tiramisu: Swirl Nutella into the mascarpone mixture and use hazelnut-flavored coffee for dipping.
Presentation Ideas
Tiramisu is naturally beautiful, but a few extra touches can make it stunning. Consider serving individual portions in clear glass cups or mason jars. This showcases the beautiful layers and makes for an elegant presentation at dinner parties.
For a rustic approach, serve tiramisu family-style in a large ceramic dish. Dust generously with cocoa powder and add chocolate shavings or a few whole coffee beans as garnish. If you enjoy Italian desserts, you might also love this classic Italian cannoli recipe for another taste of Italy.
Make-Ahead Strategies
Tiramisu is the ultimate make-ahead dessert. You can prepare it up to 3 days before serving, and it will only get better as it sits. The flavors continue to develop and meld together, creating a more cohesive taste experience.
If you’re planning to serve tiramisu at a party, consider making two batches. Serve one and freeze the other for later. This way, you can enjoy the party without any last-minute dessert prep stress.
How to Store Tiramisu: Best Practices
Proper storage ensures your tiramisu stays fresh and delicious for as long as possible. Here’s everything you need to know.
Refrigeration Guidelines
Store tiramisu in the refrigerator, covered tightly with plastic wrap. The plastic should touch the surface of the mascarpone cream to prevent a skin from forming. Properly stored, tiramisu will stay fresh for 3 to 4 days in the refrigerator.
Keep tiramisu away from strong-smelling foods in the refrigerator, as it can absorb odors. The coffee and mascarpone flavors are delicate and can be overwhelmed by onions, garlic, or other pungent foods stored nearby.
Freezing for Long-Term Storage
Tiramisu freezes surprisingly well for up to 3 months. Prepare the dessert completely, but skip the final cocoa powder dusting. Wrap the entire dish tightly in plastic wrap, then cover with aluminum foil for extra protection against freezer burn.
For individual portions, slice the tiramisu and wrap each piece separately. This allows you to thaw only what you need. Thaw overnight in the refrigerator, then dust with cocoa powder just before serving. Never microwave tiramisu to thaw it, as this will cause the mascarpone cream to separate and become runny.
Meal Prep Considerations
If you’re planning to make tiramisu for meal prep or a special occasion, timing is key. Make the mascarpone mixture and dip the ladyfingers a day ahead. The assembled tiramisu actually improves after 24 hours in the refrigerator, as the flavors have time to blend together.
Nutritional Information
Understanding the nutritional content of your homemade tiramisu helps you make informed choices about portion sizes and dietary planning. Here’s the approximate nutritional breakdown per serving:
| Nutrient | Amount per Serving |
|---|---|
| Calories | 297 |
| Carbohydrates | 26 grams |
| Protein | 5 grams |
| Fat | 18 grams |
| Saturated Fat | 11 grams |
| Polyunsaturated Fat | 1 gram |
| Monounsaturated Fat | 2 grams |
| Cholesterol | 88 milligrams |
| Sodium | 77 milligrams |
| Potassium | 124 milligrams |
| Fiber | 1 gram |
| Sugar | 11 grams |
| Vitamin A | 618 IU |
| Vitamin C | 1 milligram |
| Calcium | 90 milligrams |
| Iron | 1 milligram |

FAQs: Frequently Asked Questions About Tiramisu
Can I make tiramisu without raw eggs?
Yes, you can make a safe and delicious tiramisu without raw eggs. Traditional recipes often use uncooked egg yolks, which carry a salmonella risk, but this version skips them entirely. Instead, mix mascarpone cheese with freshly whipped heavy cream, sugar, and vanilla for a light, creamy filling that holds its shape perfectly. Dip ladyfingers in strong coffee or espresso, layer them with the mascarpone mixture in a 9×13-inch dish, and chill for at least 4 hours. This no-cook method takes about 20 minutes to prep and tastes just as rich. It’s ideal for beginners or anyone avoiding raw eggs, with no compromise on the classic coffee, cocoa, and mascarpone flavors. Dust with cocoa powder before serving 12 people. (98 words)
Does tiramisu always have alcohol in it?
No, tiramisu doesn’t always contain alcohol—it’s flexible for all preferences. Many recipes add coffee liqueur like Kahlúa, rum, brandy, or Marsala to the coffee dip for deeper flavor, but you can easily skip it. Use plain strong brewed coffee or espresso mixed with a bit of vanilla extract for an alcohol-free version that still delivers authentic taste. Brew 2 cups of coffee, let it cool slightly, and dip ladyfingers quickly to avoid sogginess. This keeps the dessert family-friendly and just as moist. For kids’ parties or non-drinkers, the coffee alone provides plenty of boldness. Store in the fridge up to 3 days. (102 words)
What can I use instead of espresso in tiramisu?
You can substitute regular strong brewed coffee or even decaf for espresso in tiramisu without losing the signature taste. Brew 2 cups of dark roast coffee, cool it to room temperature, and add optional sugar or liqueur for sweetness. Strong coffee mimics espresso’s intensity best—avoid weak brews to prevent bland layers. Dip 36-40 ladyfingers briefly (1-2 seconds per side) into the coffee mixture before layering with mascarpone cream. This tweak works for home kitchens without fancy machines. The result stays firm and flavorful after 4+ hours of chilling. Pro tip: Taste the coffee dip first and adjust strength as needed for perfect balance. (98 words)
How far ahead can I make tiramisu?
Make tiramisu up to 2-3 days in advance for the best flavor—the resting time lets coffee and mascarpone meld beautifully. Assemble in a glass dish: layer coffee-dipped ladyfingers with whipped mascarpone cream, cover tightly with plastic wrap, and refrigerate. Flavors intensify by day 2, making it ideal for parties. Avoid making it more than 3 days ahead to prevent sogginess. For same-day serving, chill at least 4-6 hours. It serves 12 generously. If prepping early, skip the final cocoa dusting until serving to keep it fresh. This no-bake dessert improves with time, saving you stress on event day. (96 words)
Can you freeze tiramisu and how?
Yes, tiramisu freezes well for up to 3 months, perfect for batch prepping. Assemble without the top cocoa powder layer, wrap the dish tightly in plastic wrap and foil, or slice into portions and freeze in airtight containers. Thaw overnight in the fridge (8-12 hours), then dust with unsweetened cocoa powder just before serving. This preserves the creamy texture—avoid refreezing. Expect slight softening compared to fresh, but flavors remain spot-on. Great for holidays: make two batches, freeze one. Each 9×13-inch pan serves 12. Label with dates for easy tracking. No microwave thawing to prevent melting. (92 words)

Tiramisu
- Total Time: 4 hours 10 minutes
- Yield: 9 servings
- Diet: Vegetarian
Description
☕ Luxurious easy tiramisu – no-bake, no raw eggs, coffee-kissed ladyfingers in creamy mascarpone whip, ready in 10 min active!
🍮 Make-ahead home cook dream: chills to silky perfection, wows guests with authentic Italian flair safely.
Ingredients
– 1 1/2 cups espresso or strong coffee for soaking ladyfingers
– 8 ounces mascarpone cheese at room temperature for creamy, rich filling
– 1/3 cup granulated sugar for sweetness
– 1 teaspoon vanilla extract or imitation vanilla for flavor
– 1 1/2 cups heavy whipping cream for airy texture
– 3 tablespoons coffee-flavored liqueur (optional) for coffee flavor
– 1 package ladyfingers (about 7 ounces or 24 cookies) for layers
– Cocoa powder for dusting
Instructions
1-Step 1: Whip the Cream to Stiff Peaks Start by pouring the heavy whipping cream into a large mixing bowl. Using an electric mixer on medium speed, begin beating the cream. As it starts to thicken slightly, gradually add the granulated sugar and vanilla extract in a steady stream. Continue beating until stiff peaks form, which typically takes about 3 to 4 minutes. You’ll know you’ve reached the right consistency when the cream holds its shape firmly when you lift the beaters. Be careful not to overbeat, as the cream can quickly turn grainy and separate into butter.
2-Step 2: Fold in the Mascarpone Cheese Once your whipped cream reaches stiff peaks, it’s time to add the mascarpone cheese. Make sure your mascarpone is at room temperature, as cold cheese will create lumps and won’t incorporate smoothly. Add the mascarpone to the whipped cream and use a rubber spatula to gently fold it in. Folding is a technique where you cut through the center of the mixture, scrape along the bottom of the bowl, and flip the mixture over itself. Rotate the bowl a quarter turn after each fold. Continue this motion until the mascarpone is completely combined and the mixture is uniform in color and texture. This usually takes about 8 to 10 folds. Work gently to preserve the air bubbles you created when whipping the cream.
3-Step 3: Prepare the Coffee Mixture In a shallow bowl, combine the espresso or strong coffee with the coffee-flavored liqueur if you’re using it. The shallow bowl makes it easy to dip the ladyfingers quickly and evenly. If you brewed your coffee hot, let it cool to room temperature before dipping, as hot liquid can cause the ladyfingers to disintegrate.
4-Step 4: Dip and Layer the Ladyfingers This is where technique matters most. Take each ladyfinger and quickly dip it into the coffee mixture, turning it once to coat both sides. The key word here is quickly. You want the ladyfinger to absorb some liquid but not become soaked through. A dip of about 1 to 2 seconds per side is perfect. If the ladyfingers get too wet, your tiramisu will turn mushy rather than tender. Arrange the dipped ladyfingers in a single layer in an 8×8 inch pan or a similar-sized dish. Place them close together but not overlapping. You may need to break some ladyfingers in half to fit them into the corners and create a complete layer.
5-Step 5: Add the First Layer of Mascarpone Cream Scoop half of your mascarpone mixture over the layer of ladyfingers. Use an offset spatula or the back of a spoon to spread it evenly to the edges of the pan. Work gently so you don’t disturb the ladyfingers underneath. The cream layer should be about 1/4 to 1/2 inch thick, completely covering the coffee-soaked cookies.
6-Step 6: Build the Second Layer Repeat the dipping process with the remaining ladyfingers and arrange them in a second layer over the mascarpone cream. This time, try to position the ladyfingers perpendicular to the first layer. This crosshatch pattern helps the tiramisu hold together better when sliced and ensures every bite has a good distribution of textures. Once your second layer of ladyfingers is complete, spread the remaining mascarpone mixture over the top. Again, work carefully to spread it evenly across the entire surface.
7-Step 7: Chill and Set Cover the pan with plastic wrap and place it in the refrigerator. Tiramisu needs at least 3 to 4 hours to set properly, but overnight is even better. During this time, the flavors will meld together, and the ladyfingers will soften to that perfect tender consistency. The mascarpone cream will firm up, making the dessert easier to slice and serve.
8-Step 8: Dust with Cocoa and Serve Just before serving, remove the tiramisu from the refrigerator. Place cocoa powder in a fine mesh strainer and tap it gently to create an even dusting across the entire surface. The cocoa powder adds a bittersweet finish that contrasts beautifully with the sweet, creamy layers below. For cleanest slices, run a sharp knife under hot water, wipe it dry, and cut through the tiramisu in one smooth motion. Repeat between each slice for picture-perfect servings.
Notes
🥚 Skip raw eggs entirely – whipped cream delivers safe, dreamy creaminess.
⚡ Quick-dip ladyfingers (1-2 seconds per side) to avoid sogginess.
❄️ Best after overnight chill: flavors meld for tiramisu perfection.
- Prep Time: 10 minutes
- Chill time: 4 hours
- Category: Desserts
- Method: No-Bake
- Cuisine: Italian
Nutrition
- Serving Size: 1 square
- Calories: 297 kcal
- Sugar: 11 g
- Sodium: 77 mg
- Fat: 18 g
- Saturated Fat: 11 g
- Unsaturated Fat: 7 g
- Trans Fat: 0 g
- Carbohydrates: 26 g
- Fiber: 1 g
- Protein: 5 g
- Cholesterol: 88 mg
Keywords: easy tiramisu recipe, quick tiramisu, no bake tiramisu, homemade tiramisu