Why You'll Love This Thumbprint Cookies
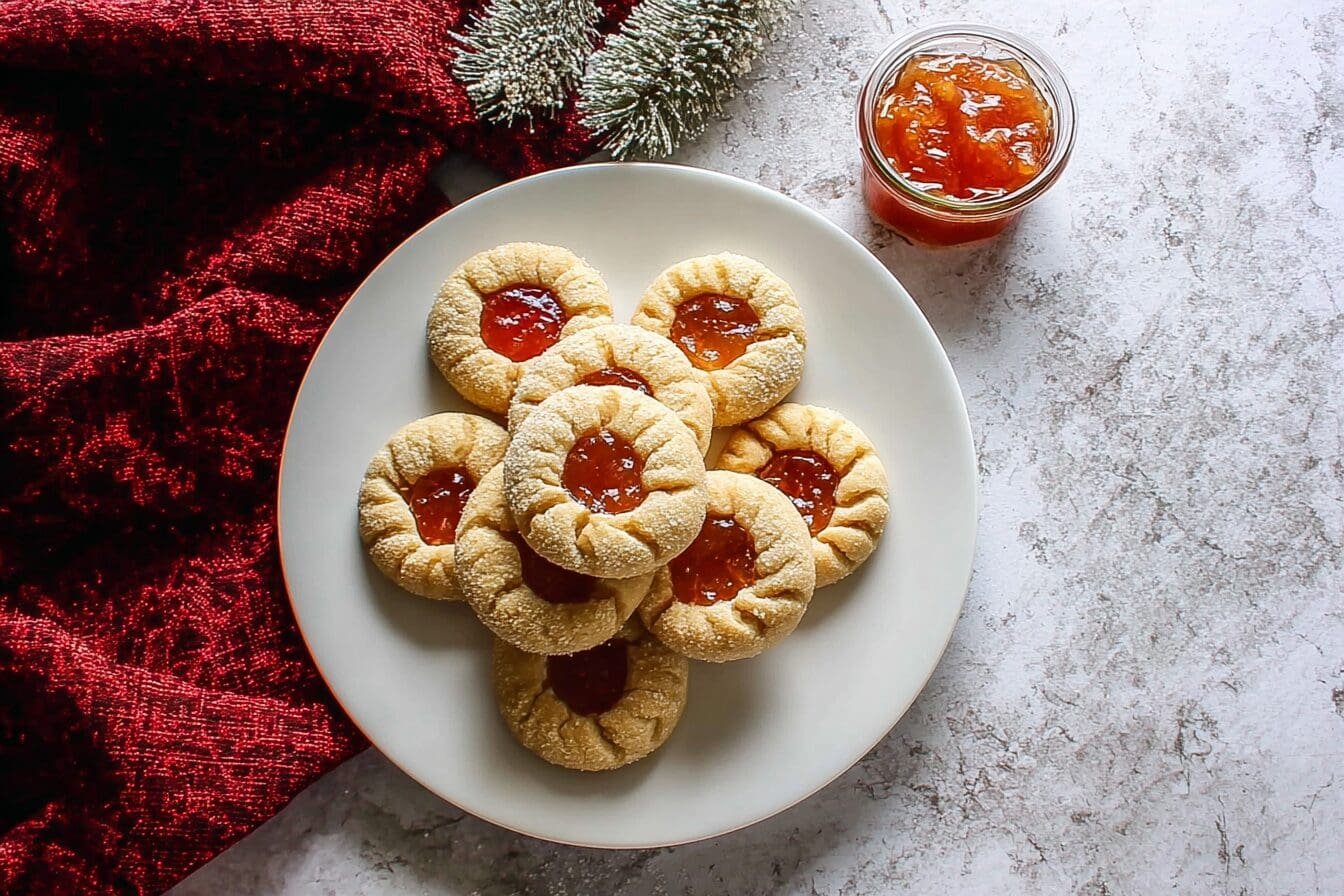
Thumbprint cookies bring joy to any kitchen with their simple charm and delightful taste. These easy thumbprint cookies come together quickly, perfect for busy days. Home cooks and baking enthusiasts alike appreciate how they turn basic pantry items into festive treats.
- Ease of preparation: Whip up this thumbprint cookie recipe in under 30 minutes of active time. With no fancy equipment needed, just mix, roll, and bake. Ideal for busy parents, students, or working professionals who want quick wins in the kitchen.
- Health benefits: Made with real butter and minimal sugar, these cookies offer a touch of indulgence without excess. Fill with fresh fruit jams for natural sweetness and fiber. Raspberries in jam add antioxidants; check out the health benefits of raspberries for more on their perks.
- Versatility: Adapt this classic thumbprint cookies recipe for any diet. Go gluten-free or vegan with swaps. Travelers and newlyweds can tweak fillings to match global flavors, while seniors enjoy the soft texture.
- Distinctive flavor: The buttery shortbread pairs perfectly with tart jam, creating a balance that stands out. Customizable fillings make each batch unique, turning ordinary baking into memorable moments around the table, just like on Recipes Isabella.
This recipe fits my passion for simple, accessible cooking that inspires joy. Yields 36 cookies, ready in about 45 minutes total.
Jump To
- 1. Why You'll Love This Thumbprint Cookies
- 2. Essential Ingredients for Thumbprint Cookies
- 3. How to Prepare the Perfect Thumbprint Cookies: Step-by-Step Guide
- 4. Dietary Substitutions to Customize Your Thumbprint Cookies
- 5. Mastering Thumbprint Cookies: Advanced Tips and Variations
- 6. How to Store Thumbprint Cookies: Best Practices
- 7. FAQs: Frequently Asked Questions About Thumbprint Cookies
- 8. Thumbprint Cookies
Essential Ingredients for Thumbprint Cookies
Gather these items for your jam thumbprint cookies. Each plays a key role in texture and taste.
Main Ingredients:
- 1 cup softened butter – Provides richness and tender crumb.
- ½ cup sugar – Adds sweetness and helps with browning.
- 2 egg yolks – Bind the dough for structure without toughness.
- 1 tsp vanilla – Infuses warm, aromatic flavor.
- 2 cups flour – Forms the base for classic shortbread texture.
- ½ tsp salt – Balances sweetness and enhances taste.
- ½ cup granulated sugar (for rolling) – Creates a crisp, sweet coating.
- ½ cup jam (raspberry, strawberry, or apricot) – Fills the thumbprint for fruity contrast; about ⅓ tsp per cookie.
Special Dietary Options:
- Vegan: Swap butter for vegan butter or coconut oil; use 2 tbsp ground flaxseed mixed with 6 tbsp water for egg yolks.
- Gluten-free: Replace flour with 2 cups 1:1 gluten-free flour blend; add ½ tsp xanthan gum if not included.
- Low-calorie: Use ½ cup light butter or Greek yogurt; reduce sugar to ⅓ cup and opt for sugar-free jam.
These choices keep your easy jam filled thumbprint cookies recipe accessible for diet-conscious individuals.
How to Prepare the Perfect Thumbprint Cookies: Step-by-Step Guide
Follow this classic jam thumbprint cookie recipe for foolproof results. Preheat oven to 350°F early.
First Step: Prepare the dough
Beat 1 cup softened butter and ½ cup sugar until fluffy, about 2 minutes. Add 2 egg yolks and 1 tsp vanilla, mix well. Stir in 2 cups flour and ½ tsp salt until a soft dough forms. Avoid overmixing to keep cookies tender.
Second Step: Chill the dough
Wrap dough in plastic and chill for 30 minutes. This prevents spreading and makes rolling easier. Room-temperature ingredients from the start ensure smooth blending.
Third Step: Shape the cookies
Preheat oven to 350°F. Line baking sheets with parchment. Roll dough into 1-inch balls (about 1-2 tbsp each). Roll balls in ½ cup granulated sugar. Place 2 inches apart on sheets.
Fourth Step: Create the thumbprints
Press thumb (or end of wooden spoon) into each ball center, making a ½-inch deep well. Rotate gently for even shape. For more detail on techniques, see this thumbprint cookies guide.
Fifth Step: Bake the cookies
Bake 10-12 minutes until edges turn golden. Centers stay pale; do not overbake. Cool on sheets 5 minutes, then transfer to racks.
Final Step: Fill and serve
Cool completely. Spoon ⅓ tsp jam into each indent. Let set 10 minutes. Enjoy warm or store. Perfect for holidays or tea time.
| Step | Time | Tips |
|---|---|---|
| Prep Dough | 10 min | Fluffy beat key |
| Chill | 30 min | Prevents spread |
| Bake | 10-12 min | 350°F golden edges |
This detailed guide ensures your simple thumbprint cookies with jam shine every time.

Dietary Substitutions to Customize Your Thumbprint Cookies
Protein and Main Component Alternatives
No main protein here, but egg yolks bind. Replace with aquafaba (3 tbsp) for vegan. Butter alternatives: almond butter for nutty twist or applesauce (½ cup) for moisture in low-fat versions. Flour swaps include almond flour (2 cups) for keto-friendly, lower-carb cookies.
Vegetable, Sauce, and Seasoning Modifications
No veggies, but add zest: 1 tsp lemon for brightness, link to my lemon oatmeal cookies for ideas. Jam variations: pumpkin puree (seasonal, spiced) or chocolate spread. Seasonings: cinnamon (½ tsp) or cardamom for warmth. Low-sugar: stevia jam. These tweaks suit food enthusiasts and travelers.
| Original | Substitution | Benefit |
|---|---|---|
| Butter | Vegan butter | Dairy-free |
| Egg yolks | Flax eggs | Vegan binding |
| Flour | GF blend | Gluten-free |
Customizing makes baking personal and inclusive for all.
Mastering Thumbprint Cookies: Advanced Tips and Variations
Take your holiday thumbprint cookies easy recipe further with these ideas.
Pro cooking techniques: Use a melon baller for uniform indents. Double-pan baking sheets prevent bottoms from over-browning. For extra crunch, roll in chopped pecans before indenting.
- Flavor variations: Lemon curd, Nutella, or salted caramel. Try rhubarb jam; see my rhubarb shortbread cookies for pairing inspo.
- Presentation tips: Dust with powdered sugar. Arrange on tiers for parties. Drizzle white chocolate for elegance.
- Make-ahead options: Freeze dough balls 1 month. Bake from frozen, add 1-2 min. Ideal for busy schedules.
Experiment to match your style.
How to Store Thumbprint Cookies: Best Practices
Keep your batch fresh with these methods.
Refrigeration: Airtight container up to 5 days at room temp; fridge 1 week. Layer parchment to avoid jam sticking.
Freezing: Up to 3 months unfilled or filled. Freeze solid on tray, then bag with parchment. Thaw 1 hour, fill if needed.
Reheating: Room temp best; oven 300°F 3 min revives crunch. Skip microwave.
Meal prep considerations: Bake weekends, freeze for week. Great for seniors or professionals.
FAQs: Frequently Asked Questions About Thumbprint Cookies
What are thumbprint cookies?
Thumbprint cookies are classic shortbread-style treats with a small indentation made by pressing your thumb (or a tool) into the dough before baking. This creates a well that’s filled with jam, chocolate, or icing after baking. Originating from Europe in the early 20th century, they’re popular for holidays due to their simple shape and customizable fillings. The dough is typically buttery and crumbly, often rolled in sugar or nuts for texture. Each cookie uses about 1-2 tablespoons of dough, bakes in 10-12 minutes at 350°F, and yields 2-3 dozen. They’re versatile for any occasion—try raspberry jam for tartness or lemon curd for brightness. Perfect for beginners, as no special tools are needed beyond a mixing bowl and baking sheet. (92 words)
How do you make thumbprint cookies from scratch?
Start with 1 cup softened butter, ½ cup sugar, 2 egg yolks, 1 tsp vanilla, 2 cups flour, and ½ tsp salt for the dough. Beat butter and sugar until fluffy (2 minutes), add yolks and vanilla, then mix in dry ingredients. Chill dough 30 minutes. Preheat oven to 350°F. Roll into 1-inch balls, roll in granulated sugar, place on parchment-lined sheets, and press thumb into centers (½-inch deep). Bake 10-12 minutes until edges are golden—don’t overbake. Cool, then fill with ⅓ tsp jam per cookie. For best results, use room-temperature ingredients and fill after cooling to prevent soggy centers. Store in airtight container up to 5 days. This recipe makes 36 cookies. (118 words)
What is the best jam to use in thumbprint cookies?
Raspberry or strawberry jam works best for thumbprint cookies due to their bright flavor and firm set that holds shape without leaking. Choose seedless varieties for smooth texture, or apricot for a milder taste. Avoid runny or low-sugar jams, as they make cookies soggy—opt for brands like Bonne Maman or homemade cooked-down preserves. For variety, try salted caramel, Nutella, or ganache, but chill fillings first. Use about ½ cup total for 36 cookies, spooning ½ tsp per indent post-baking. Pro tip: Microwave jam briefly to thin for easy filling, then let set. This keeps cookies fresh longer and adds visual appeal with contrasting colors. Experiment based on your filling preference. (112 words)
Can you freeze thumbprint cookies?
Yes, thumbprint cookies freeze well for up to 3 months. Bake and cool completely first, but skip filling to avoid mess—add jam after thawing. Place unfilled cookies in a single layer on a tray to freeze solid (2 hours), then transfer to freezer bags with parchment between layers. Thaw at room temperature 1 hour before filling. Filled cookies can freeze too: layer with parchment in bags, thaw in fridge overnight. This preserves the crisp texture better than refrigerating. Label bags with date for freshness. Great for holiday prep—bake now, freeze, and serve fresh. Avoid microwaving to prevent softening dough. Yields perfect cookies anytime. (98 words)
How do you store thumbprint cookies to keep them fresh?
Store thumbprint cookies in an airtight container at room temperature for up to 5 days. Layer with parchment paper to prevent sticking from jam. For longer storage (1 week), refrigerate in a sealed container—bring to room temp before serving to restore crispness. Filled with perishable fillings like cream cheese? Keep in fridge always. Avoid plastic wrap alone, as it traps moisture and softens the shortbread. In humid climates, add silica packets to the container. For gifting, use tins with dividers. Properly stored, they stay fresh without losing flavor or crunch. Check for mold if jam is homemade. (94 words)

Thumbprint Cookies
- Total Time: 1 hour
- Yield: 24 cookies
- Diet: Vegetarian
Description
🍪 Create classic thumbprint cookies with buttery, melt-in-your-mouth dough and sweet jam centers that are perfect for holiday baking and cookie exchanges
👍 Master these easy-to-make cookies that require no special equipment and can be customized with any jam flavor, making them ideal for beginner bakers and experienced cooks alike
Ingredients
– 1 cup softened butter Provides richness and tender crumb
– ½ cup sugar Adds sweetness and helps with browning
– 2 egg yolks Bind the dough for structure without toughness
– 1 tsp vanilla Infuses warm, aromatic flavor
– 2 cups flour Forms the base for classic shortbread texture
– ½ tsp salt Balances sweetness and enhances taste
– ½ cup granulated sugar Creates a crisp, sweet coating
– ½ cup jam Fills the thumbprint for fruity contrast
Instructions
1-First Step: Prepare the dough Beat 1 cup softened butter and ½ cup sugar until fluffy, about 2 minutes. Add 2 egg yolks and 1 tsp vanilla, mix well. Stir in 2 cups flour and ½ tsp salt until a soft dough forms. Avoid overmixing to keep cookies tender.
2-Second Step: Chill the dough Wrap dough in plastic and chill for 30 minutes. This prevents spreading and makes rolling easier. Room-temperature ingredients from the start ensure smooth blending.
3-Third Step: Shape the cookies Preheat oven to 350°F. Line baking sheets with parchment. Roll dough into 1-inch balls (about 1-2 tbsp each). Roll balls in ½ cup granulated sugar. Place 2 inches apart on sheets.
4-Fourth Step: Create the thumbprints Press thumb (or end of wooden spoon) into each ball center, making a ½-inch deep well. Rotate gently for even shape. For more detail on techniques, see this thumbprint cookies guide.
5-Fifth Step: Bake the cookies Bake 10-12 minutes until edges turn golden. Centers stay pale; do not overbake. Cool on sheets 5 minutes, then transfer to racks.
6-Final Step: Fill and serve Cool completely. Spoon ⅓ tsp jam into each indent. Let set 10 minutes. Enjoy warm or store. Perfect for holidays or tea time.
Notes
🍪 Chill the dough after shaping the indentations – this helps the cookies maintain their shape and prevents the jam from bubbling over during baking
👍 Use room temperature butter – this creates a smoother dough and helps the cookies hold their shape better while baking
🍯 Don’t overfill the thumbprints – jam expands during baking, so fill only halfway to prevent messy overflow
- Prep Time: 25 minutes
- Chilling time: 20 minutes
- Cook Time: 15 minutes
- Category: Dessert
- Method: Baking
- Cuisine: American
Nutrition
- Serving Size: 1 cookie
- Calories: 120
- Sugar: 8g
- Sodium: 95mg
- Fat: 6g
- Saturated Fat: 3.5g
- Unsaturated Fat: 2g
- Trans Fat: 0g
- Carbohydrates: 14g
- Fiber: 0g
- Protein: 1g
- Cholesterol: 20mg
Keywords: undefined