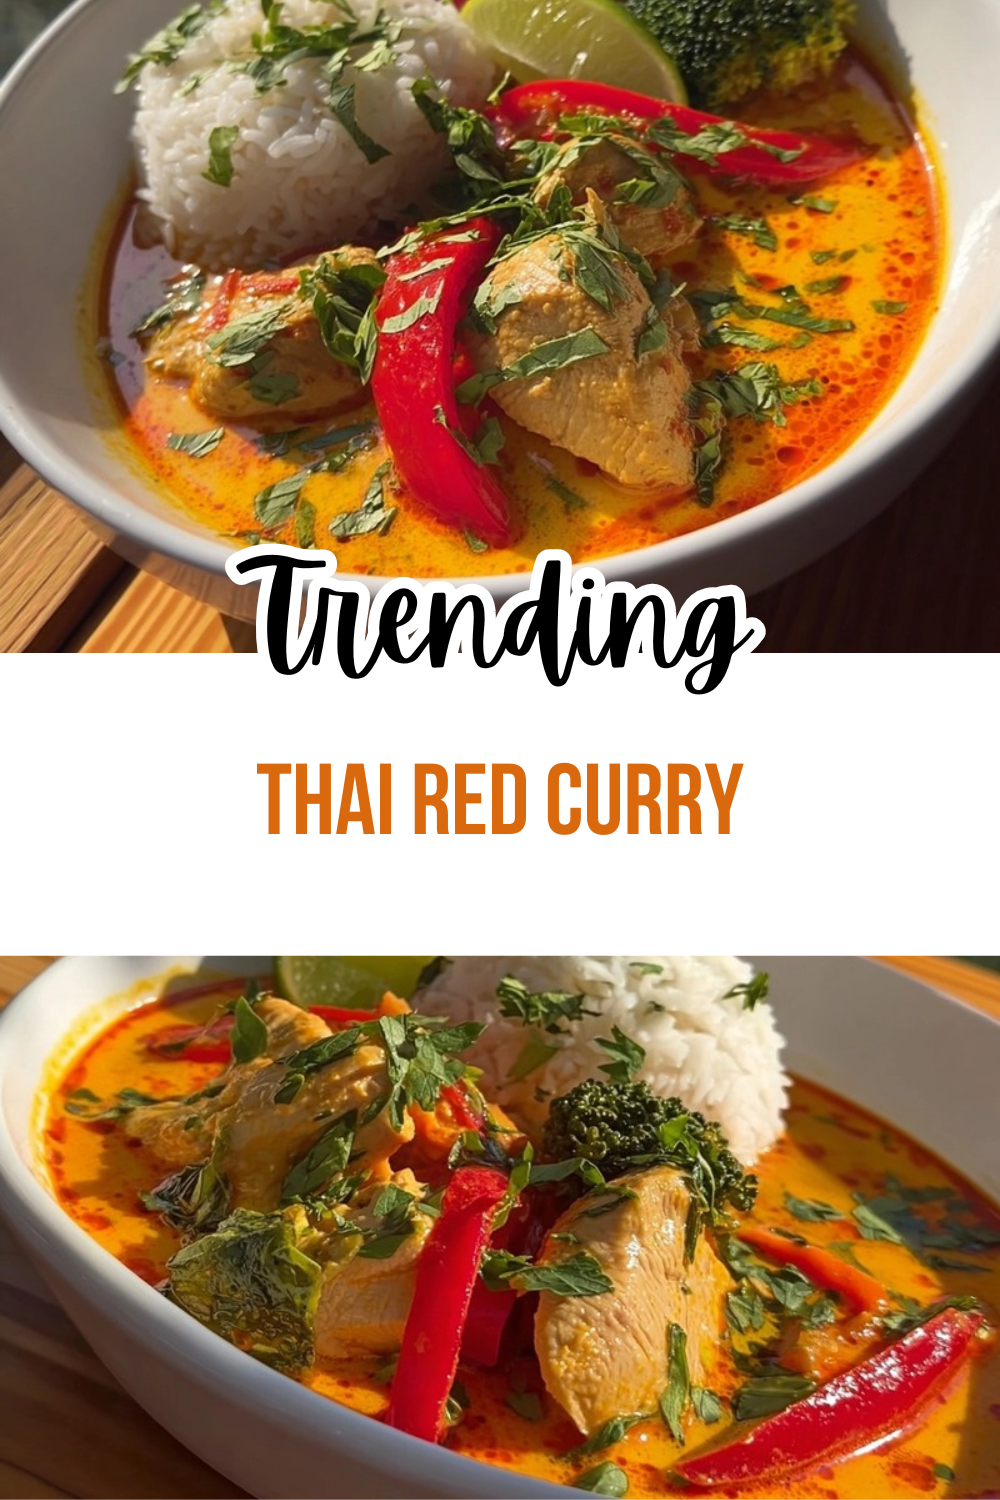
Why You’ll Love This Thai Red Curry
There’s something truly magical about a bowl of homemade Thai red curry that brings the vibrant flavors of Thailand right into your kitchen. Whether you’re a busy parent looking for a quick weeknight dinner or a food enthusiast eager to try something new, this recipe delivers on every front. The combination of creamy coconut milk, aromatic curry paste, and tender chicken creates a dish that’s both comforting and exciting.
This thai red curry with chicken has become a favorite in my household, and for good reason. It’s the kind of meal that makes everyone gather around the table eagerly, filling the air with incredible aromas that promise something delicious is coming. Let me share why this recipe deserves a permanent spot in your cooking rotation.
- Ease of preparation: With just 25 minutes from start to finish (5 minutes prep, 20 minutes cook time), this easy thai red curry recipe fits perfectly into busy schedules. The steps are straightforward, and you don’t need any special equipment beyond a large skillet. Even beginners can achieve restaurant-quality results on their first try.
- Health benefits: This curry offers a balanced meal with protein from chicken thighs, healthy fats from coconut milk, and vitamins from fresh vegetables. At approximately 530 calories per serving, it’s satisfying without being heavy. According to WebMD, chicken provides essential nutrients including protein, vitamins B6 and B12, and minerals like selenium.
- Versatility: This thai chicken curry adapts easily to different dietary needs and ingredient availability. You can swap proteins, adjust vegetables based on what’s in season, or make it vegetarian by using tofu. The recipe works for gluten-free diets when you use certified gluten-free fish sauce.
- Distinctive flavor: What makes an authentic thai red curry special is its layered flavor profile. The curry paste brings heat and aromatics, coconut milk adds richness, fish sauce contributes umami depth, and Thai basil finishes with a fresh, aniseed note. It’s a symphony of flavors that tastes like it came from a restaurant but was made in your own kitchen.
Jump To
- 1. Why You’ll Love This Thai Red Curry
- 2. Essential Ingredients for Thai Red Curry
- 3. How to Prepare the Perfect Thai Red Curry: Step-by-Step Guide
- 4. Dietary Substitutions to Customize Your Thai Red Curry
- 5. Mastering Thai Red Curry: Advanced Tips and Variations
- 6. How to Store Thai Red Curry: Best Practices
- 7. FAQs: Frequently Asked Questions About Thai Red Curry
- 8. Thai Red Curry
Essential Ingredients for Thai Red Curry
Creating a delicious thai red curry chicken recipe starts with gathering the right ingredients. Each component plays a vital role in building the complex flavor profile that makes this dish so satisfying. Here’s everything you’ll need, with precise measurements to ensure perfect results every time.
Main Ingredients
- 5 to 6 tablespoons Thai red curry paste (store bought) – The foundation of flavor, providing the signature red color and aromatic spice blend
- 2 large garlic cloves, minced (only when using jar curry paste) – Adds fresh aromatic depth when using pre-made paste
- 2 teaspoons fresh ginger, finely grated (only when using jar curry paste) – Brings warmth and brightness to the curry base
- 1 tablespoon lemongrass paste or finely chopped fresh lemongrass (only when using jar curry paste) – Infuses the dish with citrusy, floral notes
- 3 tablespoons vegetable oil (or canola or peanut oil) – The cooking medium that helps bloom the curry paste
- 1 cup (250 ml) low sodium chicken broth or stock – Creates a flavorful liquid base and helps dissolve the curry paste
- 400 ml (14 oz) full fat coconut milk – Essential for the creamy, rich texture and mild sweetness
- 6 kaffir lime leaves – Imparts an irreplaceable earthy citrus aroma
- 1 tablespoon sugar (white, brown, or palm) – Balances the flavors and brings out the curry’s natural sweetness
- 2 teaspoons fish sauce, plus more to taste – The umami powerhouse that adds savory depth
- 350 grams (12 oz) boneless and skinless chicken thighs, sliced about 0.75 cm thick – The star protein that stays juicy and tender
- 150 grams (5 oz) pumpkin or butternut squash, cut into 1.5 cm cubes (about 1 heaped cup) – Adds natural sweetness and absorbs the flavorful sauce
- 120 grams (4 oz) green beans, trimmed and cut into 5 cm pieces – Provides fresh crunch and color contrast
- 12 Thai basil leaves – The finishing touch that adds authentic Thai flavor
Optional Garnishes
- Fresh red chili slices – For those who love extra heat
- Fresh coriander/cilantro leaves – Adds a fresh, herbal finish
Special Dietary Options
For those with specific dietary needs, this coconut milk curry can be easily modified:
- Vegan: Replace chicken with firm tofu or chickpeas, swap fish sauce for soy sauce or vegan fish sauce alternative, and use vegetable broth instead of chicken stock.
- Gluten-free: Ensure your curry paste and fish sauce are certified gluten-free. Most traditional Thai curry pastes are naturally gluten-free.
- Low-calorie: Use light coconut milk and reduce the oil slightly. The sauce won’t be as rich but will still be delicious.
The quality of your thai curry paste makes a significant difference in the final result. Maesri and Mae Ploy are excellent brands that deliver authentic flavor without breaking the bank.
How to Prepare the Perfect Thai Red Curry: Step-by-Step Guide
Now that you have all your ingredients ready, let’s walk through the cooking process. This red curry recipe comes together quickly, so having everything prepared beforehand makes the cooking smooth and enjoyable. Trust me, once you smell the curry paste blooming in hot oil, you’ll understand why this dish is so addictive.
Step 1: Heat the Oil and Bloom the Curry Paste
Start by heating 3 tablespoons of vegetable oil in a large heavy-based skillet over medium-high heat. Once the oil shimmers, add 5 to 6 tablespoons of Thai red curry paste. If you’re using jar curry paste (which most home cooks do), also add 2 large minced garlic cloves, 2 teaspoons of finely grated fresh ginger, and 1 tablespoon of lemongrass paste or chopped fresh lemongrass.
Cook this mixture for about 2 minutes, stirring constantly. The goal is to “dry out” the paste slightly, which intensifies the flavors and releases the aromatic compounds. You’ll notice the paste becoming more fragrant and the color deepening. This technique, called “blooming,” is essential for developing the authentic taste that makes thai red curry with chicken so distinctive.
Step 2: Add Chicken Broth and Reduce
Pour in 1 cup (250 ml) of low sodium chicken broth or stock. Stir vigorously to dissolve the curry paste into the liquid, making sure no lumps remain. Bring the mixture to a rapid simmer and let it cook for about 3 minutes until the liquid reduces by half.
This reduction step concentrates the flavors and creates a concentrated curry base. The sauce will thicken slightly and take on a deeper, richer appearance. Don’t rush this step, as it’s crucial for building the layered flavor profile that characterizes an excellent authentic thai red curry.
Step 3: Build the Coconut Curry Base
Now it’s time to add the creamy element. Pour in 400 ml (14 oz) of full fat coconut milk, followed by 6 kaffir lime leaves, 1 tablespoon of sugar, and 2 teaspoons of fish sauce. Stir everything together until well combined.
The coconut milk transforms the concentrated curry paste into a luxuriously creamy sauce. The kaffir lime leaves infuse their distinctive citrusy aroma, while the sugar balances the savory and spicy notes. Fish sauce adds that essential umami kick that makes Thai food so irresistible. Taste your base at this point, it should be a harmonious blend of salty, sweet, and spicy.
Step 4: Cook the Chicken
Add 350 grams (12 oz) of sliced boneless, skinless chicken thighs to the pan. Spread the chicken pieces evenly so they cook uniformly, and bring everything to a gentle simmer. Reduce the heat to medium and cook for 8-10 minutes.
During this time, the sauce will reduce and thicken while the chicken cooks through completely. Chicken thighs are ideal for this thai chicken curry because they remain juicy and tender even after simmering. Unlike chicken breasts, which can dry out, thighs actually become more flavorful as they cook in the curry sauce.
According to Medical News Today, coconut milk contains healthy fats and offers various nutritional benefits when consumed in moderation.
Step 5: Season and Adjust
After the chicken has cooked through, taste your curry and adjust the seasoning. This is your chance to make the flavors exactly how you like them. Need more saltiness? Add extra fish sauce, a little at a time. Want more sweetness? Another pinch of sugar will do the trick.
The beauty of making thai red curry chicken recipe at home is that you control the balance. Thai cuisine aims for harmony between salty, sweet, sour, and spicy, so trust your palate and adjust accordingly.
Step 6: Add Vegetables and Finish
Add 150 grams (5 oz) of cubed pumpkin or butternut squash and 120 grams (4 oz) of trimmed green beans to the curry. Stir gently to coat the vegetables in the sauce, and cook for about 3 minutes. The pumpkin should be just tender, and the sauce will have thickened to a beautiful, pourable gravy-like consistency.
The pumpkin soaks up the curry flavors and adds natural sweetness, while the green beans provide fresh crunch and vibrant color contrast. Don’t overcook these vegetables, you want them to retain some texture for that perfect mouthfeel.
Step 7: Final Touches and Serving
Remove the skillet from the heat and stir in 12 Thai basil leaves. The residual heat will wilt them slightly and release their aromatic oils. Thai basil has a unique flavor profile with subtle aniseed notes that regular basil doesn’t quite match, making it an essential finishing touch for an authentic dish.
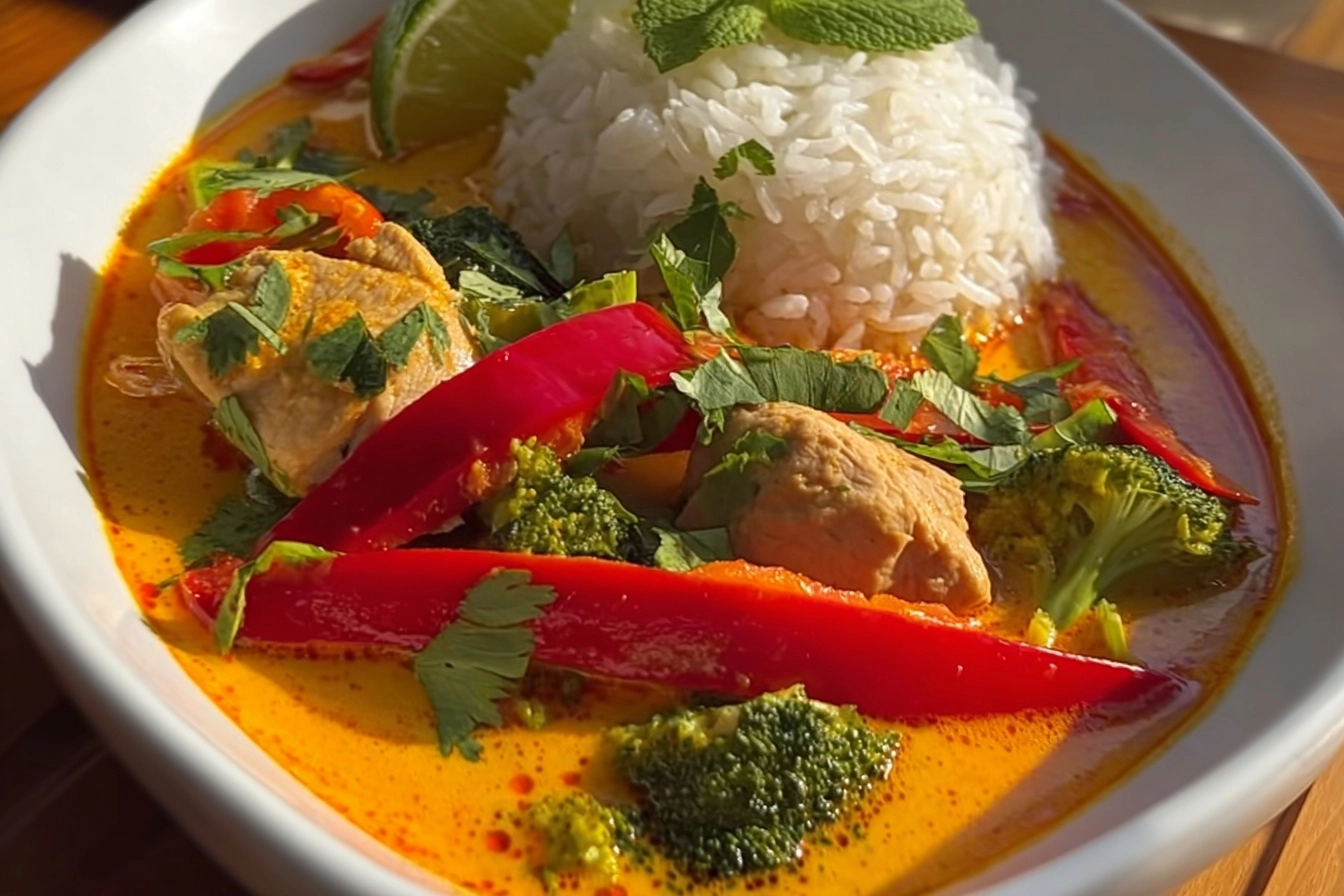
Serve your homemade Thai red curry over steamed jasmine rice for the complete experience. Garnish with fresh red chili slices and coriander leaves if desired. The rice acts as the perfect canvas for soaking up every drop of that incredible sauce.
| Step | Action | Time |
|---|---|---|
| 1 | Bloom curry paste | 2 minutes |
| 2 | Reduce broth | 3 minutes |
| 3 | Build sauce base | 2 minutes |
| 4 | Cook chicken | 8-10 minutes |
| 5 | Cook vegetables | 3 minutes |
| Total | 18-20 minutes |

Dietary Substitutions to Customize Your Thai Red Curry
Protein and Main Component Alternatives
One of the wonderful things about this red curry recipe is its flexibility. While chicken thighs are traditional and deliver the best texture, you have plenty of options depending on your preferences or what you have on hand.
Chicken alternatives: Chicken breasts or tenderloins can replace thighs if you prefer leaner meat. However, reduce the cooking time slightly and watch carefully to prevent dryness. For a completely different protein experience, try my balsamic chicken breast recipe for another weeknight-friendly option.
Seafood options: Shrimp works beautifully in this curry. Add them in the last 3-4 minutes of cooking since they cook quickly. Firm white fish like cod or halibut also works well, cut into chunks and added with the vegetables.
Vegetarian proteins: Firm tofu is an excellent vegetarian substitute. Press the tofu to remove excess moisture, cut into cubes, and add with the vegetables. For a heartier version, try chickpeas or a combination of vegetables. My creamy chicken and broccoli pasta is another great option when you want something different.
Beef option: Thinly sliced beef like flank steak can replace chicken. Slice it paper-thin against the grain and add it when you would add the chicken, but reduce cooking time to 5-6 minutes.
Vegetable, Sauce, and Seasoning Modifications
The vegetables in this thai red curry with chicken recipe can be easily adapted based on seasonality, availability, or personal preference.
Vegetable swaps: Instead of pumpkin or butternut squash, try sweet potato, regular potatoes, or kabocha squash. Each brings slightly different sweetness and texture. For the green beans, substitute with sugar snap peas, broccoli florets, bell peppers, or Thai eggplant. Bamboo shoots add a crunchy, water chestnut-like texture that’s traditionally found in Thai curries.
Sauce modifications: The sauce can be adjusted based on dietary needs. For a lighter version, use light coconut milk, though the sauce won’t be as rich. To make it gluten-free, ensure your fish sauce and curry paste are certified gluten-free. Some brands contain wheat, so always check labels.
Seasoning alternatives: Palm sugar is traditional and offers a more complex sweetness, but brown sugar or white sugar works perfectly fine. If you don’t have fish sauce, soy sauce can substitute, though the flavor won’t be as authentically Thai. Vegetarians can use a mushroom-based sauce or soy sauce mixed with a little seaweed for umami.
Herb substitutions: Thai basil is ideal, but regular basil works in a pinch. Use it sparingly, about half the amount called for, since regular basil has a different, sweeter profile. If you can’t find fresh kaffir lime leaves, dried ones are acceptable, though they’re less aromatic. Some cooks add a strip of lime zest as a substitute.
Mastering Thai Red Curry: Advanced Tips and Variations
Once you’ve mastered the basic easy thai red curry recipe, there are several techniques and variations to take your curry from great to extraordinary. These tips come from years of experimentation and a genuine love for Thai cuisine.
Pro Cooking Techniques
Blooming the paste: The most important technique for restaurant-quality curry is properly blooming your curry paste. Don’t rush this step. The paste should sizzle gently and become very fragrant. If it starts to brown too quickly, lower the heat. This process releases the essential oils in the spices and creates a deeper, more complex flavor foundation.
Oil separation: A perfectly made authentic thai red curry often has a slightly split appearance with small pools of red oil on top. This is actually desirable and shows that you’ve cooked the curry properly. The oil carries much of the flavor, so embrace this authentic look rather than trying to prevent it.
Taste as you go: Thai cooking is all about balance. Taste your curry at multiple stages: after adding the coconut milk, after the chicken cooks, and before serving. Adjust with fish sauce for saltiness, sugar for sweetness, or even a squeeze of lime juice if you want more acidity.
Flavor Variations
Once you’re comfortable with the basic recipe, try these variations:
- Pineapple Thai Red Curry: Add chunks of fresh pineapple with the vegetables. The natural sweetness and acidity create a delightful contrast to the spicy curry.
- Thai Red Curry with Potatoes: Replace pumpkin with small chunks of potato for a more filling, comfort-food style curry. This is particularly popular in some regions of Thailand.
- Seafood Red Curry: Combine shrimp, scallops, and squid for a luxurious seafood version. Add the seafood at the end and cook just until done.
- Vegetable-Packed Version: Add broccoli, cauliflower, carrots, and snap peas for a veggie-forward curry that’s still satisfying.
Presentation Tips
Half the enjoyment of a meal is visual presentation. Serve your thai red curry in wide, shallow bowls to showcase the beautiful color. The curry should have a rich orange-red hue from the paste and bright green spots from the beans and basil. A sprinkle of fresh Thai basil or cilantro on top adds a pop of fresh green. Thin slices of red chili make a beautiful garnish and let diners know there’s some heat involved.
Steamed jasmine rice is traditional, but you can also serve it with coconut rice for extra richness, or brown rice for a nuttier flavor and more fiber.
Make-Ahead Options
For busy weeknights, you can prep components of this thai chicken curry in advance:
- Prep the ingredients: Slice the chicken, chop the vegetables, and measure out the sauce ingredients up to a day ahead. Store separately in the refrigerator.
- Make the base: Cook steps 1-3 (through making the sauce base) and refrigerate for up to 2 days. When ready to serve, reheat and continue with adding the chicken and vegetables.
- Double batch: This curry freezes well, so consider making a double batch and freezing half for a future quick dinner.
How to Store Thai Red Curry: Best Practices
Knowing how to properly store your homemade Thai red curry means you can enjoy it for days to come or meal prep for busy weeks. Follow these guidelines to maintain the best flavor and food safety.
Refrigeration Guidelines
Allow your curry to cool to room temperature before refrigerating, but don’t leave it out for more than 2 hours. Transfer to an airtight container and refrigerate for up to 3-4 days. The flavors often improve after a day as they continue to meld together, making leftovers something to look forward to.
Store rice separately from the curry if possible. Rice can become soggy and absorb too much sauce when stored together. Plus, storing them separately gives you more flexibility for portioning.
Freezing Options
Your thai red curry chicken recipe freezes exceptionally well. Here’s how to do it properly:
- Cool the curry completely before freezing to prevent ice crystals from forming.
- Use freezer-safe containers or heavy-duty freezer bags, leaving about an inch of space for expansion.
- Label with the date and contents.
- Freeze for up to 3 months for best quality.
Note that vegetables like green beans may lose some of their crunch after freezing, but the flavor remains excellent. The sauce and chicken freeze beautifully, so you might consider slightly undercooking the vegetables if you plan to freeze.
Reheating Best Practices
To reheat your coconut milk curry while maintaining its quality:
- Stovetop method: Transfer to a saucepan and reheat gently over medium-low heat. Add a splash of coconut milk or water if the sauce has thickened too much. Stir occasionally until heated through.
- Microwave method: Heat in 1-minute intervals, stirring between each, until hot throughout. This method is faster but may result in slightly uneven heating.
Meal Prep Considerations
This curry is perfect for meal prep enthusiasts. Portion individual servings into containers with rice for grab-and-go lunches. The curry reheats beautifully and often tastes even better the next day. For a complete meal prep rotation, alternate this dish with other favorites from my collection to keep your weekly meals interesting and nutritious.
FAQs: Frequently Asked Questions About Thai Red Curry
What does Thai red curry taste like?
Thai red curry offers a balanced mix of sweet, savory, and spicy flavors from coconut milk, red curry paste, fish sauce, and palm sugar. The paste brings earthy chilies, garlic, galangal, and lemongrass, while shrimp paste adds umami depth. It’s mildly spicy with a creamy richness, not overly fishy despite the fish sauce. Fresh Thai basil and kaffir lime leaves provide citrusy, anise-like notes at the end. This combination creates a comforting, aromatic dish that’s rich but not heavy—perfect for pairing with jasmine rice to soak up the sauce. Taste varies slightly by recipe, but it’s generally approachable for spice beginners. (87 words)
Is Thai red curry spicy?
Thai red curry is typically mild to medium spicy, delivering a warm tingle rather than intense heat. Spice comes from dried red chilies in the curry paste, but coconut milk tempers it for a smooth finish. Levels vary by brand (e.g., Maesri is balanced) or homemade adjustments—start with less paste and taste as you go. In restaurants, it ranges from gentle to fiery; ask for “mild” if sensitive. To control heat at home, remove chili seeds from paste or add more coconut milk. This makes it family-friendly while keeping authentic Thai flair. (92 words)
What’s the best Thai red curry paste brand?
Maesri is the top choice for Thai red curry paste due to its authentic taste, fresh ingredients, and affordability—around $1-2 per small can. Found in Asian markets or major stores like Walmart, it includes real galangal, lemongrass, and chilies without fillers. For best results, use the whole can (about 4 oz) per recipe serving 4-6. Alternatives like Mae Ploy work well too, but Maesri edges out for convenience (no refrigeration needed until opened). Always sauté it first in oil for maximum flavor release. (85 words)
What are common ingredients in Thai red curry?
Key ingredients include red curry paste, full-fat coconut milk, chicken thighs (for tenderness), green beans, pumpkin or squash, Thai basil, kaffir lime leaves, fish sauce, palm sugar, and garlic. Simmer protein and veggies in the coconut-curry base until tender, then finish with torn basil and lime leaves for aroma. This yields 4-6 servings with a pourable, gravy-like sauce. Use thighs over breast to avoid dryness; add bamboo shoots or eggplant for variety. Prep time is 15 minutes, cook time 25—simple for weeknights. (89 words)
Can I freeze Thai red curry, and what substitutes work?
Yes, freeze Thai red curry in airtight containers for up to 3 months—thaw overnight in fridge and reheat gently on stovetop with a splash of coconut milk to restore creaminess. Texture may soften for veggies like green beans, but flavors hold well. Substitutes: swap pumpkin for sweet potato or kabocha; chicken thighs for breast, shrimp, beef, or firm tofu (add last to avoid overcooking). Use regular basil (half amount) if Thai basil unavailable, and lemongrass paste for fresh stalks. These keep it authentic and versatile for dietary needs. (94 words)

Thai Red Curry
- Total Time: 25 minutes
- Yield: 4 servings
- Diet: Gluten-Free
Description
🌶️🍲 Velvety coconut-based Thai red curry with juicy chicken thighs and crisp veggies packs bold, aromatic flavors in every bite.
🍗🥥 Ready in 25 minutes, gluten-free high-protein comfort dish served over rice for authentic homemade Thai delight.
Ingredients
– 5 to 6 tablespoons Thai red curry paste (store bought)
– 2 large garlic cloves, minced (only when using jar curry paste)
– 2 teaspoons fresh ginger, finely grated (only when using jar curry paste)
– 1 tablespoon lemongrass paste or finely chopped fresh lemongrass (only when using jar curry paste)
– 3 tablespoons vegetable oil (or canola or peanut oil)
– 1 cup (250 ml) low sodium chicken broth or stock
– 400 ml (14 oz) full fat coconut milk
– 6 kaffir lime leaves
– 1 tablespoon sugar (white, brown, or palm)
– 2 teaspoons fish sauce, plus more to taste
– 350 grams (12 oz) boneless and skinless chicken thighs, sliced about 0.75 cm thick
– 150 grams (5 oz) pumpkin or butternut squash, cut into 1.5 cm cubes (about 1 heaped cup)
– 120 grams (4 oz) green beans, trimmed and cut into 5 cm pieces
– 12 Thai basil leaves
– Fresh red chili slices
– Fresh coriander/cilantro leaves
Instructions
1-Step 1: Heat the Oil and Bloom the Curry Paste Start by heating 3 tablespoons of vegetable oil in a large heavy-based skillet over medium-high heat. Once the oil shimmers, add 5 to 6 tablespoons of Thai red curry paste. If you’re using jar curry paste (which most home cooks do), also add 2 large minced garlic cloves, 2 teaspoons of finely grated fresh ginger, and 1 tablespoon of lemongrass paste or chopped fresh lemongrass. Cook this mixture for about 2 minutes, stirring constantly. The goal is to “dry out” the paste slightly, which intensifies the flavors and releases the aromatic compounds. You’ll notice the paste becoming more fragrant and the color deepening. This technique, called “blooming,” is essential for developing the authentic taste that makes thai red curry with chicken so distinctive.
2-Step 2: Add Chicken Broth and Reduce Pour in 1 cup (250 ml) of low sodium chicken broth or stock. Stir vigorously to dissolve the curry paste into the liquid, making sure no lumps remain. Bring the mixture to a rapid simmer and let it cook for about 3 minutes until the liquid reduces by half. This reduction step concentrates the flavors and creates a concentrated curry base. The sauce will thicken slightly and take on a deeper, richer appearance. Don’t rush this step, as it’s crucial for building the layered flavor profile that characterizes an excellent authentic thai red curry.
3-Step 3: Build the Coconut Curry Base Now it’s time to add the creamy element. Pour in 400 ml (14 oz) of full fat coconut milk, followed by 6 kaffir lime leaves, 1 tablespoon of sugar, and 2 teaspoons of fish sauce. Stir everything together until well combined. The coconut milk transforms the concentrated curry paste into a luxuriously creamy sauce. The kaffir lime leaves infuse their distinctive citrusy aroma, while the sugar balances the savory and spicy notes. Fish sauce adds that essential umami kick that makes Thai food so irresistible. Taste your base at this point, it should be a harmonious blend of salty, sweet, and spicy.
4-Step 4: Cook the Chicken Add 350 grams (12 oz) of sliced boneless, skinless chicken thighs to the pan. Spread the chicken pieces evenly so they cook uniformly, and bring everything to a gentle simmer. Reduce the heat to medium and cook for 8-10 minutes. During this time, the sauce will reduce and thicken while the chicken cooks through completely. Chicken thighs are ideal for this thai chicken curry because they remain juicy and tender even after simmering. Unlike chicken breasts, which can dry out, thighs actually become more flavorful as they cook in the curry sauce.
5-Step 5: Season and Adjust After the chicken has cooked through, taste your curry and adjust the seasoning. This is your chance to make the flavors exactly how you like them. Need more saltiness? Add extra fish sauce, a little at a time. Want more sweetness? Another pinch of sugar will do the trick. The beauty of making thai red curry chicken recipe at home is that you control the balance. Thai cuisine aims for harmony between salty, sweet, sour, and spicy, so trust your palate and adjust accordingly.
6-Step 6: Add Vegetables and Finish Add 150 grams (5 oz) of cubed pumpkin or butternut squash and 120 grams (4 oz) of trimmed green beans to the curry. Stir gently to coat the vegetables in the sauce, and cook for about 3 minutes. The pumpkin should be just tender, and the sauce will have thickened to a beautiful, pourable gravy-like consistency. The pumpkin soaks up the curry flavors and adds natural sweetness, while the green beans provide fresh crunch and vibrant color contrast. Don’t overcook these vegetables, you want them to retain some texture for that perfect mouthfeel.
7-Step 7: Final Touches and Serving Remove the skillet from the heat and stir in 12 Thai basil leaves. The residual heat will wilt them slightly and release their aromatic oils. Thai basil has a unique flavor profile with subtle aniseed notes that regular basil doesn’t quite match, making it an essential finishing touch for an authentic dish. Serve your homemade Thai red curry over steamed jasmine rice for the complete experience. Garnish with fresh red chili slices and coriander leaves if desired. The rice acts as the perfect canvas for soaking up every drop of that incredible sauce.
Notes
🧄 Sauté jarred curry paste with fresh garlic, ginger, and lemongrass for brighter, more authentic flavors.
🍋 Use fresh kaffir lime leaves for best citrusy aroma; substitute dried if needed but rehydrate first.
🍗 Choose chicken thighs for superior juiciness that stays tender in the creamy sauce.
- Prep Time: 5 minutes
- Cook Time: 20 minutes
- Category: Main Course
- Method: Stovetop
- Cuisine: Thai
Nutrition
- Serving Size: 1 cup
- Calories: 530 kcal
- Sugar: 10g
- Sodium: 1200mg
- Fat: 40g
- Saturated Fat: 25g
- Unsaturated Fat: 15g
- Trans Fat: 0g
- Carbohydrates: 20g
- Fiber: 3g
- Protein: 25g
- Cholesterol: 100mg
Keywords: thai red curry chicken, coconut curry recipe, easy thai chicken curry, authentic red curry