Why You’ll Love This Tartlets
Tartlets are one of those recipes that fit into a busy day without much hassle. They involve simple steps that let you enjoy fresh, homemade pastries without hours in the kitchen. Plus, these little treats pack in nutrients that make them a smart choice for your daily meals.
When you try making tartlets at home, you’ll notice how they combine ease with great taste. This recipe uses everyday ingredients like flour and butter to create shells that hold up well in the oven. It’s all about mixing things quickly and letting the dough rest, which helps new bakers feel successful right away.
Many home cooks enjoy tartlets because they work for different occasions, from quick snacks to elegant desserts. According to the recipe details, each serving offers about 113 kcal along with vitamins and minerals like vitamin A and calcium, making them a healthy option for families. Whether you’re a baking enthusiast or a busy parent, tartlets can bring joy to your table with their crispy texture and customizable fillings.
Benefits for Everyday Life
One key reason to try this recipe is its short preparation time. It only takes around 30 minutes of active work, plus chilling time, so it’s perfect for students or working professionals. The dough chills for at least an hour to keep its shape, which means less stress during baking.
Health-conscious folks will like how tartlets balance carbs, protein, and fats. With just 13 grams of carbohydrates and 2 grams of protein per serving, they fit into various diets. For example, if you’re watching sodium, note that each tartlet has only 7 mg, which keeps things light.
You can adapt these tartlets to suit everyone in your home, like using them for gluten-free options. This makes them a hit with newlyweds starting out in the kitchen or seniors who want simple recipes. Overall, tartlets offer a fun way to explore new flavors without much effort.
Jump To
- 1. Why You’ll Love This Tartlets
- 2. Essential Ingredients for Tartlets
- 3. How to Prepare the Perfect Tartlets: Step-by-Step Guide
- 4. Dietary Substitutions to Customize Your Tartlets
- 5. Mastering Tartlets: Advanced Tips and Variations
- 6. How to Store Tartlets: Best Practices
- 7. FAQs: Frequently Asked Questions About Tartlets
- 8. Tartlets
Essential Ingredients for Tartlets
Gathering the right ingredients is the first step to perfect tartlets. This recipe focuses on basic items that are easy to find and mix. By measuring everything accurately, you’ll end up with shells that taste great and hold their shape.
The key is to use fresh, high-quality items for the best results. Below is a structured list of all the ingredients needed for this tartlet shells recipe. Make sure to follow the precise measurements to get the dough just right.
- 250 grams (1 2/3 cups) of all-purpose flour
- 50 grams (1/2 cup) of sifted icing sugar or powdered sugar
- A pinch of table salt
- 120 grams (1/2 cup) of very cold unsalted butter, cut into small cubes
- 1 large egg at room temperature
These ingredients come together quickly in a food processor for a smooth dough. For special dietary needs, you can swap items like using vegan butter, but always stick to the original list for the base recipe. Remember, the exact quantities help ensure the tartlets turn out crisp and flavorful.
How to Prepare the Perfect Tartlets: Step-by-Step Guide
Getting tartlets right starts with a few simple steps that anyone can follow. First, mix your dry ingredients to build a strong base for the dough. This helps create a crust that bakes evenly and holds fillings well.
Now, let’s dive into the process using the provided recipe. Begin by combining the flour, icing sugar, and salt in a food processor and pulse to mix. Add the cold butter cubes and pulse until the mixture looks like very small crumbs without large lumps.
Next, whisk the egg and add it to the mixture, pulsing just until the dough starts to form a ball. Roll the dough between two sheets of baking paper into a disk about 3 to 4 millimeters thick, then chill it in the refrigerator for at least one hour or overnight. Once chilled, remove the dough from the fridge and paper, then cut out disks with a cookie cutter that’s about 2 centimeters wider than your muffin pan openings.
Shaping and Baking the Shells
Press each dough circle gently into a non-stick muffin pan, making sure there are no air bubbles and the edges sit flush. Chill the lined pan for at least two hours or overnight to keep the dough firm. Preheat your oven to 160°C (325°F), dock the pastry bottoms with a fork, and freeze the pan while the oven heats up.
Line each shell with scrunched baking paper and fill with baking beads, dry beans, or rice for blind baking. Bake for 15 minutes, then remove the weights and paper, and bake for another 12 to 15 minutes until the shells are lightly golden and dry. Let them cool completely before adding any filling. If your filling needs baking, partially blind bake the shells first to avoid sogginess.
The total preparation time is about 30 minutes of active work, with chilling and baking adding up to around three hours. For a twist, try this pecan pie recipe for inspiration on fillings that pair well with tartlets.
Final Touches
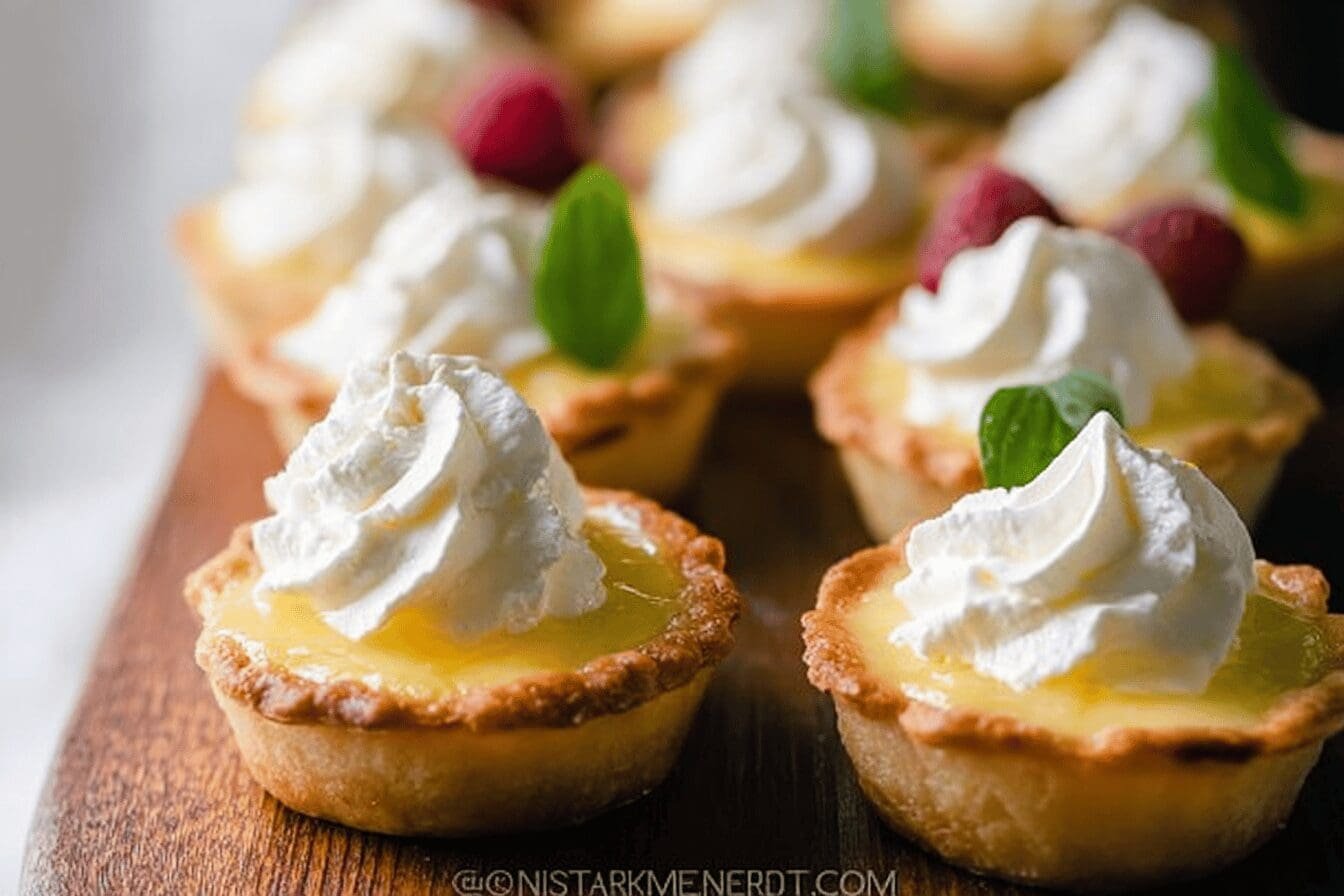
Once baked, these tartlet shells are ready for all sorts of fillings like sweet creams or fresh fruits. The recipe’s tips, such as resting the dough to relax gluten, make sure your shells don’t shrink. This step-by-step guide keeps things straightforward, so even beginners can create perfect pastries.
| Step | Time Needed | Tips |
|---|---|---|
| Mixing and Chilling Dough | 1-2 hours | Use cold butter for better crumbs |
| Shaping and Chilling Shells | 2 hours+ | Press gently to avoid cracks |
| Baking | 30 minutes | Watch for golden color |

Dietary Substitutions to Customize Your Tartlets
Tartlets are flexible, so you can tweak them for different needs. Start with the base recipe and swap ingredients to fit your lifestyle. This way, everyone at your table can enjoy them without worry.
For example, use vegan alternatives if you’re avoiding dairy. You might replace butter with coconut oil and eggs with flax eggs to keep things simple. These changes help maintain the flakiness while making the recipe suitable for diet-conscious individuals.
Protein and main component alternatives include substituting traditional cheese with vegan varieties or using tofu for a plant-based twist. For vegetable options, swap spinach with kale in fillings, as mentioned in the original structure, to add variety. Always adjust seasonings like herbs to enhance the flavor without overwhelming the tartlets.
- Use coconut oil instead of butter for a vegan version
- Opt for almond flour to make it gluten-free
- Try low-fat yogurt in place of cream for low-calorie adaptations
Mastering Tartlets: Advanced Tips and Variations
Once you’re comfortable with the basics, try some advanced tricks to elevate your tartlets. Blind-baking the crust is a pro technique that keeps it crisp and prevents sogginess from moist fillings. This step is key for fillings like chocolate ganache or fruit compotes.
Experiment with flavors by adding caramelized onions or sun-dried tomatoes for a savory spin. For sweet versions, fillings such as ricotta cheese or jams work wonderfully. Rolling the dough to 3 to 4 millimeters thick gives the best balance, as per the recipe tips, ensuring it’s sturdy yet delicate.
Use non-stick metal muffin pans with perforated bottoms for optimal results, avoiding silicone ones that might not crisp the pastry. You can make the shells in advance and store them unbaked in the fridge for up to 24 hours or freeze them for later. Check out this chocolate raspberry crumb bars recipe for ideas on complementary desserts.
Tips from the recipe: Resting the dough helps maintain its chill and relax gluten, leading to perfect shapes every time.
How to Store Tartlets: Best Practices
Proper storage keeps your tartlets fresh and tasty for days. After baking, let them cool fully before putting them away. This helps preserve the crisp texture that makes them so enjoyable.
For short-term use, store cooked tartlets in an airtight container in the fridge for up to 3 days. If you want to plan ahead, freeze unbaked shells or baked ones for up to a month. When you’re ready to eat, reheat them in an oven at 160°C for 10-15 minutes to bring back that fresh-baked feel.
Meal prep is easy with tartlets since you can batch make and freeze portions. The recipe notes that unbaked shells hold up well in the fridge, making it simple for busy parents or working professionals to have options ready.

FAQs: Frequently Asked Questions About Tartlets
Can I use any type of muffin pan to make tartlets?
Yes, you can use both regular and mini muffin pans to make tartlets. Regular muffin pans are easier to line with pastry, while mini pans create bite-sized tartlets but may be trickier to handle due to their smaller size. For best results, choose a metal pan with a non-stick surface and perforated bottoms to allow even airflow during baking. Avoid silicone pans, as they can prevent the pastry from crisping properly.
Is it okay to use frozen pastry dough for tartlet shells?
Frozen pastry dough works well if you prefer not to make pastry from scratch. Allow the dough to thaw at room temperature until soft enough to shape. Keep in mind that puff pastry expands more in the oven, which can reduce space for fillings. Other pastry types like shortcrust hold their shape better. Choose the pastry based on the desired texture and appearance of your tartlets.
Should tartlet shells be baked before adding the filling?
It depends on the type of filling. For fillings that require baking, partially blind-bake (prebake) the tartlet shells to prevent sogginess, then add the filling and finish baking. For no-bake or cold fillings, fully blind-bake the shells until dry and golden before adding the filling to maintain a crisp texture.
How far in advance can I prepare tartlet shells?
Tartlet shells can be prepared ahead of time. Unbaked shells can be refrigerated for up to 24 hours, either rolled or already shaped in the muffin pan. Once baked and cooled, they can be stored in an airtight container for up to 3 days before filling, making them convenient for planning desserts in advance.
What are common mistakes to avoid when making tartlets?
Common mistakes include using a silicone pan, which can affect baking quality; not chilling the pastry before baking, leading to shrinkage; skipping blind baking when needed, causing soggy bottoms; and overfilling the shells, which can result in spills and uneven cooking. Carefully following steps for dough preparation, chilling, and baking will improve your tartlet results.

Tartlets
- Total Time: 4 hours
- Yield: About 12 tartlet shells
- Diet: Vegetarian
Description
🥧 Making tartlet shells from scratch ensures you have perfectly crisp and flavorful pastry bases for your favorite fillings.
🍽️ This recipe guides you through a methodical process to create delicate, sturdy tartlet shells ideal for sweet or savory dishes.
Ingredients
– 250 grams (1 2/3 cups) all-purpose flour
– 50 grams (1/2 cup) sifted icing sugar or powdered sugar
– A pinch of table salt
– 120 grams (1/2 cup) very cold unsalted butter, cut into small cubes
– 1 large egg at room temperature
Instructions
1-Getting tartlets right: Getting tartlets right starts with a few simple steps that anyone can follow. First, mix your dry ingredients to build a strong base for the dough. This helps create a crust that bakes evenly and holds fillings well.
2-Combine dry ingredients: Begin by combining the flour, icing sugar, and salt in a food processor and pulse to mix. Add the cold butter cubes and pulse until the mixture looks like very small crumbs without large lumps.
3-Add egg and form dough: Next, whisk the egg and add it to the mixture, pulsing just until the dough starts to form a ball. Roll the dough between two sheets of baking paper into a disk about 3 to 4 millimeters thick, then chill it in the refrigerator for at least one hour or overnight. Once chilled, remove the dough from the fridge and paper, then cut out disks with a cookie cutter that’s about 2 centimeters wider than your muffin pan openings.
4-Shaping and Baking the Shells: Press each dough circle gently into a non-stick muffin pan, making sure there are no air bubbles and the edges sit flush. Chill the lined pan for at least two hours or overnight to keep the dough firm. Preheat your oven to 160°C (325°F), dock the pastry bottoms with a fork, and freeze the pan while the oven heats up.
5-Prepare shells for blind baking: Line each shell with scrunched baking paper and fill with baking beads, dry beans, or rice for blind baking. Bake for 15 minutes, then remove the weights and paper, and bake for another 12 to 15 minutes until the shells are lightly golden and dry. Let them cool completely before adding any filling. If your filling needs baking, partially blind bake the shells first to avoid sogginess.
6-Final Touches: Once baked, these tartlet shells are ready for all sorts of fillings like sweet creams or fresh fruits. The recipe’s tips, such as resting the dough to relax gluten, make sure your shells don’t shrink. This step-by-step guide keeps things straightforward, so even beginners can create perfect pastries.
Notes
⏳ Rest dough after rolling and after lining pans to relax gluten and keep pastry tender.
🍴 Use cookie cutters matching pan size to create deeper, uniform shells.
🔥 Prefer non-stick metal muffin pans with perforated bottoms over silicone for best baking results.
- Prep Time: 30 minutes
- Chilling time: 3 hours or overnight
- Cook Time: 30 minutes
- Category: Dessert
- Method: Baking
- Cuisine: International
Nutrition
- Serving Size: 1 tartlet shell
- Calories: 113 kcal
- Sugar: 3 g
- Sodium: 7 mg
- Fat: 6 g
- Saturated Fat: 4 g
- Trans Fat: 1 g
- Carbohydrates: 13 g
- Fiber: 1 g
- Protein: 2 g
- Cholesterol: 23 mg
Keywords: Tartlet shells, Pastry shells, Homemade tartlet base, Blind baked tartlet