Why You Will Love These Soft Pretzels
Soft pretzels are one of those bakes that feel special, but they are much easier than they look. This easy homemade soft pretzels recipe uses simple pantry ingredients, and the dough comes together with very little fuss. If you have ever wanted to try a pretzel recipe from scratch without feeling overwhelmed, this is a great place to start.
- Easy to make: The dough uses basic ingredients like yeast, flour, water, sugar, butter, and salt. If you can mix, knead, and shape a rope, you can make these homemade pretzels.
- Great for busy days: The rise time gives you space to clean up, help the kids with homework, or prep a dip. They also bake fast, so you do not need to spend all afternoon in the kitchen.
- Flexible for different needs: You can keep them simple with coarse salt, or serve them with cheese sauce, mustard, or even a sweet dip. The dough also works for pretzel bites if you want a snackable version.
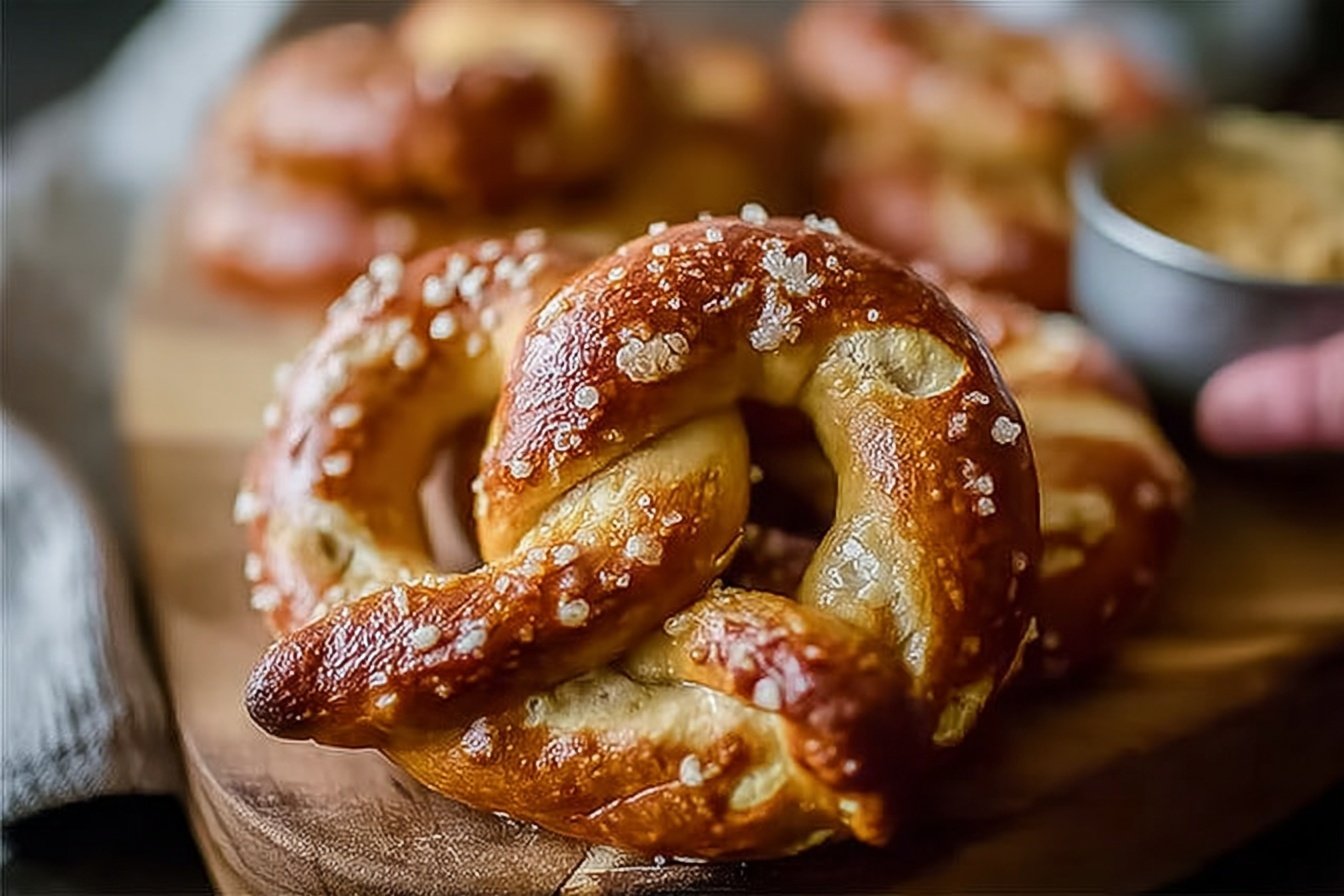
- Classic bakery flavor at home: The baking soda bath gives these pretzels that chewy outside and soft inside that people love in mall style soft pretzels.
For readers who like to compare baked snacks with other better-for-you options, you may also like this helpful overview from Healthline on whether pretzels can fit into a balanced diet. The answer depends a lot on portion size and toppings, which is one more reason homemade is so nice. You control the salt, the size, and the serving style.
These soft pretzels bring bakery-style comfort to your kitchen with ingredients you probably already have on hand.
Jump To
- 1. Why You Will Love These Soft Pretzels
- 2. Ingredients for Soft Pretzels
- 3. How to Prepare the Perfect Soft Pretzels: Step-by-Step Guide
- 4. Dietary Substitutions to Customize Your Soft Pretzels
- 5. Mastering Soft Pretzels: Advanced Tips and Variations
- 6. How to Store Soft Pretzels: Best Practices
- 7. FAQs: Frequently Asked Questions About Soft Pretzels
- 8. Soft Pretzels
Ingredients for Soft Pretzels
For the Pretzel Dough
- 2 and 1/4 teaspoons (7g) instant or active dry yeast, 1 standard packet
- 1 tablespoon brown sugar or granulated sugar
- 1 and 1/2 cups (360ml) warm water, around 100°F/38°C
- 1 tablespoon (14g) unsalted butter, melted and slightly cooled
- 1 teaspoon salt
- 3 and 3/4 to 4 cups (469 to 500g) all-purpose flour, plus more as needed
- Coarse salt for topping
For the Baking Soda Bath
- 1/2 cup (120g) baking soda
- 9 cups (2.13L) water
Using the exact amounts above gives you a reliable soft pretzel dough that is easy to handle and shape. If the dough feels sticky, add a little more flour as needed, but avoid adding too much. A slightly tacky dough usually bakes up softer and lighter.
How to Prepare the Perfect Soft Pretzels: Step-by-Step Guide
First Step: Mix the yeast base
In the bowl of a stand mixer or a large mixing bowl, combine the warm water, sugar, and yeast. Stir gently, then let it sit for about 5 minutes until the mixture looks foamy. That foam shows the yeast is active and ready to work. If it does not foam, the water may have been too hot or the yeast may be old.
Second Step: Build the dough
Add the melted butter, salt, and about 3 and 3/4 cups of the flour. Mix with a dough hook on low speed, or stir with a sturdy spoon if mixing by hand. Keep adding flour a little at a time until the dough pulls away from the sides of the bowl and feels soft but not overly sticky. You may need up to 4 cups total, plus a bit more for kneading.
Third Step: Knead until smooth
Knead the dough for about 5 to 7 minutes in a mixer, or 8 to 10 minutes by hand on a lightly floured surface. The dough should become smooth, elastic, and springy. If it sticks to your hands, dust on a little flour, but go slowly so the dough stays soft. This is the heart of a good homemade soft pretzels recipe, because proper kneading helps create that chewy texture.
Fourth Step: Let the dough rise
Place the dough in a lightly greased bowl, cover it with a clean towel or plastic wrap, and let it rise in a warm spot for about 1 hour, or until doubled in size. If your kitchen is cool, it may take a little longer. A simple trick is to place the bowl near a turned-off oven or in a lightly warmed microwave.
Fifth Step: Shape the pretzels
Once the dough has risen, punch it down gently to release extra air. Turn it onto a lightly floured surface and divide it into 8 equal pieces. Roll each piece into a rope about 20 to 22 inches long, tapering the ends slightly. Form a U shape, cross the ends over each other twice, then press them down onto the bottom curve to make the classic pretzel shape. If you are new to shaping, do not worry if the first one looks imperfect. Practice helps, and even rustic pretzels taste amazing.
Sixth Step: Prepare the baking soda bath
Bring the 9 cups of water and 1/2 cup baking soda to a gentle boil in a large pot. Stir carefully so the baking soda dissolves. This bath is what gives soft pretzels their deep color and signature taste. For more about the science behind that step, see this research on the chemistry behind browned crusts and surface reactions in baked foods. It is a nice reminder that a small kitchen step can make a big difference.
Seventh Step: Boil the pretzels
Using a slotted spatula or spider, lower one or two pretzels at a time into the simmering bath. Boil each side for about 30 seconds, then lift them out carefully and let the excess water drip off. Place them on a parchment-lined baking sheet. Do not leave them in the bath too long or they can become soggy and harder to handle.
Eighth Step: Add the topping
While the pretzels are still damp, sprinkle coarse salt over the top. If you like a lighter salt finish, use less. If you want a stronger bakery-style bite, add a little more. This is also the point where you can make one tray classic and another tray with extra seasoning for variety.
Ninth Step: Bake until golden
Bake at 450°F for 12 to 15 minutes, or until the pretzels are deeply golden brown. Rotate the pan once halfway through if your oven bakes unevenly. The finished pretzels should feel firm on the outside and soft in the center. If you want an even richer finish, brush them with a little melted butter right after baking.
Final Step: Cool and serve
Let the pretzels cool for about 5 minutes before serving. They taste best warm, fresh from the oven, with mustard, cheese sauce, or a simple butter brush. If you are serving a crowd, place them in a basket lined with a clean kitchen towel so they stay warm a little longer. This easy soft pretzels recipe from scratch makes a cozy snack, a party appetizer, or a fun weekend baking project.
| Step | Time | What to Look For |
|---|---|---|
| Mix yeast | 5 minutes | Foamy top and active yeast |
| Knead dough | 5 to 10 minutes | Smooth, soft, elastic dough |
| First rise | About 1 hour | Dough doubled in size |
| Baking soda bath | About 1 minute per pretzel | Brief boil for chewy crust |
| Bake | 12 to 15 minutes | Deep golden brown color |

Dietary Substitutions to Customize Your Soft Pretzels
Protein and Main Component Alternatives
Since pretzels are built around dough rather than meat or dairy-heavy fillings, the most useful swaps are for the flour, sweetener, and butter. If you need a dairy-free option, use a plant-based butter that melts well. For a slightly different flavor, you can use granulated sugar instead of brown sugar, which gives a cleaner taste. If you want a more rustic texture, replace up to 1 cup of the all-purpose flour with bread flour for a chewier bite.
For a lower-salt version, reduce the coarse salt topping or skip it altogether and serve the pretzels with a salty dip on the side. You can also shape the dough into mini knots, sticks, or bites if you want smaller portions for kids or snack trays. The same dough works well for all of these variations, so you do not need a separate recipe.
Vegetable, Sauce, and Seasoning Modifications
Soft pretzels are easy to customize with toppings and dips. Try everything bagel seasoning, sesame seeds, poppy seeds, garlic powder, or cinnamon sugar if you want a sweeter snack. For dipping, mustard and cheese sauce are classics, but honey mustard, ranch, or marinara also work well. If you like serving breads with a meal, these pair nicely with soup or pasta night, similar to the comforting dishes you may find in this easy garlic bread style recipe from my kitchen.
For a more seasonal twist, serve the pretzels with warm pumpkin dip in fall, or with a sharp cheddar sauce for game day. You can even shape them into hearts for holidays, or make tiny pretzel bites for a party platter. Small changes like these keep the recipe fresh without making it complicated.
Mastering Soft Pretzels: Advanced Tips and Variations
Pro cooking techniques
If you want the best texture, use a kitchen scale to measure the flour. Too much flour is the most common reason pretzels turn out dense. Also, make sure the water is warm, not hot, so the yeast wakes up properly without being damaged. When shaping, let the dough rest if it keeps shrinking back, because a short pause relaxes the gluten and makes rolling easier.
Another helpful trick is to boil only a few pretzels at a time. Crowding the pan can make the dough harder to manage and may cause uneven cooking. Line your baking sheets with parchment for easy lifting and less sticking.
Flavor variations
For savory pretzels, top the dough with coarse salt, sesame seeds, or a little garlic powder before baking. For a sweet version, skip the salt and brush the warm pretzels with melted butter, then coat them in cinnamon sugar. You can also mix shredded cheddar into the dough for a richer snack. If you love snack-style bakes, you might also enjoy browsing other comforting recipes on Recipes Isabella for more family-friendly ideas.
Presentation tips
Serve the pretzels on a wooden board with small bowls of dip. A little melted butter brushed over the top gives them a glossy finish, while a sprinkle of fresh chopped parsley adds a nice color contrast for savory versions. For parties, stack them in a basket and keep them covered with a towel so they stay warm.
Make-ahead options
You can shape the pretzels, let them rest, and refrigerate the tray for a few hours before boiling and baking. This is helpful when you want fresh-baked pretzels without doing all the work right before guests arrive. You can also freeze unbaked shaped pretzels for a later day, which makes this soft pretzels recipe from scratch especially helpful for busy weeks.
How to Store Soft Pretzels: Best Practices
Refrigeration
Store cooled pretzels in an airtight container or zip-top bag for up to 2 days at room temperature, or a little longer in the refrigerator if needed. They are best the day they are baked, but they still taste good the next day when warmed up.
Freezing
For longer storage, freeze fully baked pretzels once they are completely cool. Wrap each one tightly, then place them in a freezer-safe bag for up to 3 months. You can also freeze shaped unbaked pretzels on a tray first, then move them to a bag once solid.
Reheating
Reheat in a 350°F oven until warmed through and lightly crisp on the outside. If reheating from frozen, no need to thaw first if you are baking them. A quick brush of water before reheating can help bring back some softness. Avoid overheating in the microwave, because it can make the texture rubbery.
Meal prep considerations
For meal prep, make a double batch and freeze half. That way, you can pull out just what you need for lunchboxes, after-school snacks, or weekend appetizers. Batch baking is one of the easiest ways to save time without giving up fresh flavor.

FAQs: Frequently Asked Questions About Soft Pretzels
What ingredients do I need for homemade soft pretzels?
For homemade soft pretzels, gather these key ingredients: 1 ½ cups warm water (110°F), 1 tablespoon brown sugar, 2 teaspoons active dry or instant yeast, 4 ½ cups all-purpose flour, ½ cup unsalted butter (melted and cooled), 2 teaspoons salt, ¼ cup baking soda (for the bath), and coarse sea salt for topping. Optional add-ins include melted butter for brushing post-bake and mustard or cheese sauce for dipping. This recipe yields about 8 large pretzels. Measure flour accurately using a scale for best results, as packing it too tightly leads to dense pretzels. Warm water activates the yeast quickly—test by sprinkling yeast on top; it should foam in 5-10 minutes. Prep time is 20 minutes, plus rising. Store extras airtight for 2 days.
Why boil soft pretzels in a baking soda bath?
Boiling soft pretzels in a baking soda bath (10 cups water + ⅔ cup baking soda, simmered) for 30 seconds per side creates their signature chewy exterior, golden-brown color, and tangy flavor mimicking lye-used commercial versions. The alkaline bath gelatinizes the dough’s surface starches, promoting Maillard browning during baking for crispiness outside while keeping the inside soft. Skip it, and pretzels turn out more like breadsticks—pale and less flavorful. For safety, use food-grade baking soda; don’t ingest straight lye. Dip shaped pretzels gently with a slotted spoon to avoid deflation. After boiling, bake at 450°F for 12-15 minutes on parchment-lined sheets. This step takes 10 minutes total and elevates texture noticeably—test on one pretzel first if unsure.
How do I shape homemade soft pretzels?
After resting the dough 10-30 minutes, divide into 8 pieces (about 100g each). Roll each into a 20-22 inch rope, tapering ends slightly. Form a U-shape, cross ends twice over the bottom curve, then press twisted ends down onto the pretzel base to stick. For even shapes, work on a lightly floured surface and keep hands dry. Place on parchment, cover, and rest 10 minutes before boiling. Practice with one rope if new to it—watch a 1-minute video for visuals. Mini pretzel bites? Roll shorter ropes and twist simply. This method ensures uniform baking. Total shaping time: 15 minutes. Pro tip: If dough springs back, rest longer for gluten relaxation.
Can I make soft pretzels ahead or freeze them?
Yes, soft pretzels are freezer-friendly at multiple stages. Refrigerate shaped dough up to 24 hours (let rise first). Freeze raw dough balls up to 3 months—thaw overnight, then proceed. Boil and freeze unbaked pretzels on a tray, then bag for 2 months; bake from frozen at 425°F for 15 minutes. Fully baked (unsalted) pretzels freeze up to 3 months in airtight bags. This saves time for parties—batch-make on weekends. Avoid refreezing thawed dough to prevent texture loss. Label bags with dates. Thawing tip: Room temp for 1 hour. They reheat perfectly, retaining chewiness better than refrigerating baked ones, which dry out after 2 days.
How do I reheat frozen soft pretzels?
For best results, preheat oven to 350°F. Brush frozen pretzels lightly with water, sprinkle coarse salt, and bake on a parchment-lined sheet for 12-20 minutes until hot and crisp outside. No thawing needed—this revives the fresh-baked chew. Microwave option: Wrap in damp paper towel, heat 30-45 seconds per pretzel on high, but oven yields superior texture without sogginess. Air fryer at 350°F for 5-7 minutes works too. Post-reheat, brush with melted butter for extra shine. Stores well up to 3 months frozen; beyond that, flavor fades. Pairs great with beer cheese dip. Always use coarse salt post-thaw—it won’t stick otherwise. This method keeps them tasting like day-one fresh.

Soft Pretzels
- Total Time: 1 hour 30 minutes
- Yield: 12 pretzels
- Diet: Vegetarian
Description
🥨 Whip up chewy, golden homemade soft pretzels with that irresistible mall-fresh taste, right in your kitchen.
🧂 Simple ingredients, authentic baking soda bath for perfect texture – ideal for snacks, parties, or game days.
Instructions
1-First Step: Mix the yeast base In the bowl of a stand mixer or a large mixing bowl, combine the warm water, sugar, and yeast. Stir gently, then let it sit for about 5 minutes until the mixture looks foamy. That foam shows the yeast is active and ready to work. If it does not foam, the water may have been too hot or the yeast may be old.
2-Second Step: Build the dough Add the melted butter, salt, and about 3 and 3/4 cups of the flour. Mix with a dough hook on low speed, or stir with a sturdy spoon if mixing by hand. Keep adding flour a little at a time until the dough pulls away from the sides of the bowl and feels soft but not overly sticky. You may need up to 4 cups total, plus a bit more for kneading.
3-Third Step: Knead until smooth Knead the dough for about 5 to 7 minutes in a mixer, or 8 to 10 minutes by hand on a lightly floured surface. The dough should become smooth, elastic, and springy. If it sticks to your hands, dust on a little flour, but go slowly so the dough stays soft. This is the heart of a good homemade soft pretzels recipe, because proper kneading helps create that chewy texture.
4-Fourth Step: Let the dough rise Place the dough in a lightly greased bowl, cover it with a clean towel or plastic wrap, and let it rise in a warm spot for about 1 hour, or until doubled in size. If your kitchen is cool, it may take a little longer. A simple trick is to place the bowl near a turned-off oven or in a lightly warmed microwave.
5-Fifth Step: Shape the pretzels Once the dough has risen, punch it down gently to release extra air. Turn it onto a lightly floured surface and divide it into 8 equal pieces. Roll each piece into a rope about 20 to 22 inches long, tapering the ends slightly. Form a U shape, cross the ends over each other twice, then press them down onto the bottom curve to make the classic pretzel shape. If you are new to shaping, do not worry if the first one looks imperfect. Practice helps, and even rustic pretzels taste amazing.
6-Sixth Step: Prepare the baking soda bath Bring the 9 cups of water and 1/2 cup baking soda to a gentle boil in a large pot. Stir carefully so the baking soda dissolves. This bath is what gives soft pretzels their deep color and signature taste. For more about the science behind that step, see this research on the chemistry behind browned crusts and surface reactions in baked foods. It is a nice reminder that a small kitchen step can make a big difference.
7-Seventh Step: Boil the pretzels Using a slotted spatula or spider, lower one or two pretzels at a time into the simmering bath. Boil each side for about 30 seconds, then lift them out carefully and let the excess water drip off. Place them on a parchment-lined baking sheet. Do not leave them in the bath too long or they can become soggy and harder to handle.
8-Eighth Step: Add the topping While the pretzels are still damp, sprinkle coarse salt over the top. If you like a lighter salt finish, use less. If you want a stronger bakery-style bite, add a little more. This is also the point where you can make one tray classic and another tray with extra seasoning for variety.
9-Ninth Step: Bake until golden Bake at 450°F for 12 to 15 minutes, or until the pretzels are deeply golden brown. Rotate the pan once halfway through if your oven bakes unevenly. The finished pretzels should feel firm on the outside and soft in the center. If you want an even richer finish, brush them with a little melted butter right after baking.
10-Final Step: Cool and serve Let the pretzels cool for about 5 minutes before serving. They taste best warm, fresh from the oven, with mustard, cheese sauce, or a simple butter brush. If you are serving a crowd, place them in a basket lined with a clean kitchen towel so they stay warm a little longer. This easy soft pretzels recipe from scratch makes a cozy snack, a party appetizer, or a fun weekend baking project.
Notes
🛁 Baking soda bath gives the signature pretzel color, chew, and shine – don’t skip it!
🌡️ Use water at 100-110°F to activate yeast without killing it.
❄️ Shape and freeze unbaked pretzels for up to 2 months; bake from frozen.
- Prep Time: 15 minutes
- Rise: 1 hour
- Cook Time: 15 minutes
- Category: Breads
- Method: Baking
- Cuisine: American
Nutrition
- Serving Size: 1 pretzel
- Calories: 180
- Sugar: 2g
- Sodium: 650mg
- Fat: 2g
- Saturated Fat: 1g
- Unsaturated Fat: 1g
- Trans Fat: 0g
- Carbohydrates: 35g
- Fiber: 1g
- Protein: 5g
- Cholesterol: 5mg
Keywords: homemade soft pretzels, easy pretzel recipe, soft pretzels from scratch, bakery style pretzels