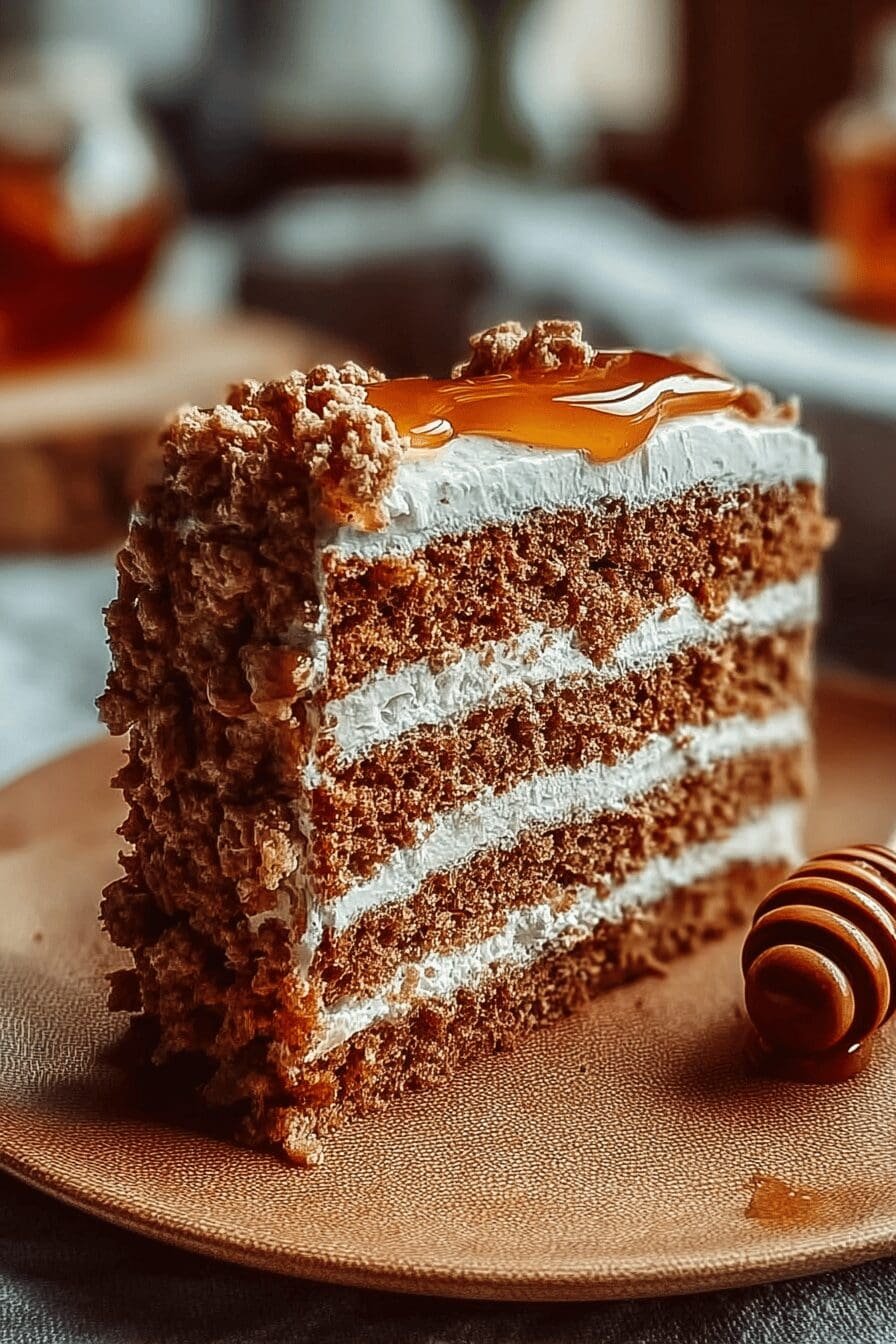
Why You’ll Love This Russian Honey Cake
Hey there, fellow baking enthusiasts! If you’re like me, always on the hunt for a dessert that’s as fun to make as it is to eat, this Russian Honey Cake is about to become your new favorite. Picture layers of tender, honey-infused cake stacked high with creamy frosting it’s a treat that brings a taste of tradition straight to your kitchen. Trust me, once you try it, you’ll wonder how you ever baked without it!
One reason you’ll adore this recipe is how straightforward it is to whip up. The steps are simple enough for beginners, with basic ingredients you might already have on hand, so you can bake without spending hours prepping. Plus, the natural honey gives it that golden glow and rich flavor that makes every bite feel special.
Beyond ease, this cake packs some great perks for your health. Made with wholesome elements like honey, which is full of antioxidants and natural vitamins, it’s a smarter swap for cakes loaded with refined sugars. Whether you’re a busy parent grabbing a quick sweet fix or a student looking for an affordable treat, this Russian Honey Cake supports your wellness goals while satisfying your cravings.
What I love most is how versatile it can be. You can tweak it for different diets, like going gluten-free or vegan, and it still keeps that amazing taste. Imagine serving this at a family gathering its unique honey aroma and spiced notes make it stand out from your everyday desserts. Let’s dive into why this cake is perfect for everyone from newlyweds hosting dinners to seniors enjoying a quiet evening snack.
Key Features That Make It Special
- It uses natural honey for a sweet, moist texture that’s hard to resist.
- The layers soften overnight, creating a melt-in-your-mouth experience that’s ideal for any occasion.
- With ingredients like eggs and flour, it’s adaptable for various preferences, keeping things exciting in the kitchen.
This Russian Honey Cake isn’t just dessert; it’s a story of flavors that connect us. For more on honey’s wonders, check out this link on the benefits of honey. Now, let’s talk about what goes into making this magic happen!
Jump To
- 1. Why You’ll Love This Russian Honey Cake
- 2. Essential Ingredients for Russian Honey Cake
- 3. How to Prepare the Perfect Russian Honey Cake: Step-by-Step Guide
- 4. Dietary Substitutions to Customize Your Russian Honey Cake
- 5. Mastering Russian Honey Cake: Advanced Tips and Variations
- 6. How to Store Russian Honey Cake: Best Practices
- 7. FAQs: Frequently Asked Questions About Russian Honey Cake
- 8. Russian Honey Cake
Essential Ingredients for Russian Honey Cake
Alright, let’s get to the heart of any great recipe the ingredients! This Russian Honey Cake relies on a mix of simple yet special items that create its signature layers and creamy frosting. I’ll walk you through everything you need, pulling from the best tips I’ve gathered over my baking adventures. Remember, using precise measurements is key to nailing that perfect balance of sweetness and spice.
To make this cake truly shine, we’ll start with the burnt honey, which adds that deep, caramelized flavor. Here’s the full list of ingredients, formatted clearly so you can shop and measure with ease. I promise, once you see how these come together, you’ll feel like a pro baker!
Main Ingredients for Cake Layers
- 3/4 cup honey (for burnt honey)
- 1/4 cup water (for burnt honey)
- 1/4 cup burnt honey (for cake layers)
- 3/4 cup honey (for cake layers)
- 1 cup plus 2 tablespoons granulated sugar
- 14 tablespoons unsalted butter (cut into pieces)
- 6 large eggs
- 2 1/2 teaspoons baking soda
- 3/4 teaspoon fine salt
- 1 teaspoon ground cinnamon
- 3 3/4 cups all-purpose flour
- 3 cups all-purpose flour (additional as per variations)
- 1 cup natural honey (for general sweetness)
- 4 large eggs (for binding and richness)
- 1 cup granulated sugar (to balance flavors)
- 1 cup unsalted butter (for added richness)
- 1 cup milk (to hydrate and blend)
Ingredients for Frosting
- 1/2 cup burnt honey
- 1/2 teaspoon fine salt
- 4 3/4 cups very cold heavy whipping cream (divided)
- One can of dulce de leche
This list covers everything you need for a complete Russian Honey Cake, including those special dietary tweaks. For instance, if you’re eyeing a vegan version, swap in flaxseed for eggs or plant-based butter. It’s all about making it your own while keeping that rich, honey-forward taste intact. If you enjoy honey in other desserts, check out my recipe for honey peach cream cheese cupcakes for more sweet inspiration!
How to Prepare the Perfect Russian Honey Cake: Step-by-Step Guide
Okay, friends, let’s roll up our sleeves and dive into the fun part baking! Making a Russian Honey Cake is like creating a little piece of edible art, and I’ll guide you through each step with my tried-and-true tips. Start by gathering your ingredients and getting excited, because the smell of caramelizing honey will have you hooked from the get-go.
First, prepare the burnt honey by simmering 3/4 cup honey until it turns a dark amber color, then mix in 1/4 cup water. This step is crucial for that deep, toffee-like flavor that sets this cake apart don’t rush it!
Next, gently melt together the butter, sugars, and honeys in a heatproof bowl. Once smooth, whisk in the eggs and spice mixture, including the baking soda, salt, and cinnamon, to create a flavorful base.
- Gradually sift in the flour and mix to form a smooth batter aim for that perfect consistency without overmixing.
- Spread 1/3 cup of batter onto parchment or silicone-lined baking sheets within traced 9-inch circles.
- Bake at 375°F (190°C) for 6-7 minutes until deeply caramelized and springy to the touch.
- Trim the edges of the baked layers and toast the trimmings at 250°F (120°C) until dried, then grind them into crumbs for decoration.
- For the frosting, combine 1/2 cup burnt honey, 1/2 teaspoon fine salt, dulce de leche, and part of the heavy whipping cream; chill this mixture before whipping the remaining cream and folding it in to form medium-stiff peaks.
- Assemble by layering the cake with generous amounts of frosting between each layer, cover the entire cake, and press the toasted crumbs on the sides.
- Chill the cake overnight to let the flavors meld and the layers soften patience is your secret ingredient here!
This process might take a bit, but it’s so worth it for that impressive result. I always add a little extra butter to keep the layers soft, and using silicone mats makes removal a breeze. If you’re planning ahead, these layers freeze beautifully without losing quality.

Dietary Substitutions to Customize Your Russian Honey Cake
One of the best things about baking is making recipes fit your lifestyle, and this Russian Honey Cake is no exception! Whether you’re vegan, gluten-free, or watching your calories, you can tweak it without losing that wow factor. Let me share some easy swaps that keep the fun alive.
For protein and main components, try replacing eggs with flax or chia eggs for a vegan twist. Use plant-based butter to maintain that creamy richness, and swap all-purpose flour for almond or rice flour if gluten is a concern.
When it comes to veggies, sauces, and seasonings, get creative with natural sweeteners like maple syrup instead of honey, or add spices such as nutmeg for extra depth. For the frosting, opt for dairy-free cream or coconut whipped topping if you’re lactose intolerant it’s all about personalization!
Quick Tips for Success
- Always test your substitutes in small batches to ensure the texture stays just right.
- Adding nuts or citrus zest can enhance flavors while keeping it diet-friendly.
- Remember, these changes make the cake adaptable for busy professionals or health-focused folks.
I’ve experimented with these myself, and they turn out great every time. It’s like giving your cake a fresh personality!
Mastering Russian Honey Cake: Advanced Tips and Variations
Once you’ve nailed the basics, it’s time to level up your Russian Honey Cake game! With a few pro techniques, you can make this dessert even more spectacular. Let’s talk about how to get those perfect layers and flavors that impress everyone at the table.
First off, focus on precise temperature control during baking to keep the layers moist and tender overbaking is a common pitfall, but avoiding it means you’ll have a cake that’s soft and delicious. For flavor variations, try tossing in citrus zest or nuts like walnuts to add texture and depth that takes it to the next level.
Presentation is key, so garnish with a drizzle of melted honey or edible flowers for that elegant finish. And if life gets hectic, remember you can bake the layers ahead and freeze them it’s a lifesaver for busy schedules.
Pro Tips from My Kitchen
- Use silicone mats for easier removal and softer layers it’s a game-changer!
- Caramelize the honey just right to balance sweetness with toasty notes, but don’t let it burn too much.
- Make dulce de leche in advance by slow-cooking sweetened condensed milk for ultimate convenience.
| Technique | Benefit |
|---|---|
| Freezing layers | Allows for easy meal prep without quality loss |
| Adding spices | Enhances flavor for a more complex taste |
Patience and a bit of planning make this cake impressive and flavorful. If you’re into other honey-based treats, my cinnamon roll honeybun cheesecake recipe might be your next adventure!
How to Store Russian Honey Cake: Best Practices
After all that hard work, you want your Russian Honey Cake to stay fresh and tasty! Proper storage is easy and ensures every slice is as good as the first. Let me walk you through the basics so your dessert lasts as long as possible.
Keep the assembled cake in an airtight container in the fridge for up to 5 days it’s perfect for making ahead. If you’re freezing, wrap individual layers tightly and store them for up to 2 months; thaw at room temperature before use.
Avoid reheating in the microwave to preserve that wonderful texture, and consider prepping layers in bulk for quick desserts. It’s all about smart planning for those unexpected gatherings!
FAQs: Frequently Asked Questions About Russian Honey Cake
What is Russian Honey Cake and how is it made?
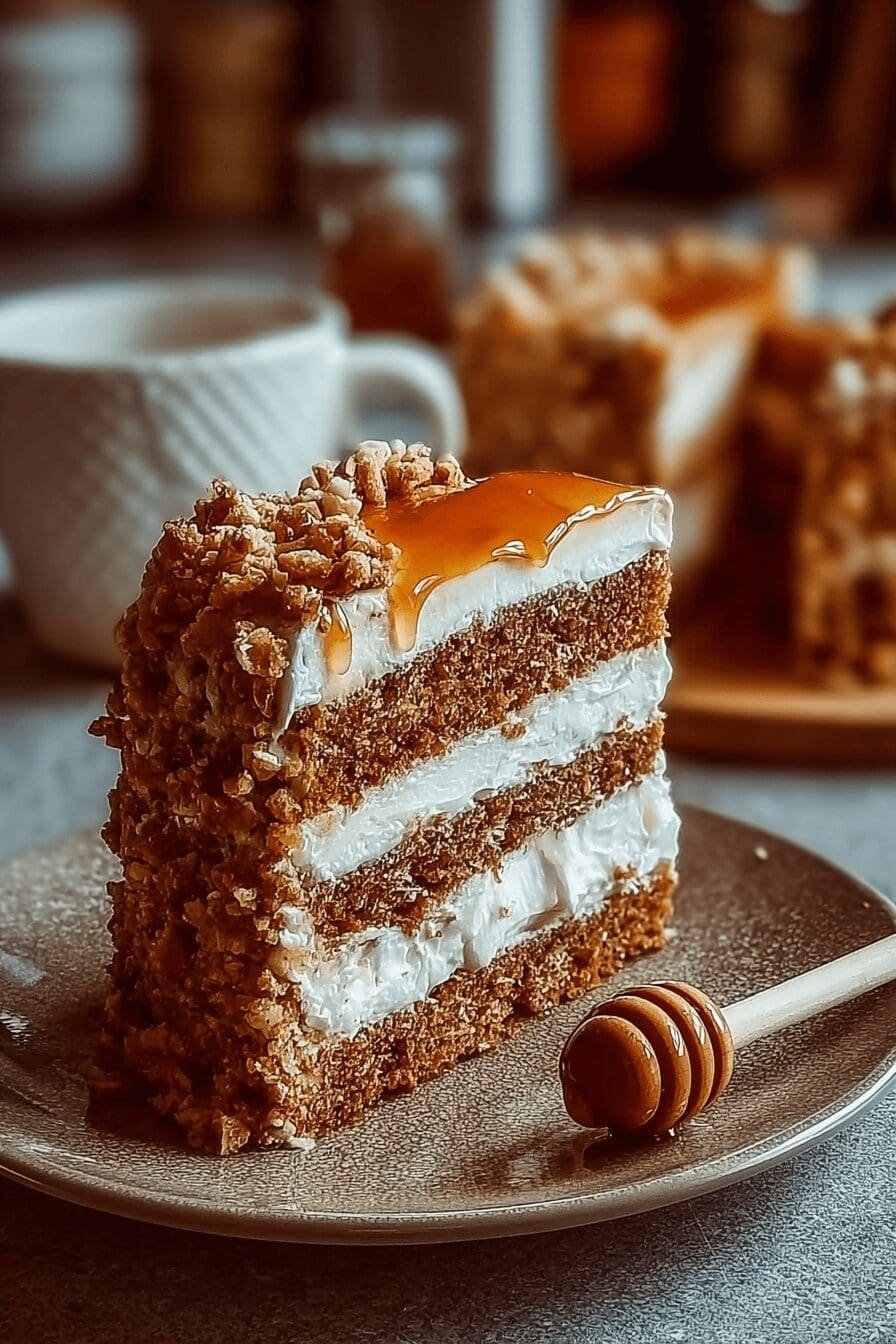
Russian Honey Cake, also known as Medovik, is a layered dessert made from thin, honey-flavored cake layers and a creamy filling, typically sour cream or a mix of sour cream and condensed milk. The cake layers are baked individually, resulting in tender, slightly chewy textures. After baking, the layers are stacked with the filling spread between each one, and the cake is chilled for several hours or overnight to soften the layers and blend the flavors. Honey is the key ingredient, providing a distinct, sweet aroma and taste.
How long should I refrigerate Russian Honey Cake before serving?
It is best to refrigerate Russian Honey Cake for at least 6 to 8 hours, but preferably overnight. This resting time allows the cake layers to absorb the moisture from the filling, becoming soft and flavorful. Serving the cake too soon after assembly can result in a texture that is too firm or dry. Refrigerating also helps the flavors meld, giving the cake its signature rich taste.
Can I use substitute ingredients in Russian Honey Cake if I don’t have traditional ones?
Yes, you can substitute some ingredients without losing too much authenticity. For example, if you don’t have sour cream, you can use a mixture of cream cheese and heavy cream or Greek yogurt for the creamy filling. If fresh honey is unavailable, high-quality clover or wildflower honey works well. However, avoid artificial honey substitutes as they lack the unique flavor honey provides. Keep in mind, using substitutes may slightly change the texture or taste but still yields a delicious cake.
How do I store leftover Russian Honey Cake to keep it fresh?
Store leftover Russian Honey Cake in an airtight container in the refrigerator. The cake should stay fresh for up to 4 to 5 days. Because the cake contains dairy-based filling, refrigeration is necessary to prevent spoilage. Before serving leftovers, remove the cake from the fridge 15–20 minutes ahead to let it come to room temperature for better flavor and texture.
What occasions is Russian Honey Cake typically served at?
Russian Honey Cake is often served during special occasions like holidays, birthdays, and family gatherings. Its rich flavor and elegant layered appearance make it a popular choice for celebratory meals in Russia and Eastern Europe. Due to its time-consuming preparation, it’s generally reserved for events where a show-stopping dessert is appreciated. However, it can also be enjoyed as a sweet treat for casual afternoon tea or coffee.

Russian Honey Cake
- Total Time: 9 hours 45 minutes
- Yield: 12 servings
- Diet: Vegetarian
Description
🍯 Experience the rich, layered delight of the Russian Honey Cake, featuring burnt honey-infused cake layers with luscious, creamy frosting.
🎂 This impressive dessert offers a balance of toffee notes and sweetness, perfect for special occasions or as a decadent treat.
Ingredients
– 3/4 cup honey for burnt honey
– 1/4 cup water for burnt honey
– 1/4 cup burnt honey for cake layers
– 3/4 cup honey for cake layers
– 1 cup plus 2 tablespoons granulated sugar
– 14 tablespoons unsalted butter cut into pieces
– 6 large eggs
– 2 1/2 teaspoons baking soda
– 3/4 teaspoon fine salt
– 1 teaspoon ground cinnamon
– 3 3/4 cups all-purpose flour
– 3 cups all-purpose flour additional as per variations
– 1 cup natural honey for general sweetness
– 4 large eggs for binding and richness
– 1 cup granulated sugar to balance flavors
– 1 cup unsalted butter for added richness
– 1 cup milk to hydrate and blend
– 1/2 cup burnt honey
– 1/2 teaspoon fine salt
– 4 3/4 cups very cold heavy whipping cream divided
– One can of dulce de leche
Instructions
1-Gradually sift in the flour and mix to form a smooth batter aim for that perfect consistency without overmixing.
2-Spread 1/3 cup of batter onto parchment or silicone-lined baking sheets within traced 9-inch circles.
3-Bake at 375°F (190°C) for 6-7 minutes until deeply caramelized and springy to the touch.
4-Trim the edges of the baked layers and toast the trimmings at 250°F (120°C) until dried, then grind them into crumbs for decoration.
5-For the frosting, combine 1/2 cup burnt honey, 1/2 teaspoon fine salt, dulce de leche, and part of the heavy whipping cream; chill this mixture before whipping the remaining cream and folding it in to form medium-stiff peaks.
6-Assemble by layering the cake with generous amounts of frosting between each layer, cover the entire cake, and press the toasted crumbs on the sides.
7-Chill the cake overnight to let the flavors meld and the layers soften patience is your secret ingredient here!
Notes
🍯 Caramelize honey carefully to develop toffee notes without burning for best flavor balance.
🧈 Adding butter to the cake layers keeps them soft and tender, avoiding crispiness.
🥄 Prepare cake layers in advance and freeze for convenience; thaw without quality loss.
- Prep Time: 1 hour
- Chill Time: 8 hours to overnight
- Cook Time: 45 minutes
- Category: Dessert
- Method: Baking, Layering, Whipping
- Cuisine: Russian
Nutrition
- Serving Size: 1 slice
- Calories: 420 kcal
- Sugar: 40 g
- Sodium: 150 mg
- Fat: 25 g
- Saturated Fat: 15 g
- Unsaturated Fat: 8 g
- Trans Fat: 0 g
- Carbohydrates: 45 g
- Fiber: 1 g
- Protein: 5 g
- Cholesterol: 110 mg
Keywords: Russian Honey Cake, Medovik, Layered Cake, Honey Cream Cake