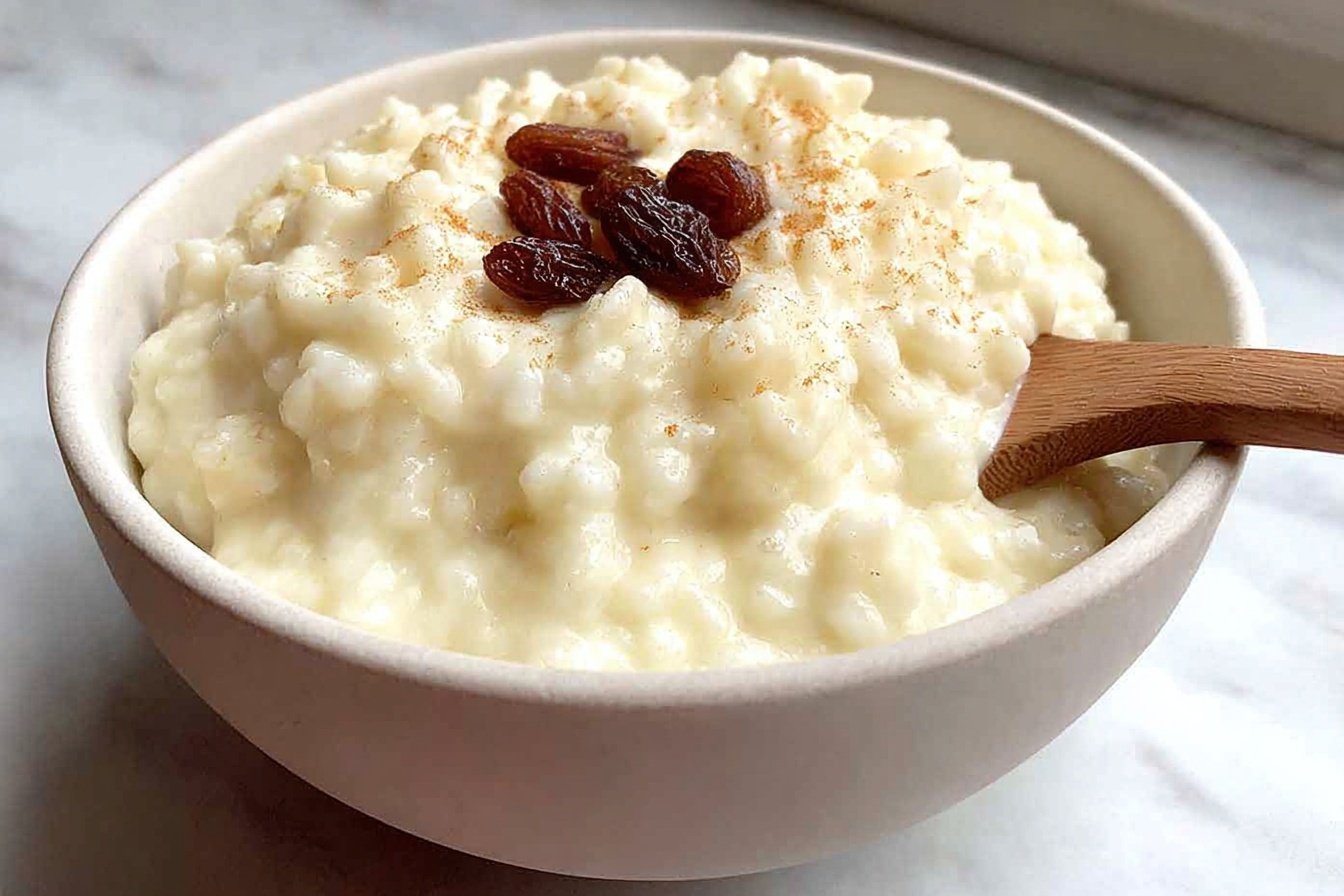
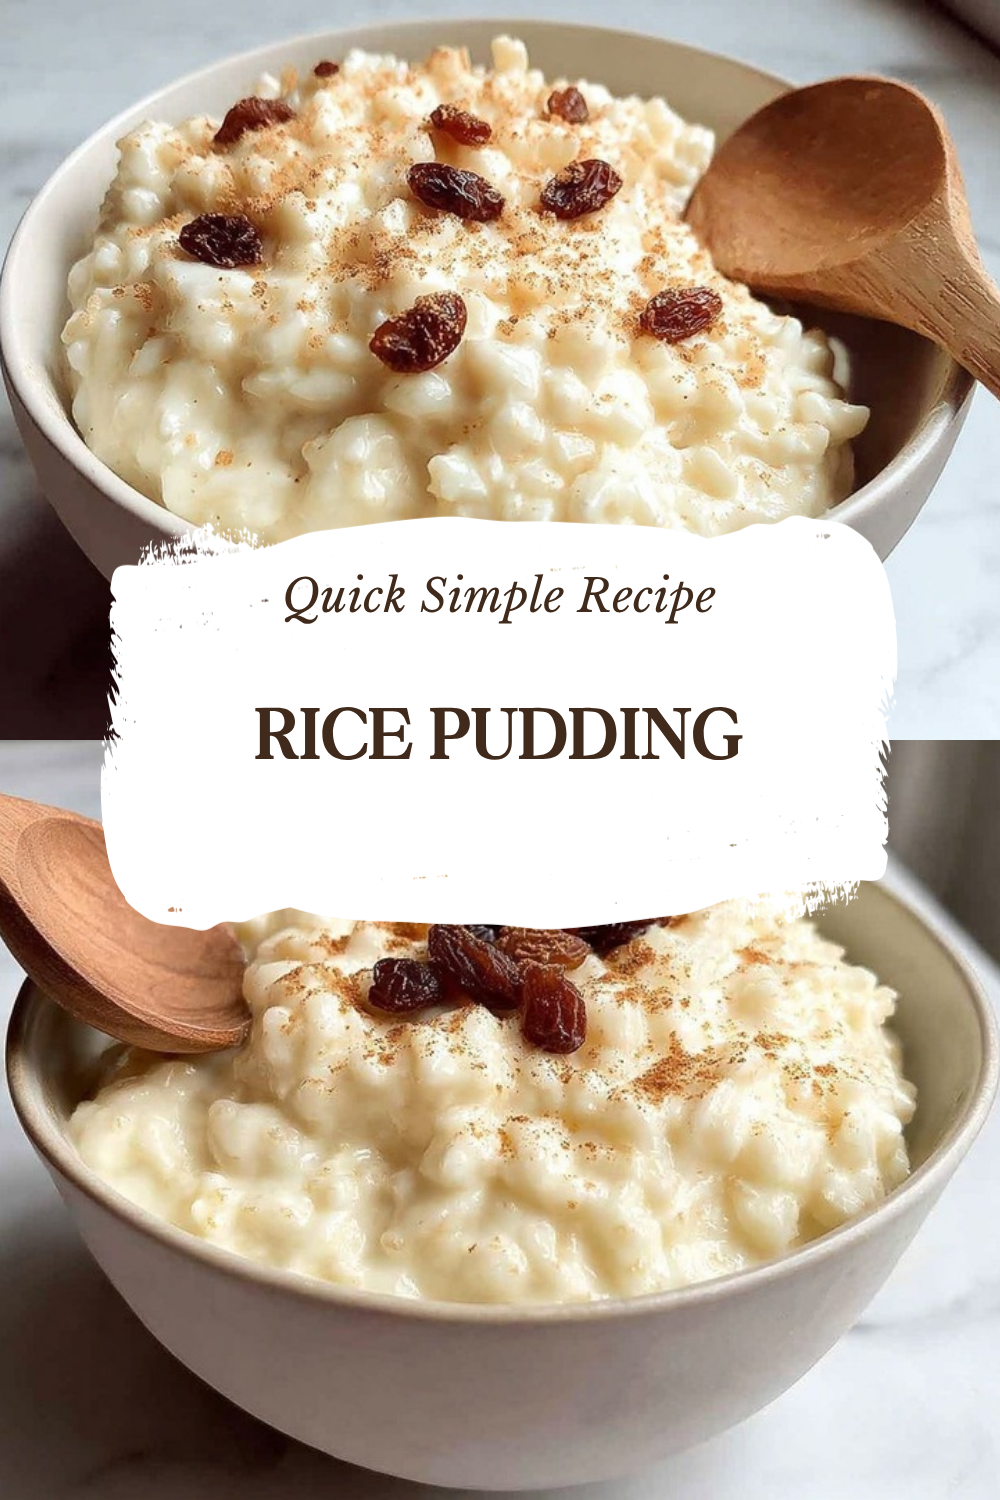
Why You’ll Love This Rice Pudding
There’s something truly magical about a warm bowl of homemade Rice Pudding that brings comfort to any table. This classic stovetop dessert has been a beloved treat for generations, and once you try this recipe, you’ll understand exactly why it never goes out of style. Made with just five main ingredients, this creamy delight offers the perfect balance of sweetness and warmth that feels like a hug in every spoonful.
Ease of Preparation
One of the biggest reasons to fall in love with this recipe is how wonderfully simple it is to make. With just 5 minutes of prep time and about 35 to 45 minutes of hands-on cooking, you can have a delicious dessert ready without any fancy equipment or complicated techniques. Unlike many custard-based desserts, this Rice Pudding requires no eggs, which means no tempering or worrying about curdled mixtures. The rice starch does all the work, naturally thickening the pudding to that perfect creamy consistency we all crave.
Health Benefits
This comforting dessert offers more than just great taste. Each serving provides 6 grams of protein and 166mg of calcium, making it a surprisingly nutritious choice for a sweet treat. The whole milk base delivers essential vitamins and minerals, while rice provides carbohydrates for energy. At just 250 calories per serving, you can enjoy this pudding guilt-free. According to WebMD, rice offers several health benefits including providing quick energy and being easy to digest, which makes this dessert gentle on the stomach.
Versatility
Whether you prefer your Rice Pudding warm and comforting or chilled and refreshing, this recipe adapts beautifully to your preferences. You can serve it straight from the stovetop for a cozy winter dessert, or refrigerate it for a cool summer treat. The recipe easily accommodates dietary modifications, too. You can omit the raisins for picky eaters, adjust the sweetness level to your liking, or even experiment with different flavorings to create your signature version.
Distinctive Flavor
What truly sets this Rice Pudding apart is the depth of flavor achieved through simple yet thoughtful ingredient choices. The cinnamon stick infuses the milk with warm, aromatic notes during the entire cooking process, creating a much more nuanced flavor than simply stirring in ground cinnamon at the end. Combined with real vanilla bean paste and the natural creaminess of short-grain rice, every bite delivers a rich, satisfying taste that store-bought versions simply cannot match.
Jump To
- 1. Why You’ll Love This Rice Pudding
- 2. Essential Ingredients for Rice Pudding
- 3. How to Prepare the Perfect Rice Pudding: Step-by-Step Guide
- 4. Dietary Substitutions to Customize Your Rice Pudding
- 5. Mastering Rice Pudding: Advanced Tips and Variations
- 6. How to Store Rice Pudding: Best Practices
- 7. FAQs: Frequently Asked Questions About Rice Pudding
- 8. Rice Pudding
Essential Ingredients for Rice Pudding
Gathering the right ingredients is the first step toward creating the perfect Rice Pudding. Each component plays a specific role in building that signature creamy texture and comforting flavor. Here’s everything you’ll need to make this classic dessert:
- 4½ cups whole milk – The foundation of creaminess. Whole milk provides the rich, velvety texture that makes this pudding so satisfying. The milk proteins and fat content help create that luxurious mouthfeel.
- 1½ cups water – Helps balance the richness and prevents the milk from scorching during the long cooking process. The combination creates the perfect consistency.
- ¾ cup granulated sugar – Provides just the right amount of sweetness. You can adjust this amount based on your preference, or substitute brown sugar for a deeper, caramel-like flavor.
- 1 cinnamon stick (3 to 4 inches long) – Infuses the pudding with warm, aromatic flavor during cooking. Ground cinnamon can work as an alternative, but the stick provides a more subtle, sophisticated flavor.
- 1 cup Arborio rice or Bomba rice – The star ingredient. Short-grain rice varieties release more starch during cooking, creating that signature creamy texture without any added thickeners. Long-grain rice is not recommended as it won’t produce the same results.
- 1 teaspoon vanilla bean paste or vanilla extract – Adds depth and warmth to the flavor profile. For an even more intense vanilla experience, split half a vanilla bean pod, scrape the seeds, and add both the seeds and pod during cooking.
- ⅔ cup golden raisins (optional) – Add natural sweetness and a pleasant chewy texture. These can be omitted entirely or stirred into individual portions for those who prefer them.
Special Dietary Options
For those with dietary restrictions, here are some helpful substitutions:
- Dairy-free: Substitute whole milk with full-fat coconut milk or a combination of coconut milk and your favorite plant-based milk alternative.
- Lower sugar: Reduce the granulated sugar to ½ cup, or use a natural sweetener like maple syrup or honey (adjust cooking time slightly as these contain moisture).
- Vegan: Use coconut milk and replace the sugar with coconut sugar or maple syrup for a completely plant-based version.
How to Prepare the Perfect Rice Pudding: Step-by-Step Guide
Creating the perfect Rice Pudding is all about patience and attention to detail. Follow these detailed steps, and you’ll achieve that dreamy, creamy consistency every single time.
Step 1: Combine Your Base Ingredients
Start by gathering a heavy-bottomed saucepan, which is essential for even heat distribution and preventing the milk from scorching. Add 4½ cups of whole milk, 1½ cups of water, ¾ cup of granulated sugar, your cinnamon stick, and 1 cup of Arborio or Bomba rice to the pan. The heavy bottom of the saucepan will protect the milk from direct heat and help maintain a consistent temperature throughout cooking. Give everything a good stir to combine, making sure the sugar begins to dissolve and the rice is evenly distributed throughout the liquid.
Step 2: Bring to an Intense Simmer
Place your saucepan over medium-high heat and bring the mixture to an intense simmer, just below the boiling point. This is a crucial moment that requires your full attention. Stir often during this phase to prevent the rice from sticking to the bottom of the pan and to keep the milk from forming a skin on top. You’ll notice the mixture starting to bubble around the edges and steam rising from the surface. Once you see those vigorous bubbles forming but before it reaches a full rolling boil, it’s time to reduce the heat. Do not let the mixture boil over, as this can scorch the milk and affect the final flavor.
Step 3: Simmer Until Rice is Tender
Reduce your heat to maintain a steady, gentle simmer. This lower temperature is where the magic happens. Cook the mixture for approximately 35 to 45 minutes, stirring often throughout this time. The stirring serves multiple purposes: it prevents sticking, helps release starch from the rice grains, and ensures even cooking. You’ll notice the mixture gradually thickening as the rice releases its starch into the milk. Test the rice for doneness by tasting a few grains. They should be completely tender with no crunchy or hard center remaining. The consistency should resemble thin oatmeal with some liquid still visible. Remember that the pudding will continue to thicken as it cools, so don’t worry if it seems a bit loose at this stage.
Step 4: Remove From Heat and Add Finishing Touches
Once your rice is perfectly tender and the pudding has reached that ideal consistency, remove the saucepan from the heat. Using tongs or a spoon, fish out the cinnamon stick and discard it. Now it’s time to add the finishing flavors. Stir in 1 teaspoon of vanilla bean paste or vanilla extract, along with the golden raisins if you’re using them. The warmth of the pudding will help the vanilla distribute evenly throughout, infusing every spoonful with that classic, aromatic flavor. If you’re using a split vanilla bean pod, you would have added it earlier with the rice, so simply remove the pod at this stage along with the cinnamon stick.
Step 5: Portion and Cool
Divide your freshly made Rice Pudding into individual ramekins for elegant single servings, or transfer it to a large serving dish for family-style presentation. At this point, you have options. You can let it cool slightly and serve it warm for maximum comfort, or allow it to cool completely to room temperature, then cover tightly and refrigerate for up to one day before serving. If you’re planning to serve it cold, the flavors will continue to develop during the resting time in the refrigerator.
Step 6: Garnish and Serve
Just before serving, add that final touch of freshly grated cinnamon or a dusting of ground cinnamon on top. This not only makes the presentation beautiful but also adds a wonderful aromatic element as you take your first bite. Whether you enjoy your Rice Pudding warm or chilled, each spoonful delivers that perfect combination of creamy, sweet, and warmly spiced flavors that make this dessert truly unforgettable.
The entire process takes just 40 to 50 minutes from start to finish, with only 5 minutes of active prep time. This makes it an excellent choice for busy weeknight desserts or last-minute entertaining when you want something homemade and special without spending hours in the kitchen. If you’re looking for other comforting desserts to add to your repertoire, check out this cinnamon roll honeybun cheesecake for another cozy treat that pairs beautifully with a cup of coffee.

Dietary Substitutions to Customize Your Rice Pudding
One of the wonderful things about this classic recipe is how easily it adapts to different dietary needs and preferences. Whether you’re cooking for someone with allergies, following a specific eating plan, or simply wanting to experiment with new flavors, there are plenty of ways to make this Rice Pudding your own.
Milk and Liquid Alternatives
The type of liquid you use significantly impacts both the texture and flavor of your pudding. While whole milk creates the richest, creamiest result, there are excellent alternatives for various dietary needs. Full-fat coconut milk makes an outstanding substitute for a dairy-free version, adding a subtle tropical note that pairs beautifully with cinnamon and vanilla. For a lighter version, you can use 2% milk, though the texture will be slightly less creamy. Some cooks prefer using a combination of milk and half-and-half for extra richness, or even adding a splash of heavy cream at the end for a truly indulgent treat.
For those avoiding dairy entirely, oat milk creates a surprisingly creamy result with a neutral flavor that won’t compete with the vanilla and cinnamon. Almond milk works well too, though you may want to add a tablespoon of butter or coconut oil to compensate for the lower fat content. Rice milk creates a naturally sweet, mild-tasting pudding that’s perfect for those with multiple allergies.
Sweetener Modifications
While granulated white sugar provides a clean, neutral sweetness that lets the other flavors shine, there are many ways to sweeten your pudding differently. Brown sugar creates a deeper, more complex sweetness with hints of molasses that complement the warm spices beautifully. Maple syrup adds a distinctive flavor that works wonderfully in autumn and winter, though you’ll need to reduce the liquid slightly to compensate. Honey brings its own floral notes and pairs exceptionally well with a dash of nutmeg. For a lower-glycemic option, coconut sugar works well and adds a lovely caramel undertone.
Rice Varieties and Their Effects
The type of rice you choose dramatically affects the final texture of your Rice Pudding. Arborio rice remains the gold standard for this recipe, releasing abundant starch while maintaining a pleasant bite in each grain. Bomba rice, traditionally used for paella, works beautifully as well. Sushi rice is another excellent short-grain option that creates an incredibly creamy result. For something different, try black rice for a striking purple-hued pudding with a nutty flavor, or jasmine rice for a delicate floral aroma. Just remember that long-grain rice varieties like basmati won’t release enough starch for that signature creamy texture.
Mastering Rice Pudding: Advanced Tips and Variations
Once you’ve mastered the basic recipe, it’s time to explore the many creative directions you can take this versatile dessert. These expert tips and variations will help you create signature versions that will have everyone asking for your secret.
Pro Cooking Techniques
The key to exceptional Rice Pudding lies in the details. Always use a heavy-bottomed pan to ensure even heat distribution and prevent scorching. Stirring in a figure-eight pattern helps keep the rice moving and prevents it from clumping together. If you notice the mixture thickening too quickly, simply add a splash more milk to maintain the right consistency. For the smoothest texture, some cooks prefer to rinse the rice briefly before cooking, though this will reduce the starch content slightly. The cinnamon stick should be added at the beginning to maximize flavor infusion, and removing it before the final stir ensures no one gets an unexpected spicy bite.
Delicious Flavor Variations
While the classic cinnamon-vanilla combination is timeless, there’s a whole world of flavors waiting to be explored. Try adding a few cardamom pods along with the cinnamon for a fragrant, exotic twist. A strip of orange or lemon zest cooked with the milk adds bright citrus notes that cut through the richness. For chocolate lovers, stir in a handful of dark chocolate chips at the end, letting them melt into swirls throughout the warm pudding. During the holidays, a pinch of ground nutmeg and a splash of rum extract creates a festive eggnog-inspired variation.
Fruit additions offer endless possibilities. Besides golden raisins, try dried cranberries, chopped dried apricots, or even fresh berries stirred in just before serving. A swirl of fruit jam or compote on top creates a beautiful presentation and adds bright flavor contrast. For a truly decadent treat, top each serving with a dollop of whipped cream or a scoop of vanilla ice cream.
Presentation and Serving Ideas
The way you present your Rice Pudding can transform it from a simple comfort food into an elegant dinner party dessert. Individual ramekins create a sophisticated presentation, especially when topped with a sprinkle of cinnamon in a decorative pattern. For gatherings, consider setting up a toppings bar with options like chopped nuts, fresh fruit, chocolate shavings, and toasted coconut, allowing guests to customize their portions. Serving the pudding in hollowed-out cinnamon-dusted apples or pears creates a stunning autumn presentation that’s sure to impress.
Make-Ahead Strategies
This Rice Pudding is perfect for entertaining because it can be made up to a day in advance without any loss of quality. In fact, many people find the flavor improves after resting overnight as the spices continue to infuse the pudding. If you’re meal prepping, portion the cooled pudding into individual containers for grab-and-go breakfasts or snacks throughout the week. The pudding travels well, making it an excellent choice for potlucks and family gatherings. Just remember to bring it to room temperature or warm it gently before serving for the best texture.
How to Store Rice Pudding: Best Practices
Proper storage ensures your homemade Rice Pudding stays fresh and delicious for as long as possible. Whether you have leftovers or want to make it ahead of time, following these guidelines will help maintain the quality and safety of your dessert.
Refrigeration Guidelines
For short-term storage, refrigeration is your best option. Allow the pudding to cool completely to room temperature before covering, which prevents condensation from forming and diluting the flavor. Transfer it to an airtight container or cover the serving dish tightly with plastic wrap, pressing the wrap directly onto the surface of the pudding to prevent a skin from forming. Properly stored, Rice Pudding will stay fresh in the refrigerator for up to 2 days. The texture may thicken during storage, which is completely normal and easily remedied when reheating.
Freezing for Longer Storage
If you need to store your pudding for longer periods, freezing works surprisingly well. Portion the cooled pudding into freezer-safe containers, leaving about half an inch of headspace for expansion. Label with the date and freeze for up to 3 months. While the texture may soften slightly upon thawing due to starch breakdown, the flavor remains excellent. For best results, thaw frozen pudding overnight in the refrigerator rather than at room temperature.
Reheating for Best Results
When you’re ready to enjoy your stored pudding, reheating requires a gentle touch. For stovetop reheating, place the pudding in a saucepan over low heat, adding a splash of milk to restore creaminess. Stir constantly for 3 to 5 minutes until heated through. Microwave reheating works well too. Transfer to a microwave-safe bowl, cover loosely, and heat on medium power in 30-second intervals, stirring between each until warm. Never boil the pudding during reheating, as high heat can cause the milk proteins to separate and create an unpleasant texture.
For more detailed nutritional information about this comforting dessert, you can refer to FoodStruct’s rice pudding analysis which provides comprehensive data on its nutritional profile.
FAQs: Frequently Asked Questions About Rice Pudding
How long does rice pudding last in the fridge?
Rice pudding stays fresh in the fridge for up to 2 days when stored properly. First, let it cool completely to room temperature to prevent condensation and bacterial growth. Transfer it to an airtight container or cover tightly with plastic wrap directly on the surface. This keeps it from drying out or absorbing fridge odors. Before eating, check for any off smells or sliminess—discard if in doubt. For best taste and texture, enjoy it within the first day. If it thickens, stir in a splash of milk when reheating gently on the stovetop over low heat or in the microwave in 30-second bursts, stirring between each. Always reheat only what you’ll eat to avoid repeated temperature changes.
Can you make rice pudding ahead of time?
Yes, rice pudding can be made up to 1 day in advance for convenience. Prepare it as usual, then cool it fully before covering and refrigerating in an airtight container. The rice will absorb most of the liquid overnight, so it may firm up—that’s normal. To serve, reheat gently on the stovetop over low heat with a little extra milk or cream (about 2-4 tablespoons per cup of pudding) to restore creaminess. Microwave works too: heat in a covered bowl on medium power in 30-60 second intervals, stirring well each time. Serve warm for comfort or chilled straight from the fridge for a lighter dessert. Avoid making it more than a day ahead to preserve the best flavor and texture.
Can rice pudding be frozen?
Rice pudding freezes well for up to 3 months, though texture may soften slightly upon thawing due to starch breakdown. Portion it into freezer-safe airtight containers or bags, leaving some headspace for expansion, and label with the date. Freeze flat for easy stacking. To thaw, place in the fridge overnight—never at room temperature to avoid bacteria. Once thawed, stir vigorously and add 1-2 tablespoons of milk per cup if it’s too thick. Reheat on the stovetop over low heat or microwave as described, stirring frequently. For best results, freeze smaller batches and consume within 1-2 months. It’s great for meal prep, but fresh homemade tastes superior.
What kind of rice is best for rice pudding?
Short-grain or medium-grain rice works best for creamy rice pudding, as it releases more starch for that signature pudding-like texture. Arborio (used in risotto) is a top choice for extra creaminess without becoming mushy—use 1 cup for a standard 4-serving recipe. Sushi rice or bomba are excellent alternatives. Avoid long-grain varieties like basmati, which stay firm and separate. Rinse the rice briefly under cold water to remove excess starch if you want less gluey results, but don’t overdo it. Cook in full-fat milk or a milk-cream mix at a simmer for 30-40 minutes, stirring often. This yields tender grains that thicken perfectly as it cools. Experiment with pudding rice if available in your area for authentic results.
How do you reheat rice pudding?
Reheat rice pudding gently to avoid curdling or separating. On the stovetop: place in a saucepan over low heat, add 1-2 tablespoons milk per cup, and stir constantly for 3-5 minutes until hot and creamy. Microwave option: transfer to a microwave-safe bowl, cover loosely, and heat on medium power in 30-second bursts, stirring after each until steaming (about 1-2 minutes total). If frozen and thawed, it may need more milk. Always taste and adjust sweetness with a pinch of sugar or cinnamon. Serve warm topped with fresh fruit, nuts, or a dusting of nutmeg. Reheating small portions preserves quality—avoid boiling, as high heat toughens the rice. This method revives day-old pudding almost like fresh.

Rice Pudding
- Total Time: 45 minutes
- Yield: 8 servings
- Diet: Vegetarian
Description
🍚 Indulge in velvety, creamy rice pudding crafted from just five simple ingredients, delivering nostalgic comfort with natural starch for egg-free richness.
🥛 Quick stovetop bliss ready in under an hour, perfect warm or chilled with optional raisins for versatile, family-pleasing desserts anytime.
Ingredients
– 4½ cups whole milk
– 1½ cups water
– ¾ cup granulated sugar
– 1 cinnamon stick (3 to 4 inches long)
– 1 cup Arborio rice or Bomba rice
– 1 teaspoon vanilla bean paste or vanilla extract
– ⅔ cup golden raisins (optional)
Instructions
1-Step 1: Combine Your Base Ingredients Start by gathering a heavy-bottomed saucepan, which is essential for even heat distribution and preventing the milk from scorching. Add 4½ cups of whole milk, 1½ cups of water, ¾ cup of granulated sugar, your cinnamon stick, and 1 cup of Arborio or Bomba rice to the pan. The heavy bottom of the saucepan will protect the milk from direct heat and help maintain a consistent temperature throughout cooking. Give everything a good stir to combine, making sure the sugar begins to dissolve and the rice is evenly distributed throughout the liquid.
2-Step 2: Bring to an Intense Simmer Place your saucepan over medium-high heat and bring the mixture to an intense simmer, just below the boiling point. This is a crucial moment that requires your full attention. Stir often during this phase to prevent the rice from sticking to the bottom of the pan and to keep the milk from forming a skin on top. You’ll notice the mixture starting to bubble around the edges and steam rising from the surface. Once you see those vigorous bubbles forming but before it reaches a full rolling boil, it’s time to reduce the heat. Do not let the mixture boil over, as this can scorch the milk and affect the final flavor.
3-Step 3: Simmer Until Rice is Tender Reduce your heat to maintain a steady, gentle simmer. This lower temperature is where the magic happens. Cook the mixture for approximately 35 to 45 minutes, stirring often throughout this time. The stirring serves multiple purposes: it prevents sticking, helps release starch from the rice grains, and ensures even cooking. You’ll notice the mixture gradually thickening as the rice releases its starch into the milk. Test the rice for doneness by tasting a few grains. They should be completely tender with no crunchy or hard center remaining. The consistency should resemble thin oatmeal with some liquid still visible. Remember that the pudding will continue to thicken as it cools, so don’t worry if it seems a bit loose at this stage.
4-Step 4: Remove From Heat and Add Finishing Touches Once your rice is perfectly tender and the pudding has reached that ideal consistency, remove the saucepan from the heat. Using tongs or a spoon, fish out the cinnamon stick and discard it. Now it’s time to add the finishing flavors. Stir in 1 teaspoon of vanilla bean paste or vanilla extract, along with the golden raisins if you’re using them. The warmth of the pudding will help the vanilla distribute evenly throughout, infusing every spoonful with that classic, aromatic flavor. If you’re using a split vanilla bean pod, you would have added it earlier with the rice, so simply remove the pod at this stage along with the cinnamon stick.
5-Step 5: Portion and Cool Divide your freshly made Rice Pudding into individual ramekins for elegant single servings, or transfer it to a large serving dish for family-style presentation. At this point, you have options. You can let it cool slightly and serve it warm for maximum comfort, or allow it to cool completely to room temperature, then cover tightly and refrigerate for up to one day before serving. If you’re planning to serve it cold, the flavors will continue to develop during the resting time in the refrigerator.
6-Step 6: Garnish and Serve Just before serving, add that final touch of freshly grated cinnamon or a dusting of ground cinnamon on top. This not only makes the presentation beautiful but also adds a wonderful aromatic element as you take your first bite. Whether you enjoy your Rice Pudding warm or chilled, each spoonful delivers that perfect combination of creamy, sweet, and warmly spiced flavors that make this dessert truly unforgettable.
Notes
🍚 Use short-grain Arborio or Bomba rice for the creamiest, starchiest texture – avoid long-grain.
🌿 A cinnamon stick infuses superior, subtle flavor during cooking over ground cinnamon.
❄️ Store airtight in fridge up to 2 days; reheat with a splash of milk to loosen if thickened.
- Prep Time: 5 minutes
- Cook Time: 40 minutes
- Category: Dessert
- Method: Stovetop
- Cuisine: American
Nutrition
- Serving Size: 1 serving
- Calories: 250 kcal
- Sugar: 26g
- Sodium: 62mg
- Fat: 5g
- Saturated Fat: 3g
- Unsaturated Fat: 2g
- Trans Fat: 0g
- Carbohydrates: 46g
- Fiber: 1g
- Protein: 6g
- Cholesterol: 14mg
Keywords: rice pudding, creamy rice pudding, stovetop rice pudding, easy rice dessert