Introduction to Red Velvet Cheesecake
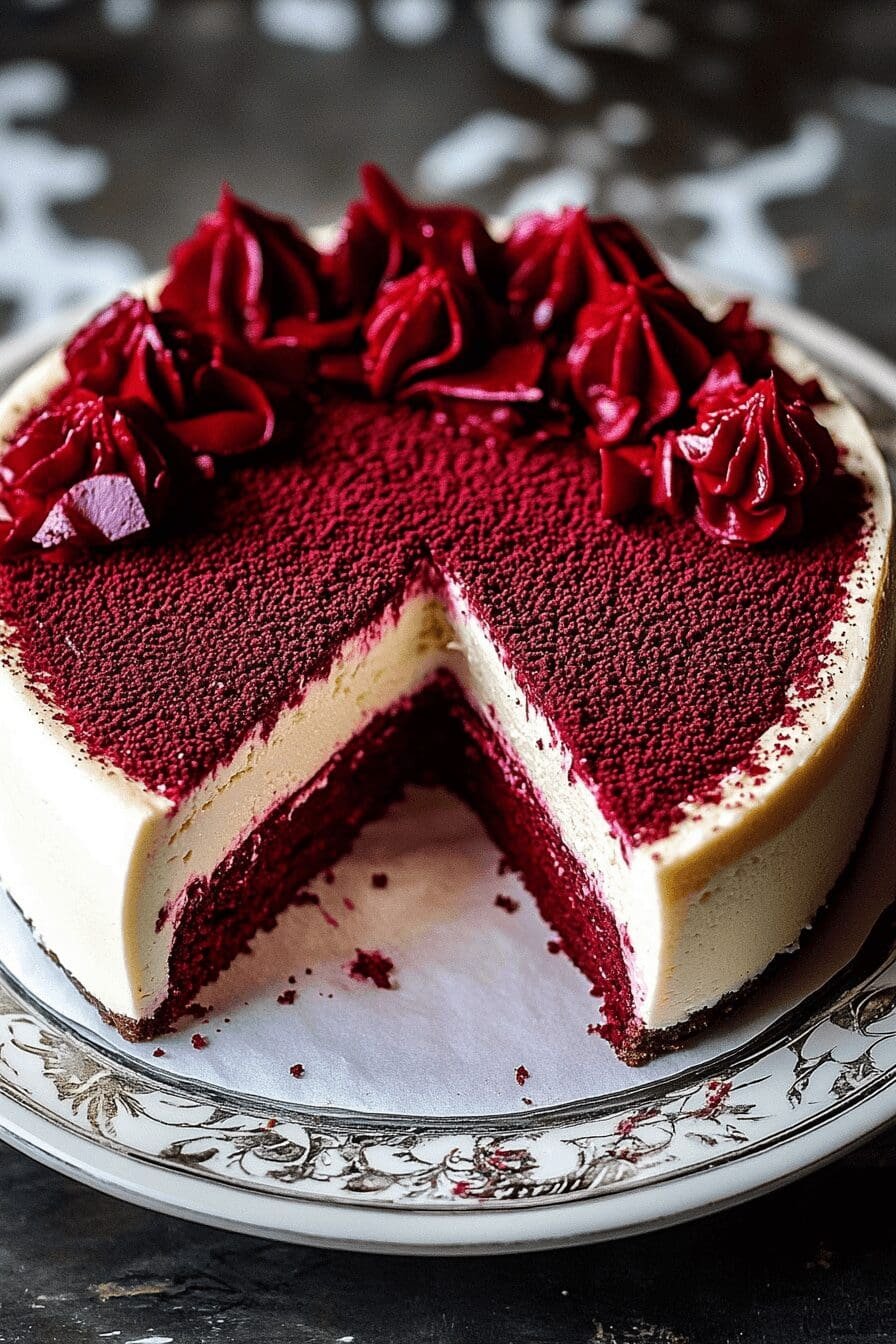
The tantalizing combination of a Red Velvet Cheesecake, with its vibrant hue and rich flavor, has captivated dessert enthusiasts for years. This fusion dessert intertwines the lush consistency of cheesecake with the iconic red velvet cake layers, primarily featuring a delightful Oreo cookie crust. Successfully creating a masterpiece that is simple, delectable, and suited for various dietary preferences, such as vegan and gluten-free options, it’s a true game-changer for many. By following our expertly crafted recipe, you’ll have the chance to impress your family and friends with this sweet delight, perfect for any occasion.
Jump To
- 1. Introduction to Red Velvet Cheesecake
- 2. Benefits and Advantages of Red Velvet Cheesecake
- 3. Ingredients Overview
- 4. How to Prepare the Perfect Red Velvet Cheesecake: Step-by-Step Guide
- 5. Mastering Red Velvet Cheesecake: Advanced Tips and Variations
- 6. How to Store Red Velvet Cheesecake: Best Practices
- 7. Nutritional Value of Red Velvet Cheesecake
- 8. FAQs: Frequently Asked Questions About Red Velvet Cheesecake
- 9. Red Velvet Cheesecake Recipe
Benefits and Advantages of Red Velvet Cheesecake
Creating a Red Velvet Cheesecake at home offers numerous advantages, making it a standout choice among dessert lovers. Its ease of preparation means that even novice bakers can achieve professional results, thanks to a well-structured recipe. Additionally, this dessert is notably versatile – offering options for those with specific dietary requirements, such as gluten-free or vegan diets. The vibrant red color, obtained naturally from food coloring, ensures it’s not just a treat for the taste buds but a feast for the eyes too. Furthermore, because many ingredients can be substituted to cater to individual needs, it comfortably accommodates varied culinary preferences. Find inspiration for delightful treats by exploring more dessert options like strawberry shortcake ice cream.

Ingredients Overview
Essential Ingredients for Red Velvet Cheesecake
- Oreo Cookie Crust:
- 24 Oreo cookies, crushed
- 1/4 cup unsalted butter, melted
- 1 tablespoon granulated sugar
- Cream Cheese Layer:
- 4 (8-ounce) packages cream cheese, softened
- 1 1/4 cups granulated sugar
- 4 large eggs
- 2 teaspoons pure vanilla extract
- 1 cup sour cream
- 1 tablespoon cocoa powder
- Red Velvet Cake Layer:
- 1 1/2 cups all-purpose flour
- 1 cup sugar
- 1 teaspoon baking soda
- 1 teaspoon salt
- 1 teaspoon cocoa powder
- 1 cup vegetable oil
- 1 cup buttermilk, room temperature
- 2 large eggs, room temperature
- 2 tablespoons red food coloring
- 1 teaspoon white vinegar
- 1 teaspoon vanilla extract
- Cream Cheese Frosting:
- 8 ounces cream cheese, softened
- 1/2 cup unsalted butter, softened
- 4 cups powdered sugar
- 1 teaspoon vanilla extract
Dietary Substitutions to Customize Your Red Velvet Cheesecake
Whether you’re accommodating dietary restrictions or ingredient preferences, these substitutions can help make your cheesecake allergen-friendly or suit your taste:
- Gluten-Free Crust Option: Swap regular Oreos with a gluten-free version to cater to those with gluten sensitivities.
- Vegan Alternatives: Substitute cream cheese with a dairy-free version and use flax eggs (1 tablespoon flaxseed meal + 3 tablespoons water per egg) instead of regular eggs.
- Low-Calorie Modifications: Opt for low-fat cream cheese and Greek yogurt in place of sour cream to reduce calorie count without sacrificing taste.
- Natural Food Coloring: If avoiding artificial colors, beet juice or pomegranate powder can provide a naturally vivid red hue.
How to Prepare the Perfect Red Velvet Cheesecake: Step-by-Step Guide
Embarking on the journey of making a red velvet cheesecake may seem daunting, but breaking it down step by step makes it manageable and fun. Follow these detailed instructions to create a culinary masterpiece:
Prepare the Oreo Cookie Crust
- First Step: Start by preheating your oven to 325°F (160°C). Line the bottom of a springform pan with parchment paper for easy removal.
- Second Step: Combine crushed Oreo cookies, melted butter, and sugar in a bowl. Mix until well combined.
- Third Step: Press the mixture firmly into the base of the prepared springform pan, creating an even layer. Bake for 10 minutes, then allow it to cool.
Prepare the Cream Cheese Layer
- Fourth Step: In a large mixing bowl, beat softened cream cheese until smooth and creamy.
- Fifth Step: Gradually add sugar, ensuring it dissolves entirely, then blend in eggs one at a time until the mixture is velvety.
- Sixth Step: Stir in vanilla extract, sour cream, and cocoa powder, mixing thoroughly for a consistent texture.
Assemble the Red Velvet Cake Layer
- Seventh Step: In another bowl, whisk together flour, sugar, baking soda, salt, and cocoa powder.
- Eighth Step: Create a well in the dry mixture and pour in vegetable oil, buttermilk, eggs, red food coloring, vinegar, and vanilla extract. Mix until smooth.
- Ninth Step: Pour half of the red velvet cake batter over the baked Oreo crust in the springform pan.
- Tenth Step: Spread the entire cream cheese mixture evenly over the red velvet batter and gently spread the remaining cake batter on top.
Baking the Cake
- Eleventh Step: Place the filled springform pan into a larger roasting pan. Pour hot water into the roasting pan until it reaches halfway up the sides of the springform pan to create a water bath.
- Twelfth Step: Bake for approximately 80 minutes. Check for doneness by ensuring the center is set, and a slight jiggle remains.
- Thirteenth Step: Once done, switch off the oven, allowing the cheesecake to gradually cool inside with the door slightly ajar.
Finish with Cream Cheese Frosting
- Fourteenth Step: After removing the cheesecake, let it cool to room temperature, then refrigerate it overnight to achieve a firm texture.
- Fifteenth Step: Before serving, prepare the cream cheese frosting by beating cream cheese and butter, followed by powdered sugar and vanilla extract, until smooth.
- Sixteenth Step: Spread the frosting generously over the chilled cheesecake, cut into slices, and serve.
Adapting ingredients and preparation techniques to your preference ensures that everyone can enjoy this delicious red velvet cheesecake. Visit our page on strawberry shortcake ice cream and no-bake matcha tiramisu for more dessert inspirations. Enhance your dessert experience with insights about the history of red velvet cake.
Mastering Red Velvet Cheesecake: Advanced Tips and Variations
Once you’ve mastered the basics of creating the red velvet cheesecake, it’s time to elevate your dessert game with some advanced tips and variations. These suggestions will help you create a stunning centerpiece dessert that will impress your family and friends at any gathering.
Advanced Tips for Perfect Red Velvet Cheesecake
- Use a Water Bath: To ensure your cheesecake has a silky texture, bake it using a water bath method. Wrap the outside of the springform pan with two layers of heavy-duty aluminum foil to prevent water from seeping in, and place it in a larger pan filled with hot water.
- Control the Temperature: Avoid cracks on the surface by baking at a consistent low temperature. Keep your oven at around 325°F and avoid opening the door frequently.
- Cool Gradually: Turn off the oven after baking and let the cheesecake cool gradually in the oven with the door slightly open for about an hour. This helps prevent rapid temperature changes that can cause cracking.
- Use Quality Ingredients: For the best taste, use high-quality cream cheese, pure vanilla extract, and fresh eggs. These ingredients greatly impact the overall flavor.
Delicious Variations to Try
- Chocolate Drizzle: Add a luxurious touch with a simple chocolate ganache drizzle. Melt dark chocolate and heavy cream together, then pour over the chilled cheesecake for a glossy finish.
- Berry Toppings: Fresh berries such as strawberries, raspberries, or blueberries not only add color but also a burst of fresh flavor to the rich cheesecake. Arrange a mix on top before serving.
- Layered Cake: Want a twist? Create a layered version combining red velvet cake layers with the cheesecake. Prepare two layers of red velvet cake, and assemble with the cheesecake in between for a dramatic two-textured dessert.
- Nuts and Chocolate Crust: Replace the Oreo crust with one made of crushed nuts and chocolate cookies for added texture and a nutty undertone that complements the creamy filling.
How to Store Red Velvet Cheesecake: Best Practices
Proper storage is crucial for maintaining the flavor and texture of your red velvet cheesecake. Whether it’s awaiting a special occasion or safeguarding leftovers, follow these best practices to keep it fresh.
Refrigeration Tips
- Wrap It Well: After your cheesecake has cooled and chilled, cover it with plastic wrap or aluminum foil to prevent it from absorbing other flavors in the fridge.
- Airtight Containers: Alternatively, store slices in airtight containers to maintain freshness and make portioning easy.
- Consume Within a Week: For optimal taste, try to consume refrigerated cheesecake within 5-7 days.
Freezing Guidelines
- Freeze Whole or in Portions: Wrap individual slices or the whole cheesecake in plastic wrap, then foil, and finally place in a freezer bag for up to 2 months.
- Defrost Gradually: To retain its texture, thaw in the refrigerator overnight rather than at room temperature.
Remember, storing your red velvet cheesecake the right way ensures each bite remains as delicious as the first. Maintaining its creamy, decadent layers will undoubtedly satisfy your cravings each time.
Nutritional Value of Red Velvet Cheesecake
Understanding the nutritional value of Red Velvet Cheesecake allows food enthusiasts to indulge mindfully. Each slice, approximately 1/12th of the cake, contains a variety of nutrients, ensuring a balance of flavor and nourishment. Here’s a breakdown of the nutritional content for a standard slice:
| Component | Amount per Serving |
|---|---|
| Calories | 350-450 kcal |
| Total Fat | 25-30 g |
| Saturated Fat | 15-18 g |
| Cholesterol | 85-100 mg |
| Sodium | 300-350 mg |
| Total Carbohydrates | 30-40 g |
| Dietary Fiber | 1-2 g |
| Sugars | 25-30 g |
| Protein | 5-8 g |
The cheesecake offers a rich source of calcium and vitamin A due to its cream cheese base, beneficial for bone health and immune function. However, moderation is key, as the dessert is relatively high in sugar and fat. When opting for a healthier version, consider substitutions such as low-fat cream cheese, reduced-sugar options, or a gluten-free alternative. Additionally, for more nutrition facts on desserts, you might also find inspiration from other blog entries about healthier dessert options.
FAQs: Frequently Asked Questions About Red Velvet Cheesecake
-
What makes red velvet cheesecake have its distinctive red color?
The classic red hue of Red Velvet Cheesecake is achieved by incorporating red food coloring into the batter. Historically, the red color was also linked to the reaction between cocoa powder and acidic ingredients. This combination altered the pigment of anthocyanin in cocoa, providing a reddish tint. Today, however, food dye is primarily responsible for the vibrant appearance. Learn more about the history of red velvet cake for more insights. -
Can red velvet cheesecake be made gluten-free?
Yes, Red Velvet Cheesecake can certainly be made gluten-free! By using gluten-free graham crackers or gluten-free Oreo cookies for the crust and ensuring all other ingredients are certified gluten-free, individuals with gluten sensitivities can enjoy this decadent dessert without worry. Vegan and gluten-free variations can also be explored for dietary considerations. -
How do I know when my red velvet cheesecake is fully baked?
To determine when your red velvet cheesecake is fully baked, check the center of the cheesecake. It should have a slight wobble; this means the residual heat will finish cooking the cake as it cools. Alternatively, using a kitchen thermometer, the internal temperature should read approximately 150°F, ensuring it is perfectly set once cooled. -
Why does my red velvet cheesecake sometimes develop moisture on top after refrigeration?
Moisture formation on top of a cheesecake is quite common after refrigeration. This is due to condensation forming as the cheesecake cools. To minimize, always allow the cheesecake to cool completely at room temperature before covering and refrigerating. Additionally, place a layer of parchment or wax paper on top before covering with a lid to absorb any excess moisture. For more tips on cheesecake storage, explore this article for comprehensive storage solutions.

Red Velvet Cheesecake Recipe
- Total Time: 2 hours
Description
🍰 Indulge in the perfect balance of rich, velvety red cake and creamy cheesecake for an unforgettable dessert experience! 😍
🎂 With a luscious Oreo crust and a smooth cream cheese frosting, this show-stopping treat is a must-have for any celebration! 🎉
Ingredients
Crushed Oreos
Melted butter
Granulated sugar
Cream cheese
Eggs
Sour cream
Cocoa powder
Red food coloring
Buttermilk
White vinegar
All-purpose flour
Baking soda
Salt
Unsalted butter
Powdered sugar
Vanilla extract
Instructions
1. Preheat the oven to 325°F and prepare a springform pan by greasing it and lining the bottom with parchment paper.
2. Make the Oreo crust by crushing Oreos into fine crumbs, mixing with melted butter and sugar, then pressing the mixture into the bottom of the pan.
3. Bake the crust for about 10 minutes, then let it cool while preparing the cheesecake layer.
4. In a mixing bowl, beat cream cheese until smooth, then add sugar and mix until well combined.
5. Add eggs one at a time, mixing on low speed, followed by sour cream, cocoa powder, and vanilla extract.
6. Pour the cheesecake batter over the cooled Oreo crust and smooth the top.
7. Prepare a water bath by wrapping the outside of the springform pan in aluminum foil and placing it in a larger baking dish filled with hot water.
8. Bake the cheesecake for about 45-60 minutes until the center is slightly jiggly.
9. Turn off the oven and let the cheesecake sit inside for an hour to cool gradually.
10. Remove from the oven, let it cool to room temperature, then refrigerate for at least 6 hours or overnight.
11. Prepare the red velvet cake batter by whisking together flour, cocoa powder, and salt in a bowl.
12. In another bowl, beat butter and sugar until fluffy, then add eggs one at a time.
13. Mix in buttermilk, red food coloring, vinegar, and vanilla extract.
14. Gradually add the dry ingredients to the wet mixture, mixing until just combined.
15. Divide the batter equally between two greased cake pans and bake for about 25-30 minutes.
16. Let the cakes cool completely, then level the tops if necessary.
17. Make the cream cheese frosting by beating cream cheese and butter until smooth, then mixing in powdered sugar and vanilla extract.
18. Assemble the cheesecake by placing one red velvet cake layer on a serving plate, adding the cheesecake layer, and topping with the second red velvet layer.
19. Frost the entire cake with the cream cheese frosting, smoothing the sides and top.
20. Chill the cake for another hour before slicing and serving.
Notes
Let the cheesecake chill overnight to achieve the creamiest texture and best flavor.
Use a water bath while baking to prevent cracks and achieve an even, smooth cheesecake layer.
For a vibrant red color, use gel food coloring instead of liquid to avoid altering the batter’s consistency.
- Prep Time: 60
- Cook Time: 60
- Category: Dessert
- Method: Baked
- Cuisine: American