Why You’ll Love This Pumpkin Scones
Pumpkin scones bring a cozy fall vibe to your kitchen, and this recipe makes them simple to whip up at home. One big plus is how easy they are to prepare, taking just about 30 minutes from start to finish for a fresh batch that even beginners can handle. Another reason to try them is the health benefits, as pumpkin adds vitamins and fiber that make these treats a smarter choice for snacks or breakfast.
They also offer great versatility, letting you tweak the ingredients for different dietary needs like gluten-free or vegan options without losing that flaky pumpkin scones texture. Finally, the distinctive flavor from warm spices like cinnamon and pumpkin pie spice sets these apart, creating a comforting taste that feels just right for autumn gatherings. For anyone searching for pumpkin scones ideas, this recipe stands out with its balance of simplicity and delicious results.
- Ease of preparation: This pumpkin scones recipe uses straightforward steps and common ingredients, so you can bake them quickly even on a busy morning. No fancy tools needed, which makes it perfect for busy parents or students looking for fast pumpkin scones without the fuss.
- Health benefits: Packed with pumpkin puree, these scones provide nutrients like vitamin A and fiber, supporting wellness while satisfying cravings. If you’re a diet-conscious individual, enjoy pumpkin scones as a lighter alternative that keeps things tasty and nourishing.
- Versatility: Adapt these pumpkin scones to fit various preferences, such as adding nuts for extra crunch or swapping sugars for a low-calorie version. Whether you’re a baking enthusiast or a working professional, this flexibility makes pumpkin scones a go-to for everyday meals or special events.
- Distinctive flavor: The blend of spices and pumpkin creates a warm, inviting taste that elevates simple baking into something memorable. For food enthusiasts, pumpkin scones offer that unique spiced profile that pairs wonderfully with coffee, enhancing your daily routine.
This approach not only highlights the best of pumpkin scones but also ensures they’re accessible for home cooks of all levels. By focusing on these benefits, you’ll see why pumpkin scones have become a favorite for creating memorable moments.
Jump To
- 1. Why You’ll Love This Pumpkin Scones
- 2. Essential Ingredients for Pumpkin Scones
- 3. How to Prepare the Perfect Pumpkin Scones: Step-by-Step Guide
- 4. Dietary Substitutions to Customize Your Pumpkin Scones
- 5. Mastering Pumpkin Scones: Advanced Tips and Variations
- 6. How to Store Pumpkin Scones: Best Practices
- 7. FAQs: Frequently Asked Questions About Pumpkin Scones
- 8. Pumpkin Scones
Essential Ingredients for Pumpkin Scones
To make the perfect pumpkin scones, you’ll need a mix of basic baking staples and some special fall flavors. Let’s break down the main ingredients with their exact measurements and why they matter for the best results.
Main Ingredients
- 2 cups all-purpose flour – This forms the base of your pumpkin scones dough, providing structure and a tender crumb when mixed properly.
- 2 and 1/2 teaspoons baking powder – Acts as a leavening agent to help the scones rise, ensuring they achieve that light, flaky texture many love in pumpkin scones.
- 1 teaspoon ground cinnamon – Adds a warm, aromatic spice that enhances the overall flavor, making your pumpkin scones taste like autumn in every bite.
- 1 and 1/2 teaspoons pumpkin pie spice (or a blend of ground allspice, ginger, nutmeg, cloves with cinnamon) – Brings a mix of spices for that signature pumpkin scones depth, which you can customize based on what you have on hand.
- 1/2 teaspoon salt – Balances the sweetness and helps bring out the flavors in your pumpkin scones, making each bite more enjoyable.
- 1/2 cup (8 tablespoons) unsalted butter, frozen – Keeps the dough cold for flakiness; grate it before adding to avoid overworking the mix, a key tip for perfect pumpkin scones.
- 1/3 cup plus 2 tablespoons heavy cream, divided – Provides moisture and richness; use part for the dough and the rest for brushing on top before baking to get that golden finish on pumpkin scones.
- 1 large egg – Binds the ingredients together, adding structure and helping create a tender interior in your pumpkin scones.
- 1/2 cup canned pumpkin puree, blotted to remove moisture – Infuses moisture and flavor; blotting it ensures your pumpkin scones don’t become too dense, keeping them light and airy.
- 1/2 cup light brown sugar – Sweetens the dough with a subtle molasses note that complements the spices in pumpkin scones perfectly.
- 1 teaspoon pure vanilla extract – Adds a hint of warmth and depth, enhancing the overall taste of your pumpkin scones.
- Optional: coarse sugar for sprinkling before baking – Gives a nice crunch and extra sweetness on the outside of your pumpkin scones, though you can skip it if you prefer a simpler finish.
Maple Glaze Ingredients
- 2 tablespoons unsalted butter – Forms the base of the glaze, adding a creamy richness that pairs well with the flavors in pumpkin scones.
- 1/3 cup pure maple syrup – Provides natural sweetness and a distinct flavor that makes the glaze for pumpkin scones irresistible.
- 1 cup sifted confectioners’ sugar – Creates a smooth, pourable consistency for the glaze, ensuring it coats your pumpkin scones evenly.
- Pinch of salt to taste – Enhances the glaze’s flavor without overpowering it, perfect for finishing off your pumpkin scones.
For special dietary options, consider these tweaks to enjoy pumpkin scones in various ways. Check out our rhubarb muffins recipe for more baking inspiration that aligns with adaptable ingredients.
Special Dietary Options
- Vegan: Swap the butter for a plant-based version like coconut oil and use a flax egg (1 tablespoon ground flaxseed mixed with 3 tablespoons water) instead of the large egg to keep your pumpkin scones cruelty-free.
- Gluten-free: Replace the all-purpose flour with a gluten-free blend, ensuring it includes xanthan gum for the right texture in your pumpkin scones.
- Low-calorie: Opt for a sugar substitute in place of light brown sugar and use reduced-fat cream to lighten up your pumpkin scones while maintaining flavor.
How to Prepare the Perfect Pumpkin Scones: Step-by-Step Guide
Follow this detailed guide to bake pumpkin scones that turn out flaky and full of flavor every time. We’ll cover everything from prep to baking, with tips for adapting to your needs.
First Step: Gather and Prep Your Ingredients
Start by pulling together all the ingredients for your pumpkin scones to make the process smooth. Measure out 2 cups all-purpose flour, 2 and 1/2 teaspoons baking powder, and the spices, then freeze your 1/2 cup unsalted butter to keep it cold. This step ensures you’re ready to mix quickly, which helps maintain that flaky texture in pumpkin scones.
Second Step: Mix the Dry Ingredients
In a large bowl, whisk together the flour, baking powder, cinnamon, pumpkin pie spice, salt, and light brown sugar until evenly combined. This creates a solid base for your pumpkin scones, allowing the spices to distribute well and enhance the flavor. Remember to handle the mixture gently to avoid compacting it, which can affect the final rise of your pumpkin scones.
Third Step: Incorporate the Butter
Grate the frozen butter into the dry mix and use your fingers or a pastry cutter to blend it in until it resembles coarse crumbs. For the best flaky pumpkin scones, keep everything cold at this stage to prevent the butter from melting too soon. If you’re aiming for a lighter version, you could try a blueberry cottage cheese breakfast bake for a similar quick treat with variations.
Fourth Step: Add Wet Ingredients
In another bowl, beat the large egg, then stir in the blotted pumpkin puree, vanilla extract, and most of the heavy cream. Pour this into the dry mixture and fold gently until just combined, which keeps your pumpkin scones from becoming tough. For dietary adaptations, swap the cream for a non-dairy option if needed.
Fifth Step: Shape and Chill the Dough
Turn the dough onto a floured surface, pat it into a circle about 1-inch thick, and cut into wedges. Place the wedges on a baking sheet and chill them in the fridge for 15 minutes to firm up, a crucial step for achieving those perfect layers in pumpkin scones. This chilling time also allows flavors to meld, making your pumpkin scones even tastier.
Sixth Step: Bake to Perfection
Preheat your oven to 400°F and brush the tops of the scones with the remaining heavy cream, then sprinkle with coarse sugar if desired. Bake for 20-25 minutes until golden brown, rotating the pan halfway for even cooking. Let them cool slightly on a wire rack before adding the glaze, ensuring your pumpkin scones have the ideal texture and warmth.
Final Step: Apply the Maple Glaze and Serve
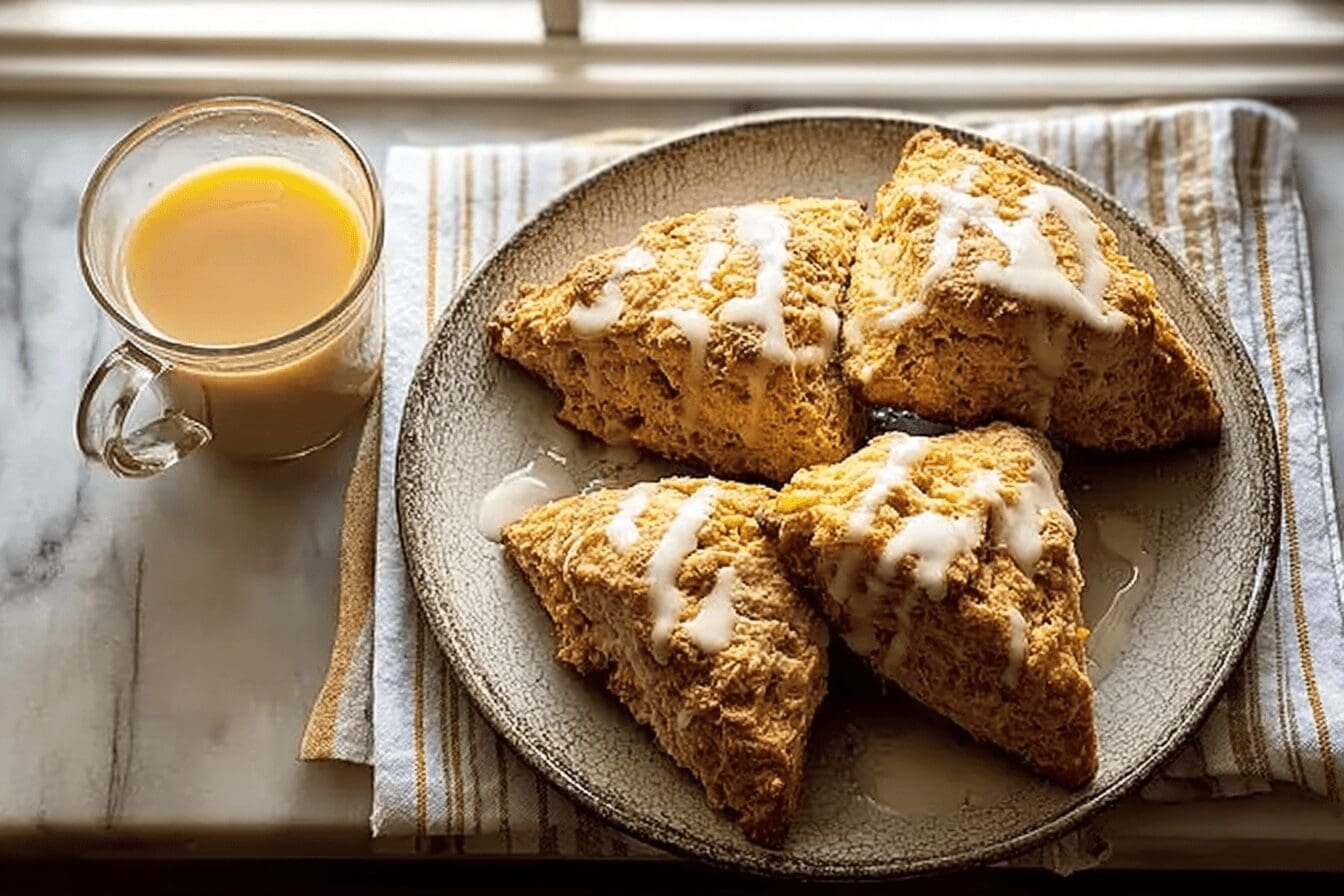
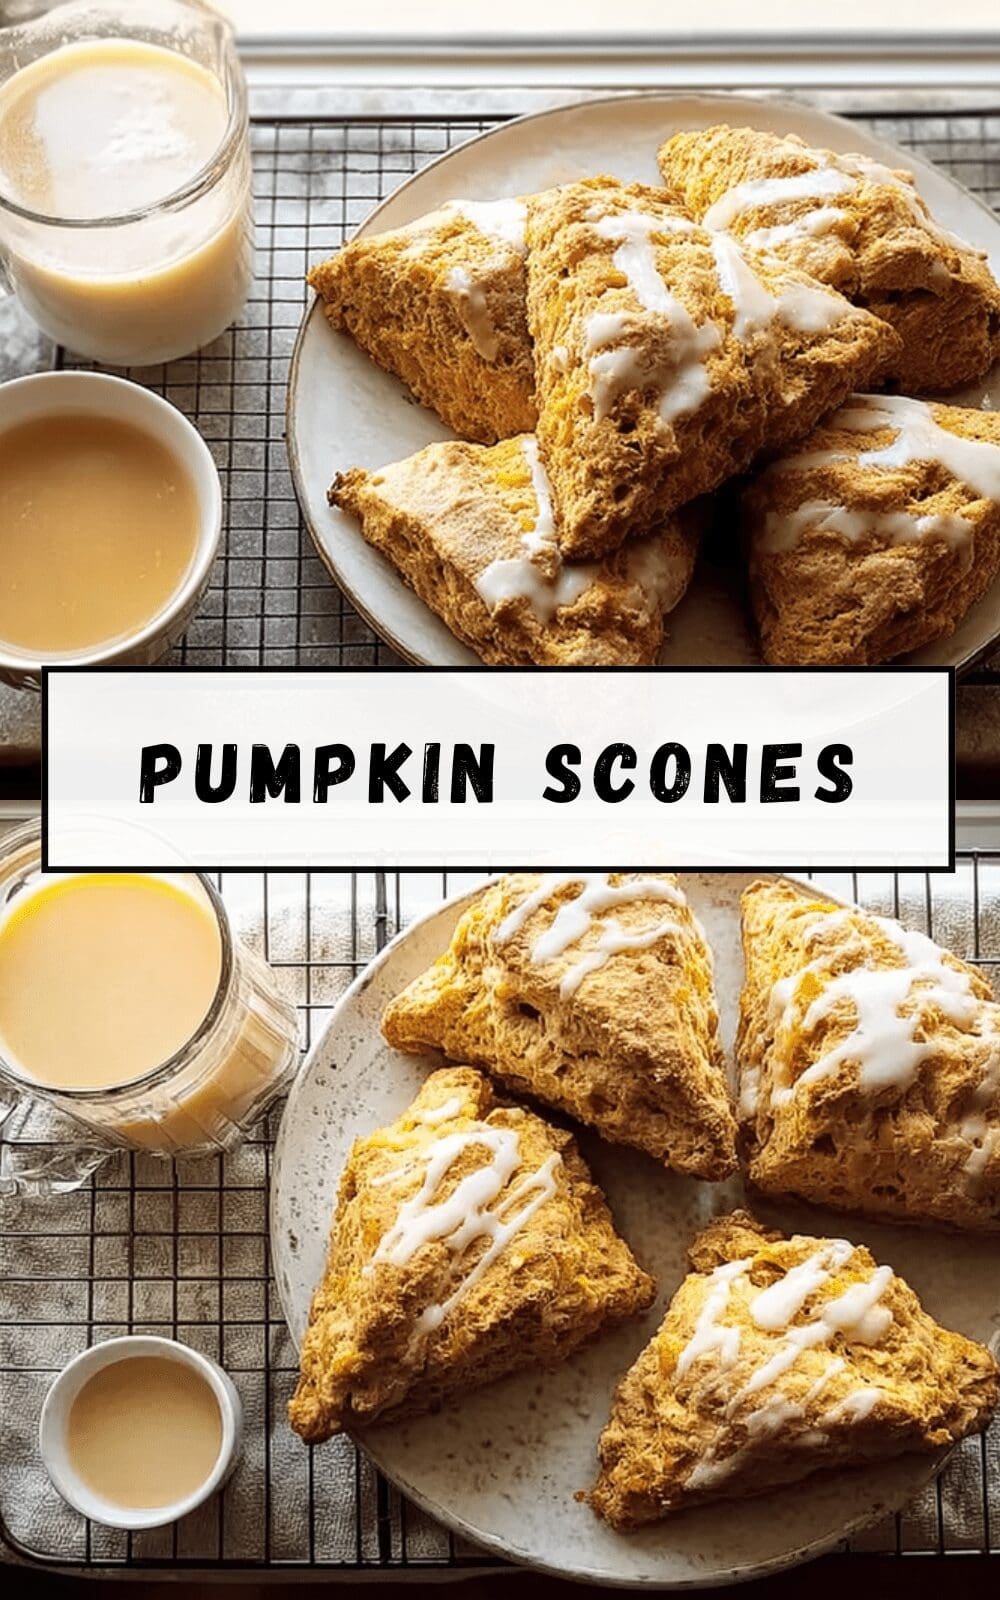
While the scones cool, melt 2 tablespoons unsalted butter with 1/3 cup maple syrup, then whisk in 1 cup sifted confectioners’ sugar and a pinch of salt. Drizzle the glaze over the scones and let it set for a few minutes. Serve warm for the best experience, pairing your pumpkin scones with coffee for a delightful treat that suits any occasion.

Dietary Substitutions to Customize Your Pumpkin Scones
Protein and Main Component Alternatives
When baking pumpkin scones, you can swap the egg for alternatives like applesauce or a flax egg to suit vegan diets, keeping the dough cohesive without altering the flavor much. For those avoiding dairy, replace the butter with vegan margarine or coconut oil to maintain that flaky texture. These changes make pumpkin scones accessible for newlyweds or seniors looking for lighter options, ensuring everyone enjoys a tasty version.
Vegetable, Sauce, and Seasoning Modifications
Experiment with different veggies by adding fresh pumpkin instead of canned for a more intense flavor, or incorporate nuts for added crunch in your pumpkin scones. Adjust seasonings with milder blends for spice-sensitive eaters, and use agave syrup in the glaze for a low-calorie twist. Travelers and working professionals will appreciate these tweaks for quick, adaptable pumpkin scones that fit various routines.
Mastering Pumpkin Scones: Advanced Tips and Variations
To take your pumpkin scones to the next level, focus on pro techniques like grating butter for even distribution, which ensures maximum flakiness. Try flavor variations by adding chocolate chips or nuts for a personalized twist, making your pumpkin scones more exciting for food enthusiasts.
Pro Cooking Techniques
One key method is to chill the dough before baking, as it helps with rising and texture in pumpkin scones.
Flavor Variations
- Add dried cranberries for a tart contrast in your pumpkin scones.
- Use honey instead of sugar for a natural sweetener option.
Presentation Tips
Serve them with fresh fruit to enhance the visual appeal of pumpkin scones.
Make-Ahead Options
Prepare the dough in advance and freeze it for busy schedules, so pumpkin scones are always ready.
How to Store Pumpkin Scones: Best Practices
| Storage Method | Duration | Tips |
|---|---|---|
| Refrigeration | 3-5 days | Wrap in plastic for freshness. |
| Freezing | Up to 3 months | Freeze wedges separately. |
For short-term needs, use refrigeration to keep your pumpkin scones fresh. For longer storage, freezing works well to preserve quality.
FAQs: Frequently Asked Questions About Pumpkin Scones
What type of butter should I use for making pumpkin scones?
Use frozen butter for pumpkin scones to achieve tender, flaky layers with crisp edges. Grate the frozen butter into fine shreds or cut it into small chunks before mixing it into the dry ingredients. This method helps the butter stay cold longer during mixing, preventing it from melting prematurely and ensuring a light, crumbly texture.
How can I prevent my pumpkin scones from being too wet or dense?
Blot excess moisture from your pumpkin puree using a paper towel before adding it to the dough. Removing excess liquid prevents the scones from spreading too much and becoming dense or muffin-like, maintaining the ideal flaky, crumbly texture. Also, avoid over-mixing the dough, which can make scones tough.
Can I freeze pumpkin scone dough before baking?
Yes, pumpkin scone dough can be shaped into wedges and frozen on a baking sheet before storing in a freezer bag. When ready to bake, either thaw the scones overnight in the refrigerator or bake them directly from frozen—just add a few extra minutes to the baking time for even cooking.
What’s the best way to apply a glaze to pumpkin scones?
For a flavorful maple glaze, gently melt unsalted butter with maple syrup over low heat. Whisk in sifted confectioners’ sugar and a pinch of salt until smooth. Drizzle the warm glaze over freshly baked, slightly cooled scones so it seeps into the cracks, enhancing both taste and appearance.
Is it necessary to brush pumpkin scones with cream before baking?
Yes, brushing pumpkin scones with heavy cream or buttermilk just before baking helps create a golden, crisp exterior. This step also allows toppings like coarse sugar to stick well, adding a pleasant crunch and subtle sweetness to the finished scones.

Pumpkin Scones
- Total Time: 45 minutes
- Yield: 8 scones
- Diet: Vegetarian
Description
🎃 Classic Pumpkin Scones Recipe With Warm Spices and Flaky Texture offers a cozy, seasonal flavor perfect for autumn mornings and snacks.
🍁 These scones combine tender, flaky layers with comforting spices and a sweet maple glaze for a delightful treat.
Ingredients
– 2 cups all-purpose flour for the base of your pumpkin scones dough
– 2 and 1/2 teaspoons baking powder as a leavening agent
– 1 teaspoon ground cinnamon for warm, aromatic spice
– 1 and 1/2 teaspoons pumpkin pie spice (or blend of ground allspice, ginger, nutmeg, cloves with cinnamon) for signature pumpkin scones depth
– 1/2 teaspoon salt to balance sweetness and enhance flavor
– 1/2 cup (8 tablespoons) unsalted butter, frozen to keep dough cold for flakiness
– 1/3 cup plus 2 tablespoons heavy cream, divided for moisture and richness
– 1 large egg to bind ingredients together
– 1/2 cup canned pumpkin puree, blotted to remove moisture for moisture and flavor
– 1/2 cup light brown sugar to sweeten with a subtle molasses note
– 1 teaspoon pure vanilla extract for warmth and depth
– Optional: coarse sugar for sprinkling before baking for crunch and extra sweetness
– 2 tablespoons unsalted butter for base of maple glaze
– 1/3 cup pure maple syrup for natural sweetness and flavor in glaze
– 1 cup sifted confectioners’ sugar for smooth consistency in glaze
– Pinch of salt to taste to enhance glaze flavor
Instructions
First Step: Gather and Prep Your Ingredients Start by pulling together all the ingredients for your pumpkin scones to make the process smooth. Measure out 2 cups all-purpose flour, 2 and 1/2 teaspoons baking powder, and the spices, then freeze your 1/2 cup unsalted butter to keep it cold. This step ensures you’re ready to mix quickly, which helps maintain that flaky texture in pumpkin scones.
Second Step: Mix the Dry Ingredients In a large bowl, whisk together the flour, baking powder, cinnamon, pumpkin pie spice, salt, and light brown sugar until evenly combined. This creates a solid base for your pumpkin scones, allowing the spices to distribute well and enhance the flavor. Remember to handle the mixture gently to avoid compacting it, which can affect the final rise of your pumpkin scones.
Third Step: Incorporate the Butter Grate the frozen butter into the dry mix and use your fingers or a pastry cutter to blend it in until it resembles coarse crumbs. For the best flaky pumpkin scones, keep everything cold at this stage to prevent the butter from melting too soon. If you’re aiming for a lighter version, you could try a blueberry cottage cheese breakfast bake for a similar quick treat with variations.
Fourth Step: Add Wet Ingredients In another bowl, beat the large egg, then stir in the blotted pumpkin puree, vanilla extract, and most of the heavy cream. Pour this into the dry mixture and fold gently until just combined, which keeps your pumpkin scones from becoming tough. For dietary adaptations, swap the cream for a non-dairy option if needed.
Fifth Step: Shape and Chill the Dough Turn the dough onto a floured surface, pat it into a circle about 1-inch thick, and cut into wedges. Place the wedges on a baking sheet and chill them in the fridge for 15 minutes to firm up, a crucial step for achieving those perfect layers in pumpkin scones. This chilling time also allows flavors to meld, making your pumpkin scones even tastier.
Sixth Step: Bake to Perfection Preheat your oven to 400°F and brush the tops of the scones with the remaining heavy cream, then sprinkle with coarse sugar if desired. Bake for 20-25 minutes until golden brown, rotating the pan halfway for even cooking. Let them cool slightly on a wire rack before adding the glaze, ensuring your pumpkin scones have the ideal texture and warmth.
Final Step: Apply the Maple Glaze and Serve While the scones cool, melt 2 tablespoons unsalted butter with 1/3 cup maple syrup, then whisk in 1 cup sifted confectioners’ sugar and a pinch of salt. Drizzle the glaze over the scones and let it set for a few minutes. Serve warm for the best experience, pairing your pumpkin scones with coffee for a delightful treat that suits any occasion.
Notes
❄️ Use frozen butter and grate it to ensure flaky texture.
💧 Blot pumpkin puree to remove excess moisture and prevent sogginess.
⚠️ Avoid over-mixing dough to keep scones tender and flaky.
🥛 Heavy cream or buttermilk is preferred for optimal texture and flavor.
❄️ Scones can be frozen baked or as shaped dough; refrigerate dough overnight if needed.
🍂 Substitute pumpkin pie spice with a mix of cinnamon, allspice, ginger, nutmeg, and cloves.
⏰ Smaller scones will bake faster; adjust baking time accordingly.
- Prep Time: 20 minutes
- Cook Time: 25 minutes
- Category: Breakfast, Snack
- Method: Baking
- Cuisine: American
Nutrition
- Serving Size: 1 scone
Keywords: pumpkin scones,warm spiced scones,class pumpkin scones,flaky pumpkin scones