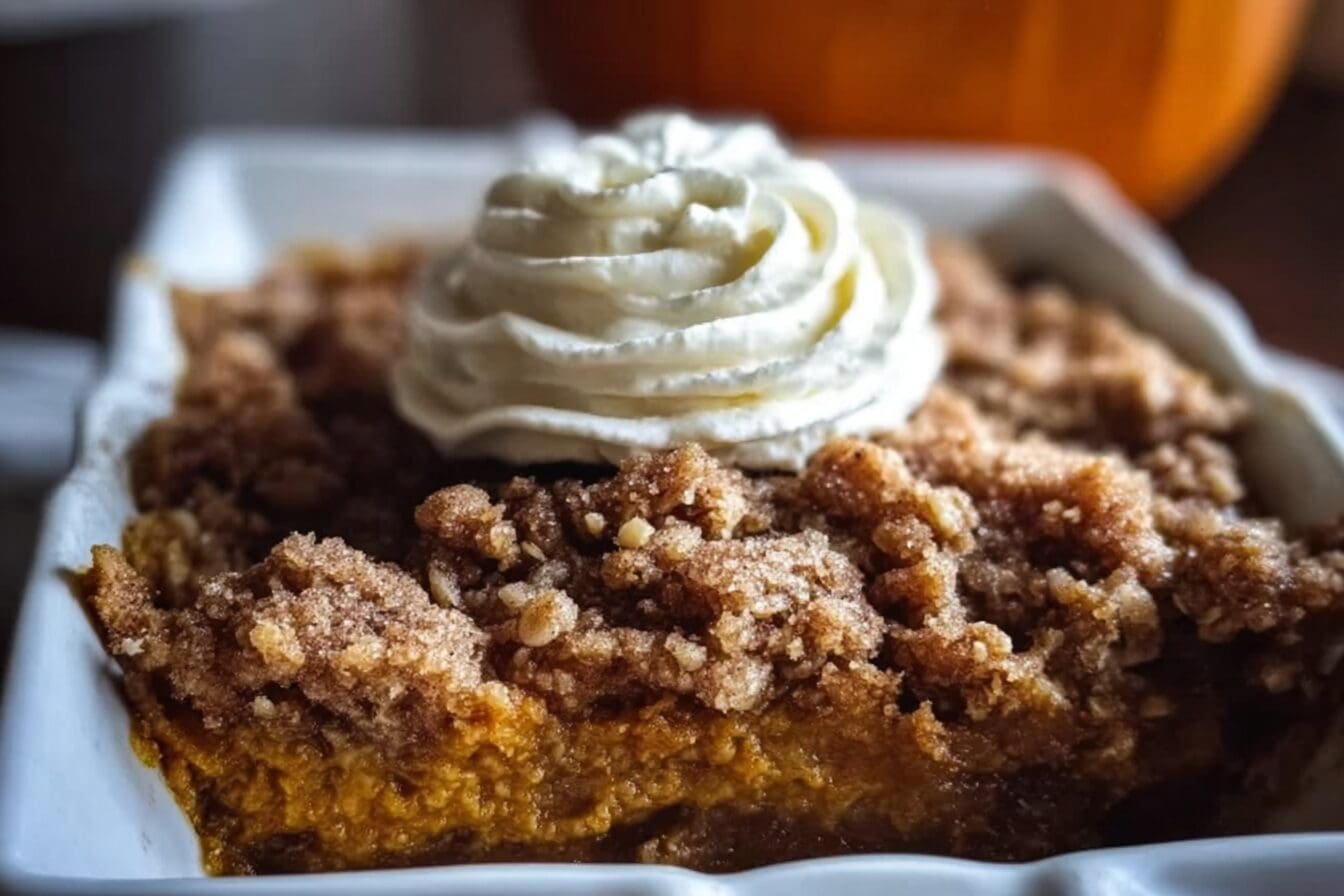
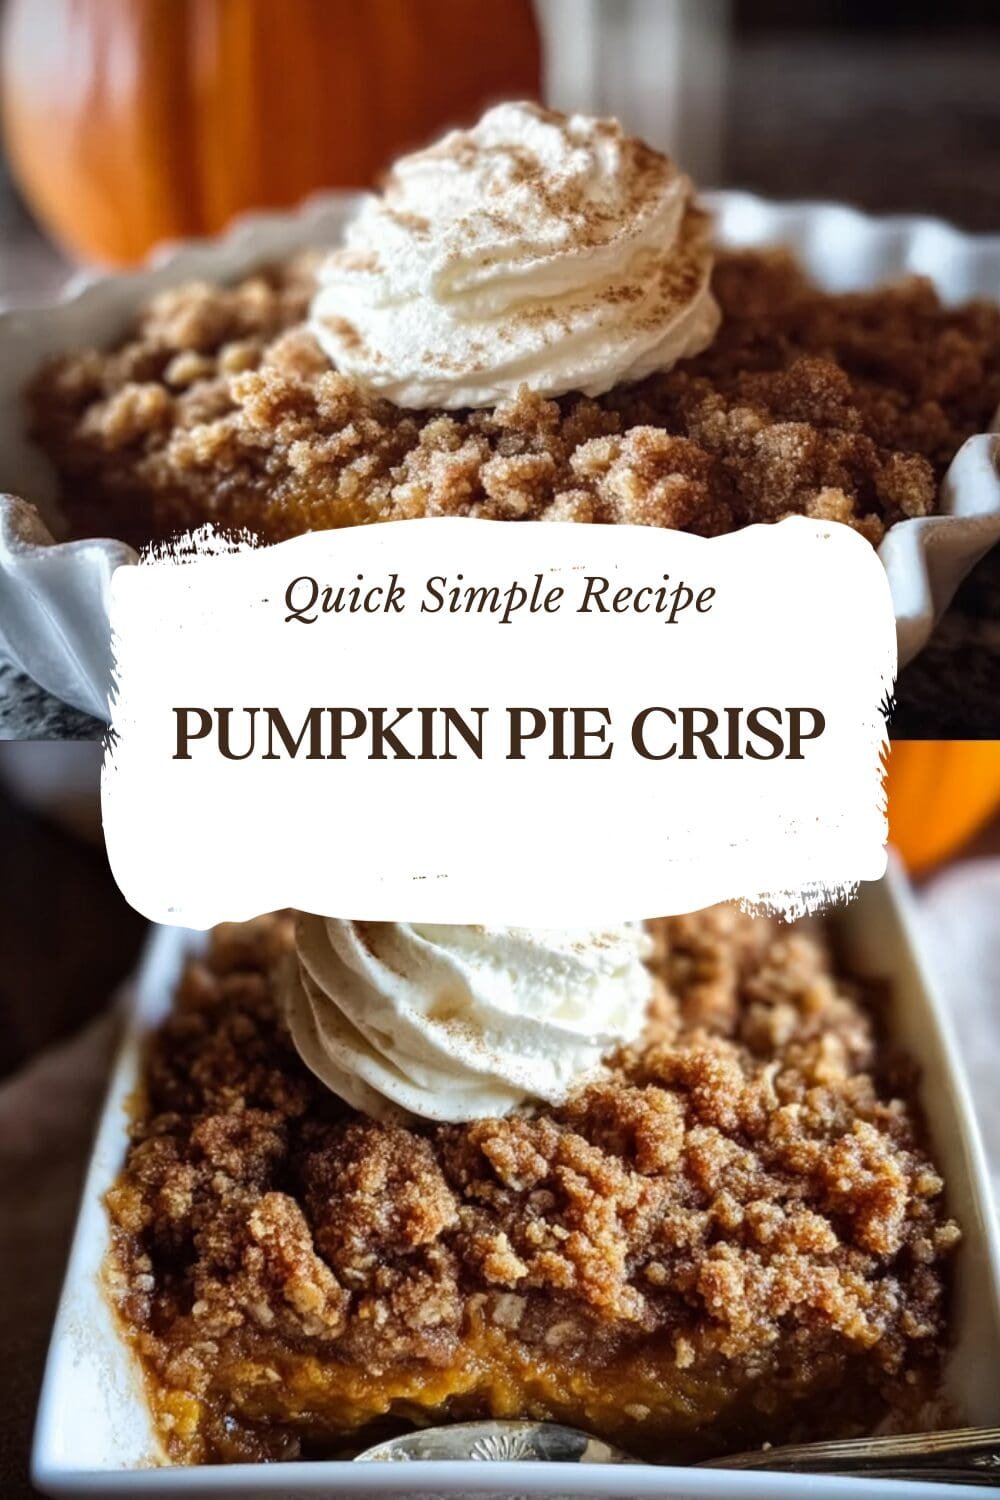
Why You’ll Love This Pumpkin Pie Crisp
If you are looking for a dessert that captures the very essence of fall comfort food, you have come to the right place. There is something incredibly magical about the combination of spiced pumpkin and a crumbly, buttery topping. This Pumpkin Pie Crisp takes everything you adore about traditional pumpkin pie and makes it even better. Oh y’all, it is so good you might want to make a double batch.
One of the best things about this recipe is how incredibly simple it is to put together. We all have those busy nights where we want something homemade but do not have hours to spend in the kitchen. This recipe comes to the rescue. It is wonderfully simple with minimal ingredients and a quick cooking time, making it perfect for busy cooks seeking a speedy yet delicious dessert. You do not need to be a pastry chef to get rave reviews with this one.
Beyond the ease, this dessert is packed with nutrient-rich ingredients. We all love a treat that tastes indulgent but still offers some nutritional value. Pumpkin is a powerhouse of vitamins, fiber, and antioxidants that support overall wellness. If you are curious about just how good this orange squash is for you, you can read about the health benefits of pumpkin and feel even better about serving this to your family.
The flavor profile here is distinctive and memorable. The unique blend of warm spices combined with the natural sweetness of pumpkin delivers a standout taste that elevates any occasion. Whether it is a weeknight treat or the grand finale of a holiday dinner, this crisp is a crowd-pleaser. Plus, it is highly versatile. You can easily adapt it to various dietary preferences, including options that are vegan and gluten-free, making it suitable for diverse nutritional needs without sacrificing flavor.
Jump To
- 1. Why You’ll Love This Pumpkin Pie Crisp
- 2. Essential Ingredients for Pumpkin Pie Crisp
- 3. How to Prepare the Perfect Pumpkin Pie Crisp: Step-by-Step Guide
- 4. Mastering Pumpkin Pie Crisp: Advanced Tips and Variations
- 5. Dietary Substitutions to Customize Your Pumpkin Pie Crisp
- 6. How to Store Pumpkin Pie Crisp: Best Practices
- 7. FAQs: Frequently Asked Questions About Pumpkin Pie Crisp
- 8. Pumpkin Pie Crisp
Essential Ingredients for Pumpkin Pie Crisp
To make this delightful dessert, you will need two main components: a rich, creamy pumpkin pie layer and a cinnamon streusel topping that gets perfectly golden and crisp in the oven. Using high-quality ingredients makes a difference here, especially with the spices and the pumpkin puree.
Main Ingredients
- 1 can (15 ounces) of pumpkin puree
- 1 cup granulated sugar
- 3 large eggs
- 2 teaspoons pumpkin pie spice
- ½ teaspoon salt
- 2 teaspoons vanilla extract
- ⅔ cup heavy cream
- 2 cups all-purpose flour
- 1 ½ cups granulated sugar
- 2 teaspoons cinnamon
- ½ teaspoon salt
- 12 tablespoons (1 ½ sticks) melted unsalted butter
Ingredient Notes
For the pumpkin base, make sure you are using pure pumpkin puree and not pumpkin pie filling, which already has sugar and spices added. The pumpkin puree provides that rich, creamy base and necessary moisture. The heavy cream is what gives the filling that luxurious, velvety texture we all crave.
For the streusel topping, the flour and sugar create the structure, while the melted butter is the key to that irresistible crunch. The butter binds the dry ingredients together so that they bake into crisp, golden nuggets rather than just a dusty layer on top. The cinnamon in the topping adds a warm, aromatic layer that pairs perfectly with the pumpkin pie spice in the filling.
How to Prepare the Perfect Pumpkin Pie Crisp: Step-by-Step Guide
Making this crisp is a straightforward process that involves mixing up the filling, making the crumble, and letting the oven do the rest of the work. Follow these steps to ensure your dessert turns out perfectly every single time.
Step 1: Preheat and Prep
First things first, preheat your oven to 375°F (190°C). It is important that the oven is fully hot before the pan goes in so the streusel starts cooking immediately. Next, grab a skillet or a medium casserole dish and butter it thoroughly. This prevents the pumpkin layer from sticking and makes cleanup much easier.
Step 2: Whisk the Pumpkin Filling
In a large bowl, grab your whisk and combine the pumpkin puree, sugar, eggs, pumpkin pie spice, salt, and vanilla extract. Whisk these together until they are well blended. Once they are combined, pour in the heavy cream. Whisk the mixture again until it is completely smooth. You want a uniform consistency here so the filling sets properly. Pour this smooth pumpkin mixture into your prepared buttered dish, spreading it out evenly.
Step 3: Create the Cinnamon Streusel
In a separate bowl, combine the flour, sugar, cinnamon, and salt for the topping. Pour the melted unsalted butter right over the dry ingredients. Using a fork, mix the butter into the flour mixture. You want to keep mixing until it looks crumbly and resembles wet sand. This texture is crucial for getting that perfect crunch.
Step 4: Assemble and Bake
Evenly spread the streusel topping over the pumpkin mixture in the dish. Do not press it down; just sprinkle it loosely. Place the dish in the oven and bake for 40 to 45 minutes. You are looking for the filling to be set and the topping to be a gorgeous golden brown. If you notice the topping getting too dark before the filling is done, just cover the top lightly with foil for the last few minutes.
Step 5: Cool and Serve
Once baked, remove the crisp from the oven and let it cool for about 10 minutes. This resting period allows the filling to firm up slightly so it is not too runny when you scoop it. Serve it warm for the best experience. If you have ever tried a peach cobbler recipe fresh out of the oven, you know that warm fruit desserts are unbeatable, and this pumpkin crisp is no exception.
Mastering Pumpkin Pie Crisp: Advanced Tips and Variations
Once you have made the basic recipe, there are so many ways to customize it to suit your taste or to impress your guests. Trust me, these little tweaks can take your dessert from delicious to absolutely extraordinary.
Adding Texture with Nuts and Oats
While the cinnamon streusel is delicious on its own, you can add extra crunch by incorporating chopped pecans or walnuts into the mixture. Simply mix them in with the dry ingredients before adding the butter. This adds a lovely nuttiness and a satisfying crunch. If you prefer a more traditional crisp texture, you can include up to 1 cup of oats in the topping. Oats absorb the butter and spices beautifully and give the dessert a heartier feel.
Flavor Twists
For a pro cooking technique, try toasting your oats or nuts lightly in a dry pan before adding them to the crumble. This enhances their natural nuttiness and adds depth to the final flavor profile. You can also experiment with the spices. We use cinnamon and pumpkin pie spice, but adding a pinch of ginger or cloves can offer exciting flavor shifts. Cinnamon is not just tasty; it also has health perks. You can check out the benefits of cinnamon to learn why it is such a great spice to use in your baking.
Extra Indulgence
When serving, consider drizzling warm caramel sauce over the top of the crisp. The saltiness of the caramel cuts through the sweetness of the pumpkin and pairs perfectly with the spices. It adds a level of indulgence that makes this feel like a restaurant-quality dessert. If you enjoy oats in your desserts, you might also love my recipe for lemon oatmeal cookies, which use that same wholesome grain for a delightful texture.
Make-Ahead Convenience
One of the smartest things you can do for a party is to prepare this dessert ahead of time. You can mix the pumpkin layer and the streusel topping separately and store them in the refrigerator for up to 48 hours. When you are ready to serve, simply assemble both layers in your baking dish and bake as directed. This saves you so much time and stress on the day of your event.

Dietary Substitutions to Customize Your Pumpkin Pie Crisp
Everyone deserves a slice of this delicious pie crisp, no matter their dietary restrictions. Here are some easy swaps to make this recipe work for you.
Vegan Options
Consider swapping traditional butter for plant-based oils or margarines to create a vegan-friendly crisp topping. You want a solid fat that melts similarly to butter to get that crumbly texture. Additionally, for the filling, you can use full-fat coconut milk or a heavy cream alternative made from almonds or oats. Flax eggs or a commercial egg replacer work well to bind the pumpkin puree together without using real eggs.
Gluten-Free Modifications
If you need to avoid gluten, you can still enjoy this dessert. Replace the all-purpose flour in the streusel with a gluten-free all-purpose blend or almond flour. Almond flour actually adds a wonderful buttery flavor and extra protein. Just be aware that almond flour browns faster, so keep an eye on it while baking. Ensure your oats are certified gluten-free if you choose to add them to the topping.
Lower Sugar and Calorie Options
To make this a bit lighter, you can use a sugar substitute like erythritol or monk fruit sweetener in place of the granulated sugar. These work well in both the filling and the topping. Another trick is to swap half of the butter in the streusel for unsweetened applesauce. This reduces the fat content while keeping the topping moist and delicious.
How to Store Pumpkin Pie Crisp: Best Practices
This dessert is best enjoyed fresh, but life happens and sometimes we have leftovers. Here is how to keep your crisp tasting great for days.
Refrigeration
Because of the eggs and cream in the pumpkin filling, you should store any leftover pumpkin pie crisp in the refrigerator. Place it in an airtight container, and it will stay fresh for up to 5 days. The topping may soften a bit in the fridge, but the flavor will actually develop and become richer over time.
Freezing
Yes, you can freeze this crisp! If you want to save some for later, wrap portions tightly in plastic wrap and then foil. It can be frozen for up to 2 months. When you are ready to eat it, let it thaw overnight in the refrigerator. This is a great way to meal prep desserts for the holiday season.
Reheating
To get that fresh-baked texture back, you need to reheat it properly. You can warm individual servings in the microwave for about 30 seconds to a minute. For a larger portion, or to crisp up the topping again, place it in a 350°F oven for about 10-15 minutes. This helps evaporate any moisture that gathered in the fridge and brings back the crunch.
FAQs: Frequently Asked Questions About Pumpkin Pie Crisp
Can I prepare Pumpkin Pie Crisp ahead of time and refrigerate it before baking?
Yes, you can prepare the pumpkin layer and the streusel topping separately and store them in the refrigerator for up to 48 hours. When ready, assemble both layers in your baking dish and bake as directed. This makes it convenient to get the dessert ready in advance without compromising texture or flavor.
What baking dishes work best for making Pumpkin Pie Crisp?
While a cast iron skillet is popular for this dessert, you can use other options like a 12-inch round casserole dish or a 9×9-inch baking pan. Aluminum foil pans are also suitable if you’re gifting the dessert. Just adjust baking times slightly if using a larger or smaller dish to ensure even cooking.
How can I modify the crisp topping for extra crunch or texture?
Adding chopped pecans or walnuts to the streusel topping adds a nice crunch. You can also mix in up to one cup of rolled oats for a more traditional crisp texture. Be sure to combine ingredients until the topping forms crumbly clusters, avoiding overmixing which can lead to a paste-like consistency.
Is there a gluten-free way to make Pumpkin Pie Crisp?
The original recipe uses all-purpose flour, but you can substitute with gluten-free options like oat flour or certified gluten-free oats. Keep in mind that gluten-free flours might alter the texture slightly, so it’s best to test small batches. Using oats in the topping is another easy gluten-free variation that many enjoy.
Can Pumpkin Pie Crisp be served with toppings, and what pairs well?
Yes, Pumpkin Pie Crisp is often served warm with a scoop of vanilla ice cream or cinnamon-flavored ice cream. The creamy cold ice cream contrasts beautifully with the warm, spiced pumpkin and crumbly topping. Whipped cream or a drizzle of caramel sauce also complements the flavors nicely.

Pumpkin Pie Crisp
- Total Time: 55 minutes
- Yield: 8 servings
Description
🎃 Experience the cozy flavors of Pumpkin Crisp with a rich, spiced filling that’s perfect for fall and year-round.
🍂 The spiced oat topping adds a delicious crunchy texture, making this dessert both comforting and irresistible.
Ingredients
– 1 can (15 ounces) pumpkin puree
– 1 cup granulated sugar
– 3 large eggs
– 2 teaspoons pumpkin pie spice
– ½ teaspoon salt
– 2 teaspoons vanilla extract
– ⅔ cup heavy cream
– 2 cups all-purpose flour
– 1 ½ cups granulated sugar
– 2 teaspoons cinnamon
– ½ teaspoon salt
– 12 tablespoons (1 ½ sticks) melted unsalted butter
Instructions
1-Step 1: Preheat and Prep First things first, preheat your oven to 375°F (190°C). It is important that the oven is fully hot before the pan goes in so the streusel starts cooking immediately. Next, grab a skillet or a medium casserole dish and butter it thoroughly. This prevents the pumpkin layer from sticking and makes cleanup much easier.
2-Step 2: Whisk the Pumpkin Filling In a large bowl, grab your whisk and combine the pumpkin puree, sugar, eggs, pumpkin pie spice, salt, and vanilla extract. Whisk these together until they are well blended. Once they are combined, pour in the heavy cream. Whisk the mixture again until it is completely smooth. You want a uniform consistency here so the filling sets properly. Pour this smooth pumpkin mixture into your prepared buttered dish, spreading it out evenly.
3-Step 3: Create the Cinnamon Streusel In a separate bowl, combine the flour, sugar, cinnamon, and salt for the topping. Pour the melted unsalted butter right over the dry ingredients. Using a fork, mix the butter into the flour mixture. You want to keep mixing until it looks crumbly and resembles wet sand. This texture is crucial for getting that perfect crunch.
4-Step 4: Assemble and Bake Evenly spread the streusel topping over the pumpkin mixture in the dish. Do not press it down; just sprinkle it loosely. Place the dish in the oven and bake for 40 to 45 minutes. You are looking for the filling to be set and the topping to be a gorgeous golden brown. If you notice the topping getting too dark before the filling is done, just cover the top lightly with foil for the last few minutes.
5-Step 5: Cool and Serve Once baked, remove the crisp from the oven and let it cool for about 10 minutes. This resting period allows the filling to firm up slightly so it is not too runny when you scoop it. Serve it warm for the best experience. If you have ever tried a peach cobbler recipe fresh out of the oven, you know that warm fruit desserts are unbeatable, and this pumpkin crisp is no exception.
Notes
🌰 Add chopped pecans or walnuts to the streusel for extra crunch.
🍯 Drizzle caramel sauce over the top for an indulgent touch.
🍽 Use any baking dish such as a 12-inch round or 9×9 casserole if a skillet is unavailable.
- Prep Time: 15 minutes
- Cooking Time: 40 minutes
- Category: Dessert
- Method: Baking
- Cuisine: American
Nutrition
- Serving Size: 1 serving
- Calories: 378 kcal
- Sugar: 2 g
- Sodium: 301 mg
- Fat: 27 g
- Saturated Fat: 16 g
- Unsaturated Fat: 9 g
- Trans Fat: 0 g
- Carbohydrates: 28 g
- Fiber: 2 g
- Protein: 7 g
- Cholesterol: 138 mg
Keywords: Pumpkin Crisp,Spiced Oat Topping,Pumpkin Dessert,Fall Baking