Why You’ll Love This Pizza Dip Sliders
You’ll adore these pizza dip sliders because they’re a breeze to whip up, turning simple ingredients into a fun, flavorful treat that everyone can enjoy. They pack a punch with rich, cheesy goodness and a hint of roasted garlic that makes each bite irresistible. Plus, they’re perfect for busy days when you want something tasty without spending hours in the kitchen.
One big plus is how easy they are to prepare just a few steps and you’re set for a hassle-free meal or snack. They bring health benefits too, using wholesome items like fresh herbs and cheese that offer vitamins and balanced nutrients. What really seals the deal is their versatility, letting you tweak the recipe to fit different needs while keeping that classic pizza dip vibe.
Imagine pulling apart these warm sliders at a family gathering; the unique mix of spices and toppings creates a standout dish that’s far from ordinary. Whether you’re a home cook looking for quick wins or a busy parent needing dinner fast, these sliders will become your go-to choice. I bet you’ll find yourself making them time and time again for their delicious simplicity.
To get more ideas for easy family meals, check out our Ritz Cracker Chicken Casserole recipe, which pairs well with this style of cooking.
Jump To
- 1. Why You’ll Love This Pizza Dip Sliders
- 2. Essential Ingredients for Pizza Dip Sliders
- 3. How to Prepare the Perfect Pizza Dip Sliders: Step-by-Step Guide
- 4. Dietary Substitutions to Customize Your Pizza Dip Sliders
- 5. Mastering Pizza Dip Sliders: Advanced Tips and Variations
- 6. How to Store Pizza Dip Sliders: Best Practices
- 7. FAQs: Frequently Asked Questions About Pizza Dip Sliders
- 8. Pizza Dip Sliders
Essential Ingredients for Pizza Dip Sliders
Let’s dive into the heart of this recipe: the ingredients that make these pizza dip sliders so amazing. I’ll list them out clearly so you can grab everything you need without any fuss. This way, you’ll see exactly how much of each item to use for the perfect batch.
- 1 whole head of garlic
- Extra-virgin olive oil (enough to drizzle)
- 12 soft dinner rolls (pull-apart style)
- 1 to 1 1/2 cups marinara sauce
- 3/4 cup shredded mozzarella cheese
- 3/4 cup shredded provolone cheese
- 1/4 cup grated Parmesan cheese (plus a little extra for finishing)
- 1/2 cup thinly sliced pepperoni
- 3 Tbsp salted butter, softened
- 1 Tbsp chopped fresh sage
- 2 tsp dried basil
- 1 tsp dried oregano
- 1 tsp dried parsley
- A pinch of chili flakes
These ingredients come together to create a balanced, flavorful dish that’s easy to adapt. For special dietary options, you can swap in vegan cheese or gluten-free rolls to make it work for everyone. I love how this selection keeps things simple yet packs in that authentic pizza dip slider taste you’ll crave.
How to Prepare the Perfect Pizza Dip Sliders: Step-by-Step Guide
Getting these pizza dip sliders just right starts with a few easy steps that anyone can follow, even if you’re new to cooking. First, preheat your oven to 400°F (200°C) to get that perfect bake going. While the oven heats up, gather your ingredients and tools so everything flows smoothly from start to finish.
Next, slice off the top of the garlic head to expose the cloves, place it on foil, drizzle with extra-virgin olive oil, wrap it tightly, and roast it for 40 to 55 minutes until the cloves turn golden and soft. As the garlic roasts, split the 12 soft dinner rolls in half horizontally and arrange the bottom halves on a parchment-lined baking sheet. This sets the stage for layering all those yummy flavors.
Now, layer each bottom half with a thin coat of 1 to 1 1/2 cups marinara sauce, then sprinkle on 3/4 cup shredded mozzarella cheese, 3/4 cup shredded provolone cheese, 1/2 cup thinly sliced pepperoni, and half of the 1/4 cup grated Parmesan cheese. Top it off by placing the roll halves over the filling to create those pull-apart wonders. Once the garlic cools, squeeze the softened cloves into a bowl and mix in 3 Tbsp softened salted butter, the remaining Parmesan, 1 Tbsp chopped fresh sage, 2 tsp dried basil, 1 tsp dried oregano, 1 tsp dried parsley, and a pinch of chili flakes. Mash it all with a fork until it forms a smooth garlic-butter spread.
Continuing the Assembly and Baking
Spread that garlic-butter mixture evenly over the tops of the assembled rolls for that extra burst of flavor. Cover the baking sheet loosely with foil and bake for 10 minutes, then remove the foil and bake for another 10 minutes until the cheese melts completely and the tops turn lightly browned. Finally, brush any leftover garlic butter over the hot sliders and serve them right away for the best taste.
This method ensures your pizza sliders come out gooey and delicious every time, with that roasted garlic adding a special twist. It’s a great way to impress guests or enjoy a quick family dinner, and you can always adapt it for dietary preferences like using turkey pepperoni. For more inspiration on savory bakes, try our Creamy Beef and Bowtie Pasta recipe to mix things up.
With about 15 minutes of prep and around an hour of cooking, you’ll have a batch ready in no time. Remember, roasting the garlic takes the longest, so plan ahead if you can. Each serving clocks in at about 186 kcal, making it a smart pick for those watching their diet.

Dietary Substitutions to Customize Your Pizza Dip Sliders
Making pizza dip sliders your own is super fun, and with a few swaps, you can fit them to just about any diet. Start with the protein; swap the pepperoni for turkey pepperoni or add caramelized onions for a fresher take. This keeps the hearty feel while lightening things up if needed.
For veggies and sauces, try using pesto instead of marinara to change the flavor profile, or toss in roasted vegetables like bell peppers. You can also play with seasonings by adding more herbs or even cooked sausage for extra depth. These tweaks help keep the sliders tasty no matter what you’re working with.
Protein and main component alternatives include replacing any meat with plant-based crumbles for a vegan option or using ground turkey for something leaner. Vegetable, sauce, and seasoning modifications might involve swapping pepperoni for zucchini or opting for a white garlic sauce. All these changes let you enjoy the sliders while meeting your dietary goals.
Mastering Pizza Dip Sliders: Advanced Tips and Variations
Once you get the basics down, taking your pizza dip sliders to the next level is a blast with some pro tips. For instance, use a cast iron skillet to give the bottoms a crispier edge or grill them for a smoky twist that amps up the flavor. These techniques make your sliders stand out at any gathering.
Flavor variations can include mixing cheeses like provolone or cheddar, or adding red pepper flakes for a spicy kick. Presentation is key too garnish with fresh herbs and serve with a side of marinara for dipping to wow your guests. If you’re prepping ahead, assemble the sliders and chill them for up to two days, then bake fresh when it’s time to eat.
Pro cooking techniques like using that cast iron skillet add extra texture, while flavor swaps such as trying different cheese blends keep things exciting. Don’t forget presentation tips like adding herbs for visual appeal. These expert ideas make your pizza dip sliders even more versatile for any occasion.
How to Store Pizza Dip Sliders: Best Practices
Keeping your pizza dip sliders fresh is easy with the right storage tricks. Store cooled sliders in an airtight container in the fridge for up to 3 days to lock in that great taste. If you want them to last longer, wrap individual sliders in plastic wrap and foil, then freeze for up to 1 month.
When it’s time to reheat, pop them in the oven at 350°F (175°C) for 10 to 15 minutes to bring back that crispy texture. For meal prep, keep components separate to maintain quality, especially for different dietary needs. Following these steps helps your sliders stay delicious and safe for later.
FAQs: Frequently Asked Questions About Pizza Dip Sliders
What are pizza dip sliders and how do you make them?
Pizza dip sliders are mini sandwiches layered with classic pizza flavors like marinara sauce, cheese, and pepperoni inside soft slider buns. To make them, start by spreading pizza sauce on the slider buns, then add mozzarella cheese, pepperoni slices, and any other desired toppings. Bake the sliders in the oven at 350°F (175°C) for about 10-15 minutes until the cheese melts and the buns are warm. Serve hot as an easy, crowd-pleasing appetizer or snack.
Can I customize pizza dip sliders for different dietary needs?
Yes, pizza dip sliders can be easily adapted for various dietary preferences. For a vegetarian option, omit pepperoni and add veggies like mushrooms, olives, or bell peppers. Use dairy-free cheese alternatives for a vegan or lactose-intolerant version. Gluten-free slider buns can be purchased or homemade to accommodate gluten sensitivities. Always check ingredient labels to ensure suitability for specific diets.
What are the best cheeses to use in pizza dip sliders?
Mozzarella is the most common and melts well, making it ideal for pizza dip sliders. However, you can mix mozzarella with provolone or cheddar for a richer flavor. Parmesan can be sprinkled on top for added taste. For a gooey, creamy texture, a combination of shredded cheeses works best. Avoid pre-sliced or low-moisture cheeses that do not melt properly.
How long can I store leftover pizza dip sliders?
Store leftover pizza dip sliders in an airtight container in the refrigerator for up to 3 days. Reheat them in the oven at 350°F (175°C) for 5-7 minutes to keep the buns soft and the cheese melted. Avoid microwaving for prolonged periods, as this can make the buns soggy and the cheese rubbery.
What are some simple sides to serve with pizza dip sliders?
Complement pizza dip sliders with easy sides like a fresh garden salad, garlic breadsticks, or a vegetable platter with ranch dip. For a heartier snack, serve with potato wedges or baked curly fries. These options balance the rich flavors of the sliders and provide variety, making the meal more satisfying and enjoyable.

Pizza Dip Sliders
- Total Time: 1 hour 15 minutes
- Yield: 12 sliders
- Diet: Omnivore
Description
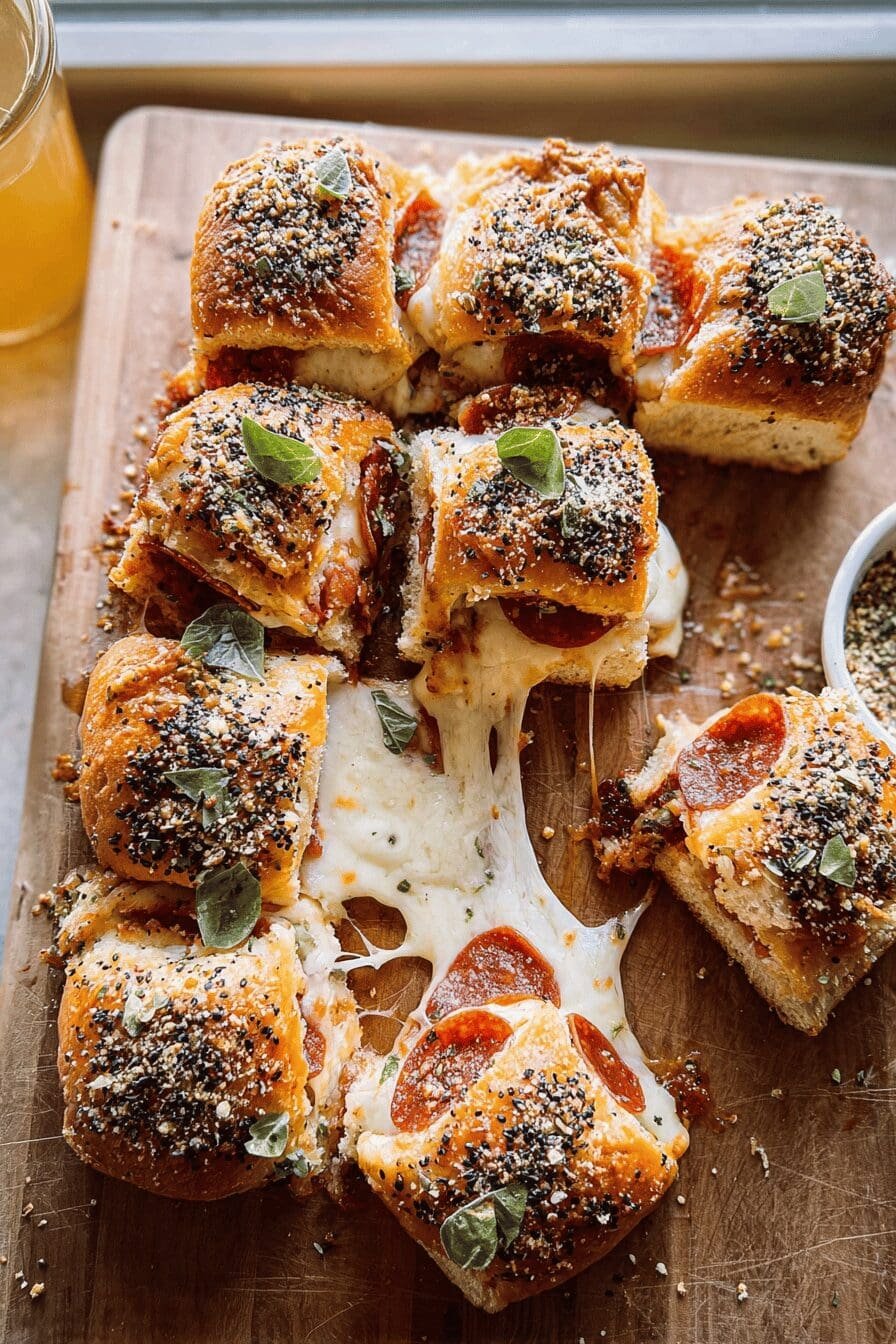
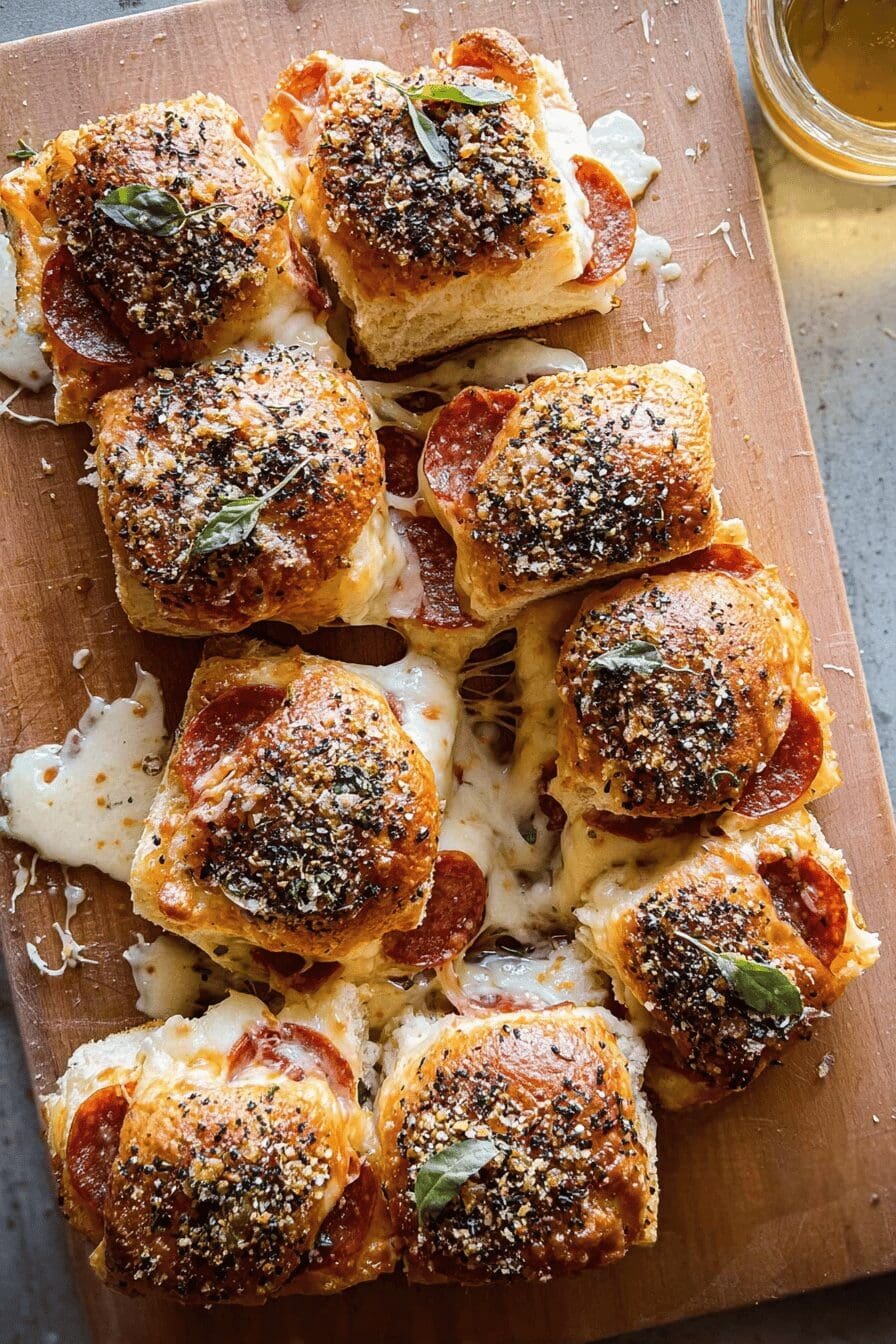
🍕 These pull‑apart sliders deliver cheesy, garlicky pizza flavor in a bite‑size, crowd‑pleasing form.
🧄 Roasted garlic butter adds a deep, mellow heat that makes every bite unforgettable.
Ingredients
– 1 whole head of garlic
– Extra-virgin olive oil (enough to drizzle)
– 12 soft dinner rolls (pull-apart style)
– 1 to 1 1/2 cups marinara sauce
– 3/4 cup shredded mozzarella cheese
– 3/4 cup shredded provolone cheese
– 1/4 cup grated Parmesan cheese (plus a little extra for finishing)
– 1/2 cup thinly sliced pepperoni
– 3 Tbsp salted butter, softened
– 1 Tbsp chopped fresh sage
– 2 tsp dried basil
– 1 tsp dried oregano
– 1 tsp dried parsley
– A pinch of chili flakes
Instructions
1-Preheat your oven: preheat your oven to 400°F (200°C) to get that perfect bake going. While the oven heats up, gather your ingredients and tools so everything flows smoothly from start to finish.
2-Roast the garlic: slice off the top of the garlic head to expose the cloves, place it on foil, drizzle with extra-virgin olive oil, wrap it tightly, and roast it for 40 to 55 minutes until the cloves turn golden and soft.
3-Prepare the rolls: split the 12 soft dinner rolls in half horizontally and arrange the bottom halves on a parchment-lined baking sheet.
4-Layer the rolls: layer each bottom half with a thin coat of 1 to 1 1/2 cups marinara sauce, then sprinkle on 3/4 cup shredded mozzarella cheese, 3/4 cup shredded provolone cheese, 1/2 cup thinly sliced pepperoni, and half of the 1/4 cup grated Parmesan cheese. Top it off by placing the roll halves over the filling to create those pull-apart wonders.
5-Prepare the garlic butter spread: once the garlic cools, squeeze the softened cloves into a bowl and mix in 3 Tbsp softened salted butter, the remaining Parmesan, 1 Tbsp chopped fresh sage, 2 tsp dried basil, 1 tsp dried oregano, 1 tsp dried parsley, and a pinch of chili flakes. Mash it all with a fork until it forms a smooth garlic-butter spread.
6-Spread garlic butter and bake: spread that garlic-butter mixture evenly over the tops of the assembled rolls for that extra burst of flavor. Cover the baking sheet loosely with foil and bake for 10 minutes, then remove the foil and bake for another 10 minutes until the cheese melts completely and the tops turn lightly browned.
7-Finish and serve: finally, brush any leftover garlic butter over the hot sliders and serve them right away for the best taste.
Notes
🔥 Roast the garlic first; it can be made ahead and stored for up to 2 days in the fridge.
🧈 Use very soft, pull‑apart rolls for the best texture that lets the pieces separate easily.
⏲️ To prevent soggy bottoms, reduce the marinara slightly or give the bottom rolls a quick 2‑minute broil before adding the toppings.
- Prep Time: 15 minutes
- Cook Time: 1 hour
- Category: Snack
- Method: Baking
- Cuisine: Italian
Nutrition
- Serving Size: 1 slider (≈ 1/12 of recipe)
- Calories: 186 kcal
- Sugar: 4 g
- Sodium: 350 mg
- Fat: 9 g
- Saturated Fat: 4 g
- Unsaturated Fat: 4 g
- Trans Fat: 0 g
- Carbohydrates: 15 g
- Fiber: 2 g
- Protein: 8 g
- Cholesterol: 20 mg
Keywords: undefined