Description
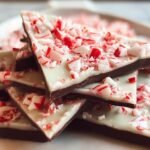
🍭 Create no-bake peppermint bark layered with white and dark chocolate for a festive, crunchy holiday treat in under 2 hours.
🎄 Easy, customizable candy perfect for gifting, parties, or snacking – stores for weeks in the fridge!
Ingredients
– 12 ounces white chocolate, coarsely chopped and divided for creamy layers and snowy holiday look
– 6 ounces semi-sweet or bittersweet chocolate, coarsely chopped for contrast and deeper chocolate flavor
– 1 and 1/2 teaspoons vegetable oil or coconut oil, divided for helping the bark spread and softer bite
– 1/2 teaspoon peppermint extract, divided for cool minty flavor
– 2 to 3 crushed candy canes for crunch and festive color
Instructions
1-First Step: Prepare your pan Line an 8- or 9-inch square baking pan or a baking sheet with parchment paper or aluminum foil. Smooth out any wrinkles as much as you can, because a flat surface helps the bark spread evenly and makes it easier to remove later. If you want thinner bark, a baking sheet works well. For thicker pieces that are easier to break into squares, the square pan is a great choice. Set out all your ingredients before you start melting chocolate. Chocolate sets quickly once it is warm, so having everything ready saves time and keeps the layers neat. Crush your candy canes now, too. A sealed plastic bag and a rolling pin or meat mallet work really well for this step.
2-Second Step: Melt the first white chocolate layer Place 6 ounces of the white chocolate in a microwave-safe bowl with 1/2 teaspoon of the oil. Microwave in 20-second increments, stirring after each round until the chocolate is smooth. Short bursts are important here because chocolate can burn quickly if it gets too hot. Once the chocolate is melted, stir in 1/4 teaspoon of peppermint extract. Pour it into the prepared pan and spread it into a thin, even layer. Try to work gently so the layer stays smooth. Then refrigerate it for 10 to 15 minutes, just until it is almost set but not fully hard.
3-Third Step: Add the middle chocolate layer Melt the semi-sweet or bittersweet chocolate with another 1/2 teaspoon of oil using the same short microwave method. Stir often, and do not rush this part. When the chocolate is fully smooth, stir in the remaining 1/4 teaspoon peppermint extract. Pour the melted chocolate over the first layer and spread it evenly from edge to edge. If the bottom layer is still slightly soft, the two layers will bond better. Chill again for 10 to 15 minutes until the surface is set enough to support the final layer without mixing.
4-Fourth Step: Finish with the top white chocolate layer Melt the remaining white chocolate with the last 1/2 teaspoon of oil. Stir until smooth, then pour it over the chilled chocolate layer. Spread it gently so the bark has a polished finish. This final layer gives the dessert its classic peppermint bark look and makes the candy cane topping stand out beautifully. Right away, sprinkle the crushed candy canes evenly over the top. Press them in very lightly if needed so they stick. If the top layer begins to set too quickly, work fast and add the candy canes before the chocolate firms up.
5-Fifth Step: Chill until fully set Refrigerate the bark for about 1 hour, or until completely firm. Once set, lift it from the pan using the parchment paper or foil. Peel away the liner and break or cut the bark into pieces. If the bark has been in the fridge for longer than 3 to 4 hours, let it sit at room temperature for 10 to 15 minutes before cutting. That small pause makes slicing and breaking much easier. For a neat finish, use a sharp knife if you want squares, or simply break it with your hands for a more rustic look. Both ways are fine, and both look festive on a holiday plate.
6-Sixth Step: Store or serve Store any leftover bark covered in the refrigerator for up to 3 weeks. You can also keep it at room temperature for a few days during colder months, but chilled storage is best for longer freshness. If you are packaging it as a gift, wrap the pieces in parchment and place them in a tin or cellophane bag.
Notes
🍫 Use high-quality chocolate bars for superior melting and flavor.
🛢️ Add oil to thin chocolate for smooth spreading and less crumbliness.
❄️ Chill each layer 10-15 minutes before adding the next to prevent mixing.
- Prep Time: 30 minutes
- Chilling: 1 hour 15 minutes
- Category: Dessert
- Method: No Bake
- Cuisine: American
Nutrition
- Serving Size: 1 oz piece
- Calories: 170
- Sugar: 18g
- Sodium: 20mg
- Fat: 10g
- Saturated Fat: 6g
- Unsaturated Fat: 4g
- Trans Fat: 0g
- Carbohydrates: 20g
- Fiber: 0g
- Protein: 1g
- Cholesterol: 5mg
Keywords: peppermint bark, easy holiday candy, no bake treat, chocolate bark