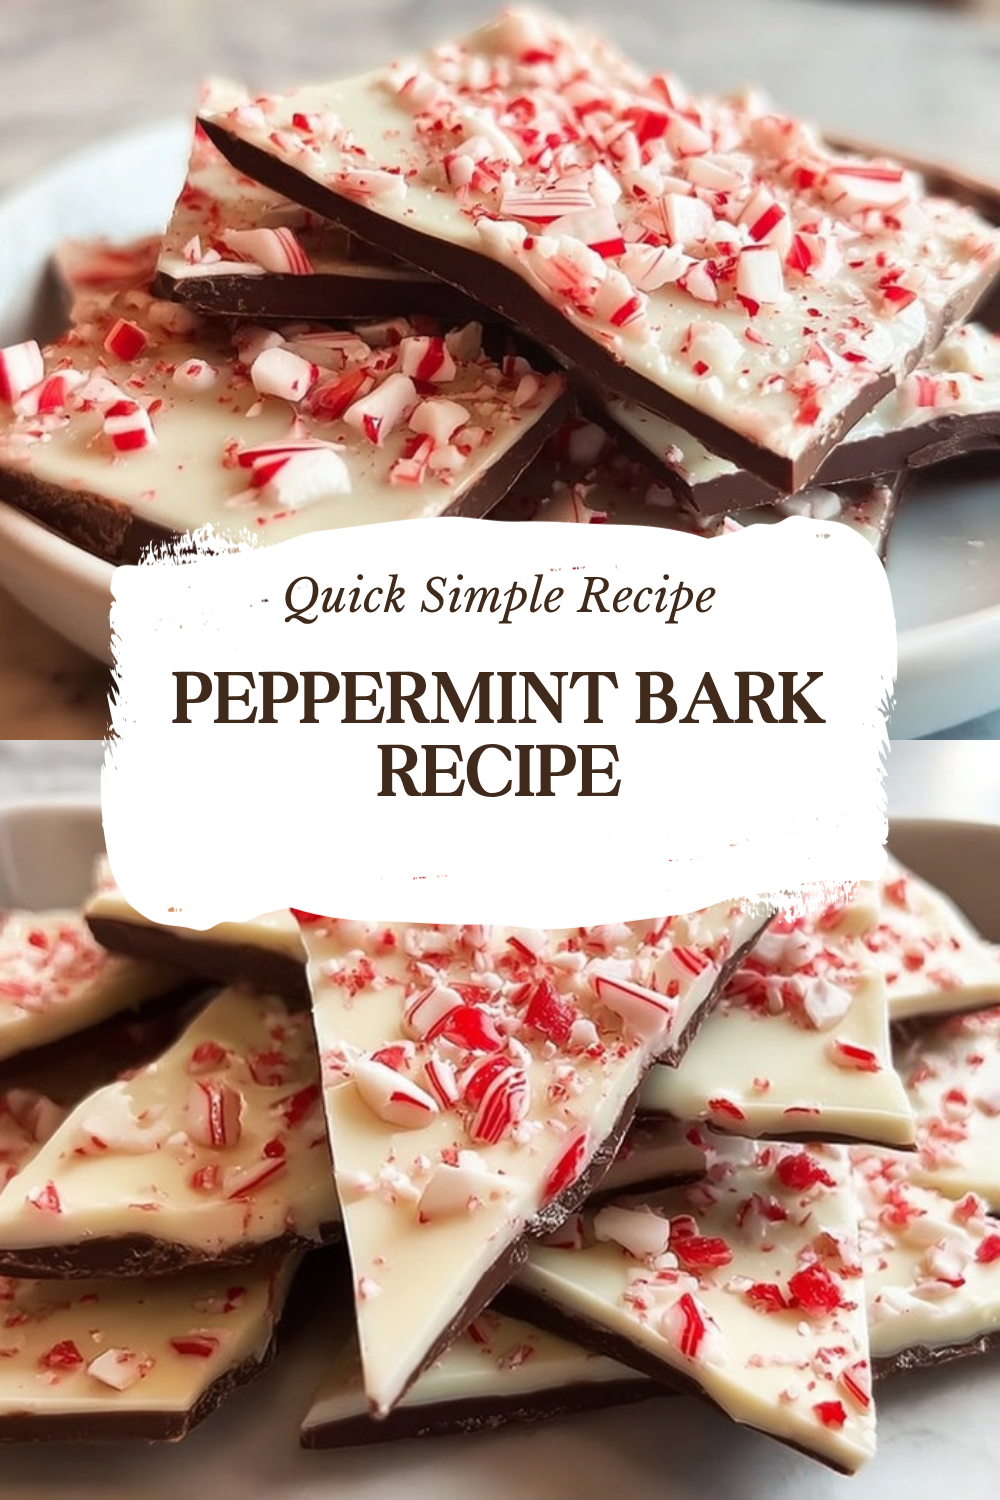
Peppermint Bark Recipe Why This Easy Holiday Candy Treat Belongs on Your List
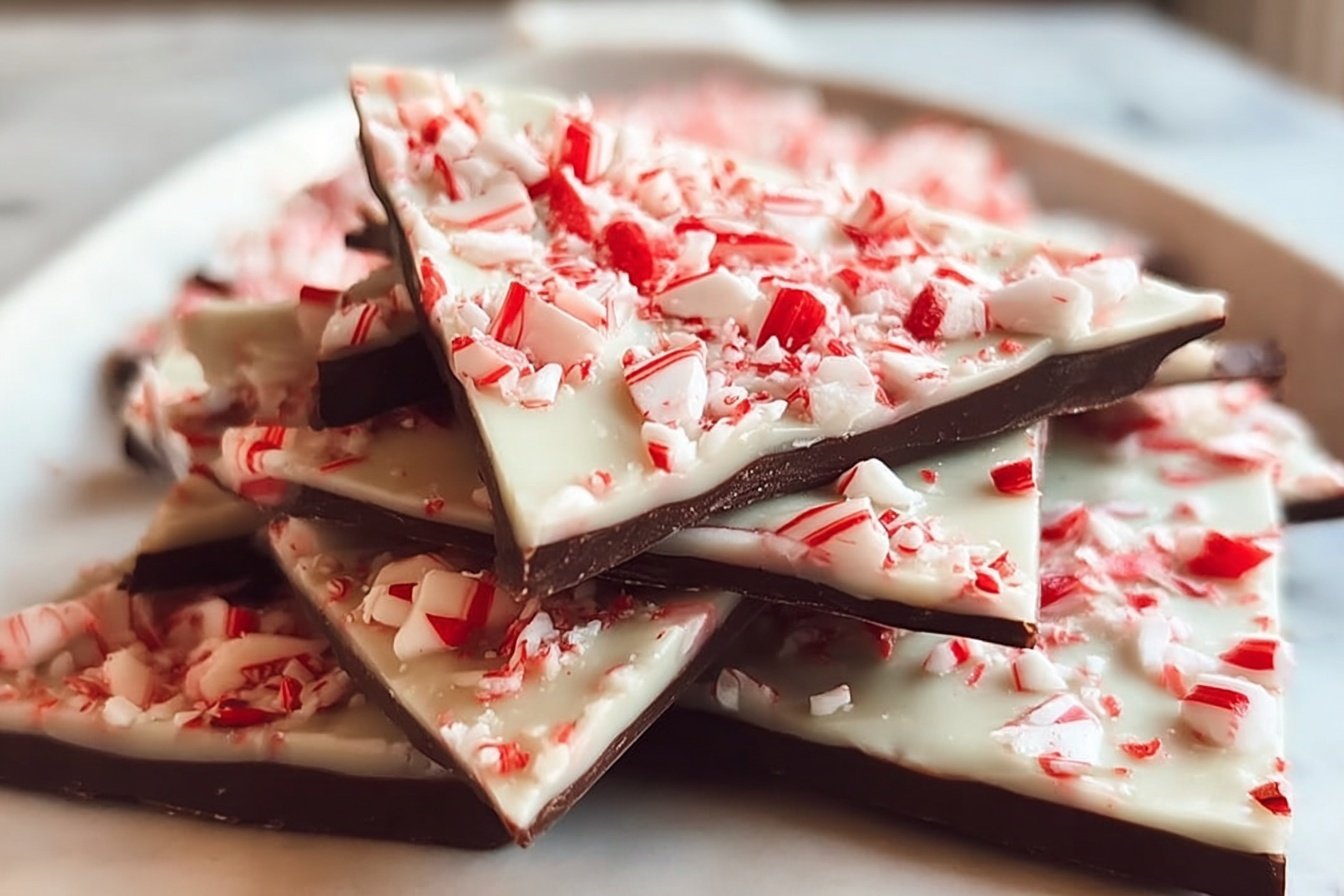
This Peppermint Bark Recipe is one of those holiday treats that looks fancy but comes together with very little effort. You only need a few simple ingredients, a little patience while the layers chill, and then you get a pretty, giftable candy that tastes like Christmas in every bite. If you love quick desserts that still feel special, this one is a keeper.
It is a great choice for busy parents, students, working professionals, and anyone who wants a sweet treat without turning on the oven. The method is no bake, the prep is easy, and the finished bark breaks into beautiful pieces that are perfect for cookie trays, party platters, or homemade gifts. It also fits right in with the style of simple recipes shared on Recipes Isabella, where cooking should feel joyful and doable for everyone.
Before we get into the steps, it helps to know why peppermint and chocolate work so well together. Peppermint brings a cool, bright flavor that cuts through the richness of the chocolate, while the candy cane topping adds a festive crunch. If you enjoy reading about the benefits of peppermint, you can also check out this helpful look at peppermint benefits on WebMD.
Jump To
- 1. Peppermint Bark Recipe Why This Easy Holiday Candy Treat Belongs on Your List
- 2. Why You’ll Love This Peppermint Bark Recipe
- 3. Essential Ingredients for Peppermint Bark Recipe
- 4. How to Prepare the Perfect Peppermint Bark Recipe: Step-by-Step Guide
- 5. Dietary Substitutions to Customize Your Peppermint Bark Recipe
- 6. Mastering Peppermint Bark Recipe: Advanced Tips and Variations
- 7. How to Store Peppermint Bark Recipe: Best Practices
- 8. FAQs: Frequently Asked Questions About Peppermint Bark Recipe
- 9. Peppermint Bark Recipe
Why You’ll Love This Peppermint Bark Recipe
- Easy preparation: This Peppermint Bark Recipe uses simple ingredients and only takes about 30 minutes of hands-on prep. Since there is no baking, it is a great last-minute holiday candy when your schedule is packed.
- Great texture and flavor: The layers of white chocolate and semi-sweet or bittersweet chocolate give each bite a smooth, rich taste, while crushed candy canes add a crisp finish and fresh minty snap.
- Flexible for gifting and sharing: This bark breaks into neat pieces, which makes it perfect for dessert boxes, holiday trays, classroom treats, and neighbor gifts. It also travels well when packed carefully.
- Simple to adapt: You can swap oils, use different chocolate brands, or change the layer order to match your taste. It can also be made in larger batches for parties or smaller batches for a quiet family treat.
Little tip from my kitchen: if a recipe is easy enough to make on a busy weeknight but pretty enough for a holiday gift bag, it is usually a recipe worth keeping.
If you want another sweet treat to pair with your holiday candy tray, you might like these easy graham cracker toffee bars for a simple make-ahead option.
Essential Ingredients for Peppermint Bark Recipe
For the best results, use quality chocolate and keep your measurements close to the amounts below. This recipe makes just over 1 pound of bark, which is plenty for sharing or storing for later.
Main Ingredients
- 12 ounces white chocolate, coarsely chopped and divided – This creates the creamy top and bottom layers that make the bark look festive and taste smooth.
- 6 ounces semi-sweet or bittersweet chocolate, coarsely chopped – This gives the middle layer a rich chocolate flavor that balances the sweetness of the white chocolate.
- 1 and 1/2 teaspoons vegetable oil or coconut oil, divided – This helps the melted chocolate spread easily and keeps the finished bark softer instead of overly brittle.
- 1/2 teaspoon peppermint extract, divided – This adds the cool peppermint flavor that makes the bark taste like the holiday season.
- 2 to 3 regular-size candy canes, crushed, 24 to 36 grams total – These add the crunchy topping and the classic red-and-white holiday look.
Special Dietary Options
- Vegan: Use dairy-free white chocolate and dairy-free dark chocolate, then choose a vegan candy cane brand if needed. Coconut oil works well here.
- Gluten-free: Most versions are naturally gluten-free, but always check labels on chocolate, extract, and candy canes to be safe.
- Low-calorie: Make thinner layers and use a little less candy cane topping. Dark chocolate may also feel less sweet, so a smaller piece goes a long way.
| Ingredient | Amount | Why It Matters |
|---|---|---|
| White chocolate | 12 ounces | Creates creamy layers and a snowy holiday look |
| Semi-sweet or bittersweet chocolate | 6 ounces | Adds contrast and deeper chocolate flavor |
| Oil | 1 and 1/2 teaspoons | Helps the bark spread and set with a softer bite |
| Peppermint extract | 1/2 teaspoon | Gives the bark its cool minty flavor |
| Crushed candy canes | 2 to 3 | Adds crunch and festive color |
How to Prepare the Perfect Peppermint Bark Recipe: Step-by-Step Guide
First Step: Prepare your pan
Line an 8- or 9-inch square baking pan or a baking sheet with parchment paper or aluminum foil. Smooth out any wrinkles as much as you can, because a flat surface helps the bark spread evenly and makes it easier to remove later. If you want thinner bark, a baking sheet works well. For thicker pieces that are easier to break into squares, the square pan is a great choice.
Set out all your ingredients before you start melting chocolate. Chocolate sets quickly once it is warm, so having everything ready saves time and keeps the layers neat. Crush your candy canes now, too. A sealed plastic bag and a rolling pin or meat mallet work really well for this step.
Second Step: Melt the first white chocolate layer
Place 6 ounces of the white chocolate in a microwave-safe bowl with 1/2 teaspoon of the oil. Microwave in 20-second increments, stirring after each round until the chocolate is smooth. Short bursts are important here because chocolate can burn quickly if it gets too hot.
Once the chocolate is melted, stir in 1/4 teaspoon of peppermint extract. Pour it into the prepared pan and spread it into a thin, even layer. Try to work gently so the layer stays smooth. Then refrigerate it for 10 to 15 minutes, just until it is almost set but not fully hard.
Third Step: Add the middle chocolate layer
Melt the semi-sweet or bittersweet chocolate with another 1/2 teaspoon of oil using the same short microwave method. Stir often, and do not rush this part. When the chocolate is fully smooth, stir in the remaining 1/4 teaspoon peppermint extract.
Pour the melted chocolate over the first layer and spread it evenly from edge to edge. If the bottom layer is still slightly soft, the two layers will bond better. Chill again for 10 to 15 minutes until the surface is set enough to support the final layer without mixing.
Fourth Step: Finish with the top white chocolate layer
Melt the remaining white chocolate with the last 1/2 teaspoon of oil. Stir until smooth, then pour it over the chilled chocolate layer. Spread it gently so the bark has a polished finish. This final layer gives the dessert its classic peppermint bark look and makes the candy cane topping stand out beautifully.
Right away, sprinkle the crushed candy canes evenly over the top. Press them in very lightly if needed so they stick. If the top layer begins to set too quickly, work fast and add the candy canes before the chocolate firms up.
Fifth Step: Chill until fully set
Refrigerate the bark for about 1 hour, or until completely firm. Once set, lift it from the pan using the parchment paper or foil. Peel away the liner and break or cut the bark into pieces. If the bark has been in the fridge for longer than 3 to 4 hours, let it sit at room temperature for 10 to 15 minutes before cutting. That small pause makes slicing and breaking much easier.
For a neat finish, use a sharp knife if you want squares, or simply break it with your hands for a more rustic look. Both ways are fine, and both look festive on a holiday plate.
Sixth Step: Store or serve
Store any leftover bark covered in the refrigerator for up to 3 weeks. You can also keep it at room temperature for a few days during colder months, but chilled storage is best for longer freshness. If you are packaging it as a gift, wrap the pieces in parchment and place them in a tin or cellophane bag.
Best timing note: this Peppermint Bark Recipe needs about 30 minutes of prep and around 1 hour of setting time, so plan for a total of about 1 hour and 45 minutes from start to finish.

Dietary Substitutions to Customize Your Peppermint Bark Recipe
Protein and Main Component Alternatives
This recipe does not rely on protein, so the main swaps are really about the chocolate. If you want a more intense flavor, use all bittersweet chocolate instead of semi-sweet in the middle layer. For a sweeter bark, use milk chocolate in place of the semi-sweet layer, though the flavor will be less bold.
If you need a dairy-free version, choose vegan white chocolate and vegan dark chocolate. Coconut oil works especially well in this case because it blends smoothly and supports a soft finish. If you like a stronger mint taste, peppermint oil can be used, but it is much more powerful than extract, so add it very sparingly.
Vegetable, Sauce, and Seasoning Modifications
Even though this is a candy recipe, a few small adjustments can change the final texture. Vegetable oil, coconut oil, avocado oil, or canola oil can all be used in place of the oil listed in the recipe. Butter is not a good choice because it can cause separation and may change the texture of the chocolate.
You can also change the look by rearranging the layers. Some people prefer a two-layer bark with about 8 ounces of each chocolate. Others like to flip the order and place dark chocolate on top or bottom. If you want a cleaner finish, keep the candy cane topping light. If you want a bigger crunch, add a little more crushed candy cane, but do not overdo it or the top layer may become uneven.
Mastering Peppermint Bark Recipe: Advanced Tips and Variations
Pro cooking techniques
For the best flavor and shine, choose high-quality chocolate bars instead of chips. Chocolate chips contain stabilizers that make them harder to melt smoothly. Chop the bars into even pieces so the chocolate melts at the same pace. Stir well between each short heating burst, and stop heating as soon as the chocolate is mostly melted. The residual heat will finish the job.
Another helpful trick is to let each layer cool for 10 to 15 minutes before adding the next one. That small chill time helps the layers stick together without sliding apart. If a layer hardens too much, gently warm the surface with a blow dryer for a few seconds so the next layer can bond.
Flavor variations
You can keep the classic peppermint flavor or try small changes. A little extra extract gives a stronger mint taste, while using only two layers creates a simpler bark. You can also swap the chocolate order for a different look, or make a larger batch for holiday parties by doubling or tripling the ingredients and using a large baking sheet.
Presentation tips
For gifts, break the bark into uneven pieces and stack them in clear bags with ribbon. For dessert platters, cut the bark into squares for a more polished look. Either way, the red candy cane topping gives the bark a cheerful finish that looks great next to cookies, brownies, and other holiday sweets.
Make-ahead options
This bark is a dream for busy holiday planning. You can make it several days ahead and store it in the refrigerator until needed. It also freezes well for longer storage. If you are making treats for a party, prepare the bark early, portion it into containers, and keep it chilled until serving time.
How to Store Peppermint Bark Recipe: Best Practices
Store peppermint bark in an airtight container in the refrigerator for up to 3 weeks. Place parchment paper between layers if you stack pieces so they do not stick together. If you plan to serve it after prolonged refrigeration, let it sit at room temperature for 10 to 15 minutes so it softens slightly and cuts more easily.
For freezing, wrap the bark well and place it in a freezer-safe container with parchment between layers. It keeps for 2 to 3 months. Thaw it in the refrigerator or at room temperature before serving. If you want the best glossy look, avoid moisture and sudden temperature changes, since those can lead to chocolate bloom.
At room temperature, the bark can keep for a few days during colder weather, but it is safest to store it chilled if your kitchen is warm. This makes it a solid make-ahead candy for holidays, gift boxes, and party trays.
FAQs: Frequently Asked Questions About Peppermint Bark Recipe
What is the best chocolate to use for peppermint bark?
For peppermint bark, choose high-quality chocolate bars like Ghirardelli, Guittard, or Baker’s brand in semi-sweet and white varieties. Avoid chocolate chips or morsels, as they contain stabilizers that prevent smooth melting and result in a grainy texture. Use 8-12 ounces per layer depending on your recipe. Melt the chocolate gently in a double boiler or microwave in 30-second intervals, stirring until fully smooth. This ensures a glossy finish and easy spreading. Quality bars give the bark a professional snap and rich flavor that pairs perfectly with peppermint extract and crushed candy canes. If substituting, opt for couverture chocolate for even better results. Prep tip: Chop bars into even pieces for uniform melting. (92 words)
What size pan should I use for peppermint bark?
Use an 8- or 9-inch square baking pan for standard batches, or a half-sheet baking pan (about 13×18 inches) for doubled or tripled recipes. Line with parchment paper or aluminum foil for easy removal and to prevent sticking. The square pan yields about 1-1.5 inches thick bark, ideal for breaking into 20-30 pieces. For thinner bark, spread on a full sheet pan. Grease lightly if needed, but parchment works best. After pouring layers, tap the pan gently to remove air bubbles. Chill in the fridge until firm, about 20-30 minutes per layer. This setup makes uniform pieces perfect for gifting or holiday platters. (104 words)
Why add oil to peppermint bark recipe and what kind works?
Oil thins melted chocolate for smooth pouring and spreading, while keeping the bark softer and less crumbly when set. Use 1-2 teaspoons per 8 ounces of chocolate—vegetable, coconut, or avocado oil are top choices for neutral flavor. Canola oil works as a substitute. Stir it in after melting the chocolate until fully combined. Avoid butter, as it can cause separation or off flavors. This step is key for a glossy, flexible texture that snaps cleanly without shattering. Pro tip: For dairy-free bark, pair coconut oil with vegan chocolate. Test a small batch if trying new oils. (98 words)
How do I prevent peppermint bark layers from separating?
Chill each layer briefly—only 10-15 minutes in the fridge—to keep it slightly soft for better adhesion. Pour the next layer directly on top while the previous one is tacky, not fully hardened. Use the same oil ratio in each for consistent thinning. If layers mix or smear, chill longer next time, up to 20 minutes. Avoid freezing between layers. For three-layer bark (semi-sweet, white, semi-sweet), work quickly after melting. Gently spread with an offset spatula to minimize disturbance. This method ensures layers bond firmly, preventing slides during breaking or storage. (92 words)
How long does peppermint bark last and how should I store it?
Store peppermint bark at room temperature in an airtight container for up to 1 week, or refrigerate for 3 weeks wrapped in parchment to avoid moisture. For longer storage, freeze in single layers separated by parchment for 2-3 months—thaw at room temp before serving. Avoid humid areas to prevent “bloom” (white streaks from sugar separation). Cut into pieces first for easy access. It makes great gifts; package in cellophane bags with ribbons. Note: High-quality chocolate extends shelf life. Check for freshness by texture—soft or sticky means it’s past peak. (89 words)
Peppermint Bark Recipe
- Total Time: 1 hour 45 minutes
- Yield: 16 servings (1 lb)
- Diet: Vegetarian
Description
🍭 Create no-bake peppermint bark layered with white and dark chocolate for a festive, crunchy holiday treat in under 2 hours.
🎄 Easy, customizable candy perfect for gifting, parties, or snacking – stores for weeks in the fridge!
Ingredients
– 12 ounces white chocolate, coarsely chopped and divided for creamy layers and snowy holiday look
– 6 ounces semi-sweet or bittersweet chocolate, coarsely chopped for contrast and deeper chocolate flavor
– 1 and 1/2 teaspoons vegetable oil or coconut oil, divided for helping the bark spread and softer bite
– 1/2 teaspoon peppermint extract, divided for cool minty flavor
– 2 to 3 crushed candy canes for crunch and festive color
Instructions
1-First Step: Prepare your pan Line an 8- or 9-inch square baking pan or a baking sheet with parchment paper or aluminum foil. Smooth out any wrinkles as much as you can, because a flat surface helps the bark spread evenly and makes it easier to remove later. If you want thinner bark, a baking sheet works well. For thicker pieces that are easier to break into squares, the square pan is a great choice. Set out all your ingredients before you start melting chocolate. Chocolate sets quickly once it is warm, so having everything ready saves time and keeps the layers neat. Crush your candy canes now, too. A sealed plastic bag and a rolling pin or meat mallet work really well for this step.
2-Second Step: Melt the first white chocolate layer Place 6 ounces of the white chocolate in a microwave-safe bowl with 1/2 teaspoon of the oil. Microwave in 20-second increments, stirring after each round until the chocolate is smooth. Short bursts are important here because chocolate can burn quickly if it gets too hot. Once the chocolate is melted, stir in 1/4 teaspoon of peppermint extract. Pour it into the prepared pan and spread it into a thin, even layer. Try to work gently so the layer stays smooth. Then refrigerate it for 10 to 15 minutes, just until it is almost set but not fully hard.
3-Third Step: Add the middle chocolate layer Melt the semi-sweet or bittersweet chocolate with another 1/2 teaspoon of oil using the same short microwave method. Stir often, and do not rush this part. When the chocolate is fully smooth, stir in the remaining 1/4 teaspoon peppermint extract. Pour the melted chocolate over the first layer and spread it evenly from edge to edge. If the bottom layer is still slightly soft, the two layers will bond better. Chill again for 10 to 15 minutes until the surface is set enough to support the final layer without mixing.
4-Fourth Step: Finish with the top white chocolate layer Melt the remaining white chocolate with the last 1/2 teaspoon of oil. Stir until smooth, then pour it over the chilled chocolate layer. Spread it gently so the bark has a polished finish. This final layer gives the dessert its classic peppermint bark look and makes the candy cane topping stand out beautifully. Right away, sprinkle the crushed candy canes evenly over the top. Press them in very lightly if needed so they stick. If the top layer begins to set too quickly, work fast and add the candy canes before the chocolate firms up.
5-Fifth Step: Chill until fully set Refrigerate the bark for about 1 hour, or until completely firm. Once set, lift it from the pan using the parchment paper or foil. Peel away the liner and break or cut the bark into pieces. If the bark has been in the fridge for longer than 3 to 4 hours, let it sit at room temperature for 10 to 15 minutes before cutting. That small pause makes slicing and breaking much easier. For a neat finish, use a sharp knife if you want squares, or simply break it with your hands for a more rustic look. Both ways are fine, and both look festive on a holiday plate.
6-Sixth Step: Store or serve Store any leftover bark covered in the refrigerator for up to 3 weeks. You can also keep it at room temperature for a few days during colder months, but chilled storage is best for longer freshness. If you are packaging it as a gift, wrap the pieces in parchment and place them in a tin or cellophane bag.
Notes
🍫 Use high-quality chocolate bars for superior melting and flavor.
🛢️ Add oil to thin chocolate for smooth spreading and less crumbliness.
❄️ Chill each layer 10-15 minutes before adding the next to prevent mixing.
- Prep Time: 30 minutes
- Chilling: 1 hour 15 minutes
- Category: Dessert
- Method: No Bake
- Cuisine: American
Nutrition
- Serving Size: 1 oz piece
- Calories: 170
- Sugar: 18g
- Sodium: 20mg
- Fat: 10g
- Saturated Fat: 6g
- Unsaturated Fat: 4g
- Trans Fat: 0g
- Carbohydrates: 20g
- Fiber: 0g
- Protein: 1g
- Cholesterol: 5mg
Keywords: peppermint bark, easy holiday candy, no bake treat, chocolate bark