Why You’ll Love This Peanut Butter Cookies Recipe
There’s something truly special about a classic peanut butter cookies recipe that brings comfort and joy to any kitchen. These homemade treats combine the perfect balance of sweet and salty flavors while delivering that signature chewy texture everyone craves. Whether you’re an experienced baker or just starting out, this easy peanut butter cookies recipe delivers consistent results every single time.
- Ease of preparation: With just 15 minutes total time from start to finish, these chewy peanut butter cookies come together quickly without any complicated techniques. The straightforward method uses basic pantry ingredients you likely already have on hand, making this recipe perfect for spontaneous baking sessions or when you need a sweet treat in a hurry.
- Health benefits: Each cookie contains 5 grams of protein from the peanut butter, making them more satisfying than many other sweet treats. The recipe also provides essential nutrients including calcium, iron, and potassium, giving you a treat that nourishes while it delights your taste buds.
- Versatility: This classic peanut butter cookies recipe adapts easily to different dietary preferences and ingredient availability. You can use creamy or chunky peanut butter, adjust sweetness levels, or modify the recipe for special diets while still achieving delicious results.
- Distinctive flavor: The combination of brown sugar and granulated sugar creates a depth of flavor that pairs perfectly with the rich, nutty taste of peanut butter. These soft peanut butter cookies develop crisp edges while maintaining a tender, chewy center that keeps everyone coming back for more.
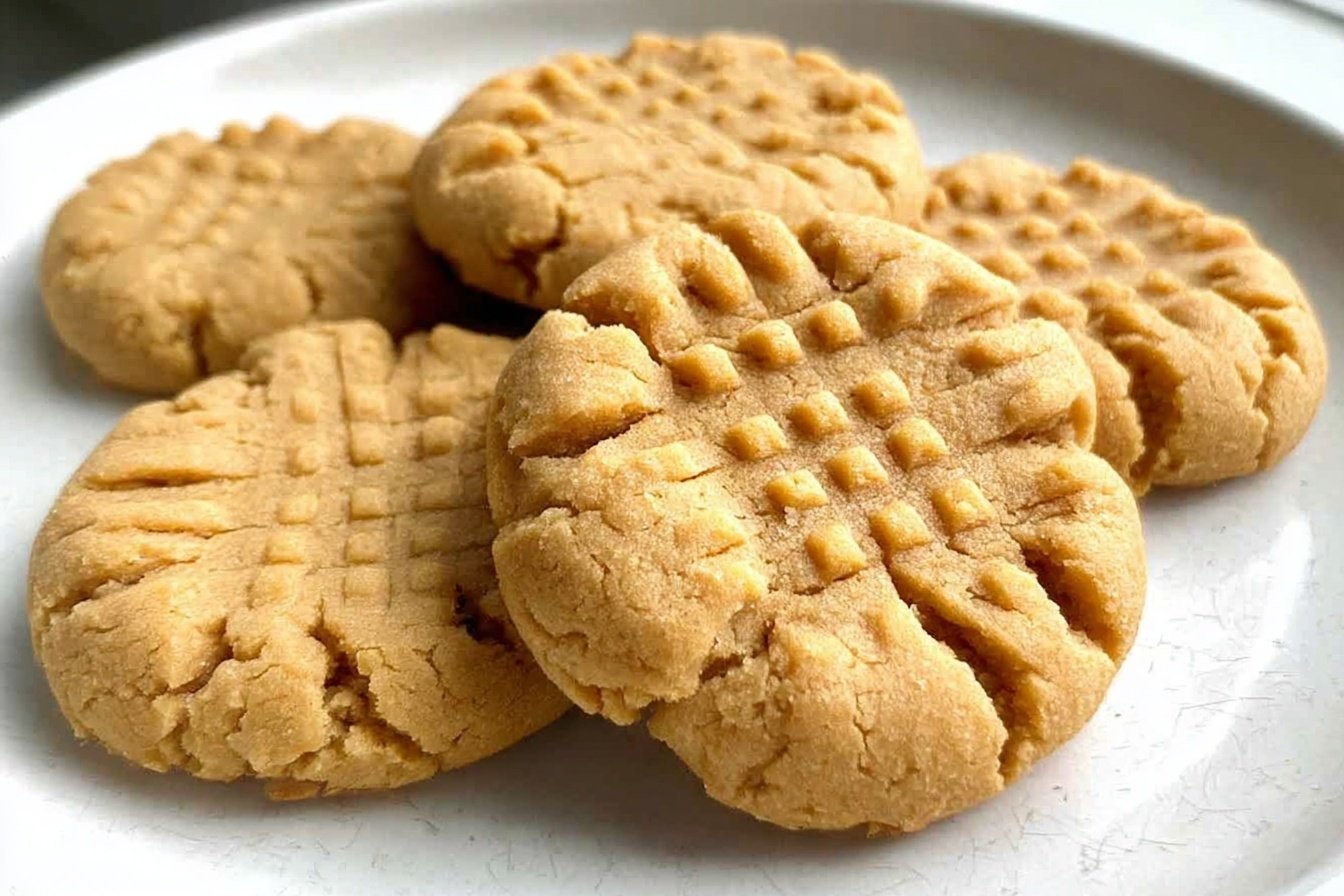
Baking these cookies fills your home with an irresistible aroma that brings everyone to the kitchen. The classic criss-cross pattern isn’t just decorative it’s a time-honored tradition that helps these treats bake evenly while giving them that recognizable look everyone associates with the perfect peanut butter cookie.
Jump To
- 1. Why You’ll Love This Peanut Butter Cookies Recipe
- 2. Essential Ingredients for Peanut Butter Cookies
- 3. How to Prepare the Perfect Peanut Butter Cookies: Step-by-Step Guide
- 4. Dietary Substitutions to Customize Your Peanut Butter Cookies
- 5. Mastering Peanut Butter Cookies: Advanced Tips and Variations
- 6. How to Store Peanut Butter Cookies: Best Practices
- 7. FAQs: Frequently Asked Questions About Peanut Butter Cookies
- 8. Peanut Butter Cookies
Essential Ingredients for Peanut Butter Cookies
Creating the perfect homemade peanut butter cookies starts with understanding each ingredient’s role in the recipe. Here’s everything you’ll need:
Main Ingredients
- 1 1/2 cups all-purpose flour (180g) – Provides structure and stability to the cookies, creating the perfect balance between tender and sturdy texture
- 1/2 cup unsalted butter, room temperature (113g) – Adds richness and helps create that signature tender crumb while allowing you to control the salt level
- 1 cup peanut butter (250g) – The star ingredient that delivers flavor, protein, and that characteristic dense, chewy texture; creamy preferred but chunky works beautifully for added texture
- 1/2 cup brown sugar, lightly packed (100g) – Contributes moisture and a subtle caramel flavor that enhances the nutty notes
- 1/2 cup granulated sugar (100g) – Creates crisp edges and helps the cookies maintain their shape during baking
- 1 teaspoon vanilla extract (5mL) – Adds depth and warmth to the overall flavor profile
- 1 large egg, room temperature – Binds the ingredients together and contributes to the chewy texture
- 3/4 teaspoon baking powder (3g) – Provides gentle lift without making cookies cakey
- Optional: 1/4 to 1/2 teaspoon sea salt – Enhances flavors and balances sweetness, especially important if using unsalted peanut butter
Special Dietary Options
Vegan adaptation: Replace the butter with equal parts coconut oil or vegan butter substitute, and use a flax egg (1 tablespoon ground flaxseed mixed with 3 tablespoons water) instead of the regular egg. The cookies will still maintain their chewy texture and peanut butter flavor.
Gluten-free modification: Swap the all-purpose flour for a 1:1 gluten-free flour blend designed for baking. These easy chewy peanut butter cookies work wonderfully with gluten-free alternatives, though you may need to chill the dough slightly longer if it feels too soft.
Lower calorie option: Reduce both sugars by 2 tablespoons each and use a natural peanut butter without added oils. You can also try replacing half the butter with unsweetened applesauce for a lighter version that still satisfies.
How to Prepare the Perfect Peanut Butter Cookies: Step-by-Step Guide
Follow these detailed instructions to create bakery-quality classic peanut butter cookies in your own kitchen. The process is straightforward, and understanding each step helps you achieve consistent results every time.
Step 1: Prepare Your Oven and Baking Equipment
Begin by preheating your oven to 350 degrees Fahrenheit. This temperature allows the peanut butter cookies to bake evenly without browning too quickly. Line your baking sheet with parchment paper, which prevents sticking and makes cleanup effortless. The parchment also promotes even heat distribution across the bottom of the cookies.
Step 2: Combine Dry Ingredients
Sift the all-purpose flour and baking powder together into a medium bowl, then whisk to combine thoroughly. This step ensures the baking powder distributes evenly throughout the flour, preventing any concentrated pockets that could create bitter spots in your finished cookies. Set this mixture aside while you prepare the wet ingredients.
Step 3: Cream Butter and Sugars
In a stand mixer fitted with the paddle attachment, combine the room temperature butter, granulated sugar, and brown sugar. Cream these ingredients together on medium speed for about 2-3 minutes until the mixture becomes light and fluffy. This creaming process incorporates air into the dough, which helps create that perfect texture in your chewy peanut butter cookies. The mixture should look pale and spread easily when properly creamed.
Pro tip: Make sure your butter is truly at room temperature for the best results. Cold butter won’t cream properly, while melted butter will make cookies that spread too much.
Step 4: Add Peanut Butter
Add the peanut butter to the creamed butter and sugar mixture. Mix until fully incorporated, scraping down the sides of the bowl as needed. The dough will become noticeably thicker and denser at this stage, which is exactly what you want for soft peanut butter cookies. If you’re using natural peanut butter without stabilizers, make sure it’s well-mixed before adding to avoid oily spots in your finished cookies.
Step 5: Incorporate Egg and Vanilla
Add the room temperature egg and vanilla extract to the mixture. Mix until combined, then scrape down the bowl and mix again briefly. The egg should be fully incorporated with no visible streaks. Room temperature eggs blend more easily into cookie dough and create a more uniform texture. The vanilla adds warmth and complexity to the peanut butter flavor.
Step 6: Add Flour Mixture
With the mixer on low speed, gradually add the flour and baking powder mixture to the wet ingredients. Beat only until just combined overmixing develops gluten and can make cookies tough instead of tender. Stop mixing as soon as no visible flour remains. The dough will be soft and slightly sticky, which is perfect for these homemade peanut butter cookies.
Step 7: Shape the Cookie Dough
Roll the dough into one-inch balls using your hands or a small cookie scoop for uniformity. Place each ball on the prepared parchment-lined baking sheet, leaving about 2 inches between cookies to allow for slight spreading. Consistent sizing ensures all cookies bake at the same rate, giving you an even batch every time.
Step 8: Create the Classic Criss-Cross Pattern
Flatten each cookie dough ball with a fork in a criss-cross pattern. Press the fork tines down firmly but gently to create parallel lines, then rotate 90 degrees and press again for the classic crosshatch design. This technique does more than create the signature look it helps dense peanut butter dough bake evenly by flattening it to the proper thickness. The pattern also creates more surface area for a slightly crisp exterior.
Tip: Dip your fork in flour or sugar between presses to prevent sticking, especially if your dough is on the softer side.
Step 9: Bake to Perfection
Bake the peanut butter cookies for about 8 to 10 minutes until the edges just begin to change color. The cookies will still look soft in the center this is exactly right. They continue cooking on the hot baking sheet after removal from the oven. Watch carefully during the last minute of baking, as the difference between perfectly baked and overdone happens quickly.
Step 10: Cool Properly
Allow cookies to cool completely on the baking sheet before transferring to a wire rack. This crucial step lets the cookies firm up properly easy peanut butter cookies are very soft when first removed from the oven and need this resting time. As they cool, the centers set while maintaining that coveted chewy texture, and the edges develop a satisfying crispness.

Dietary Substitutions to Customize Your Peanut Butter Cookies
Protein and Main Component Alternatives
For those seeking different protein sources or dealing with allergies, several substitutions work well in this classic peanut butter cookies recipe. Almond butter creates cookies with a similar texture but a milder, slightly sweeter flavor profile. Sunflower seed butter offers a nut-free alternative that’s safe for school environments while still delivering richness and protein.
If you prefer a richer cookie, try cashew butter, which produces an incredibly smooth and creamy result. Each alternative butter may require slight adjustments natural nut butters often need additional flour (about 1 tablespoon) to compensate for their higher oil content.
Sweetener and Seasoning Modifications
The sugar blend in this recipe can be adjusted based on dietary preferences and ingredient availability. Coconut sugar works as a direct substitute for brown sugar, adding a subtle caramel note while lowering the glycemic impact. Honey or maple syrup can replace some granulated sugar, though you’ll need to reduce other liquids slightly and expect a softer, more spread-prone cookie.
For those watching sodium intake, simply use unsalted butter and omit the optional salt. If you’re using natural unsalted peanut butter, add 1/4 teaspoon of sea salt to enhance the overall flavor profile. Spices like cinnamon or nutmeg (about 1/4 teaspoon) can add warmth, while a pinch of cardamom creates an unexpected depth that pairs beautifully with peanut butter.
Texture variations abound try adding 1/2 cup of chocolate chips, chopped peanuts for extra crunch, or even dried fruit for unique peanut butter cookie variations. These additions don’t change the baking method but do create entirely different flavor experiences.
Mastering Peanut Butter Cookies: Advanced Tips and Variations
Professional Baking Techniques
Using a kitchen scale to measure flour by weight (180g for this recipe) eliminates the variability of cup measurements and produces consistently perfect chewy peanut butter cookies. If measuring by volume, always fluff the flour with a spoon before scooping, then level off the excess with a knife never pack flour into the measuring cup.
Room temperature ingredients blend more effectively than cold ones. Take butter and eggs out of the refrigerator at least 30 minutes before baking. For peanut butter, stir natural varieties thoroughly to reincorporate separated oils before measuring.
Creative Flavor Variations
Transform this easy peanut butter cookies recipe with simple additions. Mix in 1/2 cup of chocolate chips for a peanut butter chocolate chip cookie that rivals traditional chocolate chip cookies in popularity. Swirl in 2 tablespoons of your favorite jam before baking for PB&J inspired treats.
Roll the dough balls in granulated sugar before creating the fork marks for a sparkling, crunchy exterior. For a more sophisticated flavor, add 1/4 teaspoon of espresso powder to enhance the peanut butter’s nutty qualities without making the cookies taste like coffee.
Presentation and Make-Ahead Options
For picture-perfect soft peanut butter cookies, use two skewers taped together instead of a fork for cleaner, more uniform criss-cross lines. A light dusting of powdered sugar after baking adds an elegant finish for special occasions.
Cookie dough balls freeze beautifully for up to 2 months. Roll and mark the dough, freeze on a baking sheet until solid, then transfer to a freezer bag. Bake directly from frozen, adding 1-2 minutes to the baking time perfect for fresh-baked homemade peanut butter cookies on demand.
How to Store Peanut Butter Cookies: Best Practices
Room Temperature Storage
Store baked peanut butter cookies in an airtight container at room temperature for up to one week. Layer parchment paper between cookies to prevent sticking and maintain the crisp edges. The natural oils in peanut butter help these cookies stay soft and chewy longer than many other cookie varieties.
Freezer Storage
For longer storage, freeze baked cookies in a single layer on a tray until solid, then transfer to freezer bags for up to 3 months. Thaw at room temperature for 30 minutes before serving. The texture remains excellent after freezing, making this a great make-ahead option.
Unbaked cookie dough also freezes well for up to 2 months. Portion the dough into balls, freeze until solid, then store in freezer bags. This method gives you fresh-baked cookies anytime with minimal preparation.
Reheating and Refreshing
If your classic peanut butter cookies have lost their just-baked warmth, warm them in a 300°F oven for 5 minutes. This quick refresh softens the centers and crisps the edges again. Never refrigerate baked cookies, as the cold temperature accelerates staling and dries them out.
FAQs: Frequently Asked Questions About Peanut Butter Cookies
Why do peanut butter cookies have fork marks?
Peanut butter cookies have fork marks, or crisscross patterns, because the dough is dense from the natural oils and thickness of peanut butter. Unlike other cookie doughs that spread easily during baking, peanut butter dough stays compact and can result in thick, uneven cookies if left alone. Pressing with a fork flattens the dough balls slightly, helping them bake evenly and create a crisp exterior with a tender inside. This tradition dates back to early recipes in the 1930s when peanut butter became popular in baking. Without the marks, cookies might puff up too much in the center. For best results, roll dough into 1-inch balls, press gently with fork tines to about ½-inch thickness, and bake at 350°F for 10-12 minutes until edges are golden.
How do you make perfect fork marks on peanut butter cookies?
To get clean, even crisscross fork marks on peanut butter cookies, start with chilled dough balls about 1-inch in size. Dip a fork in sugar or flour to prevent sticking, then press straight down firmly but gently to flatten to ½-inch thick—avoid over-flattening or cookies will be tough. For the first set of lines, press horizontally; rotate fork 90 degrees for vertical lines. Use a fork with long, widely spaced tines for defined patterns, or try two wooden skewers side-by-side for precision. Pull the fork away at an angle instead of lifting straight up to avoid distorting the dough. If dough sticks, chill it briefly. Bake immediately at 350°F for even browning. This technique ensures a classic look and uniform baking every time.
What is the best peanut butter for peanut butter cookies?
The best peanut butter for cookies is smooth, creamy, and salted varieties like Jif or Skippy, which have stabilizers for consistent texture and flavor. These provide the right balance of fat and salt without overpowering sweetness. Avoid extra-chunky unless you want texture variation. Sweetened peanut butters work but reduce recipe sugar by 1-2 tablespoons to prevent overly sweet cookies. For natural peanut butter (just peanuts and salt), stir vigorously to blend separated oil, or cookies may spread too much or taste oily—add 1 tablespoon flour if needed. Test any brand by eating it plain; if you love the taste, it will shine in cookies. Always use full-fat for richness. This choice affects spread, chewiness, and overall flavor in your batch.
Should you chill peanut butter cookie dough before baking?
You don’t need to chill peanut butter cookie dough before baking because the high fat content from peanut butter keeps cookies from spreading excessively, unlike butter-heavy recipes. They bake up perfectly straight from room temperature in 10-12 minutes at 350°F. Chilling for 30-60 minutes is fine if making dough ahead—it firms up the balls for easier handling and sharper fork marks—but it won’t change the final texture much. Over-chilling (overnight) can make cookies drier. If your kitchen is warm or using natural peanut butter, a short chill prevents slight spreading. Pro tip: Portion dough onto parchment-lined trays, chill briefly if needed, then mark and bake. This flexibility makes peanut butter cookies quick and forgiving for beginners.
How do you store peanut butter cookies to keep them fresh?
Store homemade peanut butter cookies in an airtight container at room temperature for up to 5 days—they stay soft and chewy thanks to peanut butter’s oils. Layer with parchment paper to prevent sticking. For longer storage, freeze baked cookies in a single layer on a tray first, then transfer to freezer bags for up to 3 months; thaw at room temp for 30 minutes. Cookie dough balls freeze well too—roll, mark lightly, freeze on a tray, then bag for up to 2 months; bake straight from freezer adding 1-2 minutes. Avoid refrigerating as it dries them out. If cookies get stale, revive by warming in a 300°F oven for 5 minutes. Proper storage maintains that signature crispy edges and soft centers.
Peanut Butter Cookies
- Total Time: 25 minutes
- Yield: 24 cookies
- Diet: Vegetarian
Description
🍪 Whip up easy, chewy classic peanut butter cookies with soft centers and crisp edges – ready in 15 minutes for instant satisfaction!
🥜 No-chill dough, simple ingredients, perfect for snacking or gifting to peanut butter lovers everywhere.
Ingredients
– 1 1/2 cups all-purpose flour (180g)
– 1/2 cup unsalted butter, room temperature (113g)
– 1 cup peanut butter (250g)
– 1/2 cup brown sugar, lightly packed (100g)
– 1/2 cup granulated sugar (100g)
– 1 teaspoon vanilla extract (5mL)
– 1 large egg, room temperature
– 3/4 teaspoon baking powder (3g)
– 1/4 to 1/2 teaspoon sea salt
Instructions
1-Step 1: Prepare Your Oven and Baking Equipment Begin by preheating your oven to 350 degrees Fahrenheit. This temperature allows the peanut butter cookies to bake evenly without browning too quickly. Line your baking sheet with parchment paper, which prevents sticking and makes cleanup effortless. The parchment also promotes even heat distribution across the bottom of the cookies.
2-Step 2: Combine Dry Ingredients Sift the all-purpose flour and baking powder together into a medium bowl, then whisk to combine thoroughly. This step ensures the baking powder distributes evenly throughout the flour, preventing any concentrated pockets that could create bitter spots in your finished cookies. Set this mixture aside while you prepare the wet ingredients.
3-Step 3: Cream Butter and Sugars In a stand mixer fitted with the paddle attachment, combine the room temperature butter, granulated sugar, and brown sugar. Cream these ingredients together on medium speed for about 2-3 minutes until the mixture becomes light and fluffy. This creaming process incorporates air into the dough, which helps create that perfect texture in your chewy peanut butter cookies. The mixture should look pale and spread easily when properly creamed.
4-Step 4: Add Peanut Butter Add the peanut butter to the creamed butter and sugar mixture. Mix until fully incorporated, scraping down the sides of the bowl as needed. The dough will become noticeably thicker and denser at this stage, which is exactly what you want for soft peanut butter cookies. If you’re using natural peanut butter without stabilizers, make sure it’s well-mixed before adding to avoid oily spots in your finished cookies.
5-Step 5: Incorporate Egg and Vanilla Add the room temperature egg and vanilla extract to the mixture. Mix until combined, then scrape down the bowl and mix again briefly. The egg should be fully incorporated with no visible streaks. Room temperature eggs blend more easily into cookie dough and create a more uniform texture. The vanilla adds warmth and complexity to the peanut butter flavor.
6-Step 6: Add Flour Mixture With the mixer on low speed, gradually add the flour and baking powder mixture to the wet ingredients. Beat only until just combined overmixing develops gluten and can make cookies tough instead of tender. Stop mixing as soon as no visible flour remains. The dough will be soft and slightly sticky, which is perfect for these homemade peanut butter cookies.
7-Step 7: Shape the Cookie Dough Roll the dough into one-inch balls using your hands or a small cookie scoop for uniformity. Place each ball on the prepared parchment-lined baking sheet, leaving about 2 inches between cookies to allow for slight spreading. Consistent sizing ensures all cookies bake at the same rate, giving you an even batch every time.
8-Step 8: Create the Classic Criss-Cross Pattern Flatten each cookie dough ball with a fork in a criss-cross pattern. Press the fork tines down firmly but gently to create parallel lines, then rotate 90 degrees and press again for the classic crosshatch design. This technique does more than create the signature look it helps dense peanut butter dough bake evenly by flattening it to the proper thickness. The pattern also creates more surface area for a slightly crisp exterior.
9-Step 9: Bake to Perfection Bake the peanut butter cookies for about 8 to 10 minutes until the edges just begin to change color. The cookies will still look soft in the center this is exactly right. They continue cooking on the hot baking sheet after removal from the oven. Watch carefully during the last minute of baking, as the difference between perfectly baked and overdone happens quickly.
10-Step 10: Cool Properly Allow cookies to cool completely on the baking sheet before transferring to a wire rack. This crucial step lets the cookies firm up properly easy peanut butter cookies are very soft when first removed from the oven and need this resting time. As they cool, the centers set while maintaining that coveted chewy texture, and the edges develop a satisfying crispness.
Notes
⚖️ Use a scale to measure flour accurately or fluff and level to avoid dense cookies.
🥜 Stir natural peanut butter well before using to prevent oily, runny results.
❄️ Cookies are soft when hot; cool on baking sheet 5-10 minutes to firm up perfectly.
- Prep Time: 15 minutes
- Cook Time: 10 minutes
- Category: Desserts
- Method: Baking
- Cuisine: American
Nutrition
- Serving Size: 1 cookie
- Calories: 193 kcal
- Sugar: 7 g
- Sodium: 115 mg
- Fat: 13 g
- Saturated Fat: 5 g
- Unsaturated Fat: 8 g
- Trans Fat: 0 g
- Carbohydrates: 16 g
- Fiber: 1 g
- Protein: 5 g
- Cholesterol: 23 mg
Keywords: peanut butter cookies, chewy peanut butter cookies, easy cookie recipe, classic peanut butter cookies