Why You’ll Love This Peanut Butter Blossoms
There’s something truly magical about Peanut Butter Blossoms that makes them a perennial favorite in kitchens across America. These delightful cookies combine the rich, nutty goodness of peanut butter with the sweet creaminess of chocolate kisses, creating a treat that appeals to bakers and cookie lovers of all ages and skill levels.
- Ease of Preparation: With just 30 minutes from start to finish, these classic peanut butter blossoms come together quickly and require no fancy equipment beyond a mixing bowl and cookie sheets. The straightforward steps make them perfect for beginner bakers or parents baking with children, and the forgiving dough is easy to work with even if you’re new to cookie-making.
- Irresistible Flavor Combination: The pairing of soft, chewy peanut butter cookies with smooth chocolate kisses creates a perfect balance of salty and sweet. Each bite offers a satisfying contrast between the tender cookie exterior and the creamy chocolate center that melts slightly into the warm cookie.
- Versatility for Any Occasion: Whether you’re baking for holiday cookie exchanges, birthday parties, after-school snacks, or simply craving something sweet, chocolate kiss peanut butter cookies fit the bill perfectly. They’re equally at home on an elegant dessert tray or packed in a lunchbox for an afternoon treat.
- Make-Ahead Friendly: The dough freezes beautifully, allowing you to prepare batches in advance and bake fresh cookies whenever the craving strikes. This makes soft peanut butter blossoms an excellent choice for busy households and holiday planning.
These classic peanut butter blossoms have earned their place as a beloved tradition in countless families, and once you try this recipe, you’ll understand exactly why they remain so popular year after year.
Jump To
- 1. Why You’ll Love This Peanut Butter Blossoms
- 2. Essential Ingredients for Peanut Butter Blossoms
- 3. How to Prepare the Perfect Peanut Butter Blossoms: Step-by-Step Guide
- 4. Dietary Substitutions to Customize Your Peanut Butter Blossoms
- 5. Mastering Peanut Butter Blossoms: Advanced Tips and Variations
- 6. How to Store Peanut Butter Blossoms: Best Practices
- 7. FAQs: Frequently Asked Questions About Peanut Butter Blossoms
- 8. Peanut Butter Blossoms
Essential Ingredients for Peanut Butter Blossoms
Gathering the right ingredients before you begin is the key to baking success. Each component in this peanut butter blossoms recipe serves an important purpose in creating cookies with the perfect texture and flavor.
Main Ingredients List
- ¾ cup creamy no-stir peanut butter (188g) Provides the signature nutty flavor and tender texture; no-stir varieties contain stabilizers that help the cookies hold their shape during baking.
- ½ cup unsalted butter, softened (113g) Adds richness and creates a tender crumb; using unsalted butter gives you control over the final salt level.
- ½ cup granulated sugar plus additional for rolling (100g) Contributes to the crisp exterior and helps create those beautiful cracks on the cookie surface.
- ½ cup packed light brown sugar (110g) Adds moisture and a subtle caramel note that deepens the flavor profile.
- ¼ teaspoon salt Enhances all the flavors and balances the sweetness.
- 1 large egg at room temperature Acts as a binding agent and helps create the soft, chewy texture.
- 1 teaspoon vanilla extract Adds warmth and depth to the overall flavor.
- 1½ cups all-purpose flour (180g) Provides structure while keeping the cookies tender.
- ½ teaspoon baking soda Helps the cookies spread slightly and develop those characteristic cracks.
- 36 chocolate kisses, unwrapped The iconic chocolate topper that makes these cookies instantly recognizable.
Special Dietary Options
For those with dietary restrictions, these peanut butter blossoms cookies can be adapted with a few simple substitutions:
- Gluten-Free Option: Replace the all-purpose flour with a 1:1 gluten-free flour blend designed for baking. The texture may be slightly different, but the flavor remains delicious.
- Dairy-Free Alternative: Use a plant-based butter substitute and dairy-free chocolate kisses or dark chocolate buttons.
Pro Tip: Always measure your flour using the spoon-and-level method or a kitchen scale for the most accurate results. Too much flour is the most common cause of dry, crumbly cookies.
How to Prepare the Perfect Peanut Butter Blossoms: Step-by-Step Guide
Creating beautiful soft peanut butter blossoms is easier than you might think. Follow these detailed instructions for cookies that turn out perfectly every single time.
Step 1: Prepare Your Workspace and Oven
Begin by preheating your oven to 375°F (190°C). This temperature is ideal for creating cookies that puff up nicely while developing a golden bottom and those signature surface cracks. Line your cookie sheets with parchment paper for easy cleanup and to prevent sticking. Parchment also helps the cookies bake evenly by providing a consistent surface.
Step 2: Cream the Base Ingredients
In a large mixing bowl or stand mixer, combine the creamy no-stir peanut butter, softened unsalted butter, granulated sugar, packed light brown sugar, and salt. Beat these ingredients together until they’re well combined and the mixture looks smooth and creamy. This creaming process is essential because it incorporates tiny air pockets that help the cookies rise and develop their tender texture.
The mixture should be uniform in color with no visible streaks of butter or peanut butter. If you’re using a stand mixer, medium speed for 2-3 minutes works perfectly. Hand mixers will need about 3-4 minutes to achieve the same consistency.
Step 3: Add the Egg and Vanilla
Add the room temperature egg and vanilla extract to your creamed mixture. Beat until fully incorporated, scraping down the sides of the bowl as needed to ensure everything combines evenly. A room temperature egg blends more smoothly into the dough than a cold one, creating a more uniform texture.
The dough will become slightly glossy and smooth once the egg is fully mixed in. Take your time with this step to avoid any streaks of unmixed egg.
Step 4: Incorporate the Dry Ingredients
Add the all-purpose flour and baking soda to your wet mixture. Mix on low speed just until combined. The key here is not to overmix stop as soon as no dry flour remains visible. Overmixing develops gluten, which can make your cookies tough instead of tender.
The finished dough should be soft and slightly sticky but hold its shape when scooped. If the dough feels too warm or sticky to work with, you can refrigerate it for 15-20 minutes to firm it up slightly.
Step 5: Shape and Roll the Dough
Use a cookie scoop or your hands to shape the dough into 1-inch balls. Consistency in size ensures all your cookies bake evenly. Roll each ball in granulated sugar, coating it completely for that sparkly exterior and delightful crunch.
Arrange the sugar-coated balls on your prepared cookie sheets, leaving about 2 inches of space between each one. This spacing allows the cookies to spread without touching each other.
Step 6: Bake to Golden Perfection
Place the cookie sheets in your preheated oven and bake for 8 to 10 minutes. You’ll know they’re ready when the cookies look puffy, have developed those beautiful surface cracks, and show a light golden color on the bottom edges.
| Visual Cue | What It Means |
|---|---|
| Puffy appearance | Cookies have risen properly |
| Surface cracks | Texture is developing correctly |
| Golden bottom edges | Ready to remove from oven |
| Soft centers | Cookies will set as they cool |
Step 7: Add the Chocolate Kisses
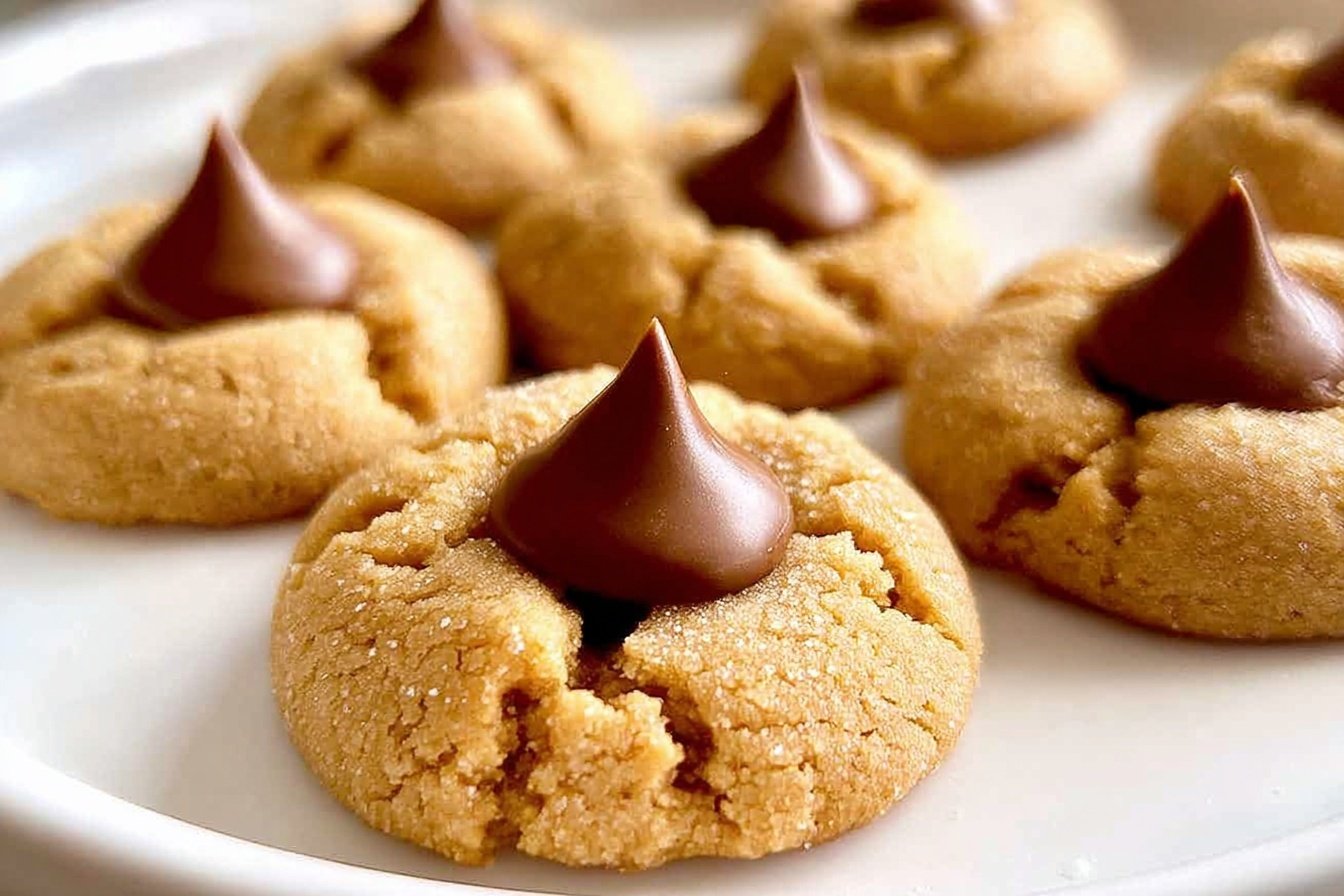
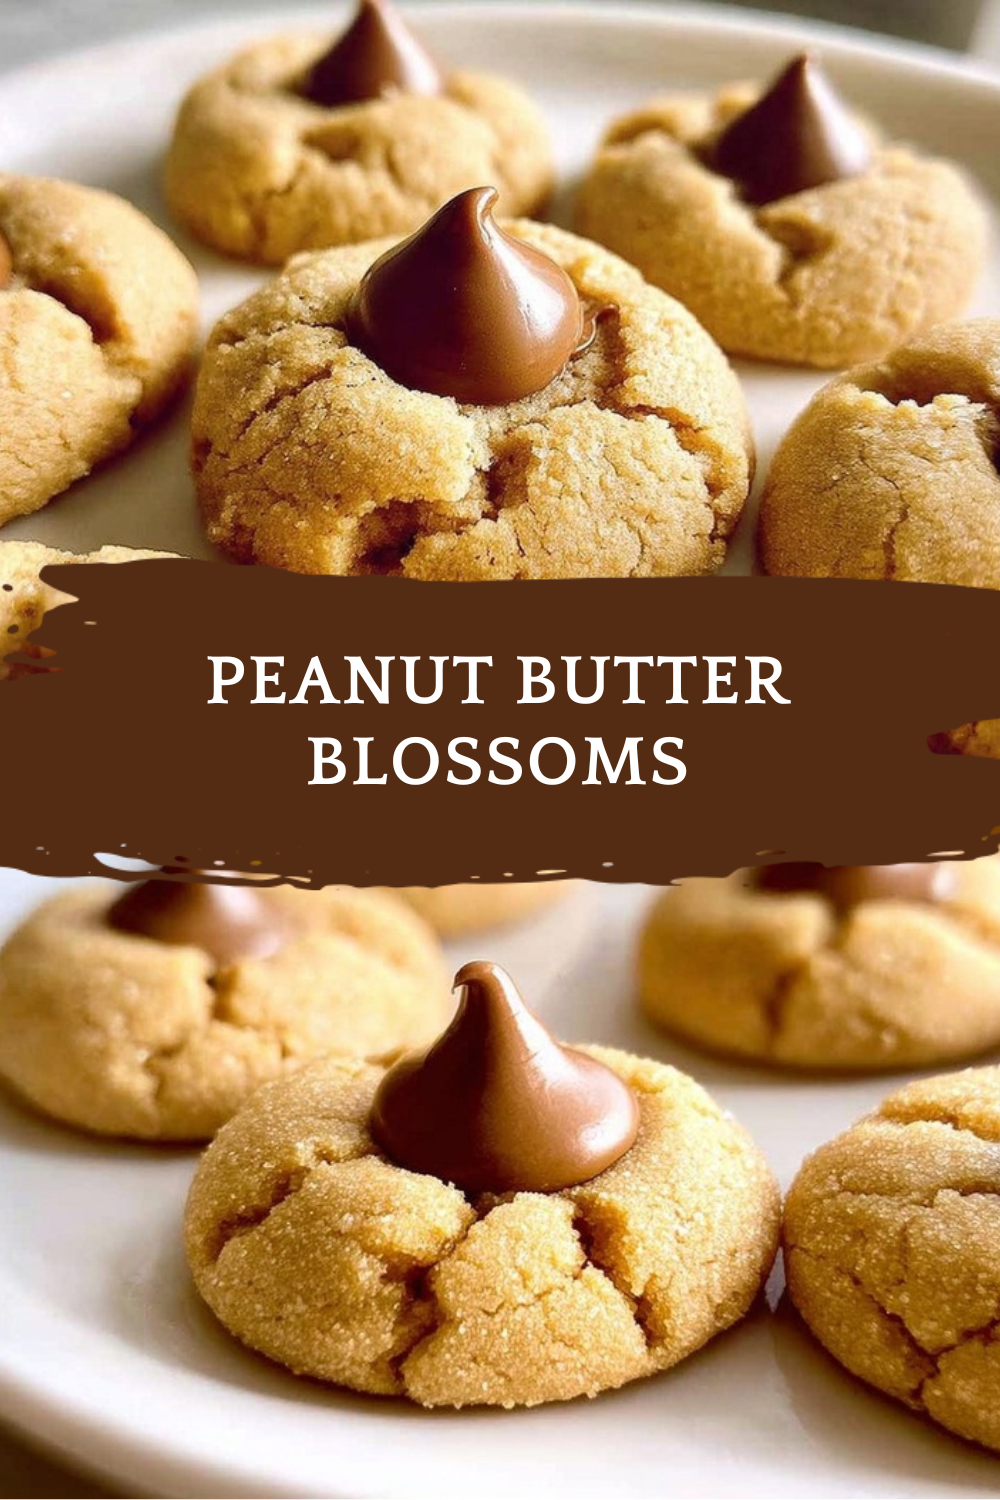
Working quickly while the cookies are still hot from the oven, press a chocolate kiss firmly into the center of each cookie. The heat will cause the cookie to crack slightly around the chocolate, creating that signature spiderweb pattern. Press straight down until the kiss is about halfway into the cookie.
Some bakers find it helpful to freeze the chocolate kisses for about 10 minutes before pressing them into the cookies. This keeps them from melting too much and helps maintain their distinctive shape.
Step 8: Cool and Set
Allow the cookies to cool completely on the baking sheet. This step is crucial because the chocolate needs time to set, and the cookies continue to firm up as they cool. Moving them too early could disturb the chocolate or cause them to break apart.
Once fully cooled, your classic peanut butter blossoms are ready to enjoy or store. Each cookie contains approximately 121 calories, making them a reasonable treat for satisfying your sweet tooth.

Dietary Substitutions to Customize Your Peanut Butter Blossoms
Protein and Main Component Alternatives
While traditional peanut butter blossoms use standard peanut butter and chocolate kisses, you can adapt the recipe to suit various dietary needs and preferences. Those looking for a protein boost might consider adding a tablespoon of protein powder to the dry ingredients, though this may slightly alter the texture.
For bakers avoiding peanuts, almond butter or sunflower seed butter can work as substitutes. Keep in mind that different nut butters have varying oil contents, which may affect how the cookies spread and bake. Sunflower seed butter sometimes turns green when baked a natural reaction that’s harmless but may surprise first-time bakers.
Vegetable, Sauce, and Seasoning Modifications
The flavor profile of chocolate kiss peanut butter cookies offers plenty of room for creativity. Consider adding a pinch of cinnamon to the dough for warm, spiced notes. Some bakers like to add a few drops of almond extract alongside the vanilla for a more complex flavor.
For a salted chocolate-peanut butter variation, sprinkle a tiny pinch of flaky sea salt on top of each chocolate kiss after pressing it into the cookie. The salt enhances both the chocolate and peanut butter flavors beautifully.
If you’re looking for another peanut butter treat to try after mastering these cookies, check out this simple peanut butter squares recipe that’s equally delicious and perfect for sharing.
Mastering Peanut Butter Blossoms: Advanced Tips and Variations
Taking your peanut butter blossoms cookies from good to exceptional requires attention to a few key details and a willingness to try creative variations.
Pro Baking Techniques
The secret to bakery-quality cookies lies in the details. Always use room temperature ingredients for the most even mixing. Cold butter won’t cream properly with the sugars, leading to inconsistent texture throughout your batch.
Invest in a kitchen scale for measuring flour accurately. According to cooking experts, precise measurements are one of the most important factors in consistent baking results. The weight measurement of 180g flour is more accurate than cup measurements, which can vary significantly depending on how the flour is scooped.
Creative Flavor Variations
While traditional soft peanut butter blossoms are beloved for good reason, don’t hesitate to experiment with different toppings:
- Milk or Dark Chocolate Kisses: Swap the standard kisses for darker chocolate varieties when you want a less sweet, more sophisticated flavor.
- Festive Flavored Kisses: During holidays, look for special edition kisses in flavors like peppermint, caramel, or pumpkin spice.
- Mini Peanut Butter Cups: Press an unwrapped mini peanut butter cup into each cookie instead of a kiss for a double peanut butter experience.
- Candied Nuts or Roasted Peanuts: For added crunch, top cookies with candied pecans or roasted peanuts after pressing in the chocolate.
Presentation Tips
Beautiful classic peanut butter blossoms deserve an attractive presentation. Arrange them on a pretty platter with varying heights for visual interest. A sprinkle of powdered sugar on the serving plate adds an elegant touch.
For gift-giving, package cookies in clear cellophane bags tied with ribbon, or arrange them in a decorative tin lined with parchment paper. These make wonderful homemade gifts during the holiday season.
Make-Ahead Options
The dough for peanut butter blossoms can be prepared in advance and frozen for later use. Shape the dough into balls and freeze them on a baking sheet until solid, then transfer to a freezer bag. When you’re ready to bake, simply roll the frozen balls in sugar and add 1-2 minutes to the baking time.
Baking Tip: Get family members involved in unwrapping chocolate kisses and rolling dough balls. It’s a fun activity that speeds up preparation and creates lasting memories in the kitchen.
How to Store Peanut Butter Blossoms: Best Practices
Proper storage keeps your homemade peanut butter blossoms fresh and delicious for days or even weeks after baking.
Short-Term Storage at Room Temperature
For cookies you plan to enjoy within 3-5 days, store them in an airtight container at room temperature. Layer parchment paper between rows if stacking to prevent the chocolate centers from sticking. Keep the container in a cool, dry spot away from direct sunlight and heat sources.
Refrigeration for Extended Freshness
If you want your peanut butter blossoms cookies to stay fresh longer, refrigeration extends their shelf life to about 2 weeks. Place cooled cookies in an airtight container with parchment between layers. The refrigerator may cause the cookie texture to firm up slightly, so let them come to room temperature before serving for the best flavor and texture.
Freezing for Long-Term Storage
Both baked cookies and unbaked dough freeze beautifully. For baked cookies, wrap each one individually in plastic wrap, then place in a freezer-safe container or bag. Remove as much air as possible to prevent freezer burn. Frozen cookies stay fresh for up to 2-3 months.
Thawing and Serving
Thaw frozen cookies at room temperature for 1-2 hours, or overnight in the refrigerator. The texture should remain soft and chewy. For a warm cookie experience, you can briefly microwave an unwrapped cookie for 10-15 seconds, though the chocolate center will melt more with this method.
Learning how to properly store baked goods helps reduce food waste and keeps treats fresh. According to nutrition experts, enjoying sweets in moderation while reducing waste supports a balanced approach to eating.
If you enjoy making peanut butter-based desserts, you might also want to try this peanut butter frosting recipe that pairs wonderfully with cakes and cupcakes.
FAQs: Frequently Asked Questions About Peanut Butter Blossoms
Can I make peanut butter blossom dough ahead of time?
Yes, peanut butter blossom dough freezes beautifully for make-ahead baking. Prepare the full batch as directed in your recipe, then portion it into balls or leave as loose dough. Place in a freezer-safe airtight container or zip-top bag, separating layers with parchment paper to prevent sticking. It keeps in the freezer for up to 3 months. To use, thaw overnight in the refrigerator or let frozen balls sit at room temperature for 20-30 minutes until soft enough to roll in sugar. Bake as usual, adding 1-2 extra minutes if starting from frozen. This method is perfect for holiday prep, saving time when baking multiple batches. Always label with the date for easy tracking. Thawed dough bakes up just as soft and chewy as fresh.
What can I use instead of Hershey’s Kisses for peanut butter blossoms?
Hershey’s Kisses are traditional, but you have plenty of swaps to customize your peanut butter blossoms. Try milk chocolate or dark chocolate Kisses for variety, or switch to Hershey’s festive flavors like peppermint or caramel during holidays. For a peanut butter twist, use mini peanut butter cups (chop if needed to fit). Add crunch with candied pecans, walnuts, or roasted peanuts pressed in after baking. Other options include Rolos for caramel-chewy centers or Hershey’s Hugs for a white chocolate-peanut butter combo. Press gently right after baking while the cookies are warm and soft—the center will melt slightly for that signature look. Test one first to ensure it doesn’t overflow. These changes keep the classic peanut butter cookie base intact while matching dietary preferences or flavors.
How do you store peanut butter blossom cookies?
Store peanut butter blossom cookies in an airtight container at room temperature for up to 3-5 days to keep them soft and fresh. Layer with parchment paper if stacking to avoid sticking from the chocolate centers. For longer storage, refrigerate in a sealed container for up to 2 weeks—the cool air firms the peanut butter but may soften texture slightly. Let them come to room temperature before serving for best taste. Avoid humid spots, as moisture can make them soggy. If gifting, wrap individually in plastic wrap inside a tin. Pro tip: Add a slice of bread to the container to maintain softness by absorbing excess air. Always check for any chocolate melting in warm conditions.
Can you freeze peanut butter blossom cookies?
Yes, baked peanut butter blossoms freeze well for up to 2-3 months. Cool completely first to prevent condensation. Wrap each cookie individually in plastic wrap, then place in a freezer-safe zip-top bag or airtight container, removing as much air as possible. This double-wrap method guards against freezer burn and odor absorption. To thaw, leave at room temperature for 1-2 hours or overnight in the fridge. For quicker results, microwave unwrapped for 10-15 seconds. They retain their chewy texture and chocolate center nicely. Freezing is ideal for leftovers after holidays or bake sales. Label bags with the date and “PB Blossoms” for organization. Avoid refreezing thawed cookies to preserve quality.
Why don’t my peanut butter blossoms crack properly?
Peanut butter blossoms crack beautifully when baked right, creating that iconic spiderweb look around the chocolate kiss. Common issues: dough too warm or thin—chill it 30-60 minutes before baking to relax gluten and hold shape. Use creamy peanut butter (not natural, as oil separation affects structure); stir well if using natural. Roll balls evenly in sugar for even cracking—granulated sugar works best. Bake at 375°F for 8-10 minutes until edges are golden but centers soft; overbaking dries them out. Press the kiss firmly immediately after baking while hot—the cookie’s residual heat causes cracking as it sets. Room temperature ingredients prevent spreading. Test one cookie first. With these steps, you’ll get perfect cracks every time for picture-worthy results.

Peanut Butter Blossoms
- Total Time: 30 minutes
- Yield: 36 cookies
- Diet: Vegetarian
Description
🍪 Irresistible peanut butter blossoms – soft chewy cookies with signature chocolate kiss tops, holiday classic perfection!
💋 30-minute family favorite: stores for weeks, customizable, pure peanut butter-chocolate bliss everyone craves.
Ingredients
– ¾ cup creamy no-stir peanut butter (188g) for signature nutty flavor and tender texture
– ½ cup unsalted butter, softened (113g) for richness and tender crumb
– ½ cup granulated sugar plus additional for rolling (100g) for crisp exterior and cracks
– ½ cup packed light brown sugar (110g) for moisture and subtle caramel note
– ¼ teaspoon salt for enhancing flavors and balancing sweetness
– 1 large egg at room temperature for binding and chewy texture
– 1 teaspoon vanilla extract for warmth and depth
– 1½ cups all-purpose flour (180g) for structure while keeping tender
– ½ teaspoon baking soda for spreading and characteristic cracks
– 36 chocolate kisses, unwrapped for iconic chocolate topper
Instructions
1-Step 1: Prepare Your Workspace and Oven
Begin by preheating your oven to 375°F (190°C). This temperature is ideal for creating cookies that puff up nicely while developing a golden bottom and those signature surface cracks. Line your cookie sheets with parchment paper for easy cleanup and to prevent sticking. Parchment also helps the cookies bake evenly by providing a consistent surface.
2-Step 2: Cream the Base Ingredients
In a large mixing bowl or stand mixer, combine the creamy no-stir peanut butter, softened unsalted butter, granulated sugar, packed light brown sugar, and salt. Beat these ingredients together until they’re well combined and the mixture looks smooth and creamy. This creaming process is essential because it incorporates tiny air pockets that help the cookies rise and develop their tender texture.
The mixture should be uniform in color with no visible streaks of butter or peanut butter. If you’re using a stand mixer, medium speed for 2-3 minutes works perfectly. Hand mixers will need about 3-4 minutes to achieve the same consistency.
3-Step 3: Add the Egg and Vanilla
Add the room temperature egg and vanilla extract to your creamed mixture. Beat until fully incorporated, scraping down the sides of the bowl as needed to ensure everything combines evenly. A room temperature egg blends more smoothly into the dough than a cold one, creating a more uniform texture.
The dough will become slightly glossy and smooth once the egg is fully mixed in. Take your time with this step to avoid any streaks of unmixed egg.
4-Step 4: Incorporate the Dry Ingredients
Add the all-purpose flour and baking soda to your wet mixture. Mix on low speed just until combined. The key here is not to overmix stop as soon as no dry flour remains visible. Overmixing develops gluten, which can make your cookies tough instead of tender.
The finished dough should be soft and slightly sticky but hold its shape when scooped. If the dough feels too warm or sticky to work with, you can refrigerate it for 15-20 minutes to firm it up slightly.
5-Step 5: Shape and Roll the Dough
Use a cookie scoop or your hands to shape the dough into 1-inch balls. Consistency in size ensures all your cookies bake evenly. Roll each ball in granulated sugar, coating it completely for that sparkly exterior and delightful crunch.
Arrange the sugar-coated balls on your prepared cookie sheets, leaving about 2 inches of space between each one. This spacing allows the cookies to spread without touching each other.
6-Step 6: Bake to Golden Perfection
Place the cookie sheets in your preheated oven and bake for 8 to 10 minutes. You’ll know they’re ready when the cookies look puffy, have developed those beautiful surface cracks, and show a light golden color on the bottom edges.
7-Step 7: Add the Chocolate Kisses
Working quickly while the cookies are still hot from the oven, press a chocolate kiss firmly into the center of each cookie. The heat will cause the cookie to crack slightly around the chocolate, creating that signature spiderweb pattern. Press straight down until the kiss is about halfway into the cookie.
Some bakers find it helpful to freeze the chocolate kisses for about 10 minutes before pressing them into the cookies. This keeps them from melting too much and helps maintain their distinctive shape.
8-Step 8: Cool and Set
Allow the cookies to cool completely on the baking sheet. This step is crucial because the chocolate needs time to set, and the cookies continue to firm up as they cool. Moving them too early could disturb the chocolate or cause them to break apart.
Once fully cooled, your classic peanut butter blossoms are ready to enjoy or store. Each cookie contains approximately 121 calories, making them a reasonable treat for satisfying your sweet tooth.
Notes
🥚 Use room-temperature egg for seamless dough blending.
⚖️ Weigh flour (180g) or spoon/level to prevent dry cookies.
🧊 Freeze kisses 10 min before pressing to hold shape.
- Prep Time: 20 minutes
- Cook Time: 10 minutes
- Category: Desserts
- Method: Baking
- Cuisine: American
Nutrition
- Serving Size: 1 cookie
- Calories: 121 kcal
- Sugar: 9 g
- Sodium: 62 mg
- Fat: 7 g
- Saturated Fat: 3 g
- Unsaturated Fat: 3 g
- Trans Fat: 0.1 g
- Carbohydrates: 14 g
- Fiber: 1 g
- Protein: 2 g
- Cholesterol: 13 mg
Keywords: peanut butter blossoms, soft pb blossoms, chocolate kiss cookies, peanut butter kiss cookies