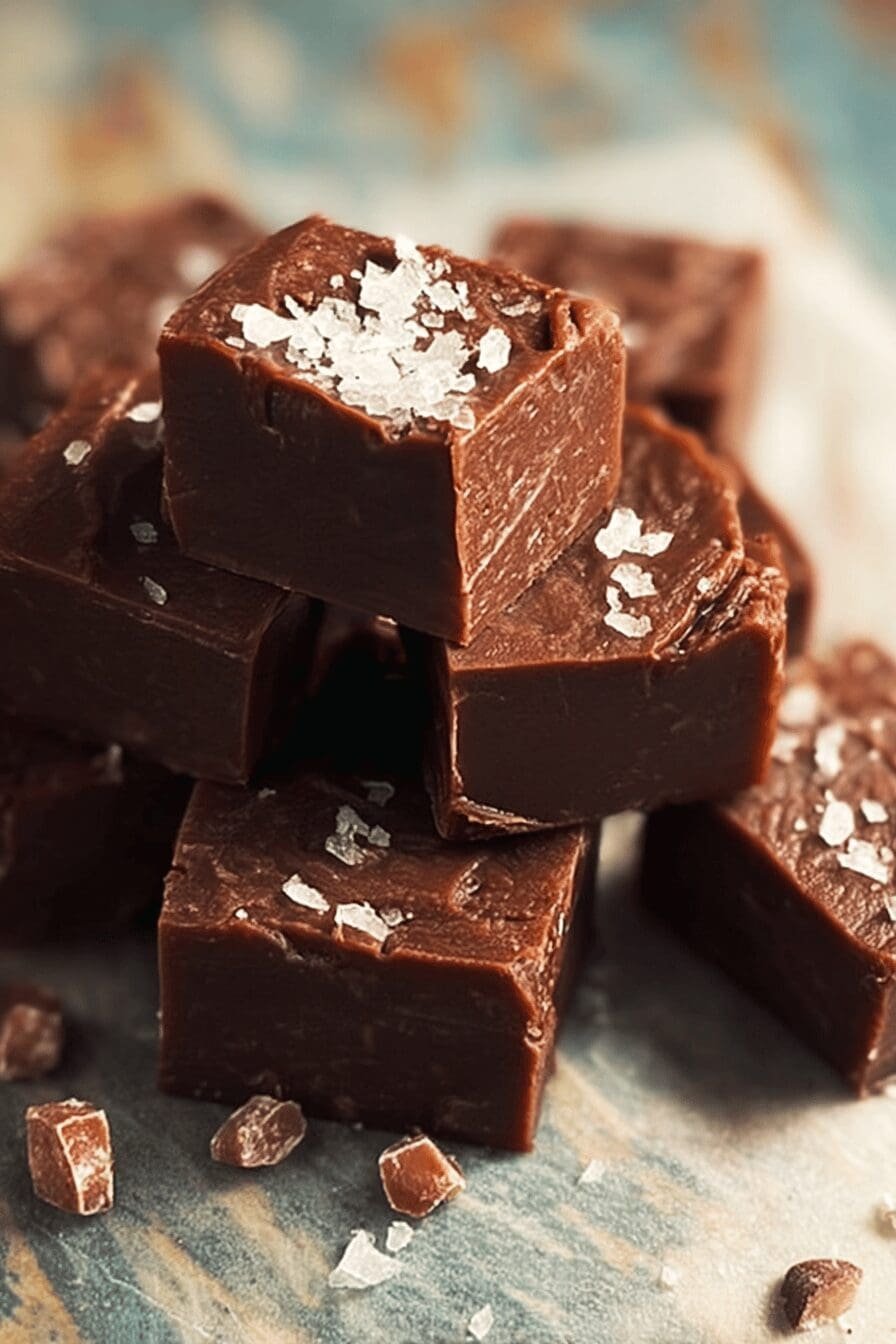
Why You’ll Love This Paula Deen Fudge
This Paula Deen fudge is a hit with home cooks and busy parents alike because it comes together fast and tastes amazing every time. Its rich, creamy texture makes it feel like a special treat without much effort, perfect for sharing during family gatherings or quick desserts on a weeknight. Plus, it’s flexible enough to tweak for different dietary needs, so everyone from baking enthusiasts to diet-conscious individuals can enjoy it without worry.
The ease of preparation stands out, as this recipe takes just about 15 minutes from start to finish, making it ideal for beginners and those with packed schedules. It offers nice health perks too, like using quality ingredients that let you swap in options for less sugar if you’re watching your intake, turning it into a balanced sweet snack. What really sets this fudge apart is its buttery sweetness that comes from a mix that’s both satisfying and customizable.
For food enthusiasts and travelers, this fudge brings a taste of Southern comfort wherever you are. Newlyweds and seniors will appreciate how simple it is to make memorable moments with something homemade. Whether you’re a working professional grabbing a quick bite or a student needing a study break treat, this recipe fits right into everyday life.
Health and Versatility Benefits
Many people love this fudge because you can adjust it for wellness goals, such as using natural swaps to cut down on fat. For instance, folks like Isabella, who runs this blog, often share how swapping ingredients keeps things tasty yet lighter. This makes it a smart choice for busy parents managing family meals or diet-conscious individuals tracking their sweets.
Baking enthusiasts might add extras like nuts for more nutrition, as nuts can provide healthy fats and proteins, as highlighted in a useful article you can read about the benefits of nuts. Overall, it’s about enjoying good food that supports your lifestyle.
Jump To
- 1. Why You’ll Love This Paula Deen Fudge
- 2. Essential Ingredients for Paula Deen Fudge
- 3. How to Prepare the Perfect Paula Deen Fudge: Step-by-Step Guide
- 4. Dietary Substitutions to Customize Your Paula Deen Fudge
- 5. Mastering Paula Deen Fudge: Advanced Tips and Variations
- 6. How to Store Paula Deen Fudge: Best Practices
- 7. FAQs: Frequently Asked Questions About Paula Deen Fudge
- 8. Paula Deen Fudge
Essential Ingredients for Paula Deen Fudge
- 1 2/3 cups sugar – Gives the fudge its sweet base and helps it set just right.
- 2/3 cup evaporated milk – Adds creaminess to balance the flavors; you can swap this with half and half for a different twist.
- 1 tablespoon butter – Brings in that smooth, buttery taste that makes the fudge so irresistible.
- 1/2 teaspoon salt – Enhances the overall flavor and keeps the sweetness from overwhelming.
- 1 package (6 ounces) milk chocolate chips – Provides the rich chocolate center that melts perfectly into the mix.
- 16 large marshmallows – Helps create a fluffy, creamy texture; fresh ones work best for that ideal consistency.
- 1 teaspoon vanilla extract – Adds a warm, aromatic note that ties everything together.
- 1 cup chopped nuts – Adds crunch and extra flavor; choose your favorite for a personal touch.
These ingredients make up the heart of this Paula Deen fudge, turning basic pantry items into something special. For special dietary options, try vegan substitutes like plant-based milk and butter to keep it creamy and delicious. This setup works well for gluten-free diets since everything here is naturally gluten-free, and you can use low-calorie sweeteners if you’re aiming to lighten things up.
One reader shared how using fresh marshmallows made a big difference in their batch, just like the tips suggest. If you’re exploring more nut-based recipes, check out this one for peanut butter squares that pair nicely with fudge ideas.
How to Prepare the Perfect Paula Deen Fudge: Step-by-Step Guide
Getting started with this Paula Deen fudge is straightforward, and it only takes about 15 minutes of your time. Begin by combining the sugar, evaporated milk, butter, and salt in a medium saucepan, then bring it to a boil while stirring constantly for 5 minutes. This step ensures everything blends smoothly and sets the base for a creamy texture.
Next, add the milk chocolate chips and keep stirring until they melt completely into the mixture. Once that’s done, remove the pan from the heat and mix in the marshmallows, vanilla extract, and chopped nuts until everything is well combined. Pour the warm mixture into an 8-inch pan and let it cool until it’s firm enough to cut into squares.
For the best results, follow the steps closely, and remember tips like extending the cooking time slightly if needed for a firmer set. Many home cooks, including busy parents, find this recipe forgiving and fun, as one user mentioned how it became their go-to for quick treats during holidays.
Adapting for Dietary Needs
If you’re making adjustments, like using half and half instead of evaporated milk, the process stays similar but might need a bit more stirring. This guide works for everyone, from students whipping up a snack to baking enthusiasts experimenting with flavors. Always stir continuously to avoid any lumps, and let the fudge cool properly for that perfect slice.
For more chocolate inspiration, you might enjoy learning about the health benefits of chocolate, which can make your treats feel even better.

Dietary Substitutions to Customize Your Paula Deen Fudge
Customizing this Paula Deen fudge is easy and helps it fit various needs, like swapping butter for vegan options to keep it plant-based. For those with lactose issues, use dairy-free cream alternatives such as almond or coconut cream without losing that rich texture. These changes make the recipe welcoming for everyone, from travelers trying new twists to seniors keeping things simple.
You can also play with flavors by replacing vanilla extract with almond or maple for a fresh take. Adding things like cinnamon can bring in a warm spice, while keeping the fudge’s creamy feel intact. Working professionals often appreciate these quick tweaks for last-minute desserts.
Simple Swaps for Better Options
For low-calorie versions, try natural sweeteners in place of sugar, and light cream for a healthier spin. One anecdote from a reader shows how these substitutions turned their fudge into a lighter favorite for family events. Whether you’re a food enthusiast or newlywed, these options let you personalize without much hassle.
Mastering Paula Deen Fudge: Advanced Tips and Variations
Once you get the basics down, mastering this Paula Deen fudge opens up fun possibilities with pro techniques like using a candy thermometer for exact temperatures. This helps avoid any grainy texture and ensures a smooth finish every time. Variations can include mixing in brown sugar for a deeper flavor or adding peanut butter for a nutty kick, which keeps things exciting.
You might also whip the mixture for extra creaminess or toss in extra nuts for more crunch, as suggested in the tips. For presentation, cut the fudge into even squares and top with a sprinkle of something fun. Make-ahead options let you prepare batches in advance, perfect for busy schedules or gifting to friends.
- Use fresh ingredients for the best taste, like those marshmallows mentioned earlier.
- Experiment with flavors such as peppermint extract for a holiday vibe.
- Store portions for easy meals, ideal for working professionals on the go.
If you’re into nutty desserts, explore pecan cheesecake pie for more ideas that complement this fudge. These expert tips, drawn from user experiences, make your fudge stand out and add a personal touch.
How to Store Paula Deen Fudge: Best Practices
Storing your Paula Deen fudge properly keeps it fresh and tasty for later, whether you’re saving it for a rainy day or sharing it later. Put it in an airtight container in the fridge for up to two weeks to lock in that creamy goodness. For longer keeps, wrap it tightly and freeze it for up to three months, which works great for meal prep.
Bring it back to room temperature before enjoying, as this helps maintain the texture without any mess. Diet-conscious individuals might portion it out for controlled snacking, making it easier to fit into daily routines. Following these steps ensures your fudge stays delicious and ready whenever you need a sweet pick-me-up.
| Storage Method | Duration | Tips |
|---|---|---|
| Refrigeration | Up to 2 weeks | Use an airtight container to prevent drying |
| Freezing | Up to 3 months | Wrap in plastic for best results |
FAQs: Frequently Asked Questions About Paula Deen Fudge
What ingredients do I need to make Paula Deen fudge?
To make Paula Deen fudge, you will typically need ingredients like granulated sugar, evaporated milk, butter, marshmallow cream, vanilla extract, and sometimes nuts like pecans. Some recipes also use white chocolate chips or semi-sweet chocolate. These ingredients combine to create a rich, creamy, and sweet fudge that is easy to prepare in about 20 minutes and sets perfectly after chilling.
How long does Paula Deen fudge need to chill before serving?
Paula Deen fudge generally needs to chill in the refrigerator for at least 2 to 3 hours. This allows the fudge to firm up and develop its classic creamy texture. For best results, cover the fudge with plastic wrap to prevent it from absorbing odors and check that it is set firmly before cutting into squares.
Can Paula Deen fudge be stored for later use, and how should I store it?
Yes, Paula Deen fudge can be stored for up to two weeks when kept in an airtight container in the refrigerator. For longer storage, you can freeze the fudge for up to three months. Just wrap the fudge tightly in plastic wrap and place it in a freezer-safe container to preserve freshness and flavor.
Is Paula Deen fudge suitable for beginners in fudge-making?
Yes, Paula Deen’s fudge recipes are known for being straightforward and suitable for beginners. The recipes use common ingredients and simple steps, such as boiling sugar and milk to the correct temperature before mixing in the marshmallow cream and butter, making it an accessible and rewarding treat for first-time fudge makers.
What variations can I try if I want to customize Paula Deen fudge?
You can customize Paula Deen fudge by adding nuts like pecans or walnuts, mixing in chocolate chips, or even swirling in peanut butter. Some variations include incorporating dried fruit or using flavored extracts like almond or mint in place of vanilla. These simple changes allow you to adjust the fudge to personal tastes while keeping the creamy texture intact.

Paula Deen Fudge
- Total Time: 15 minutes
- Yield: 16 squares 1x
- Diet: Vegetarian
Description
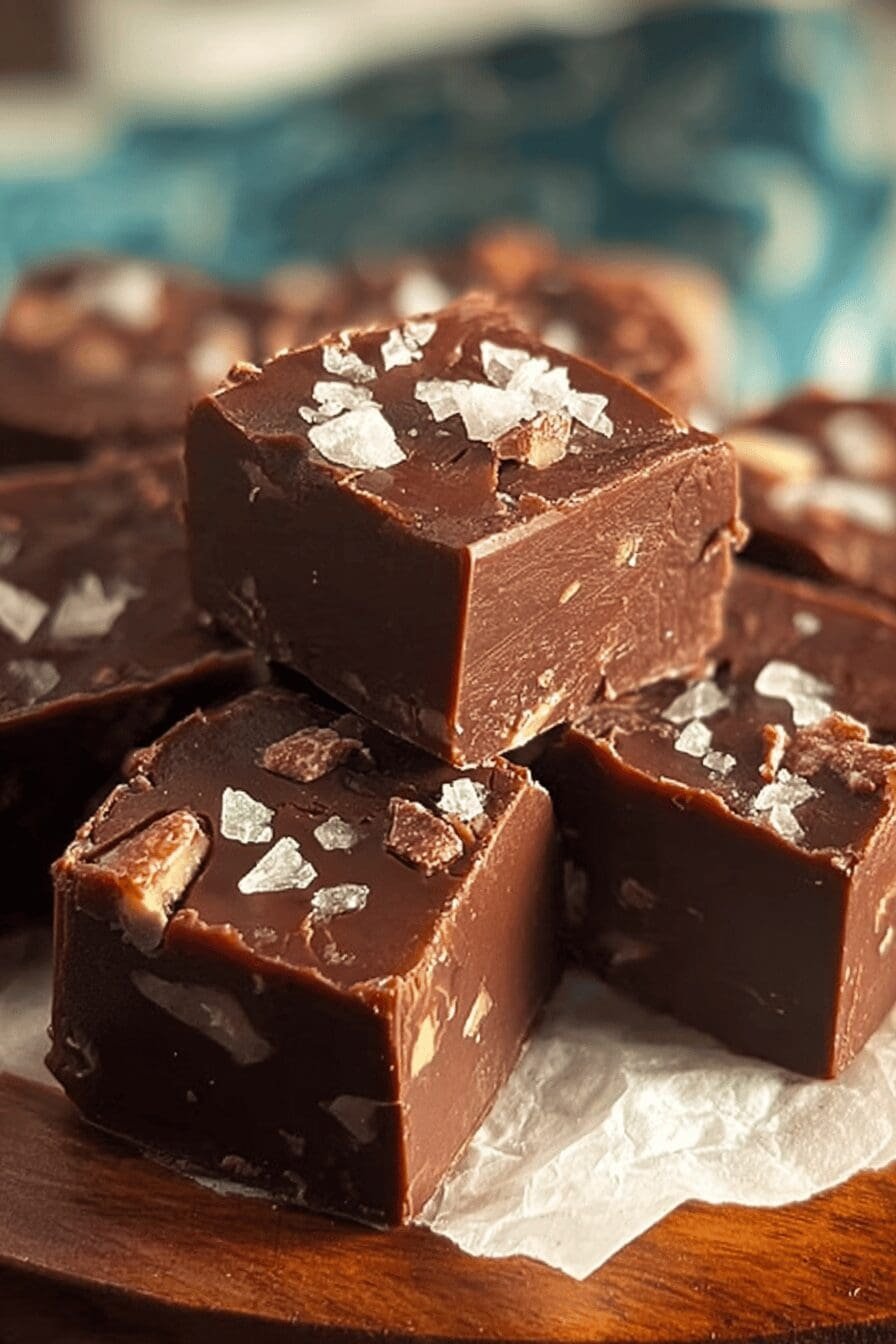
🍫 5 Minute Fudge Recipe Made Easy for Rich and Creamy Sweet Treats is a quick and simple way to enjoy classic fudge with minimal effort.
⏰ Perfect for last-minute cravings, this recipe delivers smooth, velvety texture and rich chocolate flavor in just minutes.
Ingredients
1 2/3 cups sugar Gives the fudge its sweet base and helps it set just right.
2/3 cup evaporated milk Adds creaminess to balance the flavors; you can swap this with half and half for a different twist.
1 tablespoon butter Brings in that smooth, buttery taste that makes the fudge so irresistible.
1/2 teaspoon salt Enhances the overall flavor and keeps the sweetness from overwhelming.
1 package (6 ounces) milk chocolate chips Provides the rich chocolate center that melts perfectly into the mix.
16 large marshmallows Helps create a fluffy, creamy texture; fresh ones work best for that ideal consistency.
1 teaspoon vanilla extract Adds a warm, aromatic note that ties everything together.
1 cup chopped nuts Adds crunch and extra flavor; choose your favorite for a personal touch.
Instructions
1-Getting started with this Paula Deen fudge is straightforward, and it only takes about 15 minutes of your time. Begin by combining the sugar, evaporated milk, butter, and salt in a medium saucepan, then bring it to a boil while stirring constantly for 5 minutes. This step ensures everything blends smoothly and sets the base for a creamy texture.
2-Next, add the milk chocolate chips and keep stirring until they melt completely into the mixture. Once that’s done, remove the pan from the heat and mix in the marshmallows, vanilla extract, and chopped nuts until everything is well combined. Pour the warm mixture into an 8-inch pan and let it cool until it’s firm enough to cut into squares.
3-For the best results, follow the steps closely, and remember tips like extending the cooking time slightly if needed for a firmer set. Many home cooks, including busy parents, find this recipe forgiving and fun, as one user mentioned how it became their go-to for quick treats during holidays.
4-Adapting for Dietary Needs If you’re making adjustments, like using half and half instead of evaporated milk, the process stays similar but might need a bit more stirring. This guide works for everyone, from students whipping up a snack to baking enthusiasts experimenting with flavors. Always stir continuously to avoid any lumps, and let the fudge cool properly for that perfect slice.
Notes
⏲️ Slightly extend cooking time if fudge is too soft to set.
🆕 Use fresh marshmallows for better texture and melt.
🌰 Add brown sugar, peanut butter, extra nuts, or whip mixture for creamy variations.
- Prep Time: 10 minutes
- Cooling time: 5 minutes
- Cook Time: 5 minutes
- Category: Dessert
- Method: Stovetop, No-Bake
- Cuisine: American
Nutrition
- Serving Size: 1 square
- Calories: 210
- Sugar: 28 grams
- Sodium: 90 milligrams
- Fat: 10 grams
- Saturated Fat: 6 grams
- Unsaturated Fat: 3 grams
- Trans Fat: 0 grams
- Carbohydrates: 30 grams
- Fiber: 1 gram
- Protein: 2 grams
- Cholesterol: 15 milligrams
Keywords: 5 Minute Fudge, Quick Fudge, Creamy Sweet Treats, Easy Chocolate Fudge