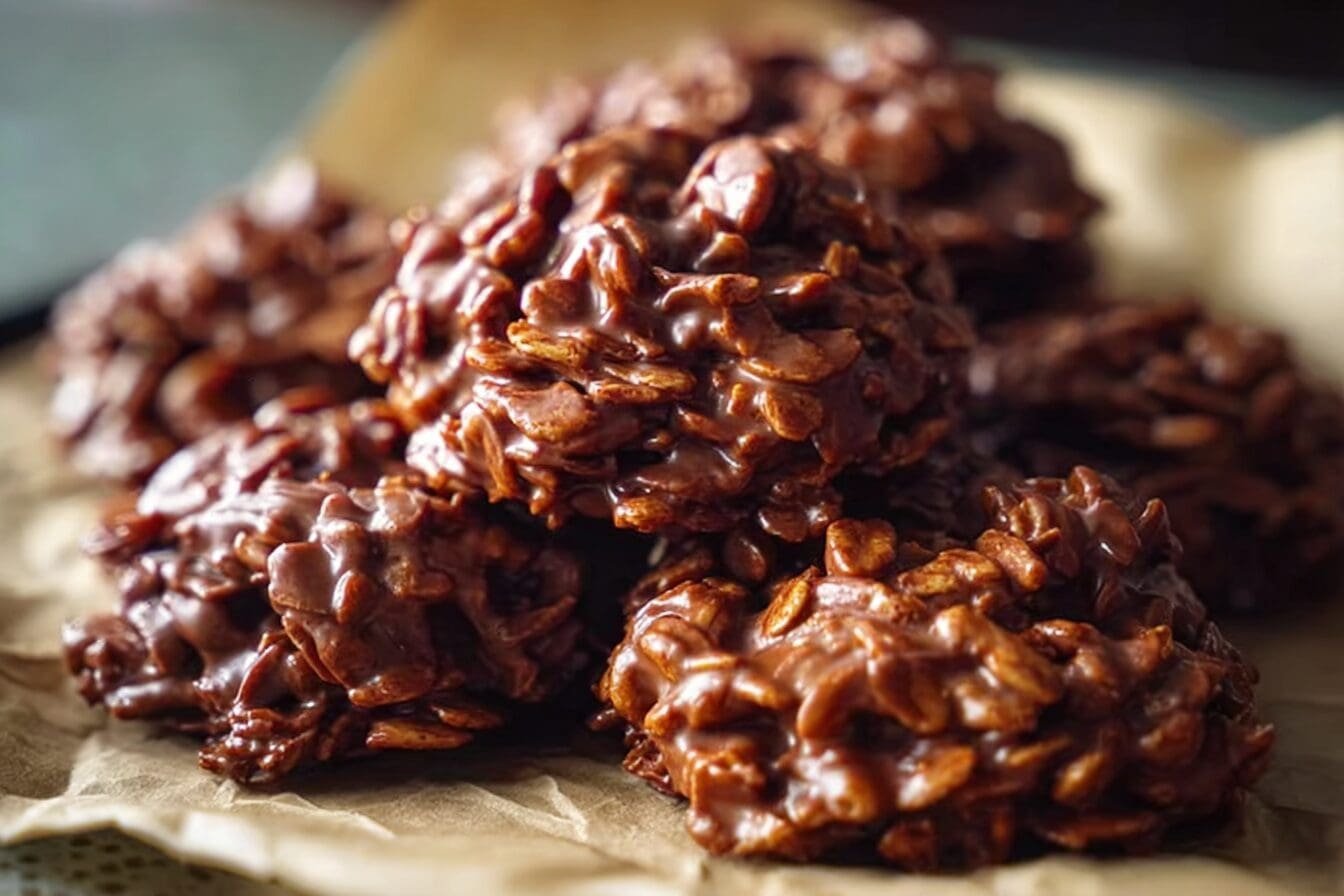
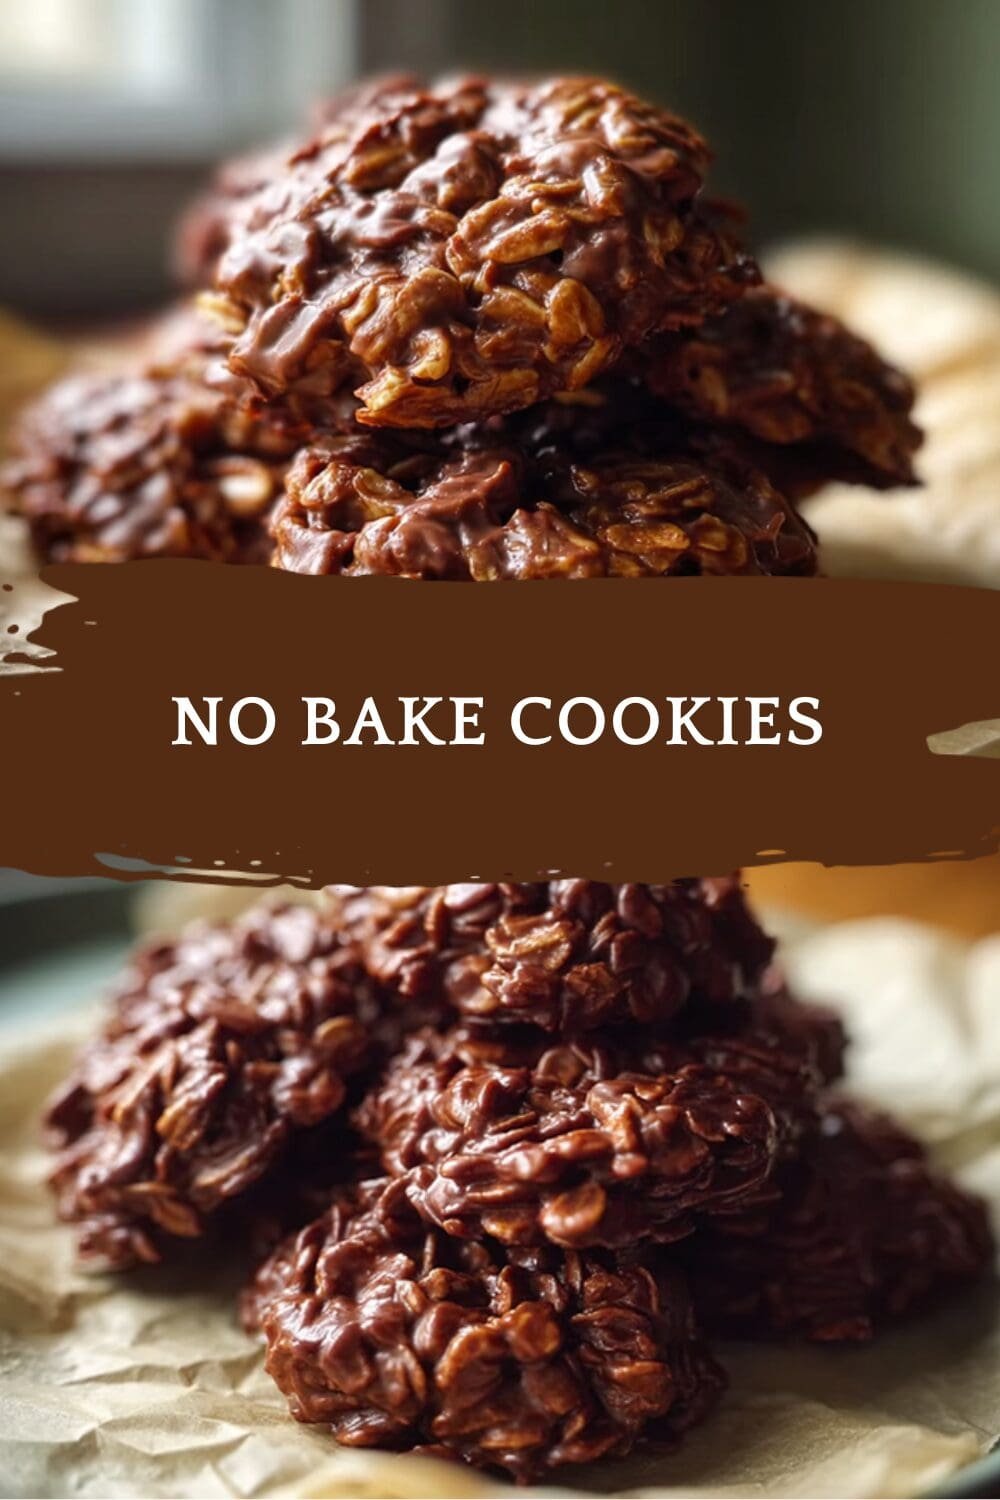
Why You’ll Love This No Bake Cookies
If you’re looking for a delightful treat without the hassle of turning on your oven, you’ve come to the right place. These no bake cookies are the perfect solution for anyone craving something sweet but short on time or energy. I’ve crafted this recipe with simplicity in mind while ensuring maximum flavor that will satisfy even the most discerning sweet tooth. What makes this no bake cookie recipe truly special: * Ease of preparation: This no bake cookie recipe is incredibly simple to make, requiring minimal ingredients and no oven time, saving you precious minutes in the kitchen. Whether you’re a busy parent, a college student, or just someone who wants a quick treat, you’ll appreciate how quickly these come together. * Health benefits: Packed with wholesome ingredients, these no bake cookies offer nutritional advantages such as fiber, healthy fats, and natural elements that can be part of a balanced diet. The oats provide fiber and complex carbohydrates, while peanut butter offers protein and healthy fats. * Versatility: Adaptable to a variety of dietary needs, this recipe can easily be modified for vegan, gluten-free, or different nutritional preferences without compromising flavor. You can customize these cookies to fit your specific requirements while still enjoying their delicious taste. * Distinctive flavor: The unique blend of ingredients creates a rich, satisfying taste that sets these no bake cookies apart from traditional baked goods. The combination of chocolate and peanut butter creates an irresistible flavor profile that will have everyone coming back for more.“There’s something magical about cookies that require no baking yet deliver such incredible flavor and texture. These treats have become a staple in my kitchen for emergency snack situations!” – Isabella Hayes
Jump To
- 1. Why You’ll Love This No Bake Cookies
- 2. Essential Ingredients for No Bake Cookies
- 3. How to Prepare the Perfect No Bake Cookies: Step-by-Step Guide
- 4. Dietary Substitutions to Customize Your No Bake Cookies
- 5. Mastering No Bake Cookies: Advanced Tips and Variations
- 6. How to Store No Bake Cookies: Best Practices
- 7. FAQs: Frequently Asked Questions About No Bake Cookies
- 8. No Bake Cookies
Essential Ingredients for No Bake Cookies
Creating the perfect no bake cookies starts with gathering the right ingredients. Each component plays a crucial role in achieving that ideal texture and flavor balance that makes these cookies so special. Let me walk you through everything you’ll need to make this recipe a success.Main Ingredients
The beauty of this classic no bake cookie recipe lies in its simplicity. Most of these ingredients are likely already in your pantry, making this a convenient treat you can whip up on impulse. To prepare these delicious cookies, you’ll need the following ingredients:- 1/2 cup butter (sliced)
- 2 cups granulated sugar
- 1/2 cup milk (any type or non-dairy alternative)
- 1/4 cup unsweetened cocoa powder
- 1/2 cup creamy peanut butter (no-stir preferred, crunchy acceptable)
- 1 teaspoon pure vanilla extract
- 3 cups quick-cooking oats
Understanding Each Ingredient’s Role
Butter provides richness and helps bind the ingredients together. Make sure it’s softened to room temperature or sliced as specified to ensure even melting. Granulated sugar creates the sweetness and, more importantly, contributes to the structure of the cookies when properly boiled. The exact measurement is crucial for the right consistency. Milk helps dissolve the sugar and creates the right fluidity for the mixture. The recipe works with various types of milk, including dairy and non-dairy alternatives. Unsweetened cocoa powder delivers that deep chocolate flavor without adding extra sweetness. It also contributes to the structural integrity of the cookies. Creamy peanut butter adds protein, healthy fats, and that classic nutty flavor that pairs so perfectly with chocolate. No-stir varieties are preferred, but crunchy peanut butter can work if you enjoy added texture. Vanilla extract enhances all the other flavors, giving the cookies a more complex and aromatic profile. Quick-cooking oats provide the bulk and texture of the cookies. They’re specifically chosen for their ability to soften slightly while maintaining structure.Special Dietary Options
This recipe is wonderfully adaptable to various dietary needs:| Dietary Need | Substitution |
|---|---|
| Vegan | Use plant-based milk, vegan butter, and ensure sugar is vegan-certified |
| Gluten-free | Use certified gluten-free quick-cooking oats |
| Dairy-free | Use dairy-free butter alternative and non-dairy milk |
How to Prepare the Perfect No Bake Cookies: Step-by-Step Guide
Ready to make your own batch of delicious no bake cookies? Follow these detailed instructions for perfect results every time. This method has been refined to ensure your cookies set properly and have the ideal texture.Preparation and Workspace Setup
Before you begin, it’s essential to have everything prepared. The process moves quickly once the mixture starts boiling, so having your workspace ready will help ensure success. Equipment you’ll need: * Large saucepan * Wooden spoon or heat-proof spatula * Two large baking sheets * Parchment paper * Cookie scoop or tablespoon * Measuring cups and spoons Start by lining two large baking sheets with parchment paper. This prevents sticking and makes cleanup a breeze. Measure all your ingredients beforehand, as precision is key to achieving the right consistency.Cooking the Sugar Base
In a large saucepan over medium heat, combine the butter, sugar, milk, and cocoa powder. Stir constantly until the butter melts and the mixture is combined. This step is crucial for creating the proper base that will bind the cookies together. Once the mixture is smooth, bring it to a rolling boil. This is where chemistry magic happens! The sugar must reach the right temperature to properly set the cookies. Continue boiling for exactly 60 seconds while stirring occasionally. Timing is critical! If you don’t boil long enough, the cookies won’t set properly. If you boil too long, they may become dry and crumbly. Use a timer and stick to that 60-second mark for perfect results.Mixing and Shaping the Cookies
After the 60-second boil, remove the saucepan from heat immediately. Working quickly, stir in the peanut butter and vanilla extract until the mixture is completely smooth. The heat from the sugar mixture will melt the peanut butter and incorporate the vanilla thoroughly. Now add the oats to the saucepan and mix thoroughly until they are fully coated. The oats should be evenly distributed throughout the mixture. This is another step where you’ll want to work quickly before the mixture begins to cool and set. Use a cookie scoop or spoon to drop the mixture onto your prepared baking sheets. Slightly flatten each cookie with the back of the spoon or your fingers. I recommend making them all similar in size for even drying and presentation.Cooling and Setting
Allow the cookies to cool and set for 20 to 30 minutes at room temperature. They will firm up as they cool, though they can also be enjoyed warm if you prefer that gooey texture. The cookies are ready when they hold their shape well and are no longer sticky to the touch.Total time breakdown: 20 minutes preparation + 5 minutes cooking + 20-30 minutes cooling = approximately 45 minutes from start to finish!

Dietary Substitutions to Customize Your No Bake Cookies
One of the wonderful things about this recipe is its adaptability. Whether you have allergies, dietary restrictions, or simply want to try something new, there are numerous ways to customize these cookies to suit your needs.Protein and Main Component Alternatives
The peanut butter in this recipe provides structure and flavor, but it can easily be swapped out based on your preferences or needs: * Almond butter creates a slightly milder flavor with a touch of sophistication * Cashew butter offers a creamier texture and subtly sweet taste * Sunflower seed butter provides an excellent nut-free alternative for those with allergies * Soy nut butter works well for those who can’t consume tree nuts but want a similar protein profile Each alternative will slightly change the flavor profile, so feel free to experiment to find your favorite combination. When substituting, try to use a natural variety with a similar consistency to peanut butter for the best results.Vegetable, Sauce, and Seasoning Modifications
Beyond the basic ingredients, there are many ways to customize your no bake cookies: * Texture additions: Incorporate shredded coconut or chopped nuts to add interesting texture variations. A tablespoon of either can transform the eating experience. * Spice variations: Experiment with cinnamon for warmth or a pinch of cayenne pepper for those who enjoy a chocolate with a kick. For a festive touch, try a drop of peppermint extract instead of part of the vanilla. * Sweetener alternatives: While the recipe calls for granulated sugar, you can experiment with coconut sugar for a lower glycemic index option, though this may affect the setting time. * Chocolate intensity: For chocolate lovers, try adding a tablespoon of chocolate chips or a square of melted dark chocolate to the mixture for an extra rich experience.Making Special Dietary Versions
If you’re looking to create specific dietary versions of these cookies, here are some guidelines:| Version | Modifications Needed |
|---|---|
| Vegan | Use vegan butter and dairy-free milk; confirm sugar is vegan-certified |
| Gluten-free | Use certified gluten-free oats |
| Lower sugar | Replace some sugar with a natural alternative like stevia (may affect setting) |
| Higher protein | Add a scoop of vanilla protein powder (may require adjusting liquid) |
Mastering No Bake Cookies: Advanced Tips and Variations
Once you’ve mastered the basic recipe, you might want to take your no bake cookies to the next level. These professional tips and creative variations will help you create cookies that are even more impressive and delicious.Pro Cooking Techniques
The secret to truly exceptional no bake cookies often lies in small details that can make a big difference in the final product: * Toast your oats: Lightly toasting the quick-cooking oats in a dry pan for 2-3 minutes before adding them to the mixture can enhance their nutty flavor and add depth to the overall taste of the cookies. * Temperature matters: Use a candy thermometer to ensure your sugar mixture reaches the right temperature (around 230°F or 110°C) during the boil. This guarantees proper setting every time. * Room temperature ingredients: While the butter needs to be sliced for even melting, having your peanut butter at room temperature helps it incorporate smoothly into the hot mixture. * Precise timing: As mentioned before, the 60-second boil is crucial. Set a timer as soon as the mixture reaches a rolling boil and stop exactly when the timer goes off.Flavor Variations to Try
For the mocha lover: Add 1 teaspoon of instant espresso powder along with the cocoa powder. This creates a sophisticated coffee-chocolate combination that’s hard to resist. For a festive touch: Replace half of the vanilla extract with peppermint extract for a refreshing twist that’s especially popular during the holiday season. For coconut enthusiasts: Toast 1/2 cup of shredded coconut and add it along with the oats for a tropical variation that brings these cookies to a whole new level. For nut lovers: Add 1/2 cup of chopped pecans or walnuts to the mixture for extra crunch and protein. This creates a more substantial cookie that’s perfect for snacking.Presentation Tips
Even no bake cookies can be elevated with the right presentation: * Chocolate drizzle: Melt some chocolate chips and drizzle over the cooled cookies for an elegant finish that looks professionally made. * Nut topping: Press a whole pecan or walnut half into the top of each cookie before they set for a decorative touch. * Sea salt sprinkle: A light sprinkling of flaky sea salt on top of each cookie enhances the chocolate flavor and creates a sophisticated appearance. * Uniform sizing: Using a cookie scoop ensures all cookies are the same size, making them look professionally prepared and helping them cook/set evenly.Make-Ahead Options
For busy schedules, these cookies can be prepared in advance: * Prepare the mixture and shape the cookies, then freeze them unbaked on a baking sheet before transferring to a freezer-safe container. They’ll keep for up to 3 months and can be thawed when needed. * Double the batch and store half in the freezer for unexpected guests or sudden cravings. * Prepare individual portions in small containers for grab-and-go snacks throughout the week.How to Store No Bake Cookies: Best Practices
Proper storage is key to maintaining the texture and flavor of your no bake cookies. Follow these guidelines to keep your cookies fresh for as long as possible.Room Temperature Storage
For short-term storage, keeping your cookies at room temperature is perfectly acceptable. Place them in an airtight container in a cool, dry place away from direct sunlight. They will maintain their best quality for up to one week. Tip: Place a piece of parchment paper between layers of cookies to prevent them from sticking together, especially if you live in a humid climate.Refrigeration
Store no bake cookies in an airtight container in the refrigerator for up to one week to maintain freshness. This is particularly recommended in warm weather or if your kitchen tends to be on the humid side. Refrigerated cookies may become slightly firmer, but they’ll still be delicious. If you prefer a softer texture, let them sit at room temperature for a few minutes before eating.Freezing for Long-Term Storage
For long-term storage, place cookies in a single layer on a baking sheet to freeze, then transfer to a freezer-safe container or bag. They can be stored frozen for up to three months. Freezing tips: * Flash-freeze individual cookies on a baking sheet before transferring to a container to prevent them from sticking together * Remove as much air as possible from freezer bags to prevent freezer burn * Label containers with the date so you can track freshnessReheating and Serving
Thaw frozen cookies at room temperature for about 30-60 minutes before serving. This prevents moisture buildup and preserves texture. If you prefer warm cookies, you can microwave them for just 5-10 seconds any longer and they may become too soft.Meal Prep Considerations
When batch cooking, portion cookies into single servings before freezing for quick grab-and-go snacks. You can also prepare the mixture ahead of time and store it in the refrigerator for up to 2 days before shaping and finishing the cookies.These no bake cookies are perfect for meal prep! Make a batch on Sunday and portion them into containers for easy snacks throughout the week. They’re great for school lunches, office snacks, or after-work treats.
FAQs: Frequently Asked Questions About No Bake Cookies
Why did my no-bake cookies not harden properly?
No-bake cookies usually fail to set if the sugar mixture hasn’t boiled long enough at the right temperature. After the mixture reaches a full rolling boil, continue cooking for at least 1 to 2 minutes to reach the proper consistency. Skipping this step can cause the cookies to remain soft or sticky. If they don’t firm up after cooling for 20-30 minutes at room temperature, placing them in the refrigerator for a short time can help them harden.
Can I use regular rolled oats instead of quick oats for no-bake cookies?
Yes, you can substitute regular old-fashioned rolled oats, but the texture will be different. Regular oats are thicker and will result in chewier, less uniform cookies. For a smoother, traditional texture, quick-cooking oats are preferred. Alternatively, pulse rolled oats briefly in a food processor to break them down before mixing.
How should I store no-bake cookies to keep them fresh?
Store no-bake cookies in an airtight container at room temperature for up to one week. If you want to keep them longer, place them in the refrigerator where they will stay fresh for about two weeks. Make sure the container is sealed well to prevent moisture absorption and loss of texture.
Is it safe to freeze no-bake cookies, and how do I thaw them?
Freezing no-bake cookies is safe and can extend their shelf life up to 3 months. After they are fully cooled, place the cookies in a freezer-safe container or bag. When ready to eat, thaw them by leaving them at room temperature for about 30-60 minutes; this prevents moisture buildup and preserves texture.
Can I customize no-bake cookies with different flavors or ingredients?
Absolutely. No-bake cookies are versatile and can be adapted with add-ins like shredded coconut, chopped nuts, or dried fruit for added texture and flavor. You can also experiment with different nut butters or flavor extracts, such as vanilla or almond. Just keep the basic cooking method the same to ensure proper setting.
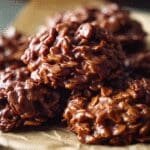
No Bake Cookies
- Total Time: 45 minutes
- Yield: 24 cookies
Description
🍪 This Classic No Bake Cookies recipe offers a quick and easy way to enjoy delicious sweets without using the oven.
⏱️ Perfect for those short on time, these cookies are simple to make and packed with rich chocolate and peanut butter flavor.
Ingredients
– 1/2 cup butter (sliced)
– 2 cups granulated sugar
– 1/2 cup milk (any type or non-dairy alternative)
– 1/4 cup unsweetened cocoa powder
– 1/2 cup creamy peanut butter (no-stir preferred, crunchy acceptable)
– 1 teaspoon pure vanilla extract
– 3 cups quick-cooking oats
Instructions
1-Preparation and Workspace Setup: Before you begin, it’s essential to have everything prepared. The process moves quickly once the mixture starts boiling, so having your workspace ready will help ensure success. Equipment you’ll need: * Large saucepan * Wooden spoon or heat-proof spatula * Two large baking sheets * Parchment paper * Cookie scoop or tablespoon * Measuring cups and spoons Start by lining two large baking sheets with parchment paper. This prevents sticking and makes cleanup a breeze. Measure all your ingredients beforehand, as precision is key to achieving the right consistency.
2-Cooking the Sugar Base: In a large saucepan over medium heat, combine the butter, sugar, milk, and cocoa powder. Stir constantly until the butter melts and the mixture is combined. This step is crucial for creating the proper base that will bind the cookies together. Once the mixture is smooth, bring it to a rolling boil. This is where chemistry magic happens! The sugar must reach the right temperature to properly set the cookies. Continue boiling for exactly 60 seconds while stirring occasionally. Timing is critical! If you don’t boil long enough, the cookies won’t set properly. If you boil too long, they may become dry and crumbly. Use a timer and stick to that 60-second mark for perfect results.
3-Mixing and Shaping the Cookies: After the 60-second boil, remove the saucepan from heat immediately. Working quickly, stir in the peanut butter and vanilla extract until the mixture is completely smooth. The heat from the sugar mixture will melt the peanut butter and incorporate the vanilla thoroughly. Now add the oats to the saucepan and mix thoroughly until they are fully coated. The oats should be evenly distributed throughout the mixture. This is another step where you’ll want to work quickly before the mixture begins to cool and set. Use a cookie scoop or spoon to drop the mixture onto your prepared baking sheets. Slightly flatten each cookie with the back of the spoon or your fingers. I recommend making them all similar in size for even drying and presentation.
4-Cooling and Setting: Allow the cookies to cool and set for 20 to 30 minutes at room temperature. They will firm up as they cool, though they can also be enjoyed warm if you prefer that gooey texture. The cookies are ready when they hold their shape well and are no longer sticky to the touch.
Notes
⏲️ Measure all ingredients first and strictly follow the 60-second boil time for perfect cookies.
🍫 Work quickly while mixing and scooping to prevent the mixture from drying.
🌾 Use quick-cooking oats for softer cookies; pulse old-fashioned oats in a food processor if used.
- Prep Time: 20 minutes
- Cooling time: 20 minutes
- Cook Time: 5 minutes
- Category: Dessert
- Method: No-bake
- Cuisine: American
Nutrition
- Serving Size: 1 cookie
- Calories: 200
- Sugar: 18 grams
- Sodium: 100 mg
- Fat: 9 grams
- Saturated Fat: 3 grams
- Trans Fat: 0 grams
- Carbohydrates: 28 grams
- Fiber: 2 grams
- Protein: 4 grams
- Cholesterol: 10 mg
Keywords: No Bake Cookies, Quick Sweets, Easy Cookies, Classic Dessert