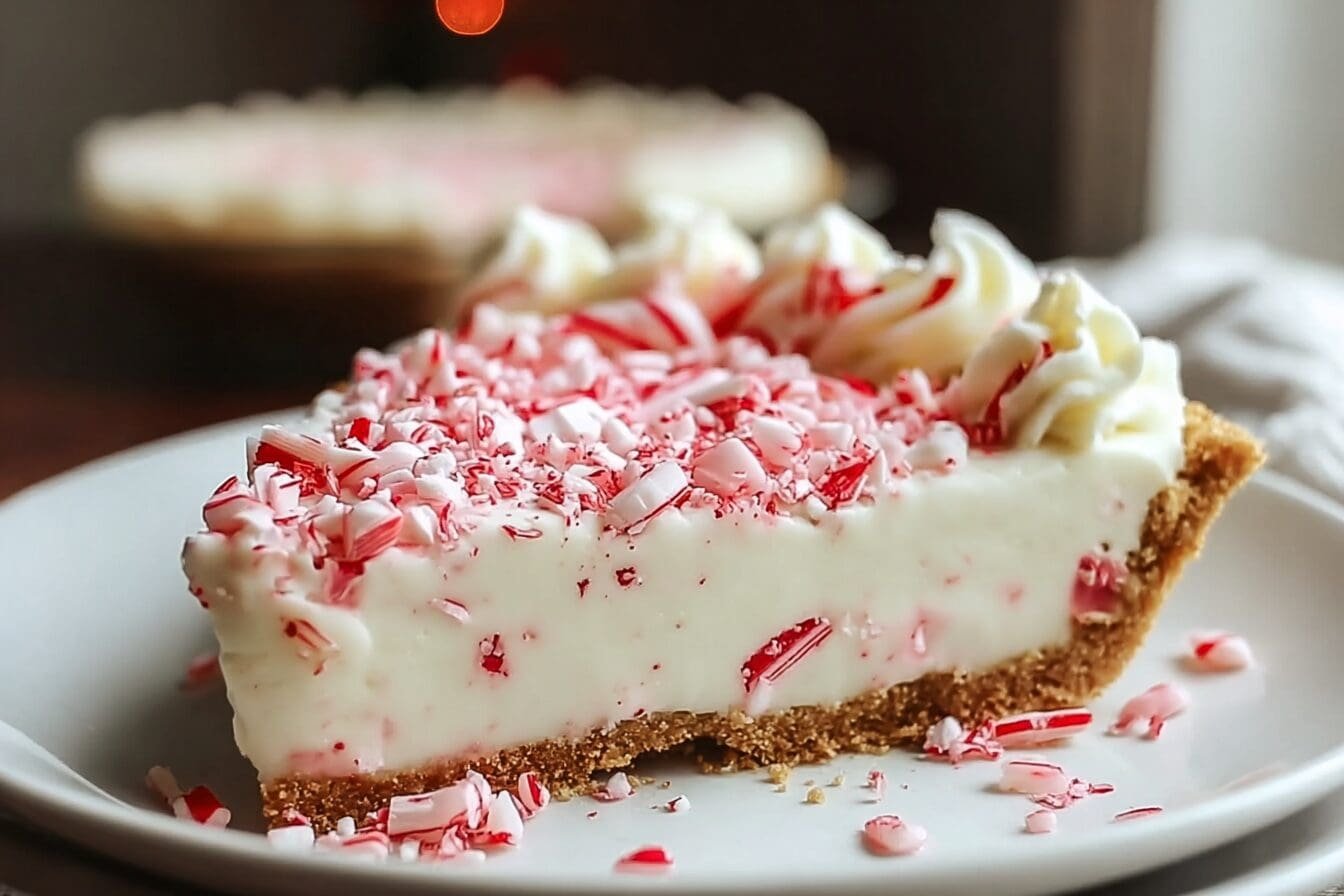
Why You’ll Love This No Bake Candy Cane Pie
This No Bake Candy Cane Pie is a festive treat that brings together the best of chocolate and peppermint flavors without any oven required. Imagine layers of rich chocolate pudding, creamy cream cheese, and a fluffy whipped cream topping dotted with crushed candy canes for a refreshing burst in every bite. It’s perfect for holiday gatherings where you want something special yet simple to prepare, appealing to home cooks, busy parents, and anyone looking for an easy dessert.
One reason you’ll adore this recipe is its straightforward preparation, which involves just mixing and chilling for a quick festive dessert. The combination of ingredients makes it lighter than many traditional pies, offering a balance of indulgence and nutrition that diet-conscious individuals can enjoy. Plus, with its adaptable nature, you can tweak it for various dietary needs while keeping that signature chocolate-peppermint magic intact.
The pie’s creamy layers provide a delightful contrast to the crunchy candy cane garnish, making it a hit at family events. Home cooks will appreciate how it fits into busy schedules, allowing more time for enjoying the holidays. Whether you’re a student in a dorm or a working professional hosting dinner, this dessert adds joy without the fuss.
Health and Versatility Aspects
This pie includes ingredients like cream cheese and heavy cream that can be substituted for healthier options, supporting nutritional wellness as mentioned in resources such as cream cheese nutrition facts. It’s not just about taste; it’s about creating memorable moments with simple, accessible recipes that align with Isabella Hayes’ passion for inspiring everyday cooks. For those exploring new flavors, the peppermint twist keeps things fresh and exciting.
As per Isabella’s blog, which focuses on recipes that are simple and accessible, this pie embodies cooking with joy. You can easily adapt it for gluten-free or vegan preferences, ensuring everyone at the table feels included. Overall, it’s a dessert that combines ease, flavor, and adaptability, making it a go-to for seasonal celebrations.
Jump To
- 1. Why You’ll Love This No Bake Candy Cane Pie
- 2. Essential Ingredients for No Bake Candy Cane Pie
- 3. How to Prepare the Perfect No Bake Candy Cane Pie: Step-by-Step Guide
- 4. Dietary Substitutions to Customize Your No Bake Candy Cane Pie
- 5. Mastering No Bake Candy Cane Pie: Advanced Tips and Variations
- 6. How to Store No Bake Candy Cane Pie: Best Practices
- 7. FAQs: Frequently Asked Questions About No Bake Candy Cane Pie
- 8. No Bake Candy Cane Pie
Essential Ingredients for No Bake Candy Cane Pie
Gathering the right ingredients is key to making this No Bake Candy Cane Pie a success. Below is a comprehensive list of everything you need, based on the exact recipe details. I’ve formatted it as a structured list to make it easy to follow, with precise measurements for each item.
- 1 chocolate pie crust (store-bought or homemade)
- 1 box (3.9 oz) instant chocolate pudding mix
- 1 cup milk
- 1 cup peppermint mocha creamer (or substitute with additional milk)
- 8 oz cream cheese, softened
- 1 ¼ cup powdered sugar
- ½ teaspoon clear vanilla extract
- ½ teaspoon peppermint extract
- 1 (8 oz) container whipped topping
- ¾ cup red and green chocolate chips (or substitutes like regular chocolate chips, mint chip chunks, sprinkles, sixlets, mini M&M’s, or nonpareils)
- 4 teaspoons cold water
- 1 teaspoon unflavored gelatin
- 1 cup heavy whipping cream
- ¼ cup powdered sugar (for whipped cream topping)
- 1 teaspoon clear vanilla extract (for whipped cream topping)
- Crushed candy cane pieces for garnish
This list ensures you have all the components for the pie’s layered goodness, from the chocolate base to the festive topping. For special dietary options, you can swap ingredients as needed, like using dairy-free alternatives for a vegan version.
How to Prepare the Perfect No Bake Candy Cane Pie: Step-by-Step Guide
Creating this No Bake Candy Cane Pie is as fun as it is simple, starting with preparing the chocolate pie crust and building up to the whipped cream topping. Follow these steps closely to achieve the rich, layered dessert that’s ideal for holiday gatherings. You’ll whisk together the pudding mixture first, then layer in the cream cheese and finish with a stable whipped cream for that perfect festive touch.
Step 1: Mixing the Pudding Layer
Begin by whisking the instant chocolate pudding mix with 1 cup milk and 1 cup peppermint mocha creamer for 2 minutes, then refrigerate for 5 minutes. This creates a smooth, flavorful base that sets the foundation for the pie’s chocolate-peppermint blend. Once ready, pour 1 ½ cups of the mixture into the prepared chocolate pie crust, spread it evenly, and freeze for 2 hours to set firmly.
If peppermint mocha creamer isn’t on hand, you can use regular milk mixed with 1/4 teaspoon of peppermint extract, as suggested in the FAQs. This step ensures your pie has that signature minty freshness without any hassle.
Step 2: Adding the Cream Cheese Layer
Next, cream together the softened cream cheese and 1 ¼ cup powdered sugar with the vanilla and peppermint extracts until smooth. Fold in the whipped topping and ¾ cup red and green chocolate chips to create a creamy, festive layer. Spread this mixture over the set pudding layer and freeze for 1 hour to help it firm up.
Adding chocolate chips brings color and texture, but if you need alternatives, options like mini M&M’s can work just as well. For more inspiration on similar desserts, check out this no-bake chocolate cream pie recipe on Isabella’s blog.
Step 3: Preparing and Piping the Whipped Cream
Sprinkle 1 teaspoon unflavored gelatin over 4 teaspoons cold water and let it stand for 5 minutes. Meanwhile, whip 1 cup heavy whipping cream with ¼ cup powdered sugar and 1 teaspoon clear vanilla extract until soft peaks form. Microwave the gelatin for 10 seconds until it’s liquid, then slowly add it to the cream while whipping on high until stiff peaks form, about 2 minutes.
Pipe the whipped cream over the pie and sprinkle with crushed candy cane pieces for garnish. Gelatin helps keep the topping stable, but you can omit it if serving right away. The pie is best served chilled, as noted in the tips for a fresh, non-frozen texture.
Final Steps and Nutritional Details
Serve the pie chilled for the ultimate enjoyment. To give you a clear idea, here’s a table of the nutritional information per serving for 8 servings total:
| Nutrient | Amount per Serving |
|---|---|
| Calories | 581 |
| Total Fat | 36g |
| Saturated Fat | 20g |
| Trans Fat | 1g |
| Unsaturated Fat | 13g |
| Cholesterol | 70mg |
| Sodium | 255mg |
| Carbohydrates | 62g |
| Fiber | 2g |
| Sugar | 50g |
| Protein | 7g |
This guide covers all the directions provided, ensuring your pie turns out perfectly every time.

Dietary Substitutions to Customize Your No Bake Candy Cane Pie
One of the best parts of this No Bake Candy Cane Pie is how easy it is to adapt for different dietary needs. Use silken tofu or cashew cream instead of dairy-based cream for vegan options, or swap heavy cream with coconut cream for a tropical twist. These changes keep the pie’s creamy texture while making it accessible for everyone.
For flavor adjustments, incorporate natural peppermint oil or crushed mint leaves in place of extract. If you’re watching sugar intake, try agave syrup or stevia as alternatives. This way, the pie remains a festive favorite without compromising on taste or health goals.
As noted in the benefits of having a healthy relationship with chocolate, enjoying treats like this in moderation can be part of a balanced diet.
Mastering No Bake Candy Cane Pie: Advanced Tips and Variations
To take your No Bake Candy Cane Pie to the next level, chill it in stages for better texture, and use a food processor for even crushing of candy canes. Experiment with adding white chocolate chips or a raspberry swirl for extra depth, as these variations enhance the overall flavor. Presentation is key, so serve with fresh mint for an elegant finish.
For more ideas on similar desserts, explore this strawberry cream cheese chill pie recipe. Make ahead by preparing up to two days in advance and storing in the fridge; it’s a great way to reduce stress during holidays.
How to Store No Bake Candy Cane Pie: Best Practices
Proper storage keeps your No Bake Candy Cane Pie tasting fresh and delicious. Keep it covered in the refrigerator for up to 3 days to maintain the filling’s creaminess. For longer-term options, wrap it tightly and freeze for up to a month, thawing overnight in the fridge before serving.
Remember, no reheating is needed; serve it chilled for the best results. This approach works well for meal prep, letting you have desserts ready for busy weeks.

FAQs: Frequently Asked Questions About No Bake Candy Cane Pie
Can I prepare No Bake Candy Cane Pie ahead of time?
Yes, you can prepare the pie up to the point before adding the whipped cream topping. After assembling the crust and filling, cover it and refrigerate or freeze the pie. Add the whipped cream topping just before serving to keep it fresh and fluffy.
What can I use if I don’t have peppermint mocha creamer?
You can replace peppermint mocha creamer with regular milk combined with about 1/4 teaspoon of peppermint extract for flavor. Adjust the amount of peppermint extract to your taste since it is quite strong. This substitution keeps the pie’s creamy peppermint flavor.
Can I freeze No Bake Candy Cane Pie?
Yes, you can freeze the pie after spreading the pudding mixture in the crust but before adding the whipped cream topping. Freeze it for up to a few weeks. When ready to serve, thaw in the refrigerator and add fresh whipped cream on top.
What are good alternatives to red and green chocolate chips in this pie?
If red and green chocolate chips aren’t available, try using mini M&M’s, red and green sixlets, nonpareils, or colored sugar sprinkles. These options add festive color and texture while keeping the pie visually appealing.
Is it necessary to use gelatin in the whipped cream topping?
Gelatin is optional in the whipped cream topping. It helps the whipped cream maintain shape longer, especially if the pie is left out for a while. However, you can omit gelatin if you plan to serve the pie soon after adding the whipped cream, which will result in a lighter texture.

No Bake Candy Cane Pie
- Total Time: 3 hours 15 minutes
- Yield: 8 servings 1x
- Diet: Vegetarian
Description
🍪 Enjoy a festive no-bake dessert that combines rich chocolate and refreshing peppermint in perfect harmony
🎄 Perfect for holiday entertaining – this impressive layered pie comes together without turning on your oven
Ingredients
1 chocolate pie crust
1 box (3.9 oz) instant chocolate pudding mix
1 cup milk
1 cup peppermint mocha creamer
8 oz cream cheese
1 ¼ cup powdered sugar
½ teaspoon clear vanilla extract
½ teaspoon peppermint extract
1 (8 oz) container whipped topping
¾ cup red and green chocolate chips
4 teaspoons cold water
1 teaspoon unflavored gelatin
1 cup heavy whipping cream
¼ cup powdered sugar for whipped cream topping
1 teaspoon clear vanilla extract for whipped cream topping
Crushed candy cane pieces for garnish
Instructions
1-Step 1: Mixing the Pudding Layer Begin by whisking the instant chocolate pudding mix with 1 cup milk and 1 cup peppermint mocha creamer for 2 minutes, then refrigerate for 5 minutes. This creates a smooth, flavorful base that sets the foundation for the pie’s chocolate-peppermint blend. Once ready, pour 1 ½ cups of the mixture into the prepared chocolate pie crust, spread it evenly, and freeze for 2 hours to set firmly.
2-Step 2: Adding the Cream Cheese Layer Next, cream together the softened cream cheese and 1 ¼ cup powdered sugar with the vanilla and peppermint extracts until smooth. Fold in the whipped topping and ¾ cup red and green chocolate chips to create a creamy, festive layer. Spread this mixture over the set pudding layer and freeze for 1 hour to help it firm up.
3-Step 3: Preparing and Piping the Whipped Cream Sprinkle 1 teaspoon unflavored gelatin over 4 teaspoons cold water and let it stand for 5 minutes. Meanwhile, whip 1 cup heavy whipping cream with ¼ cup powdered sugar and 1 teaspoon clear vanilla extract until soft peaks form. Microwave the gelatin for 10 seconds until it’s liquid, then slowly add it to the cream while whipping on high until stiff peaks form, about 2 minutes. Pipe the whipped cream over the pie and sprinkle with crushed candy cane pieces for garnish. Gelatin helps keep the topping stable, but you can omit it if serving right away. The pie is best served chilled, as noted in the tips for a fresh, non-frozen texture.
4-Final Steps and Nutritional Details: Serve the pie chilled for the ultimate enjoyment.
Notes
⏰ Prepare the pie in advance up to the whipped cream step for stress-free holiday entertaining
🍬 Adjust peppermint extract to your taste preference – start with less and add more as needed
❄️ Transfer from freezer to refrigerator 20 minutes before serving for the perfect texture
- Prep Time: 15 minutes
- Freezing Time: 3 hours
- Cook Time: 0 minutes
- Category: Dessert
- Method: No Bake
- Cuisine: American
Nutrition
- Serving Size: 1 slice
- Calories: 581
- Sugar: 50
- Sodium: 255
- Fat: 36
- Saturated Fat: 20
- Unsaturated Fat: 13
- Trans Fat: 1
- Carbohydrates: 62
- Fiber: 2
- Protein: 7
- Cholesterol: 70
Keywords: no bake candy cane pie, creamy peppermint filling, holiday dessert, chocolate peppermint pie