Why You’ll Love This Mini Biscoff Cheesecakes
If you’re looking for a dessert that combines rich, caramelized flavor with a creamy texture, these Mini Biscoff Cheesecakes are exactly what you need. This recipe is delightfully simple and quick to make, making it perfect for both beginners and busy bakers. With minimal steps and readily available ingredients, you can whip up these cheesecakes in no time without sacrificing flavor.
What makes this recipe truly special is its versatility. Whether you’re vegan, gluten-free, or seeking low-calorie options, these Mini Biscoff Cheesecakes can be customized to fit your lifestyle without losing their delicious appeal. The recipe also balances indulgence with wellness by using quality ingredients that offer a satisfying treat with potential benefits such as controlled sugar content and wholesome components.
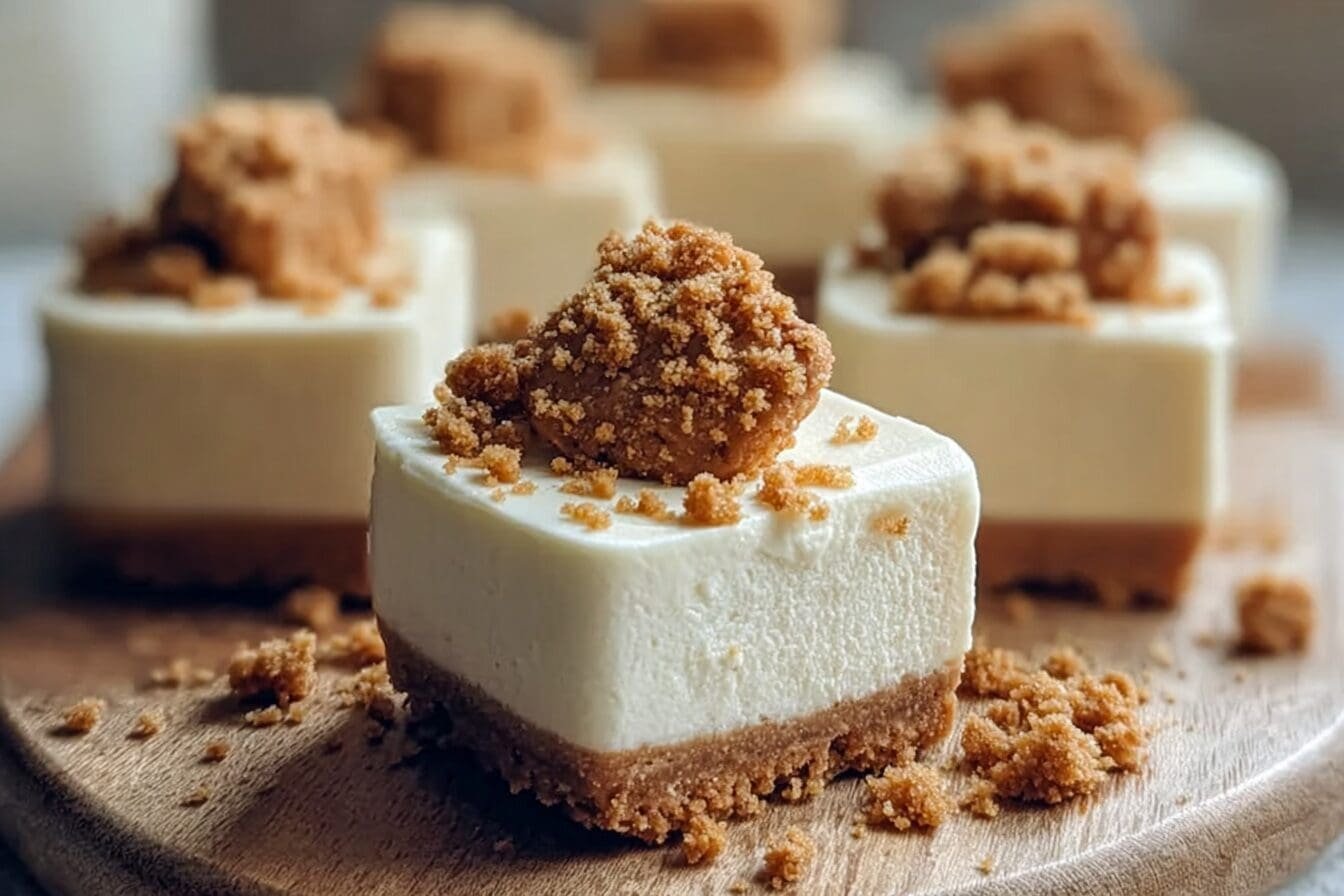
The distinctive flavor of these Mini Biscoff Cheesecakes comes from the unique, rich caramelized taste of Biscoff, combined with the creamy texture of the cheesecake filling. This blend creates a distinct and memorable dessert experience that stands out from other cheesecake recipes you might have tried. Each bite offers a perfect balance of spiced cookie crust, velvety filling, and decadent topping that will have everyone asking for seconds.
“Nothing brings people together quite like a homemade dessert that’s both impressive and approachable. These Mini Biscoff Cheesecakes have become my go-to treat for gatherings because they look special but are surprisingly simple to make.”
Jump To
- 1. Why You’ll Love This Mini Biscoff Cheesecakes
- 2. Essential Ingredients for Mini Biscoff Cheesecakes
- 3. How to Prepare the Perfect Mini Biscoff Cheesecakes: Step-by-Step Guide
- 4. Dietary Substitutions to Customize Your Mini Biscoff Cheesecakes
- 5. Mastering Mini Biscoff Cheesecakes: Advanced Tips and Variations
- 6. How to Store Mini Biscoff Cheesecakes: Best Practices
- 7. FAQs: Frequently Asked Questions About Mini Biscoff Cheesecakes
- 8. Mini Biscoff Cheesecakes
Essential Ingredients for Mini Biscoff Cheesecakes
Before we dive into the preparation process, let’s gather all the ingredients you’ll need to create these delicious no-bake treats. The magic of this recipe lies in its simple yet flavorful components that come together beautifully.
For the Crust:
- 250g package of spiced cookies finely ground
- 1/2 cup melted unsalted butter
For the Filling:
- 1 cup cold heavy cream
- 3 blocks (8 oz. each) of full-fat cream cheese softened to room temperature
- 1 cup powdered sugar
- 1 cup creamy spiced cookie butter
- 1/3 cup sour cream at room temperature
- 2 teaspoons pure vanilla extract
- A pinch of salt
For the Topping:
- 1/2 cup creamy spiced cookie butter (melted)
- Additional whole or crushed cookies for garnish
- Whipped cream for garnish
| Component | Preparation |
|---|---|
| Cookies | Fine crumbs for crust, whole/crushed for garnish |
| Butter | Melted for crust |
| Cream cheese | Softened to room temperature |
| Heavy cream | Cold |
| Sour cream | Room temperature |
How to Prepare the Perfect Mini Biscoff Cheesecakes: Step-by-Step Guide
Creating these delightful no-bake cheesecakes is easier than you might think. Follow these simple steps to achieve perfect results every time. The entire preparation process takes about 30 minutes, plus chilling time.
Creating the Crust
Start by preparing the crust for your Mini Biscoff Cheesecakes. Take your 250g package of spiced cookies and grind them into fine crumbs. You can do this using a food processor or by placing the cookies in a sealable bag and crushing them with a rolling pin.
Mix the finely ground cookies with 1/2 cup melted unsalted butter until well combined. The mixture should hold together when pressed but shouldn’t be overly wet. Press this mixture firmly into mini cheesecake or muffin pans lined with cupcake liners. Make sure to create an even layer across the bottom of each liner. Once pressed, place the pans in the refrigerator to chill while you prepare the filling.
Preparing the Filling
For the creamy filling, begin by whipping 1 cup cold heavy cream until stiff peaks form. This will help create that light, airy texture that makes these cheesecakes so delightful. Once whipped, place the cream in the refrigerator to keep it cold while you prepare the rest of the filling.
In a large mixing bowl, beat together 3 blocks (8 oz. each) of full-fat cream cheese (softened to room temperature), 1 cup powdered sugar, 1 cup creamy spiced cookie butter, 1/3 cup sour cream (at room temperature), 2 teaspoons pure vanilla extract, and a pinch of salt. Beat these ingredients until smooth and well combined. Make sure there are no lumps in the mixture for the creamiest texture.
Once the cream cheese mixture is smooth, gently fold in the chilled whipped cream. Be careful not to overmix as you want to maintain the airiness of the whipped cream. The filling should be light, fluffy, and perfectly creamy.
Assembling and Chilling
Now it’s time to assemble your Mini Biscoff Cheesecakes. Pipe or spoon the filling onto the chilled crusts, filling each liner nearly to the top. Use a spatula or the back of a spoon to smooth the tops of each cheesecake for an even appearance.
Place the assembled cheesecakes in the refrigerator and chill for at least 6 hours, though overnight chilling is recommended for the best results. This chilling time is crucial as it allows the cheesecakes to set properly and develop their full flavor.
Adding the Finishing Touches
Once your cheesecakes are fully chilled and set, it’s time to add the finishing touches. Melt 1/2 cup creamy spiced cookie butter and spread it over the top of each set cheesecake. You can create an even layer or drizzle it artistically depending on your preference.
For the final presentation, garnish with additional whole or crushed cookies and a dollop of whipped cream just before serving. This not only enhances the visual appeal but also adds extra texture and flavor to each bite.
If you enjoy this recipe, you might also want to try our Mini Strawberry Crunch Cheesecake Bites for another delightful no-bake dessert option that’s perfect for gatherings.

Dietary Substitutions to Customize Your Mini Biscoff Cheesecakes
One of the wonderful things about this recipe is its adaptability to various dietary needs and preferences. Let’s explore some ways you can customize these cheesecakes while maintaining their delicious appeal.
Protein and Main Component Alternatives
For those with dairy restrictions or preferences, replace the full-fat cream cheese with vegan cream cheese alternatives available in most grocery stores. Another excellent option is using silken tofu for a plant-based twist that still provides a creamy texture. For the heavy cream, you can use coconut cream or a plant-based whipping alternative that achieves similar results when whipped.
The spiced cookie butter can also be substituted with other nut or seed butters if you have allergies or preferences. Sunflower seed butter or almond butter can work well, though they will change the flavor profile slightly.
Vegetable, Sauce, and Seasoning Modifications
For those with gluten sensitivities, substitute traditional spiced cookies with certified gluten-free spiced cookies for the crust. Many brands offer excellent gluten-free alternatives that maintain the characteristic flavor and texture needed for this recipe.
If you’re looking to reduce sugar content, use sugar alternatives like stevia, erythritol, or monk fruit sweetener instead of powdered sugar. These substitutes can help lighten the recipe without compromising sweetness. Similarly, you can adjust the amount of cookie butter used if you’re watching your sugar intake.
To enhance the flavor profile, consider adding complementary spices like cinnamon, nutmeg, or pumpkin spice to the filling. These additions work beautifully with the spiced cookie flavor and can be adjusted according to your taste preferences.
Texture Modifications
If you prefer a denser, more traditional cheesecake texture, reduce the amount of whipped cream or omit it entirely. This will result in a firmer, richer cheesecake that some people prefer. Conversely, for an even lighter, airier texture, increase the amount of whipped cream and fold it in more gently to maintain maximum volume.
Biscoff cookies are a popular choice for these cheesecakes not just for their delicious flavor but also because they offer a reasonable calorie count when enjoyed in moderation.
Mastering Mini Biscoff Cheesecakes: Advanced Tips and Variations
Once you’ve mastered the basic recipe, you might want to experiment with these professional tips and creative variations to take your Mini Biscoff Cheesecakes to the next level.
Pro Cooking Techniques
While this is a no-bake recipe, temperature control is still crucial for success. Allowing your cream cheese to reach room temperature before mixing prevents lumps and ensures a smooth filling. Similarly, keeping your heavy cream cold until whipping is essential for achieving those perfect stiff peaks that give the cheesecakes their light texture.
When mixing the filling, be careful not to overbeat the cream cheese once you’ve added the whipped cream. Overmixing can deflate the air you’ve incorporated, resulting in a denser cheesecake. Gently fold the whipped cream in using a spatula, being mindful to maintain as much air as possible.
Flavor Variations
While the classic Biscoff flavor is delicious on its own, you can create interesting flavor combinations by adding complementary elements. Try swirling in some melted chocolate or adding a layer of chocolate ganache between the crust and filling for a chocolate lover’s version.
For a nutty twist, incorporate peanut butter or almond butter into the filling or create a marble effect by swirling it through the mixture. The combination of spiced cookie butter with peanut butter is particularly delicious and adds depth to the flavor profile.
Fruit can also complement the caramelized notes of Biscoff beautifully. Consider adding a thin layer of berry compote or fresh fruit on top of the cheesecakes before serving. Strawberries, raspberries, and even apples work wonderfully with the spiced flavor.
Presentation Tips
The visual appeal of your Mini Biscoff Cheesecakes can be enhanced with a few simple presentation techniques. Serve them on decorative plates and garnish thoughtfully with Biscoff crumbs, fresh berries, or a light dusting of powdered sugar.
For a more elegant look, pipe the whipped cream topping using a star tip to create rosettes. A small piece of whole Biscoff cookie placed on top of each whipped cream dollop adds a professional touch and instantly communicates the flavor of the dessert.
When entertaining, consider creating a dessert platter with variations of toppings. Some cheesecakes could be topped with cookie butter, others with chocolate ganache, and some with fresh fruit. This not only looks impressive but also gives your guests options to choose from.
Make-Ahead Options
These Mini Biscoff Cheesecakes are excellent for advance preparation. The crust and filling can be prepared a day ahead and stored separately in the refrigerator. Assemble them on the day of serving for the freshest appearance.
For even more convenience, you can freeze the assembled cheesecakes (before adding the toppings) for up to 3 months. Wrap each cheesecake individually in plastic wrap to protect their texture and flavor, then place them in an airtight, freezer-safe container. When ready to serve, thaw them overnight in the refrigerator and add the toppings just before serving.
Another make-ahead dessert option worth exploring is our Cannoli Cheesecake Bars, which also store beautifully and can be prepared in advance for busy days.
How to Store Mini Biscoff Cheesecakes: Best Practices
Proper storage is key to maintaining the quality and freshness of your Mini Biscoff Cheesecakes. Follow these guidelines to ensure your cheesecakes remain delicious for as long as possible.
Refrigeration
Store your mini cheesecakes in an airtight container in the refrigerator for up to 4 days to keep them fresh and prevent drying out. If you don’t have an airtight container large enough to accommodate all the cheesecakes, you can use a cake dome or cover them carefully with plastic wrap. Be sure the plastic wrap doesn’t directly touch the tops of the cheesecakes to avoid damaging the appearance.
For best results, place a paper towel in the bottom of the storage container to absorb any excess moisture that might accumulate. This helps prevent the crust from becoming soggy and maintains the ideal texture of both the crust and filling.
Freezing
For longer storage, freezing is an excellent option. Freeze the cheesecakes individually wrapped in plastic wrap to protect their texture and flavor, then place them in a sealed container. They can keep well for up to 3 months when stored properly.
When freezing, consider whether to add the toppings before or after freezing. The cookie butter topping and whipped cream are best added after thawing for the freshest appearance and texture. However, the cheesecakes can be frozen complete with all toppings if you’re short on time before serving.
Thawing and Serving
Thaw frozen mini cheesecakes overnight in the refrigerator for best results. Avoid thawing at room temperature, as this can lead to condensation and affect the texture of the cheesecakes. Once thawed, consume them within 2-3 days for the best quality.
When serving refrigerated or thawed cheesecakes, allow them to sit at room temperature for about 10-15 minutes before eating. This slight temperature change enhances the flavor and brings out the creamy texture of the filling.
Meal Prep Considerations
These Mini Biscoff Cheesecakes are ideal for batch preparation. You can easily double or triple the recipe to have a stock of delicious desserts ready for the week. Prepare them on the weekend, store them properly in the fridge or freezer, and enjoy convenient homemade treats throughout the week.
For meal prep efficiency, consider preparing the crusts and filling separately. The crusts can be made and stored in the refrigerator for up to 3 days before adding the filling. This makes the assembly process quicker and more manageable, especially when preparing large quantities.
Cream cheese, a main ingredient in this recipe, provides some nutritional benefits including protein and calcium, making these cheesecakes a slightly more indulgent but not entirely empty-calorie treat.
FAQs: Frequently Asked Questions About Mini Biscoff Cheesecakes
Can I freeze mini Biscoff cheesecakes, and how should I store them?
Yes, mini Biscoff cheesecakes can be frozen. Wrap each cheesecake individually in plastic wrap to protect their texture and flavor, then place them in an airtight, freezer-safe container. For best taste and texture, store them for up to 3 months. When you’re ready to serve, thaw the cheesecakes overnight in the refrigerator. Avoid thawing at room temperature to keep them fresh and prevent sogginess.
How long do mini Biscoff cheesecakes need to chill before serving?
Chill mini Biscoff cheesecakes in the refrigerator for at least 6 hours, but overnight chilling is recommended for the best firmness and flavor. This resting time helps the cheesecake set properly and makes slicing or removing from the pan easier. Avoid rushing this step, as insufficient chilling can cause the texture to be too soft.
Can I use a regular muffin pan to make mini Biscoff cheesecakes instead of a mini cheesecake pan?
Yes, a standard 12-cup muffin pan lined with cupcake liners works well for making mini Biscoff cheesecakes. The liners make removing the cheesecakes much easier and help maintain their shape. Just fill each liner with the cheesecake mixture and bake as directed. Be sure to allow adequate chilling time before removing the cheesecakes from the pans.
When is the best time to add whipped topping to mini Biscoff cheesecakes, and what kind should I use?
It’s best to add whipped topping just before serving to maintain its fresh texture and appearance. You can use homemade whipped cream from heavy whipping cream or store-bought options like Cool Whip, depending on your preference. If making your own, whip 1 cup of cold heavy cream until soft peaks form, then pipe or dollop on top of each cheesecake right before serving.
Can I make mini Biscoff cheesecakes as a single large cheesecake instead?
Yes, you can prepare this recipe as one 9-inch cheesecake instead of mini portions. Use a 9-inch springform pan lined with parchment paper for easy removal. The ingredient amounts stay the same, but baking time may increase slightly—expect about 40-50 minutes at 325°F (163°C). Chill the cheesecake for at least 6 hours or overnight to set before serving.
Mini Biscoff Cheesecakes
- Total Time: 6 hours 30 minutes
- Yield: 12 mini cheesecakes
Description
🍪 These No Bake Mini Biscoff Cheesecakes feature a creamy filling and spiced cookie crust for a delightful treat.
❄️ Quick to prepare with no baking required, they offer a rich and flavorful dessert perfect for any occasion.
Ingredients
– 250g package of spiced cookies finely ground
– 1/2 cup melted unsalted butter
– 1 cup cold heavy cream
– 3 blocks (8 oz. each) of full-fat cream cheese softened to room temperature
– 1 cup powdered sugar
– 1 cup creamy spiced cookie butter
– 1/3 cup sour cream at room temperature
– 2 teaspoons pure vanilla extract
– A pinch of salt
– 1/2 cup creamy spiced cookie butter melted for topping
– Additional whole or crushed cookies for garnish
– Whipped cream for garnish
Instructions
1-Creating the Crust: Start by preparing the crust for your Mini Biscoff Cheesecakes. Take your 250g package of spiced cookies and grind them into fine crumbs. You can do this using a food processor or by placing the cookies in a sealable bag and crushing them with a rolling pin.
Mix the finely ground cookies with 1/2 cup melted unsalted butter until well combined. The mixture should hold together when pressed but shouldn’t be overly wet. Press this mixture firmly into mini cheesecake or muffin pans lined with cupcake liners. Make sure to create an even layer across the bottom of each liner. Once pressed, place the pans in the refrigerator to chill while you prepare the filling.
2-Preparing the Filling: For the creamy filling, begin by whipping 1 cup cold heavy cream until stiff peaks form. This will help create that light, airy texture that makes these cheesecakes so delightful. Once whipped, place the cream in the refrigerator to keep it cold while you prepare the rest of the filling.
In a large mixing bowl, beat together 3 blocks (8 oz. each) of full-fat cream cheese (softened to room temperature), 1 cup powdered sugar, 1 cup creamy spiced cookie butter, 1/3 cup sour cream (at room temperature), 2 teaspoons pure vanilla extract, and a pinch of salt. Beat these ingredients until smooth and well combined. Make sure there are no lumps in the mixture for the creamiest texture.
Once the cream cheese mixture is smooth, gently fold in the chilled whipped cream. Be careful not to overmix as you want to maintain the airiness of the whipped cream. The filling should be light, fluffy, and perfectly creamy.
3-Assembling and Chilling: Now it’s time to assemble your Mini Biscoff Cheesecakes. Pipe or spoon the filling onto the chilled crusts, filling each liner nearly to the top. Use a spatula or the back of a spoon to smooth the tops of each cheesecake for an even appearance.
Place the assembled cheesecakes in the refrigerator and chill for at least 6 hours, though overnight chilling is recommended for the best results. This chilling time is crucial as it allows the cheesecakes to set properly and develop their full flavor.
4-Adding the Finishing Touches: Once your cheesecakes are fully chilled and set, it’s time to add the finishing touches. Melt 1/2 cup creamy spiced cookie butter and spread it over the top of each set cheesecake. You can create an even layer or drizzle it artistically depending on your preference.
For the final presentation, garnish with additional whole or crushed cookies and a dollop of whipped cream just before serving. This not only enhances the visual appeal but also adds extra texture and flavor to each bite.
Notes
🎂 Use cold heavy cream for best whipping results.
🍪 Press the crust firmly to prevent crumbling.
⏰ Chill cheesecakes overnight for optimal texture and flavor.
- Prep Time: 30 minutes
- Chilling time: 6 hours
- Cook Time: 0 minutes
- Category: Dessert
- Method: No baking, chilling
- Cuisine: American
Nutrition
- Serving Size: 1 mini cheesecake
- Calories: 350
- Sugar: 25 grams
- Sodium: 180 mg
- Fat: 28 grams
- Saturated Fat: 15 grams
- Trans Fat: 0 grams
- Carbohydrates: 22 grams
- Fiber: 1 gram
- Protein: 5 grams
- Cholesterol: 85 mg
Keywords: No Bake, Biscoff, Mini Cheesecakes, Creamy Filling