Why You’ll Love This Masoor Dal Chilla
If you’re searching for a nutritious, quick, and delicious meal that fits seamlessly into a busy lifestyle, Masoor Dal Chilla is the answer. This savory red lentil pancake brings together the best of Indian flavors while remaining incredibly simple to prepare. Whether you’re a seasoned cook or just starting your culinary journey, this recipe offers something special for everyone at the table.
The beauty of this dish lies in its remarkable combination of health benefits and satisfying taste. Made from humble split red lentils, these pancakes pack a powerful nutritional punch without requiring hours in the kitchen. Plus, the recipe naturally accommodates various dietary needs, making it perfect for families with different eating preferences.
Key Benefits of Masoor Dal Chilla
- Ease of Preparation: After soaking the lentils, the entire cooking process takes just 15-20 minutes. Simply blend, pour, and cook no fermentation needed like traditional dosa batter. This makes it an excellent choice for busy mornings or quick weeknight dinners when time is limited.
- Health Benefits: Each serving delivers an impressive nutritional profile with 12g of protein, 14g of fiber, and essential minerals like iron and potassium. As a naturally gluten-free and vegan option, it supports various wellness goals including weight management and heart health.
- Versatility: This recipe adapts beautifully to different tastes and dietary requirements. Add vegetables for extra nutrition, adjust spices to your preference, or serve it alongside various chutneys and dips. It works equally well as breakfast, lunch, dinner, or a satisfying snack.
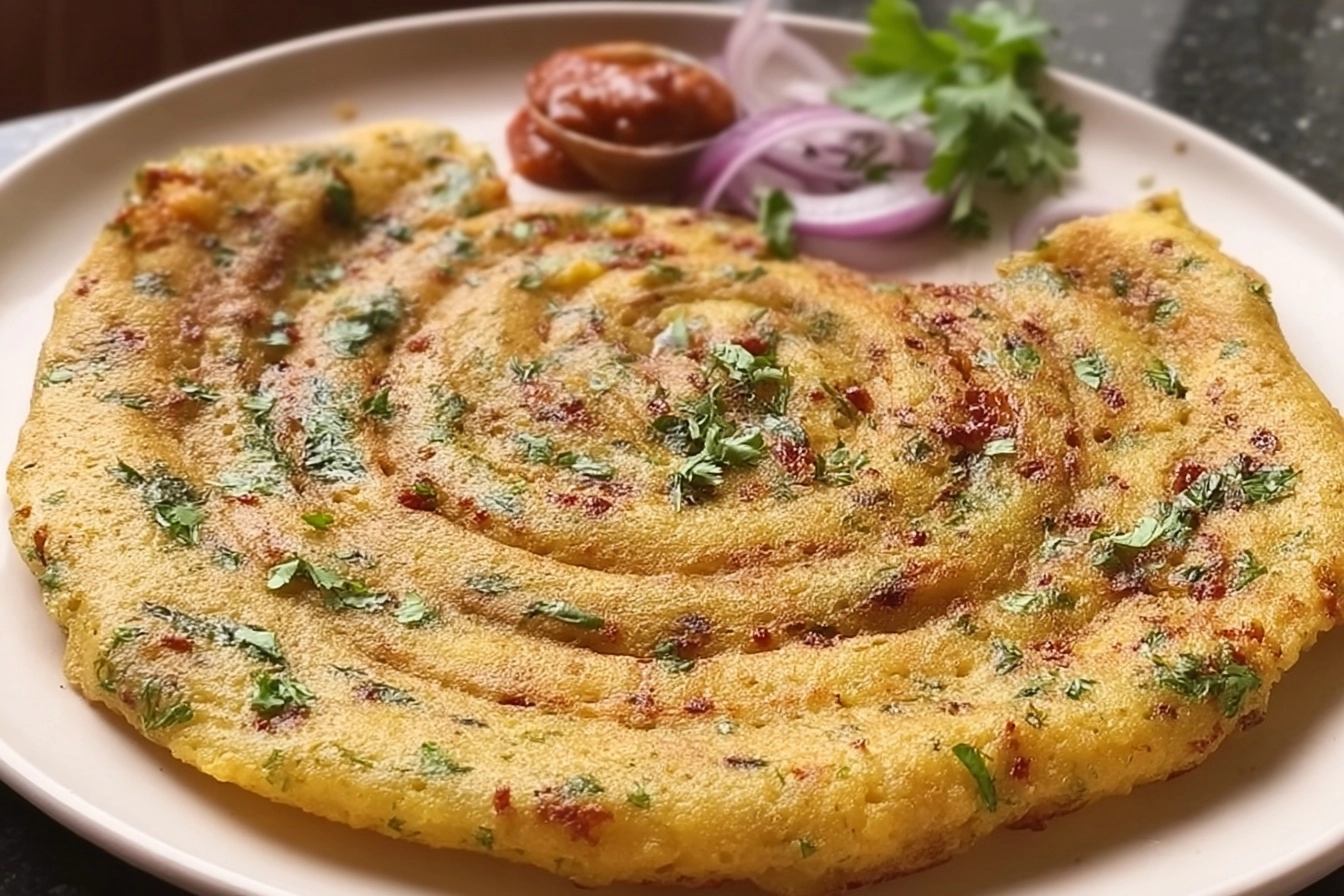
- Distinctive Flavor: The combination of green chili and ginger creates a mildly spiced, aromatic taste that pairs wonderfully with fresh cilantro. Unlike heavier Indian breads, this light pancake lets the natural nutty flavor of red lentils shine through while offering a soft, satisfying texture.
Jump To
- 1. Why You’ll Love This Masoor Dal Chilla
- 2. Essential Ingredients for Masoor Dal Chilla
- 3. How to Prepare the Perfect Masoor Dal Chilla: Step-by-Step Guide
- 4. Dietary Substitutions to Customize Your Masoor Dal Chilla
- 5. Mastering Masoor Dal Chilla: Advanced Tips and Variations
- 6. How to Store Masoor Dal Chilla: Best Practices
- 7. FAQs: Frequently Asked Questions About Masoor Dal Chilla
- 8. Masoor Dal Chilla
Essential Ingredients for Masoor Dal Chilla
Creating the perfect masoor dal chilla recipe starts with understanding each ingredient’s role. The simplicity of this dish is one of its greatest strengths you need just a handful of pantry staples to create something truly delicious. Here’s everything you’ll need to make approximately 6 to 8 chillas.
Main Ingredients
- 1 cup masoor dal (split red lentils) – The star ingredient that provides protein, fiber, and creates the pancake base. Split red lentils blend smoothly after soaking, producing a batter that cooks into tender pancakes.
- 3 cups water for soaking the lentils – Essential for softening the lentils adequately. Proper soaking ensures the lentils blend into a smooth, lump-free batter.
- 1 green chili – Adds a gentle heat and authentic Indian flavor. You can adjust the quantity based on your spice tolerance.
- 1 inch ginger – Provides warmth and aromatic depth to the pancakes while aiding digestion.
- 1 teaspoon salt – Enhances all the flavors and brings balance to the dish.
- ½ cup water for grinding – Creates the perfect pourable batter consistency. Add gradually to achieve the right texture.
- 2 tablespoons finely chopped cilantro – Adds freshness and a burst of color to the finished pancakes.
- 2 tablespoons oil for cooking – Used for pan-frying the chillas to golden perfection. Any neutral cooking oil works well.
Special Dietary Options
Vegan: This recipe is naturally vegan as written. No substitutions needed just use your preferred plant-based cooking oil.
Gluten-Free: The traditional recipe contains no wheat or gluten-containing ingredients, making it safe for those with celiac disease or gluten sensitivity.
Low-Calorie: Each pancake contains approximately 100-115 calories. To reduce calories further, use minimal oil for cooking or try a non-stick pan with just a light spray of oil.
How to Prepare the Perfect Masoor Dal Chilla: Step-by-Step Guide
Making crispy red lentil pancakes at home is simpler than you might think. Follow these detailed steps to achieve restaurant-quality results in your own kitchen. The process requires minimal active cooking time, though you’ll need to plan ahead for soaking.
Step 1: Rinse and Soak the Lentils
Begin by measuring 1 cup of masoor dal and placing it in a fine-mesh strainer. Rinse thoroughly under cold running water for about 30-45 seconds, gently agitating the lentils with your fingers. This removes any dust, debris, or surface starch that could affect the batter consistency. Continue rinsing until the water runs clear.
Transfer the rinsed lentils to a large bowl and add 3 cups of water. The lentils will expand as they soak, so ensure the bowl has enough room. Cover the bowl with a clean cloth or plate and let the lentils soak overnight or for at least 4 hours. Longer soaking produces a smoother batter and softer chillas.
Pro Tip: If you’re short on time, soak the lentils in warm water for 2-3 hours. However, overnight soaking in room temperature water yields the best texture and makes the lentils easier to digest.
Step 2: Drain and Prepare for Blending
After soaking, drain the lentils completely using your strainer. Give them a gentle shake to remove excess water. You’ll notice the lentils have softened significantly and expanded to about double their original size. This transformation is exactly what you want.
Transfer the drained lentils to your blender jar. Add 1 green chili (stem removed), 1 inch of fresh ginger (peeled and roughly chopped), and 1 teaspoon of salt. These aromatics will blend into the batter, creating a flavorful base for your chillas.
Step 3: Blend into Smooth Batter
Add ½ cup of fresh water to the blender and begin blending on medium speed. Start with pulses to break down the lentils, then increase to high speed. Continue blending until you achieve a completely smooth, pourable batter with no grainy texture.
The consistency should resemble that of regular pancake batter or a thick crepe batter. If the batter seems too thick or your blender struggles, add water 1-2 tablespoons at a time. Avoid adding too much water at once, as thin batter creates fragile chillas that break easily.
Test the consistency by lifting some batter with a spoon. It should flow smoothly but not be watery. If it falls in thick clumps, blend longer or add a bit more water.
Step 4: Add Fresh Cilantro and Rest
Transfer the smooth batter to a mixing bowl. Add 2 tablespoons of finely chopped fresh cilantro and stir gently to distribute evenly throughout the batter. The cilantro adds freshness and a beautiful speckled appearance to your finished chillas.
Let the batter rest for 5 minutes. This resting period allows the flavors to meld and the batter to stabilize, resulting in better-textured pancakes. While the batter rests, prepare your cooking station.
Step 5: Heat the Pan
Place a non-stick pan, cast-iron skillet, or traditional tawa on the stove over low-medium heat. Proper temperature is crucial too hot and the chilla will burn on the outside while remaining undercooked inside; too cool and it won’t develop those appealing golden spots.
Test the pan’s readiness by sprinkling a few drops of water. The water should sizzle and evaporate within seconds. If it dances around and takes longer to evaporate, the pan isn’t hot enough yet.
Step 6: Pour and Spread the Batter
Once the pan is properly heated, pour approximately ⅓ cup of batter onto the center. Using the back of your ladle or a small bowl, quickly spread the batter outward in a circular motion to create a circle roughly 5-6 inches in diameter. Work efficiently the batter begins cooking as soon as it hits the pan.
Keep the thickness similar to a crepe or slightly thicker than a dosa. Thinner chillas become crispier, while thicker ones remain softer inside. Find your preferred thickness through experimentation.
Step 7: Cook the First Side
Let the chilla cook undisturbed for 2-3 minutes on the first side. You’ll notice the edges beginning to lift slightly and the surface changing from glossy to matte. Small bubbles may form on the surface, similar to regular pancakes.
Add a few drops of oil around the edges and on the surface. The oil helps create those beautiful golden-brown spots and makes flipping easier.
Step 8: Flip and Cook the Second Side
When the edges lift easily and the bottom has developed light golden spots, it’s time to flip. Slide a thin spatula under the chilla and flip it over in one confident motion. Add a few more drops of oil around the edges.
Cook the second side for another 2-3 minutes until it matches the golden color of the first side. Press gently with your spatula to ensure even cooking and contact with the pan.
Step 9: Serve Immediately
Transfer the cooked chilla to a plate and serve hot. These healthy dal chilla pancakes taste best when fresh and warm. Repeat the process with the remaining batter, adding oil to the pan as needed between each chilla.
Stack cooked chillas on a plate and cover loosely with a clean kitchen towel to keep them warm while you cook the remaining batter. This recipe yields approximately 6 to 8 chillas depending on size.

Dietary Substitutions to Customize Your Masoor Dal Chilla
Protein and Main Component Alternatives
While split red lentils create the classic masoor cheela, several alternatives work beautifully for variety or dietary preferences. Split yellow moong dal makes an excellent substitute, offering a slightly lighter flavor and softer texture. Soak moong dal for just 2 hours instead of the longer time required for masoor dal.
For a more substantial, nuttier flavor, try chana dal. This requires longer soaking (6-8 hours) but produces distinctively crispier chillas. You can also create mixed dal chillas by combining equal parts masoor and moong dal this gives you the best qualities of both lentils.
If you’re feeling adventurous, experiment with different lentil combinations:
| Lentil Type | Soaking Time | Texture | Flavor Profile |
|---|---|---|---|
| Split Red Lentils (Masoor) | 4+ hours | Soft, tender | Mild, slightly nutty |
| Split Yellow Moong | 2 hours | Very soft | Light, mild |
| Chana Dal | 6-8 hours | Crispier | Rich, nutty |
| Mixed (Masoor + Moong) | 3-4 hours | Soft | Balanced, mild |
Always use split lentils rather than whole ones for the smoothest batter. Whole lentils create grainy textures that don’t spread as evenly.
Vegetable, Sauce, and Seasoning Modifications
Transform your basic lentil chilla into a nutrient-packed meal by incorporating vegetables directly into the batter. Finely chopped onions add sweetness and crunch, while grated carrots introduce natural sweetness and beautiful color. Chopped spinach boosts iron content and creates lovely green flecks throughout.
For spicier chillas, increase the green chili quantity or add red chili powder to the batter. Conversely, reduce or eliminate the green chili for a milder version suitable for children or those sensitive to heat. Cumin seeds (jeera), asafoetida (hing), and turmeric powder all complement the lentil base beautifully.
Serve your chillas with various accompaniments: green chutney, tamarind date chutney, or fresh yogurt for a cooling contrast. A side of pickled vegetables or a simple cucumber salad rounds out the meal perfectly.
Mastering Masoor Dal Chilla: Advanced Tips and Variations
Once you’ve mastered the basic savory masoor dal chilla, try these advanced techniques to take your cooking to the next level. These tips help troubleshoot common issues and introduce creative variations.
Pro Cooking Techniques
The key to perfect chillas lies in batter consistency and pan temperature. If your chillas consistently break during flipping, thicken the batter by blending in a small amount of additional soaked lentils or reducing the water slightly. A thicker batter holds together better.
Cooking the first side thoroughly before flipping is crucial. Wait until the edges lift easily and the surface appears set. Rushing this step leads to torn chillas. Use a thin, flexible spatula for easier maneuvering.
For restaurant-style crispy edges, increase the heat slightly for the last 30 seconds of cooking. This technique creates those delightfully crunchy borders while keeping the center tender.
Flavor Variations
- Masala Chilla: Add finely chopped tomatoes, onions, and green peppers to the batter along with a pinch of garam masala.
- Spinach Chilla: Blend fresh spinach leaves with the lentils for a vibrant green chilla packed with extra nutrients.
- Garlic Chilla: Add 2-3 garlic cloves while blending for a pungent, aromatic variation.
- Cheese Stuffed Chilla: Sprinkle grated cheese on one half of the cooking chilla, fold over, and cook until the cheese melts.
Presentation Tips
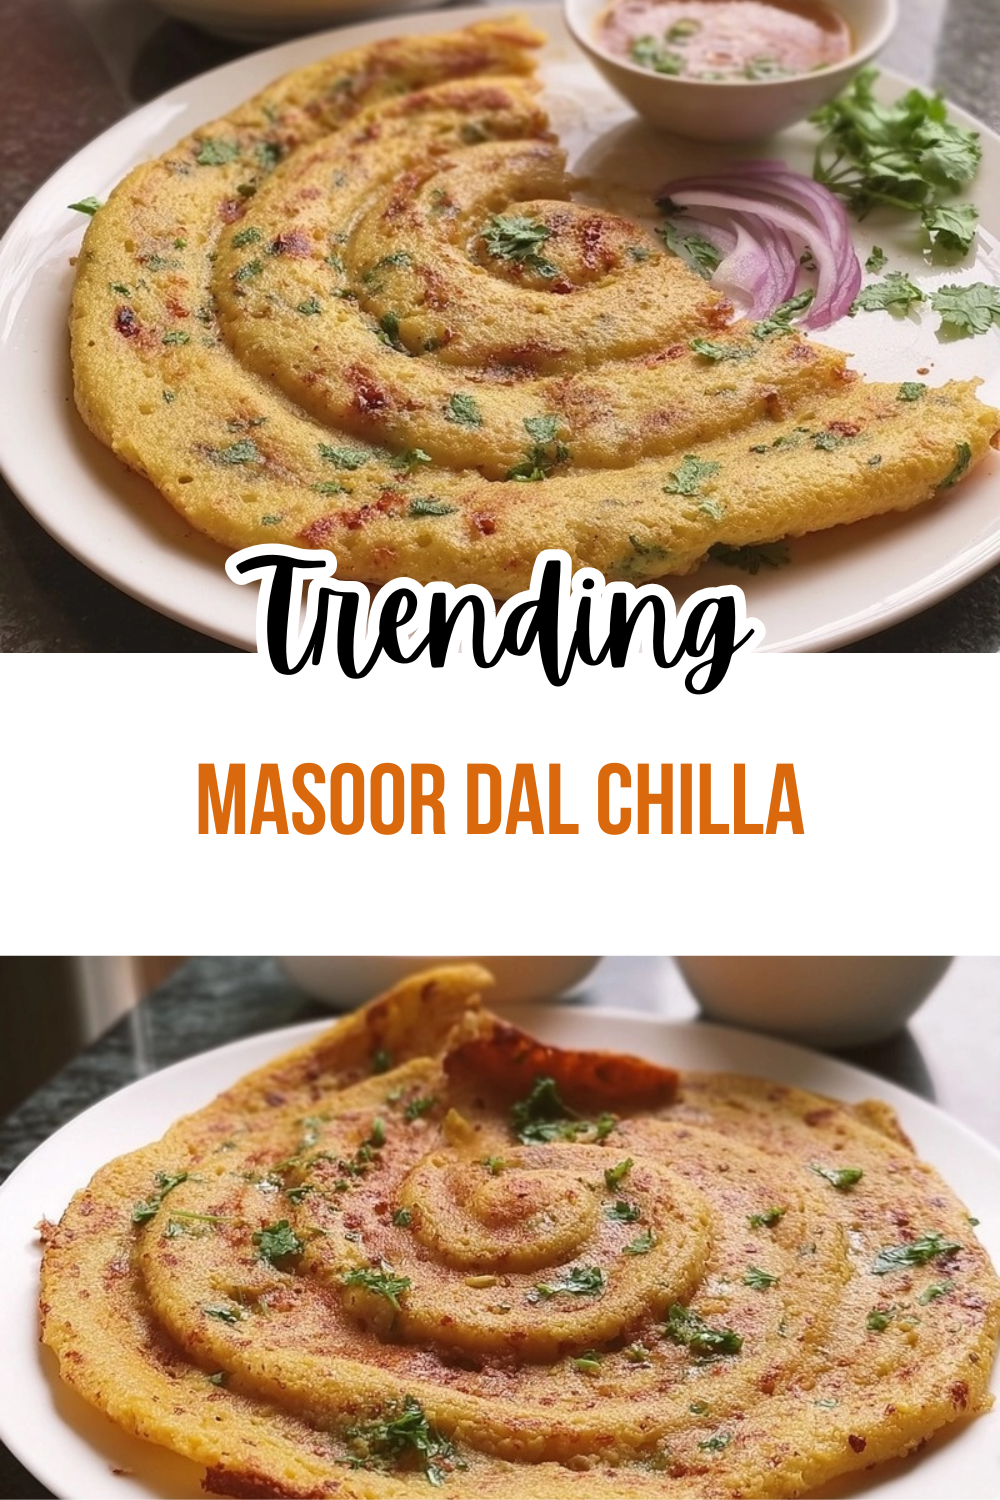
Serve your chillas rolled or folded into quarters for an elegant presentation. Garnish with fresh cilantro leaves and a squeeze of lemon juice just before serving. A side of colorful chutney in small bowls adds visual appeal.
For a complete meal, pair with protein-rich egg dishes or a fresh salad. The mild flavor of chillas complements bolder side dishes wonderfully.
Make-Ahead Options
Busy mornings call for preparation strategies. Soak a large batch of lentils over the weekend and blend into batter. Store the batter in the refrigerator for up to 2 days just stir well and add a splash of water if it thickens before using.
For even more convenience, cook a full batch of chillas and refrigerate or freeze them. They reheat beautifully on a hot pan in just 1-2 minutes per side, making weekday breakfasts nearly effortless.
How to Store Masoor Dal Chilla: Best Practices
Proper storage ensures your red lentil pancakes maintain their taste and texture for future meals. Follow these guidelines to maximize freshness and minimize waste.
Refrigeration
Cooked chillas store well in the refrigerator for 3-5 days when properly handled. Allow them to cool completely to room temperature before storing this prevents condensation that leads to sogginess. Stack the cooled chillas in an airtight container with parchment paper between each layer to prevent sticking. Label the container with the date for easy tracking.
Freezing
For longer storage, freeze your chillas for up to one month. Flash-freeze individual chillas on a baking sheet for 1 hour, then transfer to a freezer bag with parchment paper separators. This method prevents them from freezing together in a solid block, allowing you to remove only what you need.
According to health experts, lentils retain their nutritional benefits well during freezing, making this an excellent meal-prep strategy for maintaining a healthy diet throughout busy weeks.
Reheating
Avoid microwaving chillas as this makes them chewy and tough. Instead, reheat on a hot pan or skillet over medium heat for 1-2 minutes per side. Add a small drop of oil for restored crispiness. This method revives the texture to nearly fresh-cooked quality.
Meal Prep Considerations
For efficient meal prep, prepare the batter on Sunday and cook fresh chillas throughout the week. The batter keeps for 2 days refrigerated. Alternatively, cook all chillas at once and store them for grab-and-go breakfasts simply reheat while your morning coffee brews.
Uncooked lentil batter can also be frozen in portion-sized containers. Thaw overnight in the refrigerator, stir well, and cook as usual.
FAQs: Frequently Asked Questions About Masoor Dal Chilla
What is masoor dal chilla?
Masoor dal chilla is a popular Indian savory pancake made from soaked and ground red lentils (masoor dal), blended with green chilies, ginger, cilantro, and spices like cumin and salt. It’s naturally gluten-free, vegan, high in plant-based protein, and ready in under 30 minutes after soaking. Each chilla offers about 100-120 calories, 8g protein, and fiber for a filling breakfast, snack, or light meal. No fermentation needed like dosa— just blend into a smooth batter and cook on a hot griddle. Serve 2-3 per person with green chutney or yogurt for a balanced start to your day. Perfect for weight management due to its low-carb, nutrient-dense profile.
How do you make masoor dal chilla at home?
Start by rinsing 1 cup masoor dal and soaking for 4-8 hours (or overnight). Drain, then blend with 1-2 green chilies, 1-inch ginger, ½ tsp cumin seeds, salt to taste, and ½-¾ cup water for a pourable batter like pancake mix. Stir in chopped cilantro and onions if desired; let rest 10 minutes. Heat a non-stick pan on medium, add ½ tsp oil, pour ⅓ cup batter, spread to 6 inches. Cook 2-3 minutes until edges crisp, flip, add oil, and cook 2 more minutes until golden. Makes 8-10 chillas. Tip: Use a cast-iron tawa for crispier results. Total time: 25 minutes active.
Why does my masoor dal chilla break when flipping?
Masoor dal chilla often breaks if the batter is too thin, the pan isn’t hot enough, or the first side isn’t fully cooked. Fix it by thickening batter with extra dal or less water for better binding. Preheat pan on medium-high, spread batter thinner (5-6 inches), and cook until edges lift easily and bubbles form—about 2-3 minutes. Use a thin spatula to flip gently from the edges. Low oil or overcrowding causes sticking; add 2-3 drops oil around edges. If still issues, add 1 tsp rice flour to batter for crispiness. Practice on low-medium heat yields perfect, intact chillas every time.
Can you substitute masoor dal in chilla recipe?
Yes, swap masoor dal with split yellow moong dal (same quantity) for a lighter, quicker-cooking version—blend without long soak for 2 hours. Chana dal works for nuttier flavor but needs 6-8 hours soaking. Avoid whole lentils; stick to split for smooth batter. For mixed dal chilla, combine ½ cup masoor with ½ cup moong. Adjust spices as moong is milder. All options stay gluten-free and vegan. Test small batches: moong yields softer chillas, chana crispier. Nutrition stays similar—high protein around 8-10g per chilla. Great for variety without changing core recipe steps.
How to store and reheat masoor dal chilla?
Cool cooked chillas completely, then refrigerate in an airtight container for 3-5 days or freeze stacked with parchment paper in a freezer bag for up to 1 month. For freezing, cook fully first to avoid sogginess. Reheat on a hot pan over medium heat for 1-2 minutes per side—no microwave, as it makes them chewy. Add a drop of oil for crispiness. Batter stores in fridge 2 days; stir before use, add water if thick. Avoid room temperature storage beyond 2 hours. This keeps texture and flavor intact, saving time for busy mornings. Pro tip: Label freezer bags with dates for easy rotation.
Masoor Dal Chilla
- Total Time: 4 hours 30 minutes
- Yield: 4 servings (6-8 chillas)
- Diet: Vegan, Gluten-Free
Description
🥞🌶️ Crispy, protein-packed red lentil pancakes offer a gluten-free, vegan alternative to breads, bursting with mild spice and soft texture for healthy meals.
🥞🌶️ High-fiber, quick-cooking after soaking, perfect for breakfast or snacks—nutritious, filling, and customizable with veggies.
Ingredients
– 1 cup masoor dal (split red lentils)
– 3 cups water for soaking the lentils
– 1 green chili
– 1 inch ginger
– 1 teaspoon salt
– ½ cup water for grinding
– 2 tablespoons finely chopped cilantro
– 2 tablespoons oil for cooking
Instructions
1-Step 1: Rinse and Soak the Lentils Begin by measuring 1 cup of masoor dal and placing it in a fine-mesh strainer. Rinse thoroughly under cold running water for about 30-45 seconds, gently agitating the lentils with your fingers. This removes any dust, debris, or surface starch that could affect the batter consistency. Continue rinsing until the water runs clear. Transfer the rinsed lentils to a large bowl and add 3 cups of water. The lentils will expand as they soak, so ensure the bowl has enough room. Cover the bowl with a clean cloth or plate and let the lentils soak overnight or for at least 4 hours. Longer soaking produces a smoother batter and softer chillas.
2-Step 2: Drain and Prepare for Blending After soaking, drain the lentils completely using your strainer. Give them a gentle shake to remove excess water. You’ll notice the lentils have softened significantly and expanded to about double their original size. This transformation is exactly what you want. Transfer the drained lentils to your blender jar. Add 1 green chili (stem removed), 1 inch of fresh ginger (peeled and roughly chopped), and 1 teaspoon of salt. These aromatics will blend into the batter, creating a flavorful base for your chillas.
3-Step 3: Blend into Smooth Batter Add ½ cup of fresh water to the blender and begin blending on medium speed. Start with pulses to break down the lentils, then increase to high speed. Continue blending until you achieve a completely smooth, pourable batter with no grainy texture. The consistency should resemble that of regular pancake batter or a thick crepe batter. If the batter seems too thick or your blender struggles, add water 1-2 tablespoons at a time. Avoid adding too much water at once, as thin batter creates fragile chillas that break easily. Test the consistency by lifting some batter with a spoon. It should flow smoothly but not be watery. If it falls in thick clumps, blend longer or add a bit more water.
4-Step 4: Add Fresh Cilantro and Rest Transfer the smooth batter to a mixing bowl. Add 2 tablespoons of finely chopped fresh cilantro and stir gently to distribute evenly throughout the batter. The cilantro adds freshness and a beautiful speckled appearance to your finished chillas. Let the batter rest for 5 minutes. This resting period allows the flavors to meld and the batter to stabilize, resulting in better-textured pancakes. While the batter rests, prepare your cooking station.
5-Step 5: Heat the Pan Place a non-stick pan, cast-iron skillet, or traditional tawa on the stove over low-medium heat. Proper temperature is crucial too hot and the chilla will burn on the outside while remaining undercooked inside; too cool and it won’t develop those appealing golden spots. Test the pan’s readiness by sprinkling a few drops of water. The water should sizzle and evaporate within seconds. If it dances around and takes longer to evaporate, the pan isn’t hot enough yet.
6-Step 6: Pour and Spread the Batter Once the pan is properly heated, pour approximately ⅓ cup of batter onto the center. Using the back of your ladle or a small bowl, quickly spread the batter outward in a circular motion to create a circle roughly 5-6 inches in diameter. Work efficiently the batter begins cooking as soon as it hits the pan. Keep the thickness similar to a crepe or slightly thicker than a dosa. Thinner chillas become crispier, while thicker ones remain softer inside. Find your preferred thickness through experimentation.
7-Step 7: Cook the First Side Let the chilla cook undisturbed for 2-3 minutes on the first side. You’ll notice the edges beginning to lift slightly and the surface changing from glossy to matte. Small bubbles may form on the surface, similar to regular pancakes. Add a few drops of oil around the edges and on the surface. The oil helps create those beautiful golden-brown spots and makes flipping easier.
8-Step 8: Flip and Cook the Second Side When the edges lift easily and the bottom has developed light golden spots, it’s time to flip. Slide a thin spatula under the chilla and flip it over in one confident motion. Add a few more drops of oil around the edges. Cook the second side for another 2-3 minutes until it matches the golden color of the first side. Press gently with your spatula to ensure even cooking and contact with the pan.
9-Step 9: Serve Immediately Transfer the cooked chilla to a plate and serve hot. These healthy dal chilla pancakes taste best when fresh and warm. Repeat the process with the remaining batter, adding oil to the pan as needed between each chilla. Stack cooked chillas on a plate and cover loosely with a clean kitchen towel to keep them warm while you cook the remaining batter. This recipe yields approximately 6 to 8 chillas depending on size.
Notes
🌶️ Adjust green chili for spice level and add onions, spinach, or carrots to batter for extra nutrition and variety.
🥄 If batter is too thin and breaks, thicken with a little rice flour and cook first side longer for crispiness.
❄️ Refrigerate cooked chillas up to 5 days or freeze with parchment; reheat on a hot pan for freshness.
- Prep Time: 15 minutes
- Soaking: 4 hours or overnight
- Cook Time: 15 minutes
- Category: Breakfast
- Method: Pan-Fried
- Cuisine: Indian
Nutrition
- Serving Size: 2 pancakes
- Calories: 225 kcal
- Sugar: 1 g
- Sodium: 632 mg
- Fat: 7 g
- Saturated Fat: 1 g
- Unsaturated Fat: 7 g
- Trans Fat: 1 g
- Carbohydrates: 28 g
- Fiber: 14 g
- Protein: 12 g
- Cholesterol: 0 mg
Keywords: masoor dal chilla, red lentil pancakes, crispy savory chilla, gluten free pancakes