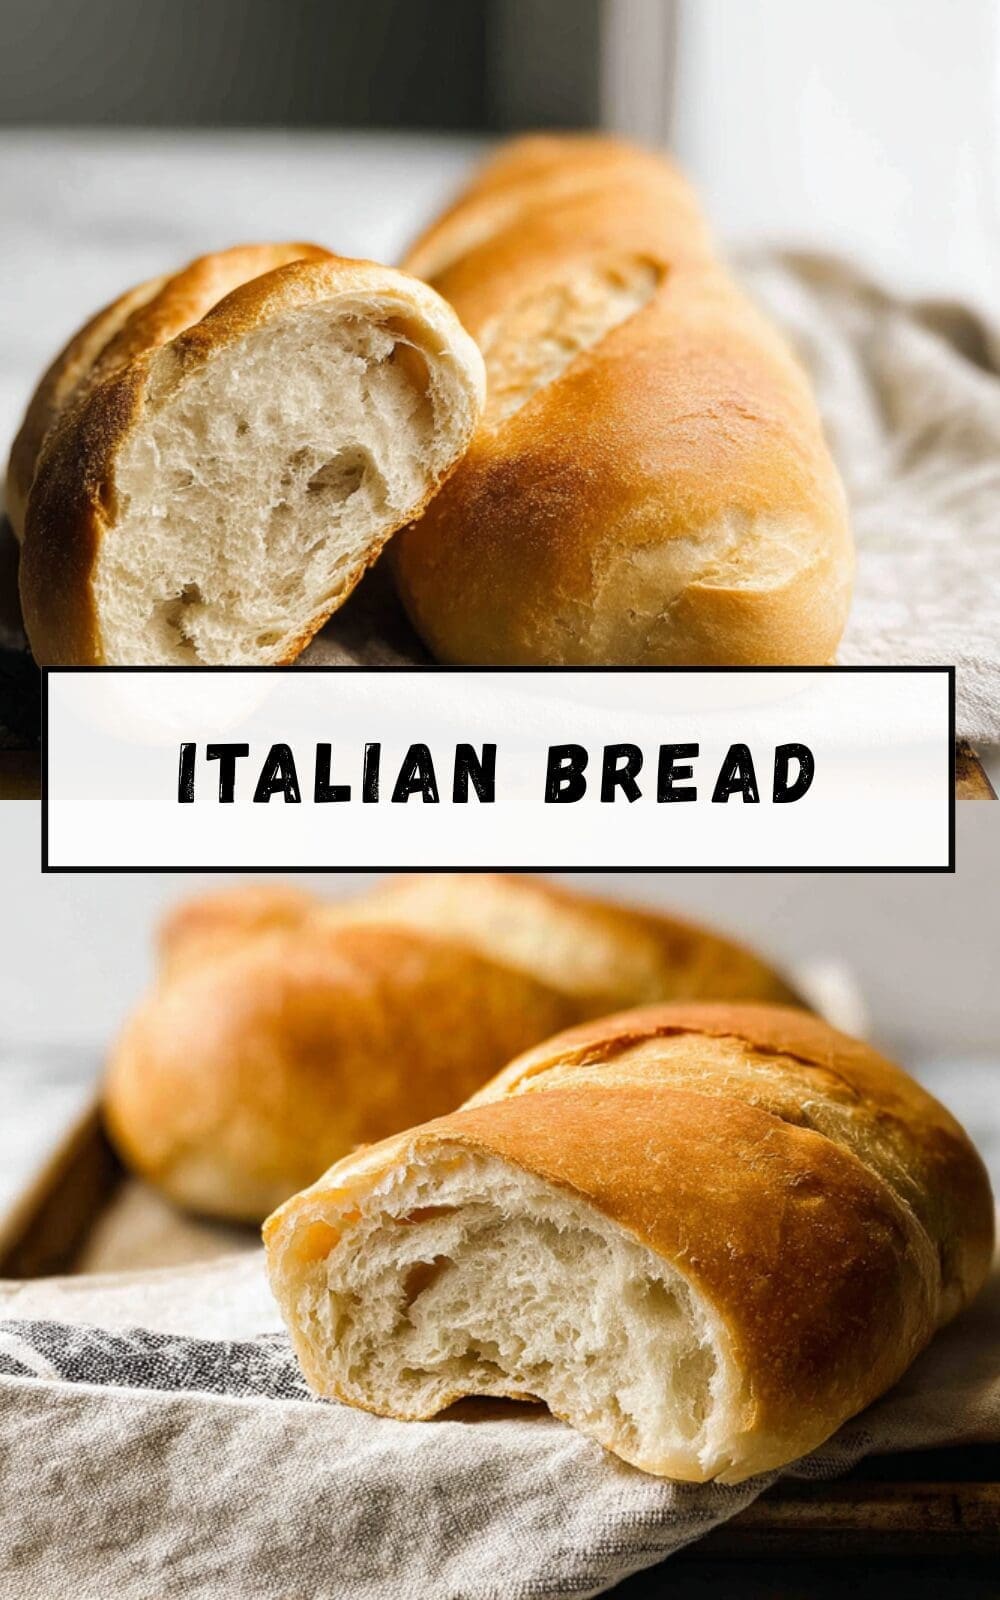
Why You’ll Love This Italian Bread
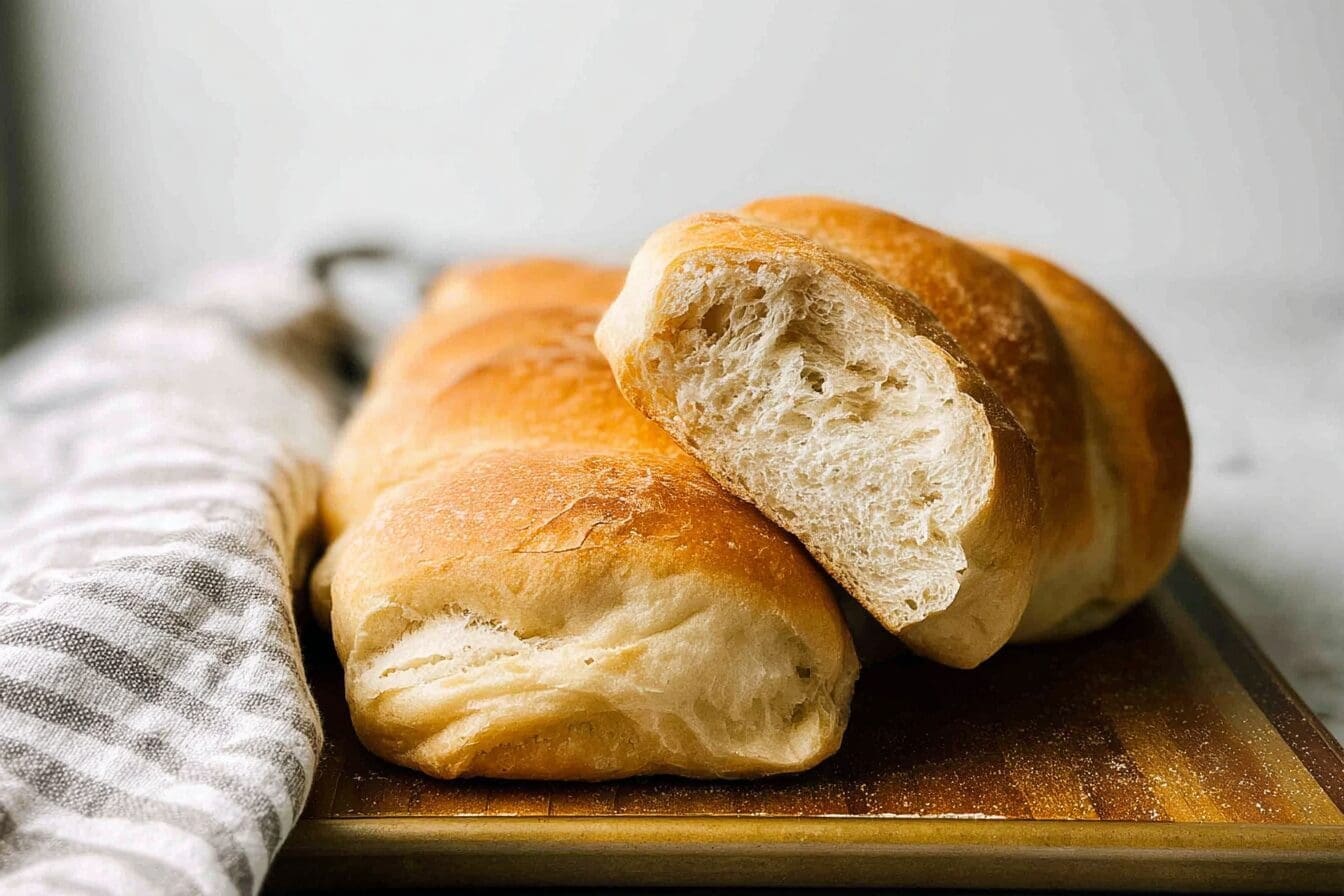
Imagine pulling a warm, fresh loaf of Italian bread from your oven, filling your kitchen with that irresistible aroma. This recipe stands out because it’s simple and straightforward, making it ideal for anyone new to baking or short on time. With minimal ingredients and easy steps, you’ll enjoy soft crust and rich flavor that everyone will love.
One of the best parts is the health benefits from using everyday items like flour and yeast, which provide essential nutrients. This Italian bread can be adapted for various dietary needs, helping you stay on track with your wellness goals. Whether you’re baking for family dinners or quick meals, this bread’s versatility makes it a go-to choice that adds a touch of homemade magic to any occasion.
Beyond its ease, the taste is what truly wins people over, thanks to the natural sweetness and texture. For busy parents or working professionals, this recipe fits perfectly into a hectic schedule without needing special tools. Food enthusiasts and even seniors will appreciate how it brings people together around the table, just like Isabella Hayes shares on her blog.
This Italian bread isn’t just food; it’s a simple joy that makes everyday moments special. Baking it yourself lets you control the ingredients, ensuring a wholesome option for students or diet-conscious individuals. Once you try it, you’ll see why it’s a favorite among home cooks looking for reliable, delicious results.
Jump To
- 1. Why You’ll Love This Italian Bread
- 2. Essential Ingredients for Italian Bread
- 3. How to Prepare the Perfect Italian Bread: Step-by-Step Guide
- 4. Dietary Substitutions to Customize Your Italian Bread
- 5. Mastering Italian Bread: Advanced Tips and Variations
- 6. How to Store Italian Bread: Best Practices
- 7. FAQs: Frequently Asked Questions About Italian Bread
- 8. Italian Bread
Essential Ingredients for Italian Bread
Gathering the right ingredients is the first step to creating delicious Italian bread at home. This section outlines everything you need, focusing on the exact measurements for a successful bake. You’ll find that using fresh, quality items helps achieve that soft crust and rich flavor we’re aiming for.
- 1 ½ tablespoons active dry yeast (about 2 packets)
- ½ cup warm water (110°F)
- ½ teaspoon granulated sugar
- 2 cups hot water (115-120°F)
- 3 tablespoons granulated sugar
- 1 tablespoon salt
- ½ cup vegetable oil (olive oil can be substituted)
- 5 to 6 cups all-purpose flour (more if needed for pliable dough)
- 1 large egg white (for brushing on loaves)
These ingredients come together to make a dough that’s easy to handle and full of flavor. Remember, the warm water activates the yeast, so getting the temperature right is key for a good rise.
How to Prepare the Perfect Italian Bread: Step-by-Step Guide
Ready to make your own Italian bread? This guide walks you through the process in simple steps, ensuring even beginners can succeed. Start by preparing your ingredients and workspace for the best results. The total time is about 2 hours and 15 minutes, including rising and baking, so plan ahead for a rewarding baking session.
Gathering and Proofing the Yeast
First, dissolve 1 ½ tablespoons of active dry yeast in ½ cup of warm water at 110°F, along with ½ teaspoon of granulated sugar. Let this mixture sit for about 5-10 minutes until it becomes foamy, showing the yeast is active. This step is crucial as it ensures your dough will rise properly and give that soft, airy texture.
While the yeast proofs, prepare the rest of the mixture in a large bowl or stand mixer. Combine 2 cups of hot water at 115-120°F with 3 tablespoons of granulated sugar, 1 tablespoon of salt, and ½ cup of vegetable oil (or olive oil if you prefer). Stir these together until well blended, setting the base for your dough’s rich flavor.
Mixing and Rising the Dough
Once the yeast is ready, add 3 cups of all-purpose flour to the liquid mixture and mix well. Then, stir in the yeast mixture thoroughly. Gradually add 2 to 3 more cups of flour, mixing until the dough is blended but still sticky no kneading needed here, which keeps things simple.
Cover the dough with a towel and let it rise in a warm spot for 1 hour. After rising, if the dough feels too sticky, add flour in quarter-cup amounts until it’s workable but not dry. This approach helps maintain the dough’s texture without overworking it, leading to that perfect Italian bread consistency.
Shaping and Baking the Loaves
Divide the dough into 2 or 3 pieces on a floured surface. Roll each piece to your desired length, then roll it up like a jelly roll and place it on a greased cookie sheet with the sealed side down. Tuck the ends underneath for a neat shape and slash the tops diagonally every few inches with a sharp knife.
Cover the loaves and let them rise for another 30 minutes. Preheat your oven to 400°F during this time. For a golden finish, brush the loaves with whisked egg white before baking. Pop them in the oven for 25 to 30 minutes until they’re golden brown. For an extra tip, use an oven thermometer to keep temperatures accurate.
| Step | Time Estimate | Tips |
|---|---|---|
| Proof Yeast | 5-10 minutes | Check for foam to ensure activation |
| Mix and First Rise | 1 hour | Keep in a warm area for best results |
| Shape and Second Rise | 30 minutes | Add flour if needed for handling |
| Bake | 25-30 minutes | Brush with egg white for a crisp crust |
Once baked, cool the loaves on a wire rack before slicing. If you’re adjusting for dietary preferences, like using olive oil, do it during the mixing step. For more ideas on baking, check out the cheesy quick bread recipe on our site, which pairs wonderfully with Italian bread.

Dietary Substitutions to Customize Your Italian Bread
Protein and Main Component Alternatives
Making Italian bread work for your needs is easy with a few swaps. For instance, replace all-purpose flour with gluten-free blends if that’s your preference, ensuring the dough stays pliable. You can also use alternatives like flaxseed meal for binding in vegan versions, keeping the bread’s soft texture intact.
Vegetable, Sauce, and Seasoning Modifications
Switch up the oil by using avocado oil instead of vegetable oil for a new twist on flavor. Add extras like sun-dried tomatoes or fresh herbs to boost taste without much effort. This flexibility makes Italian bread a fun base for experiments, especially for travelers or newlyweds exploring new recipes.
Remember, these changes help suit busy parents or diet-conscious folks. Always test small batches to get the balance right, maintaining that rich flavor we love. For more inspiration on variations, visit the blueberry cottage cheese breakfast bake for complementary ideas.
Mastering Italian Bread: Advanced Tips and Variations
Taking your Italian bread to the next level involves some pro techniques like using a pre-ferment for deeper flavor. This method, where you mix part of the flour and water ahead of time, adds complexity without much extra work. Experiment with hydration levels to get a crustier or softer loaf, depending on what you prefer.
Remember, the key to great bread is patience letting flavors develop slowly makes all the difference.
For flavor variations, try mixing in olives or caramelized onions before shaping the dough. Presentation is simple yet effective; add seeds on top for a nice look, and slice at an angle for elegant servings. If you’re prepping ahead, make the dough the night before and refrigerate it to enhance taste.
These tips are perfect for baking enthusiasts who want to innovate. As an external resource, you can check out this Italian bread recipe on Amanda’s Cookin’ for more ideas on advanced baking.
How to Store Italian Bread: Best Practices
Keeping your Italian bread fresh is key to enjoying it longer. Store it in an airtight container to avoid moisture, which helps maintain that soft crust. For longer storage, wrap it tightly and freeze for up to 3 months, as the dough itself can handle freezing well.
- Refrigerate for short-term use to keep it from going stale.
- Reheat in an oven at 350°F for 5-10 minutes to bring back crispness.
- Slice before freezing for easy meal prep portions.
This method works great for working professionals or families with busy schedules.
FAQs: Frequently Asked Questions About Italian Bread
Can I freeze Italian bread dough to use later?
Yes, you can freeze Italian bread dough for up to 3 months. To do this, wrap the dough tightly in plastic wrap and place it inside a freezer-safe bag. When you’re ready to bake, thaw the dough at room temperature for about 4 hours. Avoid freezing dough for too long after it has been refrigerated, as yeast activity changes. After thawing, shape the dough as needed and bake according to your recipe.
What is the ideal water temperature for activating yeast in Italian bread dough?
The ideal water temperature for activating yeast is about 110°F (43°C). Water hotter than this can kill the yeast, preventing the dough from rising, while cooler water will slow the fermentation process, resulting in a longer rise time. Using a kitchen thermometer helps ensure you get the temperature right for consistent results.
Can I substitute olive oil for vegetable oil in Italian bread recipes?
Yes, olive oil is a perfect substitute for vegetable oil in Italian bread recipes. It adds a slightly richer flavor that complements the bread’s texture and traditional taste. When substituting, use the same amount of olive oil as the recipe calls for vegetable oil.
What type of flour is best for making authentic Italian bread?
The most commonly used flour for Italian bread is all-purpose white flour. It provides the right balance of protein for gluten development, resulting in a chewy crust and soft crumb. Some recipes may call for bread flour for extra strength, but all-purpose flour works well for most home bakers.
How is Italian bread different from French bread?
Italian bread typically contains flour, yeast, salt, water, and olive oil or other fats, giving it a softer crust and wider shape. French bread, such as baguettes, traditionally contains only flour, yeast, salt, and water, with no oils or fats. French bread tends to be longer, thinner, and crispier, while Italian bread is usually shorter and has a more tender crumb.

Italian Bread
- Total Time: 2 hours 15 minutes
- Yield: 2 to 3 loaves 1x
- Diet: Vegetarian
Description
🍞 This homemade Italian bread recipe creates a soft crust with rich, authentic flavor that complements any meal.
🌿 Perfect for sandwiches or serving alongside your favorite dishes, it’s a versatile and satisfying bread to bake at home.
Ingredients
1 ½ tablespoons active dry yeast (about 2 packets)
½ cup warm water (110°F)
½ teaspoon granulated sugar
2 cups hot water (115-120°F)
3 tablespoons granulated sugar
1 tablespoon salt
½ cup vegetable oil (olive oil can be substituted)
5 to 6 cups all-purpose flour (more if needed for pliable dough)
1 large egg white for brushing on loaves
Instructions
1-Gathering and Proofing the Yeast: First, dissolve 1 ½ tablespoons of active dry yeast in ½ cup of warm water at 110°F, along with ½ teaspoon of granulated sugar. Let this mixture sit for about 5-10 minutes until it becomes foamy, showing the yeast is active. This step is crucial as it ensures your dough will rise properly and give that soft, airy texture.
2-Gathering and Proofing the Yeast: While the yeast proofs, prepare the rest of the mixture in a large bowl or stand mixer. Combine 2 cups of hot water at 115-120°F with 3 tablespoons of granulated sugar, 1 tablespoon of salt, and ½ cup of vegetable oil (or olive oil if you prefer). Stir these together until well blended, setting the base for your dough’s rich flavor.
3-Mixing and Rising the Dough: Once the yeast is ready, add 3 cups of all-purpose flour to the liquid mixture and mix well. Then, stir in the yeast mixture thoroughly. Gradually add 2 to 3 more cups of flour, mixing until the dough is blended but still sticky no kneading needed here, which keeps things simple.
4-Mixing and Rising the Dough: Cover the dough with a towel and let it rise in a warm spot for 1 hour. After rising, if the dough feels too sticky, add flour in quarter-cup amounts until it’s workable but not dry. This approach helps maintain the dough’s texture without overworking it, leading to that perfect Italian bread consistency.
5-Shaping and Baking the Loaves: Divide the dough into 2 or 3 pieces on a floured surface. Roll each piece to your desired length, then roll it up like a jelly roll and place it on a greased cookie sheet with the sealed side down. Tuck the ends underneath for a neat shape and slash the tops diagonally every few inches with a sharp knife.
6-Shaping and Baking the Loaves: Cover the loaves and let them rise for another 30 minutes. Preheat your oven to 400°F during this time. For a golden finish, brush the loaves with whisked egg white before baking. Pop them in the oven for 25 to 30 minutes until they’re golden brown. For an extra tip, use an oven thermometer to keep temperatures accurate.
7-Shaping and Baking the Loaves: Once baked, cool the loaves on a wire rack before slicing. If you’re adjusting for dietary preferences, like using olive oil, do it during the mixing step. For more ideas on baking, check out the cheesy quick bread recipe on our site, which pairs wonderfully with Italian bread.
Notes
🌡️ Use warm water (110°F) to proof the yeast effectively for the best rise.
🍶 Vegetable oil is ideal, but olive oil can be substituted for a different flavor.
⏳ Add flour gradually after the first rise to keep the dough workable without drying it out.
- Prep Time: 15 minutes
- Rising Time: 1 hour 30 minutes
- Cook Time: 30 minutes
- Category: Bread
- Method: No-knead rising and baking
- Cuisine: Italian
Nutrition
- Serving Size: 1 slice
- Calories: 160 calories
- Sugar: 3 grams
- Sodium: 230 mg
- Fat: 5 grams
- Saturated Fat: 1 gram
- Unsaturated Fat: 4 grams
- Trans Fat: 0 grams
- Carbohydrates: 26 grams
- Fiber: 1 gram
- Protein: 4 grams
- Cholesterol: 0 mg
Keywords: Italian bread, homemade bread, soft crust bread, easy bread recipe