
Why You’ll Love This Homemade Naan
There’s something magical about tearing into a piece of freshly made homemade naan the charred spots, the pillowy texture, the way it soaks up every bit of curry sauce on your plate. This recipe brings that restaurant-quality experience right into your kitchen, and I promise you’ll wonder why you ever bought store-bought versions.
Ease of Preparation
Unlike many bread recipes that demand hours of kneading and complicated techniques, this naan requires no kneading at all. You simply mix the ingredients, let the dough rest, roll it out, and cook it in a hot skillet. The entire active preparation takes roughly 20 minutes, with the rising time doing all the heavy lifting for you. Even if you’ve never baked bread before, this recipe walks you through each step so clearly that success is practically guaranteed.
Health Benefits
Making your own naan puts you in complete control of what goes into your bread. Each naan contains just 223 calories and offers 5 grams of protein, making it a satisfying addition to any meal. You control the salt, the type of fat used, and can skip any preservatives or additives found in commercial versions. Plus, the fermentation process from the yeast creates beneficial compounds that can aid digestion according to research on fermented foods from the National Center for Biotechnology Information.
Versatility
This homemade naan adapts beautifully to whatever you’re craving. Serve it plain with a brush of butter, load it with garlic and herbs, or stuff it with melting cheese for an indulgent treat. It pairs wonderfully with curries, works as a wrap for sandwiches, or stands alone as a snack with dips. The basic dough welcomes endless variations, so you never get bored.
Distinctive Flavor
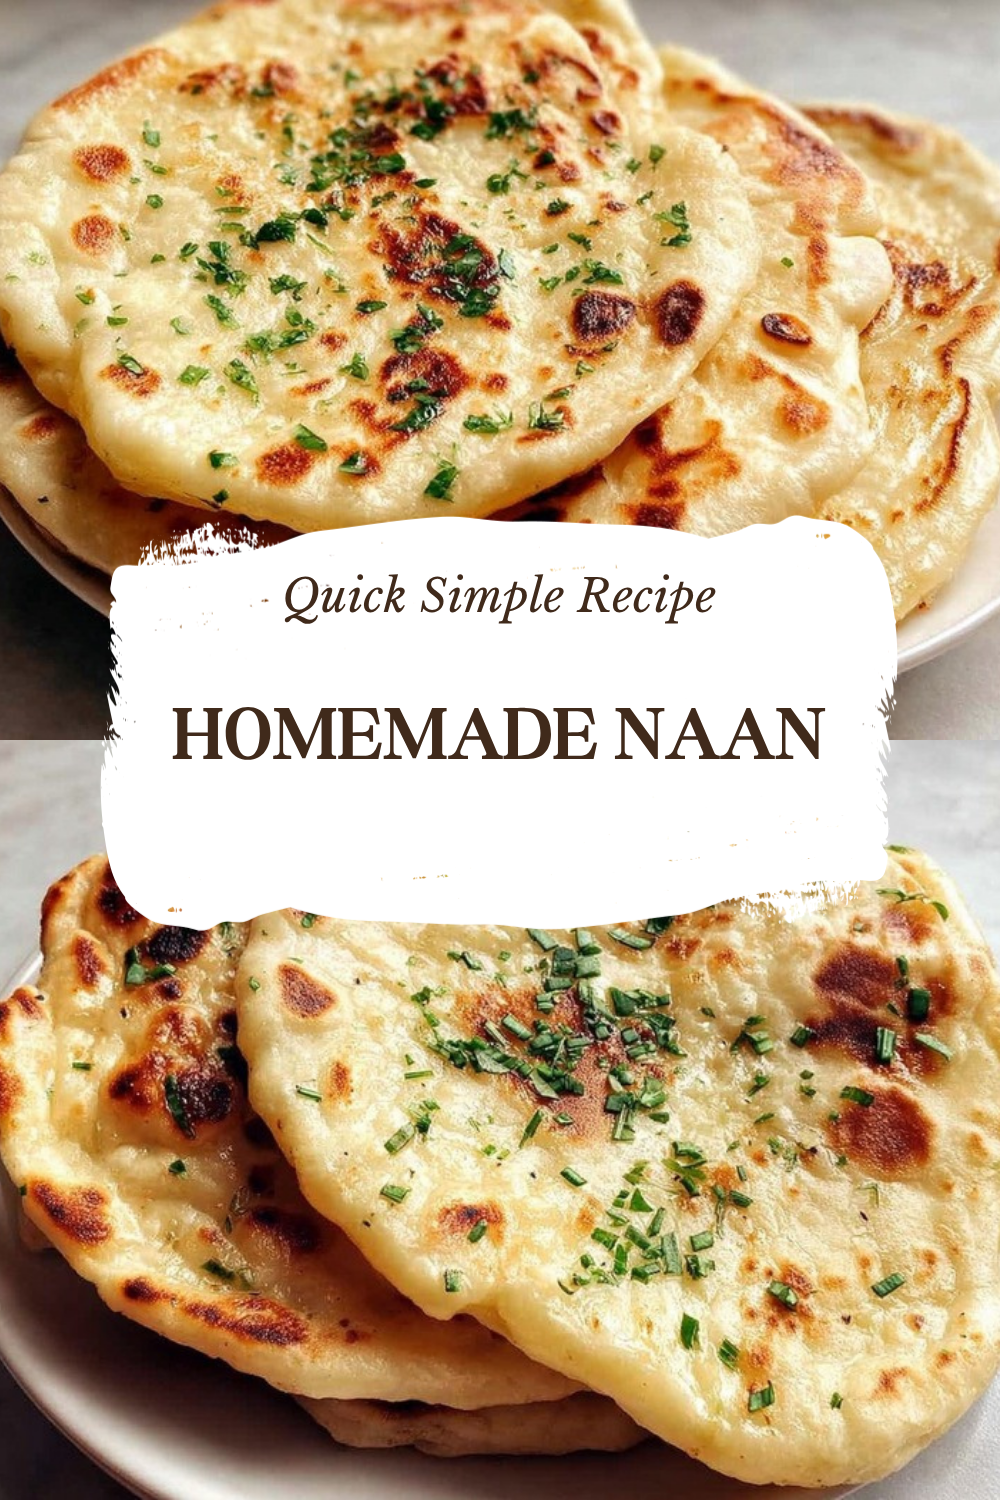
The combination of ghee, a touch of sugar, and the high-heat cooking method creates a flavor profile that’s distinctly different from other flatbreads. Ghee adds a rich, nutty taste while raising the smoke point for better browning. Those characteristic charred spots contribute a subtle smokiness that elevates every bite, and finishing with fresh cilantro and nigella seeds adds aromatic complexity that makes this bread truly memorable.
Jump To
- 1. Why You’ll Love This Homemade Naan
- 2. Essential Ingredients for Homemade Naan
- 3. How to Prepare the Perfect Homemade Naan: Step-by-Step Guide
- 4. Nutritional Information
- 5. Dietary Substitutions to Customize Your Homemade Naan
- 6. Mastering Homemade Naan: Advanced Tips and Variations
- 7. How to Store Homemade Naan: Best Practices
- 8. FAQs: Frequently Asked Questions About Homemade Naan
- 9. Homemade Naan
Essential Ingredients for Homemade Naan
Main Dough Ingredients
- 1 teaspoon instant or rapid rise yeast Creates the rise and air pockets for fluffy texture
- 1/2 cup warm water at about 105°F (40°C) Activates the yeast without killing it
- 1 tablespoon white sugar Feeds the yeast and adds subtle sweetness
- 2 tablespoons full fat milk (low fat acceptable) Contributes richness and softness to the dough
- 1 and 1/2 tablespoons whisked egg (approximately half an egg) Provides structure and tenderness without drying out the bread
- 1/2 teaspoon cooking or kosher salt Enhances overall flavor
- 1 and 3/4 cups bread flour or all-purpose/plain flour Forms the base; bread flour yields softer results
- 30 grams (2 tablespoons) melted ghee or unsalted butter for dough Creates tenderness and distinctive flavor
Finishing Ingredients
- 30 grams (2 tablespoons) melted ghee or butter for brushing Adds shine and richness to finished naan
- 1 small garlic clove for optional garlic butter Infuses savory aroma
- Nigella seeds for garnish Provides subtle onion-like flavor and visual appeal
- Finely chopped coriander/cilantro for garnish Adds fresh, bright notes
For Cheese Naan
- Shredded melting cheese such as Monterey Jack, cheddar, tasty, or colby (about 1/4 cup per naan) Creates gooey, melty center
Special Dietary Options
Vegan: Replace the milk with unsweetened plant-based milk, substitute the egg with 1 tablespoon of plain dairy-free yogurt or a flax egg, and use oil instead of ghee or butter.
Gluten-free: Use a 1:1 gluten-free flour blend designed for bread baking. The texture will differ slightly but still yields delicious results.
Lower calorie: Reduce the ghee or butter in the dough and skip the finishing brush, or use a light cooking spray. Each plain naan contains 223 calories according to nutritional data from FatSecret’s flatbread nutritional database.
How to Prepare the Perfect Homemade Naan: Step-by-Step Guide
Step 1: Bloom the Yeast
Start by activating your yeast, which is essential for achieving that fluffy, bubbly texture. In a small bowl, combine 1 teaspoon of instant or rapid-rise yeast with 1/2 cup of warm water at approximately 105°F (40°C). Add 1 tablespoon of white sugar to feed the yeast. Cover the bowl and let it sit for about 10 minutes until the mixture becomes foamy on top. This foaming indicates that your yeast is alive and ready to work its magic. If no foam appears after 10 minutes, your yeast may be dead, and you should start fresh with a new packet.
Step 2: Prepare the Wet Ingredients
While the yeast blooms, whisk together 2 tablespoons of full-fat milk and 1 and 1/2 tablespoons of whisked egg in a separate small bowl. Using approximately half an egg prevents the bread from becoming too dense or dry. The milk adds richness and helps create a softer crumb, while the egg contributes structure and a lovely golden color when cooked.
Step 3: Sift the Dry Ingredients
In a large mixing bowl, sift together 1 and 3/4 cups of bread flour and 1/2 teaspoon of salt. Sifting removes any lumps and aerates the flour, which helps create a lighter texture in your final bread. Bread flour is preferred because its higher protein content develops more gluten, resulting in that characteristic chewiness that makes naan so satisfying. However, all-purpose flour works perfectly fine if that’s what you have on hand.
Step 4: Combine Everything
Make a well in the center of your sifted flour. Pour in the foamy yeast mixture, 30 grams (2 tablespoons) of melted ghee or unsalted butter, and the egg-milk mixture. Using a spatula or wooden spoon, mix everything together until the ingredients are mostly combined. The dough will look shaggy and uneven at this point, which is completely normal.
Step 5: Form the Dough
Now use your hands to bring the dough together into a soft, slightly sticky ball. There’s no need to knead this dough on a counter simply press and fold it within the bowl until it forms a cohesive mass. The dough should feel tacky but not so sticky that it coats your hands completely. If it’s too wet, add flour one tablespoon at a time, but be sparing. A slightly sticky dough produces the fluffiest results.
Step 6: First Rise
Cover the bowl tightly with cling wrap or a damp kitchen towel. Place it in a warm location I often set mine near a preheating oven or on top of a running clothes dryer. Let the dough rise for 1 to 1.5 hours until it has doubled in size. This slow fermentation develops flavor and creates the internal structure that will puff up during cooking.
Step 7: Divide and Shape
Once doubled, gently transfer the dough to a lightly floured surface. Divide it into 6 equal pieces using a bench scraper or knife. Shape each piece into a smooth ball by tucking the edges underneath and rolling gently between your palms. Handle the dough gently to preserve the air pockets that have formed during rising.
Step 8: Second Rest
Place the shaped balls on a floured tray, dust them lightly with flour, and cover loosely with a tea towel. Let them rest for 15 minutes until they’ve increased in size by about 50%. This shorter rest relaxes the gluten, making the dough easier to roll out without springing back.
Step 9: Roll Out the Naan
Working with one ball at a time, flatten it gently with your palm. Use a rolling pin to roll it out to 3 to 4 millimeters thick and approximately 16 centimeters wide. Don’t worry about making a perfect circle traditional naan has an organic, slightly irregular shape. Keep the thickness consistent for even cooking, and avoid rolling too thin, or your naan will become crisp like a cracker rather than soft and pillowy.
Step 10: Heat Your Cooking Surface
Place a cast iron skillet over high heat and let it get nice and hot you want it to be lightly smoking. Cast iron is ideal because it retains heat beautifully and creates those characteristic charred spots. Lightly rub the surface with oil if needed, but avoid non-stick pans as they can’t handle the high heat required for proper naan cooking.
Step 11: Cook the Naan
Lay one rolled naan onto the hot skillet. Cook for 1 to 1.5 minutes until the underside develops a deep golden color and bubbles begin forming on top. Flip the naan using tongs and cook the second side for about 1 minute until golden bubbles appear. Watch carefully as the high heat can quickly go from perfect to burnt. Adjust your heat as needed to maintain consistent results.
Step 12: Finish and Serve
Immediately brush the hot naan with 30 grams (2 tablespoons) of melted ghee or butter. For garlic naan, mix the melted butter with one small crushed garlic clove before brushing. Sprinkle with nigella seeds and finely chopped coriander or cilantro. Serve warm while still soft and pliable.
Cheese Naan Variation
For an indulgent twist, roll out your naan as described above and brush with butter. Place approximately 1/4 cup of shredded melting cheese like Monterey Jack, cheddar, or colby in the center. Gather the edges together like a money bag to seal the cheese inside, then flip it smooth side up and gently roll it to 6 to 7 millimeters thick. Cook in your hot skillet for 1 to 1.5 minutes until puffed and golden, then flip and cook for another 45 seconds. The cheese melts into a gooey, stretchy center that’s absolutely irresistible.
Nutritional Information
The following table shows the nutritional breakdown per naan, excluding finishing butter or ghee and cheese fillings:
| Nutrient | Amount |
|---|---|
| Calories | 223 |
| Carbohydrates | 29 grams |
| Protein | 5 grams |
| Fat | 10 grams |
| Saturated Fat | 6 grams |
| Cholesterol | 36 milligrams |
| Sodium | 277 milligrams |
| Fiber | 1 gram |
| Sugar | 2 grams |
| Vitamin A | 287 IU |
| Calcium | 17 milligrams |
| Iron | 1 milligram |

Dietary Substitutions to Customize Your Homemade Naan
Protein and Main Component Alternatives
While traditional naan relies on wheat flour and dairy, several substitutions can accommodate different dietary needs without sacrificing flavor or texture. For a protein-rich variation, try replacing half the bread flour with chickpea flour. This adds earthy flavor and increases the protein content while maintaining a tender crumb. Another option is incorporating Greek yogurt in place of the milk and egg mixture use 3 tablespoons of plain Greek yogurt for added protein and a subtle tang that complements curry dishes beautifully.
For those avoiding eggs entirely, substitute the 1 and 1/2 tablespoons of whisked egg with 1 tablespoon of plain yogurt or 1 tablespoon of milk mixed with a pinch of baking powder. These alternatives provide moisture and binding properties similar to egg without the allergen concerns. The yogurt option actually creates an even softer, more tender result that some people prefer.
Vegetable, Sauce, and Seasoning Modifications
The flavor profile of your homemade naan can change dramatically with simple seasoning swaps. Instead of nigella seeds, try topping with sesame seeds, poppy seeds, or everything bagel seasoning for a different crunch and taste. Fresh herbs like chopped green onions or mint offer bright alternatives to cilantro. For a warming spice kick, mix a pinch of cumin or coriander powder into your finishing butter.
If you’re serving this alongside something like my creamy beef and bowtie pasta, consider brushing your naan with garlic-infused olive oil rather than plain butter to complement the rich sauce. For a sweet variation that works wonderfully with breakfast dishes, skip the savory toppings and brush with honey butter, then sprinkle with cinnamon sugar. The dough itself is a blank canvas that welcomes both savory and sweet applications, so don’t hesitate to experiment with flavors that match your meal.
Mastering Homemade Naan: Advanced Tips and Variations
Pro Cooking Techniques
The secret to achieving those perfect bubbles lies in heat management. Your skillet needs to be screaming hot before the naan touches it. Test the temperature by sprinkling a few drops of water on the surface they should sizzle and evaporate instantly. If your naan isn’t puffing up, your pan likely isn’t hot enough. Conversely, if it’s burning before cooking through, reduce the heat slightly. Finding that sweet spot takes practice, so don’t get discouraged by your first few attempts.
Press the naan gently with a spatula while cooking to encourage even contact with the hot surface and promote bubble formation.
Another technique worth trying is the “slap” method used in professional kitchens. Rather than carefully laying the naan on the skillet, quickly slap it down with confidence. This transfers it faster without losing heat and creates better initial contact for those characteristic charred spots.
Flavor Variations
Once you’ve mastered the basic recipe, the variations are endless. Peshawari naan stuffs the dough with a sweet mixture of coconut, nuts, and raisins for a dessert-like treat. Kashmiri naan incorporates dried fruits and nuts directly into the dough. For a spicy kick, mix finely chopped jalapenos into the dough or top with red chili flakes and butter. Garlic lovers can increase the garlic butter intensity by letting crushed cloves steep in warm butter for 30 minutes before brushing.
Herbed naan offers another dimension of flavor. Mix finely chopped rosemary, thyme, or oregano into the dough, or sprinkle them on top with the butter. A seeded variation might include both nigella and sesame seeds pressed into the dough before cooking, creating a multi-textured topping that adds crunch with every bite.
Presentation Tips
Naan looks most appealing when served warm and slightly charred. Stack cooked naan in a clean kitchen towel to keep them soft and warm while you finish the batch. For presentation, fan them slightly on a large platter rather than stacking perfectly flat. Garnish with extra fresh cilantro and a light sprinkle of paprika for color contrast. If serving with a main dish like my slow cooker pepper steak, arrange the naan around the plate’s edge to create an inviting, restaurant-style presentation.
Make-Ahead Options
For busy schedules, prepare the dough the night before. After the first rise, punch down the dough, cover tightly, and refrigerate overnight. The cold slows fermentation, developing deeper flavor complexity. Remove the dough 30 minutes before cooking to let it come to room temperature, then proceed with dividing and shaping. Alternatively, freeze shaped, uncooked dough balls on a baking sheet, then transfer to a freezer bag. Thaw completely in the refrigerator overnight before rolling and cooking. You can also fully cook naan, cool completely, and freeze with parchment paper between pieces for up to one month.
How to Store Homemade Naan: Best Practices
Refrigeration
Cooked naan stays fresh at room temperature for about 2 hours, but for longer storage, refrigeration is your best option. Allow the naan to cool completely on a wire rack never store warm bread as condensation creates sogginess. Wrap each piece individually in plastic wrap or place them in an airtight container with parchment paper between layers. Refrigerated naan keeps well for 3 to 4 days. The texture will firm up slightly in the cold, but proper reheating restores the softness.
Freezing
For longer storage, freezing works beautifully. Cool the naan completely, then wrap each piece tightly in plastic wrap. Place wrapped pieces in a freezer-safe bag, removing as much air as possible before sealing. Label with the date and freeze for up to 3 months. Frozen naan thaws quickly at room temperature in about 30 minutes, or you can reheat directly from frozen using the methods below.
Reheating
The best method for reheating naan mimics the original cooking process. Heat a dry skillet over medium-high heat and warm each piece for 30 to 45 seconds per side until pliable and hot throughout. For a softer result, sprinkle a few drops of water on the naan before heating the steam helps restore moisture. Alternatively, wrap naan in foil and warm in a 350°F oven for 10 minutes. Microwave reheating works in a pinch but tends to make the bread rubbery, so use this method only when time is extremely tight.
Meal Prep Considerations
When planning meals ahead, consider cooking a double batch of naan and freezing half for future use. The dough can also be prepared through the first rise, divided, and frozen as individual balls. Thaw overnight in the refrigerator, bring to room temperature, and proceed with rolling and cooking. This approach lets you enjoy fresh naan any day of the week with minimal active preparation time. Cooked naan also works wonderfully for meal prep use it throughout the week for wraps, as a base for quick pizzas, or simply as a side for leftover curry.
FAQs: Frequently Asked Questions About Homemade Naan
What flour should I use for homemade naan?
Bread flour is ideal for homemade naan because it creates a fluffier, softer texture due to its higher protein content. All-purpose flour works fine as a substitute if bread flour isn’t available—the difference is small, and it still yields great results. Start with 2-3 cups of flour for a standard recipe, sifting it to avoid lumps. Mix in yeast, warm water, sugar, salt, and a bit of oil until a soft, sticky dough forms. This simple swap keeps your naan pillowy without extra effort. For best results, measure flour by weight (about 500g for bread flour) to ensure consistency across batches.
Can I use instant yeast in naan dough?
Yes, instant or rapid-rise yeast is perfect for naan dough and produces the fluffiest results. Dissolve 1-2 teaspoons in 1/2 cup warm water (around 110°F) with 1 teaspoon sugar, letting it sit 5-10 minutes until foamy—this activates it fully. Mix into flour, salt, and oil for a smooth dough. No kneading needed; just combine until it forms a ball. Let rise 1-1.5 hours in a warm spot until doubled. This method skips long proofs and delivers restaurant-style bubbles and chew. Avoid active dry yeast if possible, as instant works faster and more reliably at home.
Does naan dough need to rise before cooking?
Yes, rising is key for fluffy homemade naan. After mixing, let the dough rest covered in a warm place for 1-1.5 hours until it doubles in size—this develops air pockets for that signature texture. Divide into 8-10 balls, cover, and rest another 15 minutes. Skip this, and your naan will be dense. For make-ahead, refrigerate dough overnight; it enhances flavor and structure. Bring to room temp before rolling. Pro tip: Poke risen dough gently—it should spring back slowly. This step takes minimal hands-on time but transforms basic dough into light, airy flatbread ready for stovetop charring.
How thick should I roll naan dough and how do I cook it?
Roll naan dough to 3-4 mm thick (about 1/8 inch) for optimal fluffiness—thinner crisps it up, thicker hinders bubbles. Use a floured surface and rolling pin, stretching gently into ovals. Heat a cast iron skillet over high heat (no oil needed, or lightly wipe with oil). Cook first side 60-90 seconds until golden bubbles form, flip, and cook 45-60 seconds more for char marks. Avoid non-stick pans at high heat to prevent damage. Brush hot naan with butter or ghee, add garlic and herbs. Yields 8-10 pieces in 20 minutes total cooking time. Perfect stovetop method mimics tandoor results.
Can I make cheese naan or prepare dough ahead?
For cheese naan, roll plain dough thin, add 2-3 tbsp shredded melting cheese like Monterey Jack in the center, pinch edges to seal, then gently re-roll flat. Cook as usual—the cheese oozes and stretches beautifully. Monterey Jack beats mozzarella for flavor. Make dough ahead by refrigerating overnight after initial mix; flavor improves, and bring to room temp for rising before cooking. Cooked naan stores in an airtight bag up to 2 days or freezes well (reheat in foil at 350°F). Skip yogurt to avoid gumminess. These tweaks let you prep effortlessly for meals, serving with curries or as appetizers.

Homemade Naan
- Total Time: 2 hours 30 minutes
- Yield: 6 naan
- Diet: Vegetarian
Description
🍞 Bake up fluffy, bubbly, chewy naan at home with golden char and authentic tandoor-like texture using just a skillet – no oven needed.
🥙 Versatile and pillowy soft, this easy recipe pairs perfectly with curries, dips, or as cheese-stuffed delights for irresistible meals.
Ingredients
– 1 teaspoon instant or rapid rise yeast Creates the rise and air pockets for fluffy texture
– 1/2 cup warm water at about 105°F (40°C) Activates the yeast without killing it
– 1 tablespoon white sugar Feeds the yeast and adds subtle sweetness
– 2 tablespoons full fat milk (low fat acceptable) Contributes richness and softness to the dough
– 1 and 1/2 tablespoons whisked egg (approximately half an egg) Provides structure and tenderness without drying out the bread
– 1/2 teaspoon cooking or kosher salt Enhances overall flavor
– 1 and 3/4 cups bread flour or all-purpose/plain flour Forms the base; bread flour yields softer results
– 30 grams (2 tablespoons) melted ghee or unsalted butter for dough Creates tenderness and distinctive flavor
– 30 grams (2 tablespoons) melted ghee or butter for brushing Adds shine and richness to finished naan
– 1 small garlic clove for optional garlic butter Infuses savory aroma
– Nigella seeds for garnish Provides subtle onion-like flavor and visual appeal
– Finely chopped coriander/cilantro for garnish Adds fresh, bright notes
– Shredded melting cheese such as Monterey Jack, cheddar, tasty, or colby (about 1/4 cup per naan) Creates gooey, melty center
Instructions
1-Step 1: Bloom the Yeast Start by activating your yeast, which is essential for achieving that fluffy, bubbly texture. In a small bowl, combine 1 teaspoon of instant or rapid-rise yeast with 1/2 cup of warm water at approximately 105°F (40°C). Add 1 tablespoon of white sugar to feed the yeast. Cover the bowl and let it sit for about 10 minutes until the mixture becomes foamy on top. This foaming indicates that your yeast is alive and ready to work its magic. If no foam appears after 10 minutes, your yeast may be dead, and you should start fresh with a new packet.
2-Step 2: Prepare the Wet Ingredients While the yeast blooms, whisk together 2 tablespoons of full-fat milk and 1 and 1/2 tablespoons of whisked egg in a separate small bowl. Using approximately half an egg prevents the bread from becoming too dense or dry. The milk adds richness and helps create a softer crumb, while the egg contributes structure and a lovely golden color when cooked.
3-Step 3: Sift the Dry Ingredients In a large mixing bowl, sift together 1 and 3/4 cups of bread flour and 1/2 teaspoon of salt. Sifting removes any lumps and aerates the flour, which helps create a lighter texture in your final bread. Bread flour is preferred because its higher protein content develops more gluten, resulting in that characteristic chewiness that makes naan so satisfying. However, all-purpose flour works perfectly fine if that’s what you have on hand.
4-Step 4: Combine Everything Make a well in the center of your sifted flour. Pour in the foamy yeast mixture, 30 grams (2 tablespoons) of melted ghee or unsalted butter, and the egg-milk mixture. Using a spatula or wooden spoon, mix everything together until the ingredients are mostly combined. The dough will look shaggy and uneven at this point, which is completely normal.
5-Step 5: Form the Dough Now use your hands to bring the dough together into a soft, slightly sticky ball. There’s no need to knead this dough on a counter simply press and fold it within the bowl until it forms a cohesive mass. The dough should feel tacky but not so sticky that it coats your hands completely. If it’s too wet, add flour one tablespoon at a time, but be sparing. A slightly sticky dough produces the fluffiest results.
6-Step 6: First Rise Cover the bowl tightly with cling wrap or a damp kitchen towel. Place it in a warm location I often set mine near a preheating oven or on top of a running clothes dryer. Let the dough rise for 1 to 1.5 hours until it has doubled in size. This slow fermentation develops flavor and creates the internal structure that will puff up during cooking.
7-Step 7: Divide and Shape Once doubled, gently transfer the dough to a lightly floured surface. Divide it into 6 equal pieces using a bench scraper or knife. Shape each piece into a smooth ball by tucking the edges underneath and rolling gently between your palms. Handle the dough gently to preserve the air pockets that have formed during rising.
8-Step 8: Second Rest Place the shaped balls on a floured tray, dust them lightly with flour, and cover loosely with a tea towel. Let them rest for 15 minutes until they’ve increased in size by about 50%. This shorter rest relaxes the gluten, making the dough easier to roll out without springing back.
9-Step 9: Roll Out the Naan Working with one ball at a time, flatten it gently with your palm. Use a rolling pin to roll it out to 3 to 4 millimeters thick and approximately 16 centimeters wide. Don’t worry about making a perfect circle traditional naan has an organic, slightly irregular shape. Keep the thickness consistent for even cooking, and avoid rolling too thin, or your naan will become crisp like a cracker rather than soft and pillowy.
10-Step 10: Heat Your Cooking Surface Place a cast iron skillet over high heat and let it get nice and hot you want it to be lightly smoking. Cast iron is ideal because it retains heat beautifully and creates those characteristic charred spots. Lightly rub the surface with oil if needed, but avoid non-stick pans as they can’t handle the high heat required for proper naan cooking.
11-Step 11: Cook the Naan Lay one rolled naan onto the hot skillet. Cook for 1 to 1.5 minutes until the underside develops a deep golden color and bubbles begin forming on top. Flip the naan using tongs and cook the second side for about 1 minute until golden bubbles appear. Watch carefully as the high heat can quickly go from perfect to burnt. Adjust your heat as needed to maintain consistent results.
12-Step 12: Finish and Serve Immediately brush the hot naan with 30 grams (2 tablespoons) of melted ghee or butter. For garlic naan, mix the melted butter with one small crushed garlic clove before brushing. Sprinkle with nigella seeds and finely chopped coriander or cilantro. Serve warm while still soft and pliable.
Notes
🦠 Always bloom the yeast first for maximum fluffiness and rise.
🥛 Use bread flour for the softest, chewiest texture; all-purpose works too.
🔥 High-heat cast iron skillet creates those signature bubbles – avoid non-stick.
- Prep Time: 20 minutes
- Rising Time: 2 hours
- Cook Time: 10 minutes
- Category: Bread
- Method: Stovetop
- Cuisine: Indian
Nutrition
- Serving Size: 1 naan
- Calories: 223 kcal
- Sugar: 2g
- Sodium: 277mg
- Fat: 10g
- Saturated Fat: 6g
- Unsaturated Fat: 4g
- Trans Fat: 0g
- Carbohydrates: 29g
- Fiber: 1g
- Protein: 5g
- Cholesterol: 36mg
Keywords: naan recipe, fluffy naan, bubbly naan, chewy naan