Description
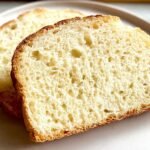
🍞 Discover the joy of baking your own soft, fluffy homemade bread with this beginner-friendly recipe that fills your home with an irresistible aroma.
🥖 Perfect for novices, these easy steps yield professional results using simple ingredients, saving money and impressing family and friends.
Ingredients
– 2 cups warm water (105-115 degrees Fahrenheit)
– 1 tablespoon active dry yeast
– 1/4 cup honey or sugar
– 2 teaspoons salt
– 2 tablespoons oil (canola or vegetable)
– 4 to 5 1/2 cups all-purpose or bread flour
Instructions
1-Step 1: Proofing the Yeast Begin by proofing the yeast to ensure it is active. In a large bowl, combine 1 tablespoon of active dry yeast with 2 cups of warm water (105-115 degrees Fahrenheit). Add a pinch of sugar or honey to feed the yeast. Stir gently and let the mixture rest for 5-10 minutes. The yeast should become foamy and bubbly, indicating it is alive and ready to work. If you see no foam after 10 minutes, your yeast may be inactive and should be replaced with fresh yeast from the refrigerator.
2-Step 2: Mixing the Initial Dough Once your yeast is proofed, add the remaining sugar or honey (about 1/4 cup total), 2 teaspoons of salt, and 2 tablespoons of oil to the bowl. Mix these ingredients well to combine. Add 3 cups of flour and stir thoroughly until no dry flour remains. This initial mixing helps develop the foundation of your dough. The mixture will still be quite wet and sticky at this point, which is perfectly normal for this easy bread recipe.
3-Step 3: Gradually Adding More Flour Add 1 more cup of flour and mix to combine completely. Now comes the important part: gradually add more flour, about 1/2 cup at a time, while mixing continuously. Watch carefully as the dough begins to pull away from the sides of the bowl. Stop adding flour when the dough still feels slightly sticky to the touch but is manageable and holds together. This homemade bread easy steps method prevents over-flouring, which creates dense, heavy bread.
4-Step 4: Kneading the Dough Turn the dough onto a lightly floured surface and knead by hand for 5-8 minutes until smooth and elastic. Alternatively, use a stand mixer with a dough hook for 4-5 minutes. To knead by hand, use the heel of your palm to push the dough away from you, fold it back over itself, rotate, and repeat. Proper kneading develops the gluten network that gives bread its structure and chew. The dough is ready when it passes the windowpane test: stretch a small piece gently between your fingers. It should stretch thin enough to see light through without tearing immediately.
5-Step 5: First Rise Place your kneaded dough in a greased bowl, turning it once to coat all sides with oil. Cover the bowl with a clean towel or plastic wrap and place it in a warm location away from drafts. Let the dough rise until it has doubled in size, which typically takes about 1.5 hours at room temperature. To speed up rising, try this professional technique: preheat your oven to 180 degrees Fahrenheit, then turn it off. Place the covered bowl inside with the door slightly ajar. This creates an ideal warm environment that can reduce rising time significantly.
6-Step 6: Shaping the Loaves Once doubled, punch the dough down firmly to remove air bubbles. Divide the dough into two equal portions using a sharp knife or bench scraper. Shape each portion into a log by folding the sides inward and rolling tightly. Place the shaped loaves into greased 9×5 inch loaf pans, seam side down.
7-Step 7: Second Rise Cover the loaf pans lightly with a towel or plastic wrap. Let the dough rise again until it extends about 1 inch above the rim of the pans. This second rise typically takes 45 minutes to 1 hour. The dough should look puffy and hold an indent when gently pressed with your finger.
8-Step 8: Baking Your Homemade Bread Preheat your oven to 350 degrees Fahrenheit. Once the loaves have completed their second rise, place them in the center of the oven. Bake for 30-33 minutes until the tops are golden brown and the loaves sound hollow when tapped. An instant-read thermometer inserted into the center should register 190-200 degrees Fahrenheit for perfectly baked bread.
9-Step 9: Cooling and Serving Remove the baked loaves from the oven and immediately invert them onto wire cooling racks. Brush the tops with melted butter for a soft, flavorful crust. Allow the bread to cool for at least 10-15 minutes before slicing. Cutting into hot bread can cause the interior to become gummy, so patience is key for the best texture.
10-Step 10: Storage Store your finished bread in an airtight container at room temperature for 2-3 days or refrigerated for up to 5 days. For longer storage, freeze the bread for up to three months. Always allow the bread to cool completely before storing to prevent moisture buildup.
Notes
✅ Use fresh yeast stored in the refrigerator to maintain activity.
🚀 To quicken rising, place dough in a greased bowl covered with plastic wrap inside an oven preheated to 180°F, then turned off with the door slightly ajar.
⚠️ Do not over-flour the dough, as it will cause dense bread. The dough should be slightly sticky when touched but manageable.
- Prep Time: 15 minutes
- Rising Time: 3 hours
- Cook Time: 30 minutes
- Category: Bread
- Method: Baking
- Cuisine: American
Nutrition
- Serving Size: 1 slice
- Calories: 202 kcal
- Sugar: 3g
- Sodium: 196mg
- Fat: 2g
- Saturated Fat: 1g
- Unsaturated Fat: 0g
- Trans Fat: 0g
- Carbohydrates: 41g
- Fiber: 1g
- Protein: 5g
- Cholesterol: 0mg
Keywords: homemade bread, easy bread recipe, beginner bread, simple loaf