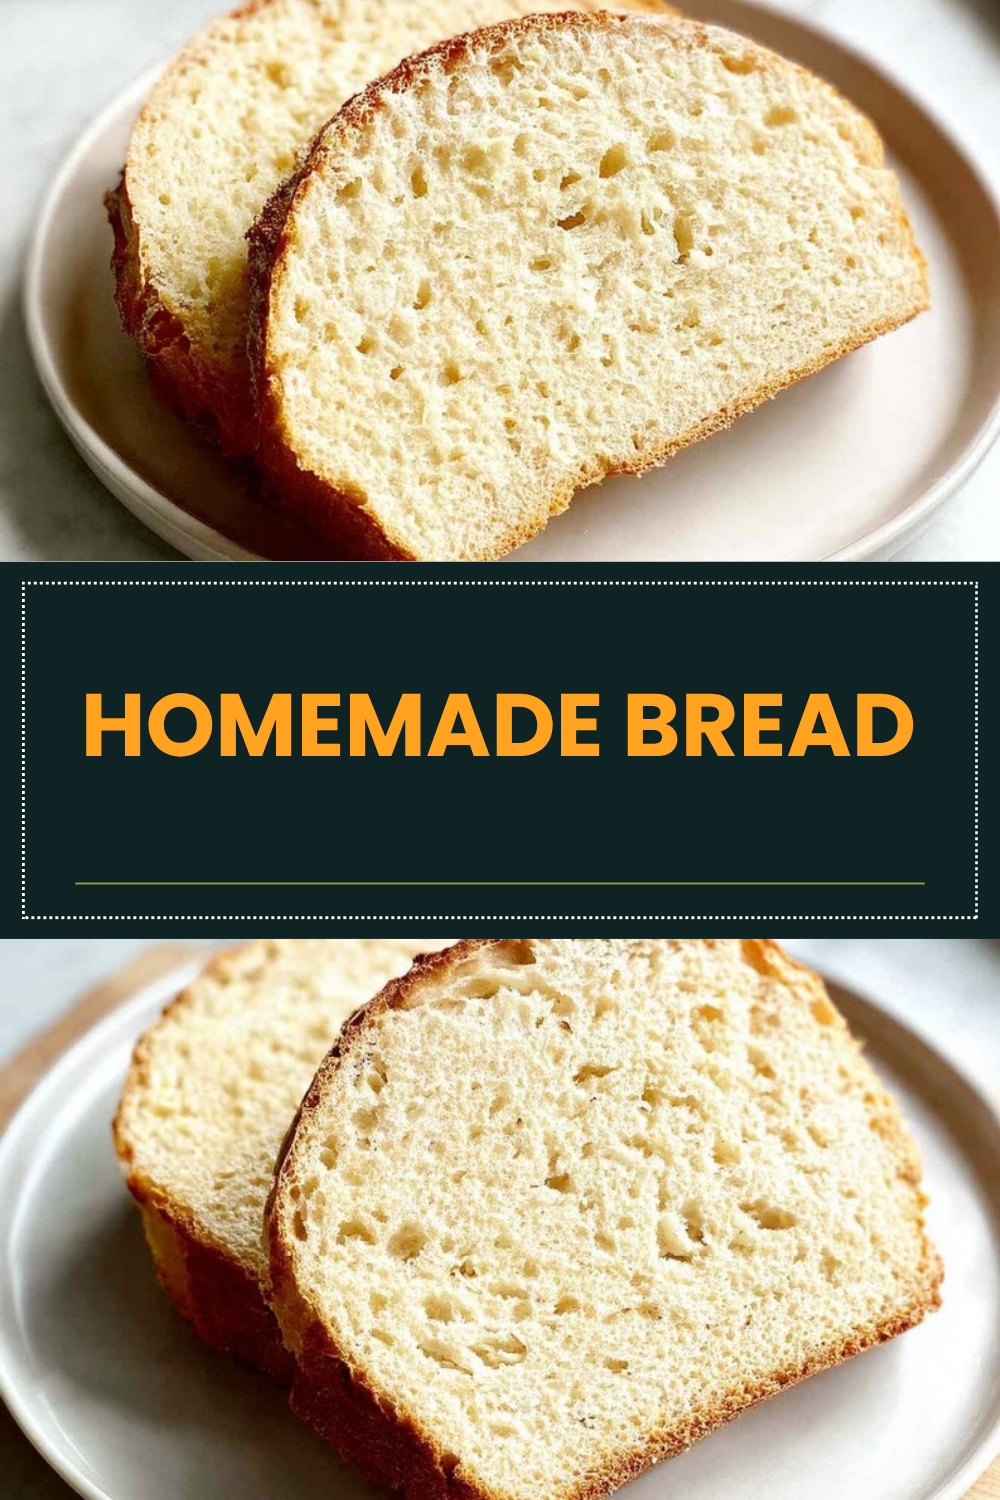
Why You’ll Love This Homemade Bread
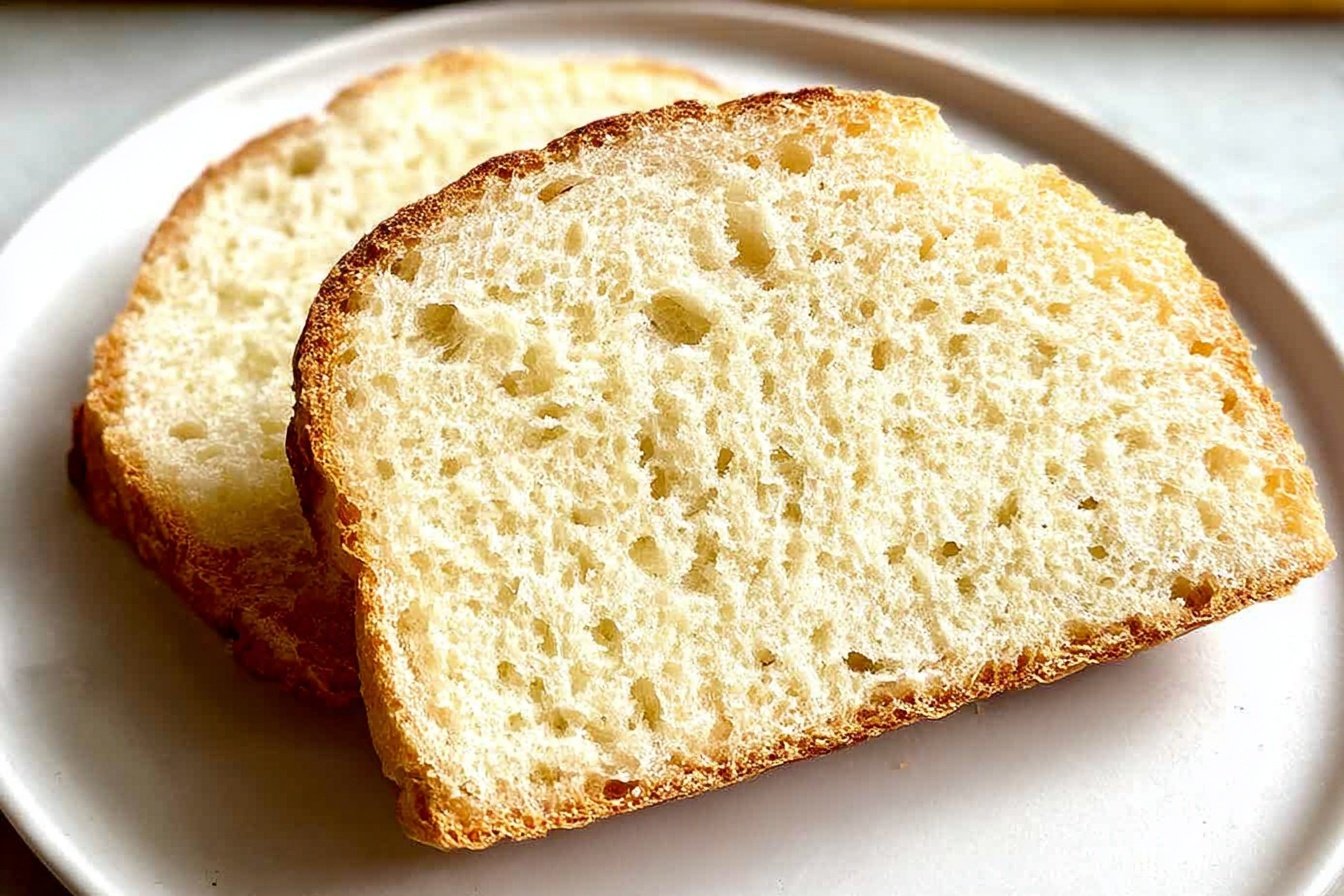
There’s something truly special about pulling a loaf of warm, golden homemade bread from the oven. The aroma fills your kitchen, and that first slice, still steaming slightly, brings a sense of accomplishment that store-bought bread simply cannot match. This easy bread recipe has become a favorite among home cooks for good reason.
Benefits of Making Your Own Bread
- Ease of Preparation: This beginner bread recipe requires only basic pantry ingredients and simple techniques. With just 15 minutes of hands-on prep time and clear instructions, even those new to baking can create beautiful loaves. No fancy equipment is needed, just a bowl, spoon, and your hands.
- Health Benefits: Unlike commercial breads loaded with preservatives and additives, this homemade bread recipe for beginners lets you control every ingredient. Each slice contains just 202 calories with only 3g of sugar, making it a wholesome choice for your family.
- Versatility: This simple homemade bread for beginners adapts to various preferences. Add cinnamon sugar swirls, fold in raisins, or keep it classic. The recipe works with all-purpose or bread flour, and you can substitute ingredients based on what you have available.
- Distinctive Flavor: The combination of honey and yeast creates a subtly sweet flavor profile with a soft, tender crumb. Brushing the baked loaves with butter adds richness that makes this step by step homemade bread recipe truly memorable.
Fresh homemade bread tastes better and offers more nutritional value than most store-bought options, giving you complete control over what goes into your food.
Jump To
- 1. Why You’ll Love This Homemade Bread
- 2. Essential Ingredients for Homemade Bread
- 3. How to Prepare the Perfect Homemade Bread: Step-by-Step Guide
- 4. Dietary Substitutions to Customize Your Homemade Bread
- 5. Mastering Homemade Bread: Advanced Tips and Variations
- 6. How to Store Homemade Bread: Best Practices
- 7. FAQs: Frequently Asked Questions About Homemade Bread
- 8. Homemade Bread
Essential Ingredients for Homemade Bread
Creating the perfect loaf starts with understanding each ingredient’s role. This easy homemade bread recipe uses simple, affordable ingredients that you likely already have in your kitchen.
Complete Ingredient List
- 2 cups warm water (105-115 degrees Fahrenheit) – Activates the yeast and creates the right environment for dough development. Water that is too hot will kill the yeast, while cool water slows the rising process.
- 1 tablespoon active dry yeast – The magical ingredient that makes bread rise. Instant or rapid rise yeast can be substituted with slightly faster results.
- 1/4 cup honey or sugar – Feeds the yeast for activation and adds subtle sweetness. Honey provides a more complex flavor profile.
- 2 teaspoons salt – Essential for flavor and helps strengthen the gluten structure while controlling yeast activity.
- 2 tablespoons oil (canola or vegetable) – Keeps the bread tender and moist. Melted butter can be substituted for a richer taste.
- 4 to 5 1/2 cups all-purpose or bread flour – The foundation of your bread. Bread flour creates a chewier texture with better rise, while all-purpose flour produces a softer loaf.
Special Dietary Options
For those with dietary restrictions, this bread recipe offers flexibility:
- Vegan Option: Replace honey with sugar and use vegetable oil instead of butter for brushing.
- Gluten-Free Adaptation: Use a 1:1 gluten-free flour blend designed for yeast baking. Results may vary in texture.
- Lower Calorie: Reduce honey to 2 tablespoons and use less oil for a lighter loaf.
How to Prepare the Perfect Homemade Bread: Step-by-Step Guide
This comprehensive step by step homemade bread recipe walks you through each stage of the baking process. Follow these instructions carefully for bakery-quality results at home.
Step 1: Proofing the Yeast
Begin by proofing the yeast to ensure it is active. In a large bowl, combine 1 tablespoon of active dry yeast with 2 cups of warm water (105-115 degrees Fahrenheit). Add a pinch of sugar or honey to feed the yeast. Stir gently and let the mixture rest for 5-10 minutes. The yeast should become foamy and bubbly, indicating it is alive and ready to work. If you see no foam after 10 minutes, your yeast may be inactive and should be replaced with fresh yeast from the refrigerator.
Step 2: Mixing the Initial Dough
Once your yeast is proofed, add the remaining sugar or honey (about 1/4 cup total), 2 teaspoons of salt, and 2 tablespoons of oil to the bowl. Mix these ingredients well to combine. Add 3 cups of flour and stir thoroughly until no dry flour remains. This initial mixing helps develop the foundation of your dough. The mixture will still be quite wet and sticky at this point, which is perfectly normal for this easy bread recipe.
Step 3: Gradually Adding More Flour
Add 1 more cup of flour and mix to combine completely. Now comes the important part: gradually add more flour, about 1/2 cup at a time, while mixing continuously. Watch carefully as the dough begins to pull away from the sides of the bowl. Stop adding flour when the dough still feels slightly sticky to the touch but is manageable and holds together. This homemade bread easy steps method prevents over-flouring, which creates dense, heavy bread.
The secret to perfect bread dough: it should feel slightly sticky when touched but should not stick aggressively to your fingers. Trust the texture more than the exact flour measurement.
Step 4: Kneading the Dough
Turn the dough onto a lightly floured surface and knead by hand for 5-8 minutes until smooth and elastic. Alternatively, use a stand mixer with a dough hook for 4-5 minutes. To knead by hand, use the heel of your palm to push the dough away from you, fold it back over itself, rotate, and repeat. Proper kneading develops the gluten network that gives bread its structure and chew.
The dough is ready when it passes the windowpane test: stretch a small piece gently between your fingers. It should stretch thin enough to see light through without tearing immediately.
Step 5: First Rise
Place your kneaded dough in a greased bowl, turning it once to coat all sides with oil. Cover the bowl with a clean towel or plastic wrap and place it in a warm location away from drafts. Let the dough rise until it has doubled in size, which typically takes about 1.5 hours at room temperature.
To speed up rising, try this professional technique: preheat your oven to 180 degrees Fahrenheit, then turn it off. Place the covered bowl inside with the door slightly ajar. This creates an ideal warm environment that can reduce rising time significantly.
Step 6: Shaping the Loaves
Once doubled, punch the dough down firmly to remove air bubbles. Divide the dough into two equal portions using a sharp knife or bench scraper. Shape each portion into a log by folding the sides inward and rolling tightly. Place the shaped loaves into greased 9×5 inch loaf pans, seam side down.
Step 7: Second Rise
Cover the loaf pans lightly with a towel or plastic wrap. Let the dough rise again until it extends about 1 inch above the rim of the pans. This second rise typically takes 45 minutes to 1 hour. The dough should look puffy and hold an indent when gently pressed with your finger.
Step 8: Baking Your Homemade Bread
Preheat your oven to 350 degrees Fahrenheit. Once the loaves have completed their second rise, place them in the center of the oven. Bake for 30-33 minutes until the tops are golden brown and the loaves sound hollow when tapped. An instant-read thermometer inserted into the center should register 190-200 degrees Fahrenheit for perfectly baked bread.
| Bread Doneness Indicators | What to Look For |
|---|---|
| Visual | Golden brown crust on top and sides |
| Sound | Hollow sound when tapped on top |
| Temperature | Internal temp of 190-200 degrees F |
| Color | Even browning with no pale spots |
Step 9: Cooling and Serving
Remove the baked loaves from the oven and immediately invert them onto wire cooling racks. Brush the tops with melted butter for a soft, flavorful crust. Allow the bread to cool for at least 10-15 minutes before slicing. Cutting into hot bread can cause the interior to become gummy, so patience is key for the best texture.
Step 10: Storage
Store your finished bread in an airtight container at room temperature for 2-3 days or refrigerated for up to 5 days. For longer storage, freeze the bread for up to three months. Always allow the bread to cool completely before storing to prevent moisture buildup.

Dietary Substitutions to Customize Your Homemade Bread
Protein and Main Component Alternatives
While this homemade bread recipe for beginners is already quite adaptable, you can make additional modifications to suit various dietary needs or ingredient availability.
Flour Substitutions: Bread flour creates a chewier, more structured loaf due to its higher protein content (12-14%). All-purpose flour produces a softer, more tender crumb. For whole wheat options, replace up to 50% of the white flour with whole wheat flour and consider adding vital wheat gluten to maintain proper rise. Check out this sweet Alabama pecan bread for another delicious homemade bread variation.
Yeast Alternatives: Active dry yeast works perfectly for this recipe. If you have instant yeast, skip the proofing step and add it directly with the dry ingredients. Expect faster rise times of about 20-30% less than active dry yeast. Rapid rise yeast also works well and reduces total rising time.
Vegetable, Sauce, and Seasoning Modifications
Sweetener Options: Honey adds floral notes and moisture to the bread, while granulated sugar creates a more neutral flavor profile. Brown sugar adds a subtle molasses flavor. Maple syrup can also work but may affect the browning of the crust.
Fat Variations: Canola and vegetable oil keep the bread moist without adding strong flavors. Melted butter creates a richer taste and softer crust. Olive oil adds a subtle fruity flavor that pairs well with savory bread variations.
Add-ins and Variations: After the first rise, you can knead in various additions before shaping. Try cinnamon sugar swirls by rolling out the dough, sprinkling with cinnamon sugar, and rolling tightly. Raisins, dried cranberries, chopped nuts, or seeds add texture and flavor. For savory options, consider adding garlic powder, dried herbs, or shredded cheese.
Mastering Homemade Bread: Advanced Tips and Variations
Pro Baking Techniques
Take your simple homemade bread for beginners to the next level with these professional tips:
- Temperature Control: Always use water between 105-115 degrees Fahrenheit for proofing yeast. Use a kitchen thermometer for accuracy, or test by dropping water on your wrist. It should feel warm but not hot.
- Freshness Matters: Store yeast in the refrigerator to maintain activity. Check expiration dates and always proof before using to avoid wasting ingredients.
- Dough Consistency: Resist the urge to add too much flour. Slightly sticky dough creates lighter, airier bread. Add flour gradually until the dough just stops sticking to your hands.
- Kneading Technique: Proper kneading develops gluten structure. Use the push-fold-rotate method for consistent results. The dough should become smooth, elastic, and slightly tacky.
Flavor Variations
Once you have mastered the basic homemade bread easy steps, experiment with these delicious variations:
- Cinnamon Swirl Bread: After the first rise, roll the dough into a rectangle, brush with melted butter, and sprinkle generously with cinnamon sugar. Roll tightly and place in the pan for the second rise.
- Raisin Bread: Add 1 cup of raisins after the first rise, kneading them gently into the dough before shaping. Soak raisins in warm water for 10 minutes for plumper results.
- Herb Bread: Mix 2 tablespoons of dried herbs like rosemary, thyme, or Italian seasoning into the flour before mixing.
- Seed Bread: Add 2-3 tablespoons of sesame seeds, poppy seeds, or sunflower seeds to the dough for added texture and nutrition.
Presentation and Serving Tips
Make your homemade bread look as good as it tastes:
- Slash the tops of loaves with a sharp knife before baking for a professional bakery appearance.
- Brush with an egg wash (1 beaten egg with 1 tablespoon water) before baking for a shiny, golden crust.
- Sprinkle with coarse salt, sesame seeds, or rolled oats before baking for added texture and visual appeal.
Make-Ahead Options
For busy schedules, this beginner bread recipe offers flexibility:
- Prepare the dough through the first rise, then refrigerate for up to 24 hours before shaping and baking.
- Shape the loaves and freeze before the second rise for up to 3 months. Thaw overnight in the refrigerator, then rise and bake.
- Bake the bread completely, cool, and freeze for up to 3 months. Thaw at room temperature and warm in a 350-degree oven for 10 minutes.
Learning the science behind bread making helps you understand why each step matters and troubleshoot any issues that arise.
How to Store Homemade Bread: Best Practices
Room Temperature Storage
Store completely cooled bread in an airtight container or resealable plastic bag at room temperature for 2-3 days. Keep bread away from direct sunlight and heat sources. A bread box provides ideal conditions by maintaining proper humidity while allowing some air circulation.
Refrigeration
Refrigerating bread extends its shelf life to about 5 days. Wrap the cooled loaf tightly in plastic wrap or place in a sealed bag. Note that refrigeration can accelerate staling, so this method works best if you plan to toast the bread before eating.
Freezing for Long-Term Storage
Freezing preserves bread quality for up to 3 months. Slice the bread before freezing for convenient single servings. Wrap tightly in plastic wrap, then place in a freezer bag, removing as much air as possible. Label with the date and type of bread. Thaw frozen slices in a toaster or at room temperature for 30 minutes.
Reheating Tips
Revive day-old bread by sprinking the crust lightly with water and warming in a 350-degree oven for 5-10 minutes. Toast individual slices for breakfast or sandwiches. For frozen bread, thaw completely before reheating for the best texture.
Creative Uses for Leftover Bread
Never waste homemade bread:
- Make breadcrumbs by pulsing dried bread in a food processor. Store in an airtight container for up to 3 months.
- Create croutons by cubing bread, tossing with olive oil and seasonings, and baking at 375 degrees until crispy.
- Use for bread pudding, French toast, or strata recipes.
- Dry bread cubes for homemade stuffing or dressing.
FAQs: Frequently Asked Questions About Homemade Bread
Do I need a stand mixer or bread machine to make homemade bread?
No, you don’t need special equipment for homemade bread. Mix ingredients in a large bowl with a wooden spoon, then knead by hand on a floured surface for 8-10 minutes until smooth and elastic. A stand mixer with dough hook simplifies kneading (use medium speed for 5-7 minutes), and a bread machine works for the full cycle—just halve the recipe if your machine’s pan is small (typically 1-2 lb capacity). This basic method yields soft, fluffy loaves every time. Start with room-temperature ingredients for best results, and always flour your hands to prevent sticking. Total hands-on time is about 20 minutes without machines.
How do I proof yeast for homemade bread?
To proof yeast, combine 1 packet (2 1/4 tsp) active dry yeast, 1/4 cup warm water (105-115°F, like wrist-temperature), and 1 tsp sugar in a bowl. Stir and wait 5-10 minutes until it foams and bubbles—proof of live yeast. If no foam, discard and use fresh yeast; dead yeast ruins the rise. This step activates the yeast for better dough development. Use a thermometer for accuracy, or test water by dropping on your wrist—it should feel warm, not hot. Instant yeast skips proofing; add directly to dry ingredients. Proper proofing ensures tall, airy homemade bread in 1-2 hours of rising.
Can I use all-purpose flour for homemade bread recipes?
Yes, all-purpose flour works perfectly in homemade bread recipes as a 1:1 substitute for bread flour, producing a soft, tender loaf. Bread flour (higher protein, 12-14%) gives a chewier texture and better rise due to more gluten. Avoid direct swaps with whole wheat flour—its lower gluten and higher fiber need recipe adjustments (replace up to 50% and add vital wheat gluten). Measure flour by spooning into the cup and leveling with a knife for precision; too much flour makes dense bread. Sift if lumpy. Experiment: one loaf with each flour to see the difference in crumb and crust.
Can I make homemade bread dough ahead or freeze it?
Yes, prepare dough to the first rise (step 4), store in an airtight container in the fridge up to 24 hours. Let it warm to room temp (1-2 hours), punch down, shape, and proceed. For freezing, shape loaves after first rise (step 6), place in freezer-safe pans, cover tightly with foil, and freeze up to 3 months. Thaw overnight in fridge, then rise at room temp 4-5 hours until doubled before baking. Freeze baked, cooled loaves in bags up to 3 months—thaw on counter. Label with dates. This flexibility lets you bake fresh anytime without full effort.
How can I speed up rising time for homemade bread dough?
Speed up rising by creating a warm spot: after mixing and first knead, place dough in a greased bowl (turn to coat), cover with plastic wrap. Preheat oven to 180°F, turn off, and put bowl inside with door cracked 1 inch—aim for 80-85°F. Dough doubles in 30-45 minutes vs. 1-2 hours at room temp. Use instant yeast for 20-30% faster rise without proofing. Avoid temps over 110°F, which kills yeast. In humid weather, rises quicker naturally. Test doneness by poking: if indent springs back slowly, it’s ready. This trick cuts total time by 1 hour for quicker fresh bread.
Homemade Bread
- Total Time: 3 hours 45 minutes
- Yield: 2 loaves
- Diet: Vegetarian
Description
🍞 Discover the joy of baking your own soft, fluffy homemade bread with this beginner-friendly recipe that fills your home with an irresistible aroma.
🥖 Perfect for novices, these easy steps yield professional results using simple ingredients, saving money and impressing family and friends.
Ingredients
– 2 cups warm water (105-115 degrees Fahrenheit)
– 1 tablespoon active dry yeast
– 1/4 cup honey or sugar
– 2 teaspoons salt
– 2 tablespoons oil (canola or vegetable)
– 4 to 5 1/2 cups all-purpose or bread flour
Instructions
1-Step 1: Proofing the Yeast Begin by proofing the yeast to ensure it is active. In a large bowl, combine 1 tablespoon of active dry yeast with 2 cups of warm water (105-115 degrees Fahrenheit). Add a pinch of sugar or honey to feed the yeast. Stir gently and let the mixture rest for 5-10 minutes. The yeast should become foamy and bubbly, indicating it is alive and ready to work. If you see no foam after 10 minutes, your yeast may be inactive and should be replaced with fresh yeast from the refrigerator.
2-Step 2: Mixing the Initial Dough Once your yeast is proofed, add the remaining sugar or honey (about 1/4 cup total), 2 teaspoons of salt, and 2 tablespoons of oil to the bowl. Mix these ingredients well to combine. Add 3 cups of flour and stir thoroughly until no dry flour remains. This initial mixing helps develop the foundation of your dough. The mixture will still be quite wet and sticky at this point, which is perfectly normal for this easy bread recipe.
3-Step 3: Gradually Adding More Flour Add 1 more cup of flour and mix to combine completely. Now comes the important part: gradually add more flour, about 1/2 cup at a time, while mixing continuously. Watch carefully as the dough begins to pull away from the sides of the bowl. Stop adding flour when the dough still feels slightly sticky to the touch but is manageable and holds together. This homemade bread easy steps method prevents over-flouring, which creates dense, heavy bread.
4-Step 4: Kneading the Dough Turn the dough onto a lightly floured surface and knead by hand for 5-8 minutes until smooth and elastic. Alternatively, use a stand mixer with a dough hook for 4-5 minutes. To knead by hand, use the heel of your palm to push the dough away from you, fold it back over itself, rotate, and repeat. Proper kneading develops the gluten network that gives bread its structure and chew. The dough is ready when it passes the windowpane test: stretch a small piece gently between your fingers. It should stretch thin enough to see light through without tearing immediately.
5-Step 5: First Rise Place your kneaded dough in a greased bowl, turning it once to coat all sides with oil. Cover the bowl with a clean towel or plastic wrap and place it in a warm location away from drafts. Let the dough rise until it has doubled in size, which typically takes about 1.5 hours at room temperature. To speed up rising, try this professional technique: preheat your oven to 180 degrees Fahrenheit, then turn it off. Place the covered bowl inside with the door slightly ajar. This creates an ideal warm environment that can reduce rising time significantly.
6-Step 6: Shaping the Loaves Once doubled, punch the dough down firmly to remove air bubbles. Divide the dough into two equal portions using a sharp knife or bench scraper. Shape each portion into a log by folding the sides inward and rolling tightly. Place the shaped loaves into greased 9×5 inch loaf pans, seam side down.
7-Step 7: Second Rise Cover the loaf pans lightly with a towel or plastic wrap. Let the dough rise again until it extends about 1 inch above the rim of the pans. This second rise typically takes 45 minutes to 1 hour. The dough should look puffy and hold an indent when gently pressed with your finger.
8-Step 8: Baking Your Homemade Bread Preheat your oven to 350 degrees Fahrenheit. Once the loaves have completed their second rise, place them in the center of the oven. Bake for 30-33 minutes until the tops are golden brown and the loaves sound hollow when tapped. An instant-read thermometer inserted into the center should register 190-200 degrees Fahrenheit for perfectly baked bread.
9-Step 9: Cooling and Serving Remove the baked loaves from the oven and immediately invert them onto wire cooling racks. Brush the tops with melted butter for a soft, flavorful crust. Allow the bread to cool for at least 10-15 minutes before slicing. Cutting into hot bread can cause the interior to become gummy, so patience is key for the best texture.
10-Step 10: Storage Store your finished bread in an airtight container at room temperature for 2-3 days or refrigerated for up to 5 days. For longer storage, freeze the bread for up to three months. Always allow the bread to cool completely before storing to prevent moisture buildup.
Notes
✅ Use fresh yeast stored in the refrigerator to maintain activity.
🚀 To quicken rising, place dough in a greased bowl covered with plastic wrap inside an oven preheated to 180°F, then turned off with the door slightly ajar.
⚠️ Do not over-flour the dough, as it will cause dense bread. The dough should be slightly sticky when touched but manageable.
- Prep Time: 15 minutes
- Rising Time: 3 hours
- Cook Time: 30 minutes
- Category: Bread
- Method: Baking
- Cuisine: American
Nutrition
- Serving Size: 1 slice
- Calories: 202 kcal
- Sugar: 3g
- Sodium: 196mg
- Fat: 2g
- Saturated Fat: 1g
- Unsaturated Fat: 0g
- Trans Fat: 0g
- Carbohydrates: 41g
- Fiber: 1g
- Protein: 5g
- Cholesterol: 0mg
Keywords: homemade bread, easy bread recipe, beginner bread, simple loaf