
Why You’ll Love This Hasselback Potatoes
There’s something truly special about Hasselback potatoes that makes them stand out from ordinary roasted potatoes. This Swedish-inspired dish transforms simple potatoes into an elegant side dish that looks like it came from a fine dining restaurant, yet requires minimal effort in your home kitchen.
Whether you’re preparing a weeknight family dinner or hosting a special gathering, this hasselback potatoes recipe delivers impressive results every time. Here’s why this dish deserves a spot in your regular cooking rotation:
- Ease of Preparation: Despite their fancy appearance, crispy golden hasselback potatoes require just a few basic techniques. With simple slicing methods and straightforward roasting, even beginner cooks can achieve restaurant-quality results. The total hands-on time is only about 20 minutes, making this an accessible recipe for busy weeknights.
- Health Benefits: Potatoes offer a good source of vitamin C, potassium, and vitamin B6, while the olive oil in this recipe provides heart-healthy monounsaturated fats. According to health experts, potatoes can be a nutritious addition to your diet when prepared with wholesome ingredients like the herbs and olive oil used here.
- Versatility: This hasselback potatoes side dish pairs beautifully with virtually any main course. Serve them alongside grilled steaks, roasted chicken, or baked fish for a complete meal. The recipe also adapts easily to different dietary preferences, making it perfect for feeding a crowd with varied tastes.
- Distinctive Flavor: The combination of fresh sage leaves tucked between slices and generous garlic herb butter creates layers of savory flavor. The two-stage roasting method ensures the edges become wonderfully crispy while the insides remain fluffy and tender, giving you the best of both textures in every bite.
Jump To
- 1. Why You’ll Love This Hasselback Potatoes
- 2. Essential Ingredients for Hasselback Potatoes
- 3. How to Prepare the Perfect Hasselback Potatoes: Step-by-Step Guide
- 4. Dietary Substitutions to Customize Your Hasselback Potatoes
- 5. Mastering Hasselback Potatoes: Advanced Tips and Variations
- 6. How to Store Hasselback Potatoes: Best Practices
- 7. FAQs: Frequently Asked Questions About Hasselback Potatoes
- 8. Hasselback Potatoes
Essential Ingredients for Hasselback Potatoes
Creating the perfect crispy hasselback potatoes starts with gathering the right ingredients. Each component plays a specific role in achieving that signature texture and flavor profile that makes this dish so memorable.
Main Ingredients List
- 6 medium Yukon Gold potatoes or small russet potatoes – Yukon Golds offer a creamy interior with naturally buttery flavor, while russets provide extra crispiness from their higher starch content. Choose potatoes that are uniform in size for even cooking.
- Extra-virgin olive oil (for roasting and drizzling) – The initial coating helps the potatoes crisp up beautifully during the first roasting stage. Olive oil also carries flavor and promotes even browning.
- Fresh sage leaves (quantity to fit between slices) – These aromatic herbs infuse the potatoes with earthy, savory notes. Plan for about 8-10 leaves per potato, tucked between the slices.
- Homemade garlic herb butter (made from butter, garlic, herbs, and salt; enough to generously brush potatoes) – This rich finishing butter adds incredible flavor and helps achieve that golden, crispy exterior. About 4-6 tablespoons should coat all six potatoes generously.
- Sea salt and freshly ground black pepper (to taste) – Essential seasonings that enhance all the other flavors. Use about 1 teaspoon of salt and 1/2 teaspoon of pepper for the batch.
- Fresh parsley and red pepper flakes (optional, for garnish) – These finishing touches add color and a hint of heat, making the presentation pop.
Special Dietary Options
| Dietary Need | Substitution |
|---|---|
| Vegan | Replace butter with vegan butter or additional olive oil. The potatoes and herbs are naturally plant-based. |
| Gluten-Free | This recipe is naturally gluten-free! No modifications needed. |
| Low-Calorie | Reduce butter amount and use a light spray of olive oil. Focus on herbs for flavor without added fat. |
| Dairy-Free | Use olive oil instead of butter, or substitute with dairy-free margarine. |
How to Prepare the Perfect Hasselback Potatoes: Step-by-Step Guide
Making golden hasselback potatoes is easier than you might think. Follow these detailed steps, and you’ll have a stunning side dish that’s crispy on the outside and fluffy on the inside.
First Step: Prepare Your Equipment and Potatoes
Start by preheating your oven to 425°F (220°C). Line a baking sheet with parchment paper, which prevents sticking and makes cleanup a breeze. While the oven heats up, wash and dry your potatoes thoroughly. Keeping the skin on is essential for the classic hasselback look, so don’t peel them. Pat them completely dry with a clean kitchen towel or paper towels, as excess moisture will prevent proper crisping.
Second Step: Master the Signature Slice
Creating those beautiful, even slices is the key to perfect hasselback potatoes. Here’s the foolproof method:
- Place one potato on a cutting board.
- Position two butter knives or chopsticks on either side of the potato, parallel to each other. These act as guards to stop your knife from cutting all the way through.
- Using a sharp chef’s knife, make thin crosswise slices about 1/8-inch (3 mm) apart. The guides will prevent your knife from reaching the cutting board, keeping the potato intact at the bottom.
- Repeat this process for all six potatoes.
Pro Tip: If you’re new to making hasselback potatoes, practice your slicing technique on one potato first to build confidence before tackling the entire batch.
Third Step: Season and Arrange
Transfer your sliced potatoes to the prepared baking sheet. Drizzle generously with olive oil, making sure some gets between the slices. Use your hands to gently work the oil into all the crevices. Season with sea salt and freshly ground black pepper, again working the seasoning between the slices for even flavor distribution.
Now comes the fun part: carefully tuck fresh sage leaves between the potato slices. Aim for every third or fourth slice, spacing them evenly. The sage will infuse the potato with its aromatic flavor as it roasts. Finish with another light drizzle of olive oil over the top.
Fourth Step: First Roasting Stage
Place the baking sheet in your preheated oven and roast for 50 minutes. During this stage, the potatoes will begin to fan out slightly as they cook, and the olive oil will start creating that crispy exterior. The high heat (425°F) is essential for achieving those crispy edges while keeping the inside tender.
About halfway through this first roasting period, check on your potatoes. If they seem dry, you can baste them with any pan juices. This helps keep them moist and promotes even browning.
Fifth Step: Garlic Herb Butter Application
After the initial 50-minute roast, remove the baking sheet from the oven. Your crispy hasselback potatoes will have started opening up like beautiful fans. Now brush them generously with your homemade garlic herb butter. Make sure to get the butter between the slices, where it will melt and create incredible flavor throughout.
Crispy potato recipes like this one benefit from this two-stage cooking process. The initial olive oil roasting creates the base, while the butter adds richness and helps achieve that gorgeous golden color.
Sixth Step: Final Roasting and Serving
Return the buttered potatoes to the oven for another 25 minutes. This second roasting period allows the butter to melt into all those crevices, creating layers of flavor while achieving maximum crispiness. The potatoes are done when a fork easily pierces through the center and the edges are beautifully browned and crispy.
Remove from the oven and taste for seasoning. Add more salt and pepper if needed. Garnish with fresh chopped parsley and a pinch of red pepper flakes for color and a subtle kick. Serve immediately with extra garlic butter on the side for dipping.

Dietary Substitutions to Customize Your Hasselback Potatoes
Protein and Main Component Alternatives
While hasselback potatoes are traditionally a side dish, you can transform them into a more substantial meal with creative additions. For a heartier version, try stuffing thin slices of prosciutto, bacon, or cheese between the potato slices along with the sage. This works beautifully when serving loaded baked potato dishes alongside simpler main courses.
For vegetarian protein boosts, sprinkle grated Parmesan or crumbled feta cheese between the slices before the final roasting stage. The cheese melts and creates a savory crust that’s absolutely delicious. You can also serve these potatoes with a dollop of Greek yogurt or sour cream for added protein.
Vegetable, Sauce, and Seasoning Modifications
The beauty of this potato recipe lies in its adaptability. Here are some delicious variations to try:
Herb Variations: While sage is classic, you can substitute or combine it with rosemary, thyme, or oregano. Each brings its own character to the dish. Rosemary pairs wonderfully with garlic butter, while thyme offers a more subtle earthiness.
Spice Options: For those who enjoy more heat, add paprika or cayenne pepper to the seasoning mix. Smoked paprika creates a beautiful color and adds a smoky depth that complements the garlic butter perfectly.
Vegetable Additions: Thin slices of garlic can be tucked between the potato slices alongside the sage for an extra garlic punch. You can also add thin slices of onion or bell peppers for additional flavor and color.
Sauce Pairings: These potatoes are delicious on their own, but they also pair wonderfully with various sauces. Try serving them with chimichurri, garlic aioli, or a simple herb yogurt sauce for dipping.
Mastering Hasselback Potatoes: Advanced Tips and Variations
Once you’ve mastered the basic hasselback potatoes recipe, you can experiment with advanced techniques and creative variations to keep this side dish exciting.
Pro Cooking Techniques
Parboiling Method: For faster cooking times and guaranteed tender centers, try parboiling your potatoes for 10 minutes before slicing. This technique reduces total oven time and ensures the insides are perfectly fluffy. Just be sure to cool and dry them completely before slicing.
Sharp Knife Essential: A very sharp knife is crucial for clean, even slices. A dull knife can tear the potato and create uneven slices that don’t fan out properly. If your knife isn’t as sharp as it should be, try dipping it in hot water between cuts for smoother slicing.
Consistent Slice Thickness: Aim for exactly 1/8-inch slices for the most even cooking. Thicker slices won’t crisp up properly, while thinner slices may burn before the potato is cooked through. Using a ruler initially can help you develop a feel for the right thickness.
Flavor Variations
The basic recipe is delicious, but these variations add exciting new dimensions:
- Cheesy Hasselback: Place thin slices of cheddar or Gruyere cheese between the potato slices during the last 15 minutes of roasting.
- Bacon Wrapped: Wrap bacon around the middle of each potato before roasting for a smoky, savory twist.
- Mediterranean Style: Use sun-dried tomatoes, olives, and fresh basil in addition to or instead of sage.
- Loaded Hasselback: After roasting, top with sour cream, chives, and crispy bacon bits for a loaded baked potato experience.
Presentation Tips
Make your hasselback potatoes side dish look as good as it tastes with these simple presentation ideas:
Serve on a rustic wooden board or a beautiful platter. The contrast of the golden brown potatoes against natural wood looks stunning. Garnish with fresh herb sprigs and a sprinkle of flaky sea salt for that professional restaurant finish. If serving family-style, arrange the potatoes in a circle with a small bowl of garlic butter in the center for communal dipping.
Make-Ahead Options
For busy hosts, these potatoes can be partially prepared in advance:
Slice the potatoes up to 24 hours ahead and store them submerged in cold water in the refrigerator. This prevents browning and saves prep time on cooking day. Just be sure to dry them thoroughly before adding oil and seasonings.
You can also roast the potatoes through the first stage (50 minutes), then finish with butter and the final 25 minutes just before serving. This works well for dinner parties when you want to spend time with guests.
How to Store Hasselback Potatoes: Best Practices
Proper storage ensures your leftover crispy golden hasselback potatoes remain delicious for later enjoyment. Here’s everything you need to know about storing, freezing, and reheating this dish.
Refrigeration Guidelines
Allow cooked potatoes to cool completely before storing. Place them in an airtight container and refrigerate within two hours of cooking. Properly stored, they will keep for 3-4 days in the refrigerator. The olive oil used in cooking helps maintain moisture, but the texture will soften slightly over time.
Freezing for Long-Term Storage
For longer storage, hasselback potatoes can be frozen for up to one month. To freeze, arrange cooled potatoes on a baking sheet and flash freeze until solid (about 2 hours). Then transfer to a freezer-safe container or bag, separating layers with parchment paper. This prevents them from sticking together.
Best Reheating Methods
Reheating properly is key to restoring that signature crispiness:
Air Fryer (Best Method): Preheat to 380°F (190°C) and reheat for 7-10 minutes, shaking the basket halfway through. This method quickly restores the crispy edges without overcooking the interior.
Oven Method: Place on a baking sheet at 400°F for 10-15 minutes. Optionally brush with a little oil or butter before reheating to help crisp the edges.
Avoid Microwave: Microwaving will make the potatoes soggy and lose their distinctive crispy texture. It’s worth taking the extra time to reheat properly.
Meal Prep Considerations
If you’re planning to make hasselback potatoes as part of your weekly meal prep, consider roasting them through the first stage only. Store partially cooked potatoes, then finish with butter and the final roasting when ready to serve. This approach gives you freshly finished potatoes with minimal prep time on busy weeknights.
FAQs: Frequently Asked Questions About Hasselback Potatoes
What are Hasselback potatoes and how did they get their name?
Hasselback potatoes are a Swedish dish created in the 1950s at the Hasselbacken restaurant in Stockholm, hence the name. They feature whole potatoes sliced thinly almost to the bottom, then fanned out and baked until the edges crisp up while the insides stay fluffy. This simple technique transforms basic potatoes into an elegant side dish. Start with medium-sized russet or Yukon Gold potatoes for best results. Slice them 1/8-inch apart using guides like chopsticks to avoid cutting through. Brush with melted butter, olive oil, or garlic-infused oil, season with salt, pepper, and herbs like rosemary or thyme, then bake at 425°F for 60-75 minutes, basting occasionally. The result is a stunning presentation perfect for holidays or weeknight dinners, pairing well with steak, chicken, or fish. (98 words)
What potatoes work best for Hasselback potatoes?
Medium-sized russet or Yukon Gold potatoes are ideal for Hasselback potatoes because they hold their shape during slicing and baking, with russets offering extra crispiness from higher starch content and Yukon Golds providing creamier interiors. Avoid large baking potatoes, as they take longer to cook evenly, or waxy varieties like red potatoes that don’t fan out well. Select firm, unblemished potatoes about 3-4 inches long. Wash and dry them thoroughly before slicing to ensure the skins crisp up. For 4 servings, use 4-6 potatoes. Pro tip: Parboil for 10 minutes first to shorten baking time and guarantee tender centers without over-browning the edges. This choice ensures consistent results every time. (112 words)
How do you cut Hasselback potatoes without slicing through the bottom?
Cutting Hasselback potatoes evenly without slicing all the way through is easy with guides. Place two chopsticks, butter knives, or wooden spoon handles parallel on a cutting board, about 1/4-inch from each side of the potato. Position the potato between them, then make thin slices (about 1/8-inch apart) downward—the guides stop your knife blade before it reaches the bottom, keeping the potato intact for fanning. Use a sharp chef’s knife for clean cuts. Start from one end to the other. If slices stick, dip the knife in hot water between cuts. This method prevents mishaps and creates the signature accordion look. Practice on one potato first for confidence. (108 words)
How long to bake Hasselback potatoes in the oven?
Bake Hasselback potatoes at 425°F for 60-75 minutes until golden and crispy on the edges. Prep by slicing as directed, then gently fan the slices and insert thin pats of butter, garlic slices, or cheese between them for flavor. Drizzle with olive oil, sprinkle with sea salt, black pepper, paprika, and fresh herbs. Place on a parchment-lined baking sheet. After 30 minutes, baste with pan juices and rotate the tray for even cooking. They’re done when a fork pierces the center easily and edges are fan-crisp. For extra crunch, broil 2-3 minutes at the end. Rest 5 minutes before serving to let flavors settle. Serves 4 as a side. (114 words)
Can you reheat Hasselback potatoes and keep them crispy?
Yes, Hasselback potatoes reheat well without losing crispiness. Prepare them fully, cool, and store in an airtight container in the fridge for up to 3 days. For best results, use an air fryer at 380°F for 7-10 minutes, shaking the basket halfway— this revives the crunch effectively. Oven reheating works too: place on a baking sheet at 400°F for 10-15 minutes, optionally brushing with oil first. Avoid microwaving, as it makes them soggy. If frozen (up to 1 month), thaw overnight in the fridge before reheating. This method keeps the fanned slices intact and flavorful, perfect for meal prep or leftovers. (102 words)

Hasselback Potatoes
- Total Time: 1 hour 35 minutes
- Yield: 6 servings
- Diet: Vegetarian
Description
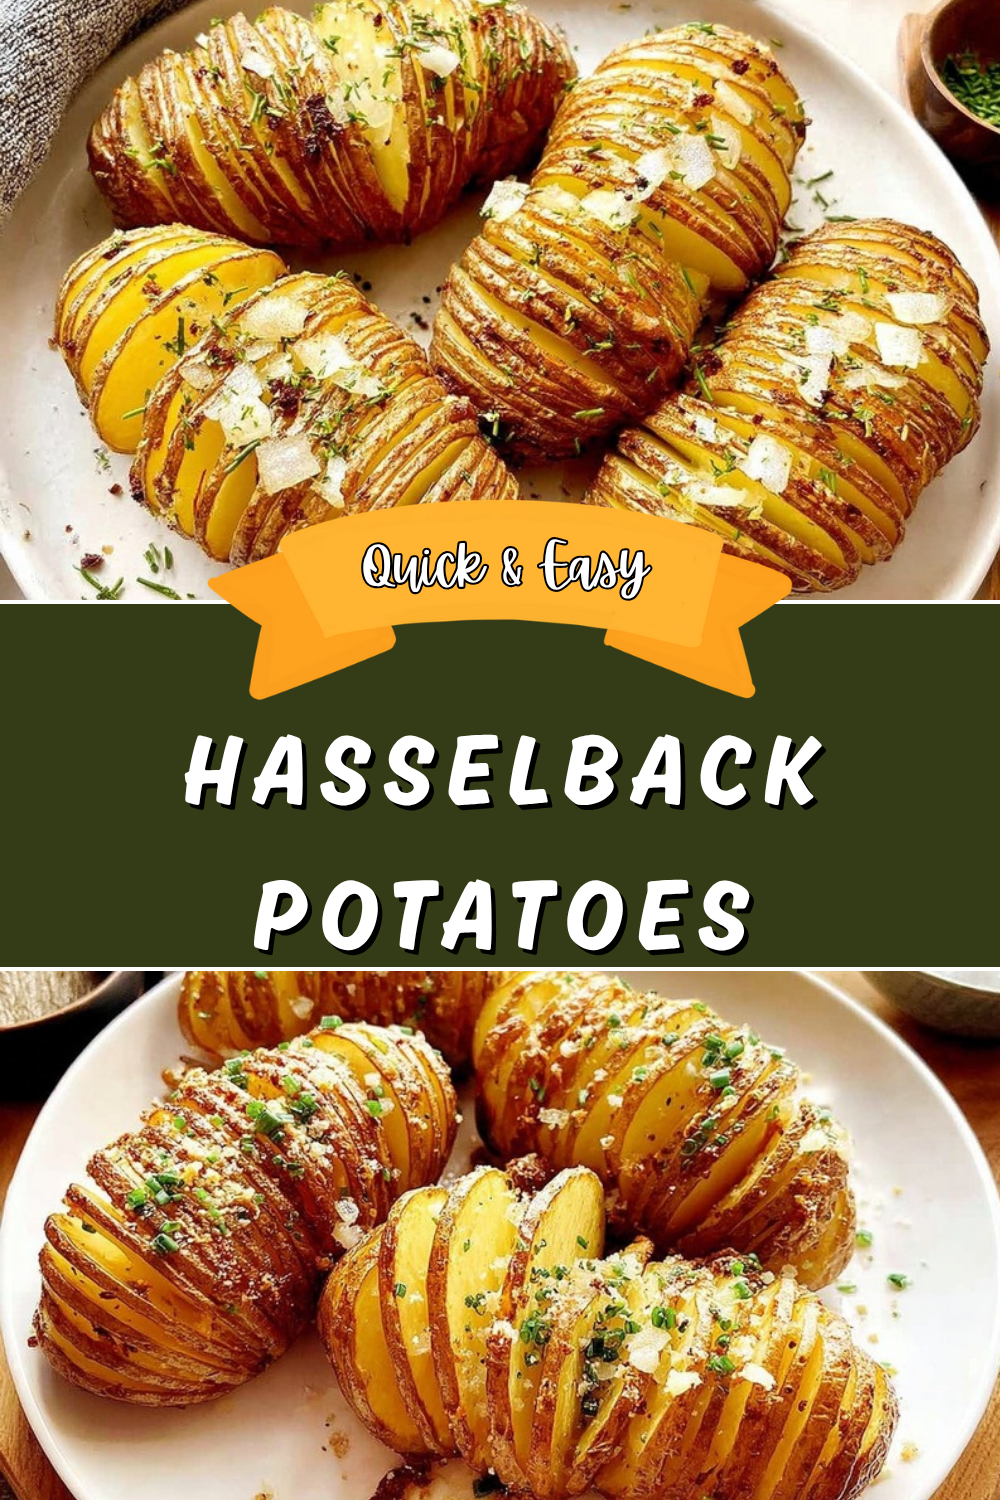
🥔 Fan-sliced Hasselback potatoes with ultra-crispy edges and fluffy centers – stunning side that wows at every table!
🌿 Sage-tucked, herb-buttered golden perfection roasts in 75 min: impressive yet easy for holidays or weeknights.
Ingredients
– 6 medium Yukon Gold potatoes or small russet potatoes
– Extra-virgin olive oil for roasting and drizzling
– Fresh sage leaves (quantity to fit between slices)
– Homemade garlic herb butter (made from butter, garlic, herbs, and salt; enough to generously brush potatoes)
– Sea salt and freshly ground black pepper (to taste)
– Fresh parsley and red pepper flakes (optional, for garnish)
Instructions
1-First Step: Prepare Your Equipment and Potatoes Start by preheating your oven to 425°F (220°C). Line a baking sheet with parchment paper, which prevents sticking and makes cleanup a breeze. While the oven heats up, wash and dry your potatoes thoroughly. Keeping the skin on is essential for the classic hasselback look, so don’t peel them. Pat them completely dry with a clean kitchen towel or paper towels, as excess moisture will prevent proper crisping.
2-Second Step: Master the Signature Slice Creating those beautiful, even slices is the key to perfect hasselback potatoes. Here’s the foolproof method: 1. Place one potato on a cutting board. 2. Position two butter knives or chopsticks on either side of the potato, parallel to each other. These act as guards to stop your knife from cutting all the way through. 3. Using a sharp chef’s knife, make thin crosswise slices about 1/8-inch (3 mm) apart. The guides will prevent your knife from reaching the cutting board, keeping the potato intact at the bottom. 4. Repeat this process for all six potatoes.
3-Third Step: Season and Arrange Transfer your sliced potatoes to the prepared baking sheet. Drizzle generously with olive oil, making sure some gets between the slices. Use your hands to gently work the oil into all the crevices. Season with sea salt and freshly ground black pepper, again working the seasoning between the slices for even flavor distribution. Now comes the fun part: carefully tuck fresh sage leaves between the potato slices. Aim for every third or fourth slice, spacing them evenly. The sage will infuse the potato with its aromatic flavor as it roasts. Finish with another light drizzle of olive oil over the top.
4-Fourth Step: First Roasting Stage Place the baking sheet in your preheated oven and roast for 50 minutes. During this stage, the potatoes will begin to fan out slightly as they cook, and the olive oil will start creating that crispy exterior. The high heat (425°F) is essential for achieving those crispy edges while keeping the inside tender. About halfway through this first roasting period, check on your potatoes. If they seem dry, you can baste them with any pan juices. This helps keep them moist and promotes even browning.
5-Fifth Step: Garlic Herb Butter Application After the initial 50-minute roast, remove the baking sheet from the oven. Your crispy hasselback potatoes will have started opening up like beautiful fans. Now brush them generously with your homemade garlic herb butter. Make sure to get the butter between the slices, where it will melt and create incredible flavor throughout.
6-Sixth Step: Final Roasting and Serving Return the buttered potatoes to the oven for another 25 minutes. This second roasting period allows the butter to melt into all those crevices, creating layers of flavor while achieving maximum crispiness. The potatoes are done when a fork easily pierces through the center and the edges are beautifully browned and crispy. Remove from the oven and taste for seasoning. Add more salt and pepper if needed. Garnish with fresh chopped parsley and a pinch of red pepper flakes for color and a subtle kick. Serve immediately with extra garlic butter on the side for dipping.
Notes
📏 Use knives or chopsticks as slicing guides to keep the base intact.
🔥 Roast in two stages: oil first for crispiness, butter second for flavor.
⏲️ Check after 70 min total – adjust for potato size and oven.
- Prep Time: 20 minutes
- Cook Time: 75 minutes
- Category: Side Dishes
- Method: Roasting
- Cuisine: Swedish
Nutrition
- Serving Size: 1 potato
- Calories: 280 kcal
- Sugar: 1 g
- Sodium: 350 mg
- Fat: 16 g
- Saturated Fat: 8 g
- Unsaturated Fat: 8 g
- Trans Fat: 0 g
- Carbohydrates: 32 g
- Fiber: 4 g
- Protein: 4 g
- Cholesterol: 30 mg
Keywords: hasselback potatoes, crispy hasselback potatoes, golden hasselback potatoes, potato side dish