Why You’ll Love This Hasselback Butternut Squash
Hasselback Butternut Squash is more than just a pretty dish it’s a simple yet impressive way to upgrade your meals with layers of flavor and texture. This recipe stands out for its ease of preparation, letting you create a beautiful, fan-like squash without needing fancy tools. You’ll appreciate the basic knife technique that makes slicing straightforward and the roasting time that’s quick enough for weeknight dinners or holiday feasts.
From a health perspective, Hasselback Butternut Squash delivers a nutrient-packed punch. It’s loaded with vitamins A and C, which support immune health and vision, while the fiber helps with digestion and keeps you feeling full. This roasted butternut hasselback option is naturally lower in fat, making it a smart choice for diet-conscious folks who want a satisfying side without the guilt.
The versatility of Hasselback Butternut Squash means it fits any lifestyle. Whether you’re going vegan by swapping butter for oil and skipping the prosciutto, or keeping it gluten-free with alternative bread, this recipe adapts effortlessly. Plus, you can make it low-calorie by cutting back on glaze or add protein for a heartier meal, all while enjoying the hasselback-style butternut’s tender interior and caramelized edges.
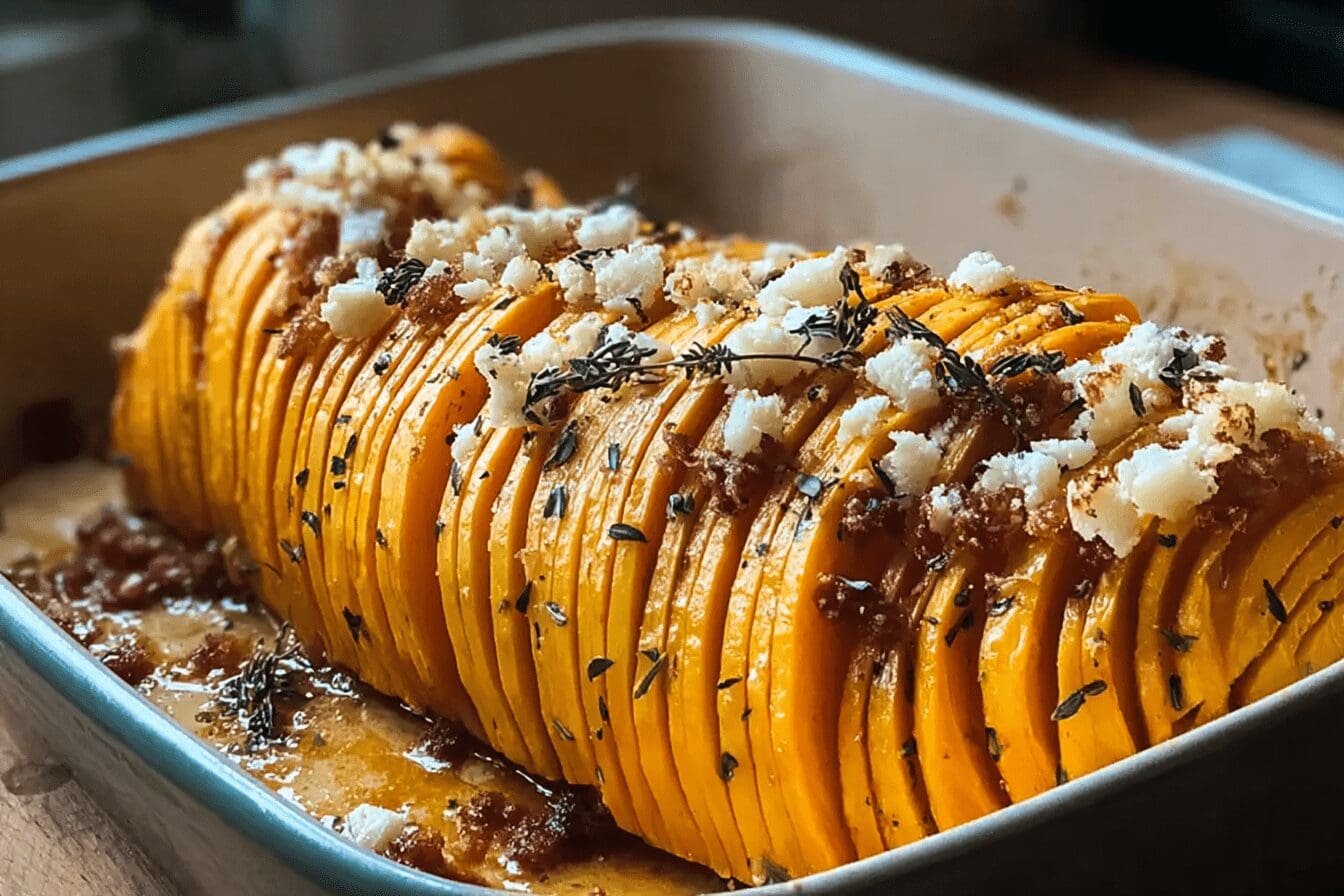
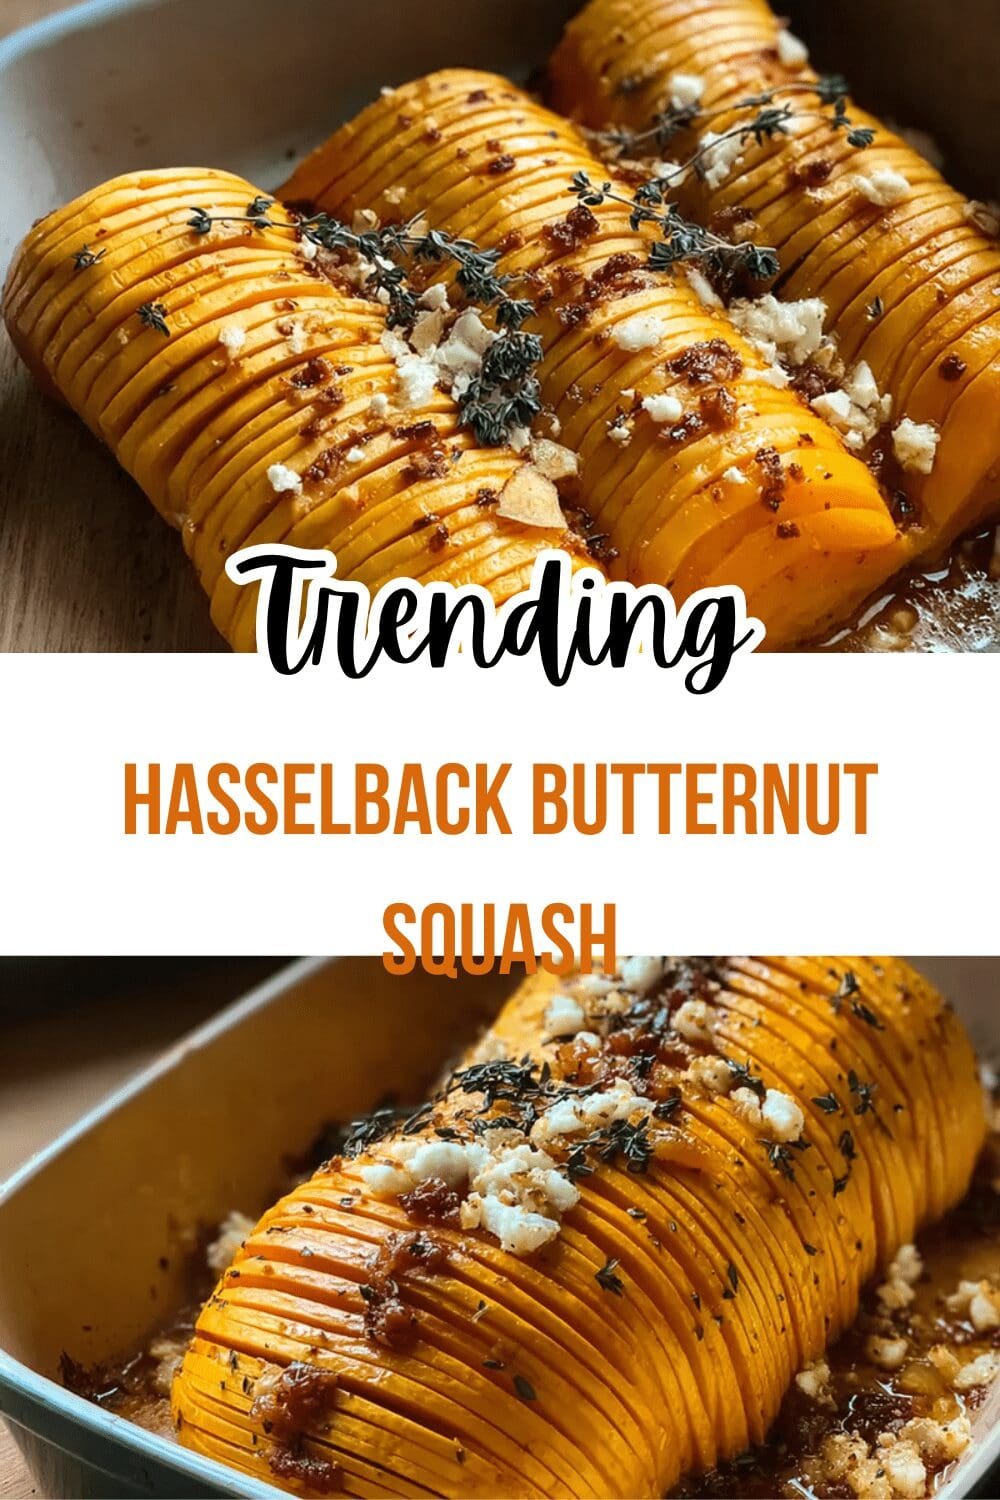
One of the best parts is the distinctive flavor that makes this Hasselback Butternut Squash recipe shine. The contrast between the crispy, golden edges and the soft, buttery flesh creates a delightful eating experience. With layers of seasoning and a sweet glaze, every bite balances savory notes from herbs like sage and a crunchy topping for added depth.
Jump To
- 1. Why You’ll Love This Hasselback Butternut Squash
- 2. Essential Ingredients for Hasselback Butternut Squash
- 3. How to Prepare the Perfect Hasselback Butternut Squash: Step-by-Step Guide
- 4. Dietary Substitutions to Customize Your Hasselback Butternut Squash
- 5. Mastering Hasselback Butternut Squash: Advanced Tips and Variations
- 6. How to Store Hasselback Butternut Squash: Best Practices
- 7. FAQs: Frequently Asked Questions About Hasselback Butternut Squash
- 8. Hasselback Butternut Squash
Essential Ingredients for Hasselback Butternut Squash
Putting together Hasselback Butternut Squash starts with the right ingredients, each playing a key role in building flavor and texture. Below is a detailed list based on the classic recipe, including precise measurements and a quick note on what each one brings to the dish. I’ve incorporated variations for special diets to make it easy to customize.
- 2 small to medium butternut squash – the main component, providing sweet, starchy flesh that forms the base of this roasted hasselback squash dish.
- 4 tablespoons olive oil – promotes browning and crisping in the hasselback slices, helping to lock in moisture and add a subtle richness.
- 1 stick (8 tablespoons) salted extra creamy butter, at room temperature – enriches the mouthfeel and helps the edges crisp up, but can be replaced for a creamy texture in other versions.
- 3 tablespoons maple syrup – an optional glaze that accents caramelization and balances the savory flavors, making the hasselback butternut squash extra irresistible.
- 2 teaspoons chopped fresh sage plus 8 sage leaves – adds a herby aroma and freshness, enhancing the overall seasoning layers in this Hasselback Butternut Squash.
- 1 cup finely torn ciabatta bread – creates crispy breadcrumbs for topping, adding texture, though you can swap for gluten-free options if needed.
- 3 ounces prosciutto – provides a salty crunch that contrasts the sweetness, but omit for vegan adaptations or use plant-based alternatives.
- Salt and pepper to taste – balances the sweetness and seasons the flesh, ensuring every bite of this Hasselback Butternut Squash is perfectly flavored.
For special dietary options: To make it vegan, replace the butter with olive oil or a plant-based alternative and skip the prosciutto. For gluten-free, all core ingredients are naturally gluten-free, but use gluten-free bread for the topping. If you’re aiming for low-calorie, reduce the oil to 1 tablespoon and skip the maple syrup, relying on herbs and spices for flavor instead.
How to Prepare the Perfect Hasselback Butternut Squash: Step-by-Step Guide
Creating the perfect Hasselback Butternut Squash is all about following simple steps that turn a humble veggie into a star side dish. Start with your preparation to set the stage for success, and you’ll have a delicious meal ready in no time. This guide keeps things straightforward, so even if you’re new to hasselback-style butternut, you’ll feel like a pro.
First Step: Preparation and Mise en Place
Begin by preheating your oven to 425 degrees F, which gives you that perfect roast for Hasselback Butternut Squash. Wash and dry the 2 small to medium butternut squash, then trim the ends and peel the skin for easier handling. Set out your 4 tablespoons olive oil, 1 stick (8 tablespoons) salted extra creamy butter, 3 tablespoons maple syrup, 2 teaspoons chopped fresh sage plus 8 sage leaves, and a baking sheet to keep everything organized. This step ensures you’re ready to go, making the process smooth and efficient, especially for busy parents or working professionals.
For dietary tweaks, use olive oil in place of butter if you’re making a vegan version. This roasted butternut hasselback will still shine with these simple swaps.
Second Step: Cutting the Squash
Now, halve the squash lengthwise and scoop out the seeds to prepare for the signature hasselback slices. Place the squash stem-side up on a cutting board and use two wooden spoons on either side as guides to avoid cutting all the way through. Make thin, even crosswise slits about 2-3 mm apart across the rounded side, which allows the slices to fan out beautifully during cooking. This technique is key for that eye-catching look in Hasselback Butternut Squash, and it works well for variations like adding protein later.
If you’re diet-conscious, remember this method keeps the dish low-calorie by not adding extra fats yet. For more ideas, check out our squash dressing recipe for complementary sides.
Third Step: Seasoning and Basting
Once sliced, rub the squash with the 4 tablespoons olive oil and season with salt and pepper to taste. Mix the 1 stick (8 tablespoons) salted extra creamy butter, 3 tablespoons maple syrup, and 2 teaspoons chopped fresh sage to create a flavorful sage maple butter. Spread half of this mixture over the scored side, letting it drip into the slits for even flavor distribution, then add more salt and pepper as needed.
This basting step enhances the caramelized edges of Hasselback Butternut Squash, and for low-calorie options, use just herbs without the butter. It’s a flexible way to enjoy this recipe as a vegetarian or gluten-free dish.
Fourth Step: Baking Setup
Place the prepared squash on a baking sheet with the scored side up, ready for roasting. If you want a more tender interior, loosely tent with foil for the first part of cooking. Roast at 425 degrees F for 15 minutes until slightly softened, which is ideal for this Hasselback Butternut Squash to absorb flavors.
Adaptations here include skipping foil for quicker crisping if you’re in a rush, and it’s naturally vegan-friendly with oil swaps.
Fifth Step: Roasting Times and Temperatures
After the initial roast, continue baking for 30 minutes, then add the remaining butter mixture and baste with any pan juices. Roast for another 15-20 minutes until tender, checking at intervals to ensure even cooking. For larger squash, this might take longer, so aim for 40-60 minutes total depending on size as a guide, use 400°F for most Hasselback Butternut Squash preparations.
While the squash roasts, prepare the topping by tossing 1 cup finely torn ciabatta bread, some olive oil, the 8 sage leaves, salt, pepper, and 3 ounces prosciutto on a separate sheet. Bake for 10-15 minutes until toasted, then crumble for topping. For protein additions, this is where you’d include roasted chickpeas for a heartier, low-calorie meal.
Sixth Step: Finishing and Serving
In the last few minutes, increase the heat if needed to crisp the edges, then transfer to a plate and drizzle with any leftover butter. Top with the prosciutto breadcrumbs and sage leaves for that final touch. Let it rest for a few minutes before serving warm, making it a versatile side for any occasion.
For vegan or gluten-free versions, adjust as mentioned, and this dish pairs well with other recipes like our roasted red pepper stuffed chicken. The total time is about 1 hour 20 minutes, with 20 minutes prep.

Dietary Substitutions to Customize Your Hasselback Butternut Squash
Protein and Main Component Alternatives
When customizing Hasselback Butternut Squash, start with protein swaps to fit your needs. For vegan options, try roasted chickpeas or spiced lentils as crunchy toppings that add protein without altering the hasselback squash variations much. Texturally, these keep the dish light and maintain a similar cook time, ideal for diet-conscious individuals.
If you’re not vegetarian, shredded chicken or pancetta can replace prosciutto, adding a savory depth while keeping the recipe quick. These changes ensure your Hasselback Butternut Squash remains gluten-free and low-calorie if you stick to plant-based choices.
Vegetable, Sauce, and Seasoning Modifications
Switch up the veggies in your roasted butternut hasselback for seasonal variety, like using acorn squash or sweet potato instead. This affects cook time slightly, as sweeter options may caramelize faster, and pairs well with sauces like tahini-lemon or balsamic reduction for a fresh twist.
Experiment with seasonings such as za’atar or curry powder to change the flavor profile, which keeps the dish adaptable for food enthusiasts. For low-calorie preferences, skip creamy sauces and opt for herb-heavy toppings, ensuring your hasselback-style squash stays healthy and delicious.
Mastering Hasselback Butternut Squash: Advanced Tips and Variations
Taking your Hasselback Butternut Squash to the next level involves some pro techniques that make cooking easier and more fun. Par-roast larger halves before slicing to ensure even doneness, which helps with that perfect hasselback butternut texture. You can also use clarified butter for better browning, adjusting for vegan options with oil.
Flavor variations keep things exciting try a maple-chipotle glaze with pecans for a smoky kick, or go for miso-maple with sesame seeds for an Asian-inspired twist. Presentation-wise, fan the squash on a platter and add microgreens for a restaurant-style look, which works great for special occasions.
Make-ahead strategies are a game-changer for busy schedules; partially roast and refrigerate, then finish later. For external inspiration on toppings, see this guide to prosciutto breadcrumbs. Always tweak for dietary needs, like vegan glazes, to keep it inclusive.
How to Store Hasselback Butternut Squash: Best Practices
Proper storage keeps your Hasselback Butternut Squash tasting fresh, starting with refrigeration for short-term needs. Let it cool to room temperature within 2 hours, then place in an airtight container and store in the fridge for 3-4 days to maintain quality.
For freezing, remove toppings first and freeze the roasted squash on a tray until solid, then transfer to bags for up to 2-3 months. When reheating, use the oven at 350°F for 10-15 minutes to re-crisp edges, avoiding the microwave to preserve texture.
Meal prep tips include roasting multiple at once and storing them separately from glazes, which helps with batch cooking for working professionals. This approach ensures your storing hasselback squash stays versatile and ready for quick meals.
FAQs: Frequently Asked Questions About Hasselback Butternut Squash
What size butternut squash is best for making Hasselback butternut squash?
Choose small to medium-sized butternut squash for Hasselback preparation. This size allows each half to serve about two people and ensures even cooking. Larger squash may require longer roasting times and can be harder to slice evenly for the Hasselback technique.
How can I slice butternut squash for Hasselback without cutting all the way through?
To avoid cutting through the butternut squash, place two wooden spoons or chopsticks parallel on either side of the squash as a barrier. Use a sharp knife to make thin, evenly spaced slits across the squash’s rounded side, stopping when the knife hits the spoons. This technique keeps the base intact while allowing the slices to fan out during cooking.
Can I prepare Hasselback butternut squash ahead of time and reheat it later?
Yes, you can partially roast the squash for about 30 minutes, then let it cool and refrigerate it for 1-2 days. When ready to serve, finish roasting until tender and golden. Breadcrumbs or toppings can also be prepared in advance and stored separately. This method saves time while maintaining flavor.
How can I make Hasselback butternut squash vegan or gluten-free?
To make a vegan version, substitute butter with olive oil or a plant-based margarine and skip any meat additions. For gluten-free options, replace traditional breadcrumbs with gluten-free breadcrumbs or crushed nuts. The overall cooking time and technique remain the same, ensuring a tasty alternative for special diets.
Is it possible to freeze Hasselback butternut squash, and how should I reheat it?
Hasselback butternut squash can be frozen after cooking and cooling completely. Wrap tightly in foil or place in an airtight container before freezing. To reheat, thaw in the refrigerator overnight and warm in an oven set to 350°F (175°C) until heated through and crisp on the edges, usually about 15-20 minutes.

Hasselback Butternut Squash
- Total Time: 1 hour 20 minutes
- Yield: 4 servings
Description
🍠 This Hasselback Butternut Squash features perfectly roasted, thinly sliced squash glazed with sweet maple syrup and savory sage butter.
🥓 The crispy prosciutto breadcrumb topping adds a flavorful crunch, making it an ideal festive side dish.
Ingredients
– 2 small to medium butternut squash the main component, providing sweet, starchy flesh that forms the base of this roasted hasselback squash dish
– 4 tablespoons olive oil promotes browning and crisping in the hasselback slices, helping to lock in moisture and add a subtle richness
– 1 stick (8 tablespoons) salted extra creamy butter, at room temperature enriches the mouthfeel and helps the edges crisp up, but can be replaced for a creamy texture in other versions
– 3 tablespoons maple syrup an optional glaze that accents caramelization and balances the savory flavors, making the hasselback butternut squash extra irresistible
– 2 teaspoons chopped fresh sage plus 8 sage leaves adds a herby aroma and freshness, enhancing the overall seasoning layers in this Hasselback Butternut Squash
– 1 cup finely torn ciabatta bread creates crispy breadcrumbs for topping, adding texture, though you can swap for gluten-free options if needed
– 3 ounces prosciutto provides a salty crunch that contrasts the sweetness, but omit for vegan adaptations or use plant-based alternatives
– Salt and pepper to taste balances the sweetness and seasons the flesh, ensuring every bite of this Hasselback Butternut Squash is perfectly flavored
Instructions
1-First Step: Preparation and Mise en Place Begin by preheating your oven to 425 degrees F, which gives you that perfect roast for Hasselback Butternut Squash. Wash and dry the 2 small to medium butternut squash, then trim the ends and peel the skin for easier handling. Set out your 4 tablespoons olive oil, 1 stick (8 tablespoons) salted extra creamy butter, 3 tablespoons maple syrup, 2 teaspoons chopped fresh sage plus 8 sage leaves, and a baking sheet to keep everything organized. This step ensures you’re ready to go, making the process smooth and efficient, especially for busy parents or working professionals.
2-Second Step: Cutting the Squash Now, halve the squash lengthwise and scoop out the seeds to prepare for the signature hasselback slices. Place the squash stem-side up on a cutting board and use two wooden spoons on either side as guides to avoid cutting all the way through. Make thin, even crosswise slits about 2-3 mm apart across the rounded side, which allows the slices to fan out beautifully during cooking. This technique is key for that eye-catching look in Hasselback Butternut Squash, and it works well for variations like adding protein later.
3-Third Step: Seasoning and Basting Once sliced, rub the squash with the 4 tablespoons olive oil and season with salt and pepper to taste. Mix the 1 stick (8 tablespoons) salted extra creamy butter, 3 tablespoons maple syrup, and 2 teaspoons chopped fresh sage to create a flavorful sage maple butter. Spread half of this mixture over the scored side, letting it drip into the slits for even flavor distribution, then add more salt and pepper as needed.
4-Fourth Step: Baking Setup Place the prepared squash on a baking sheet with the scored side up, ready for roasting. If you want a more tender interior, loosely tent with foil for the first part of cooking. Roast at 425 degrees F for 15 minutes until slightly softened, which is ideal for this Hasselback Butternut Squash to absorb flavors.
5-Fifth Step: Roasting Times and Temperatures After the initial roast, continue baking for 30 minutes, then add the remaining butter mixture and baste with any pan juices. Roast for another 15-20 minutes until tender, checking at intervals to ensure even cooking. For larger squash, this might take longer, so aim for 40-60 minutes total depending on size as a guide, use 400°F for most Hasselback Butternut Squash preparations.
6-Sixth Step: Finishing and Serving In the last few minutes, increase the heat if needed to crisp the edges, then transfer to a plate and drizzle with any leftover butter. Top with the prosciutto breadcrumbs and sage leaves for that final touch. Let it rest for a few minutes before serving warm, making it a versatile side for any occasion.
Notes
🔪 Use a sharp knife and wooden spoons on both sides to prevent slicing all the way through.
🍁 Maple syrup helps caramelize squash and balance savory flavors.
🥓 Prosciutto breadcrumbs add salty crunch and complement the sweet herb glaze.
- Prep Time: 20 minutes
- Cook Time: 1 hour
- Cook Time: 1 hour
- Category: Side Dish
- Method: Roasting
- Cuisine: American
Nutrition
- Serving Size: 1 serving
- Calories: 365
Keywords: Hasselback Butternut Squash, Sage Butter, Prosciutto Topping, Roasted Squash