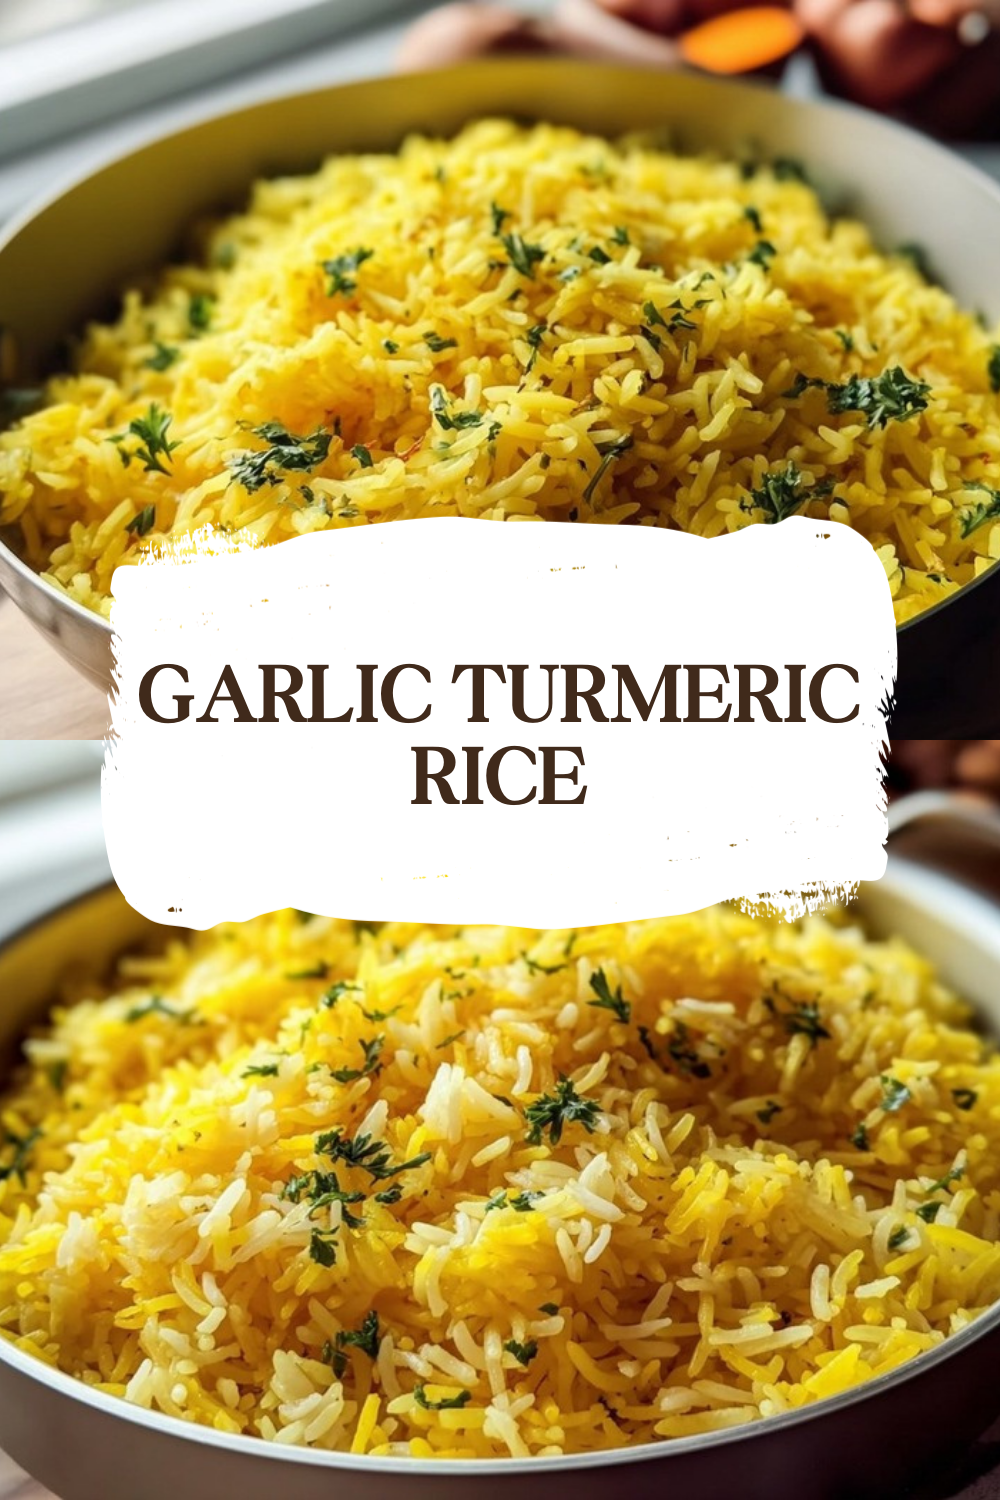
Why You’ll Love This Garlic Turmeric Rice
Garlic Turmeric Rice brings together simple ingredients to create a side dish that transforms any meal into something special. This vibrant, golden rice offers so much more than just a pretty color on your plate. Whether you are a busy parent looking for quick sides or a food enthusiast wanting to try new flavors, this recipe delivers on every front.
Ease of Preparation
This recipe comes together in about 25 minutes from start to finish. The prep time is just 5 minutes, making it perfect for weeknight dinners when time is tight. You can prepare this dish using three different cooking methods: electric pressure cooker, rice cooker, or traditional stove-top. Each method produces fluffy, flavorful results with minimal effort. The pressure cooker method takes only 4 minutes of active cooking time, plus a natural release period, which means you can focus on preparing your main dish while the rice cooks.
Health Benefits
Turmeric contains curcumin, a powerful antioxidant and anti-inflammatory compound that gives this spice its reputation as a wellness booster. When paired with ground black pepper, the absorption of curcumin increases significantly, making this combination both tasty and functional. Garlic adds more than just aromatic flavor; it brings its own set of health-promoting properties. A trusted medical resource notes that turmeric has been used for centuries in traditional medicine for its healing properties.
Versatility
This Garlic Turmeric Rice recipe is naturally vegan and gluten-free, which makes it suitable for a wide range of dietary needs. You can serve it alongside grilled meats, roasted vegetables, or stir-fried dishes. The recipe also adapts easily to different flavor profiles and can accommodate various mix-ins like peas, corn, carrots, or lima beans. Whether you follow the basic recipe or customize it with additional spices and vegetables, the results remain consistently delicious.
Distinctive Flavor
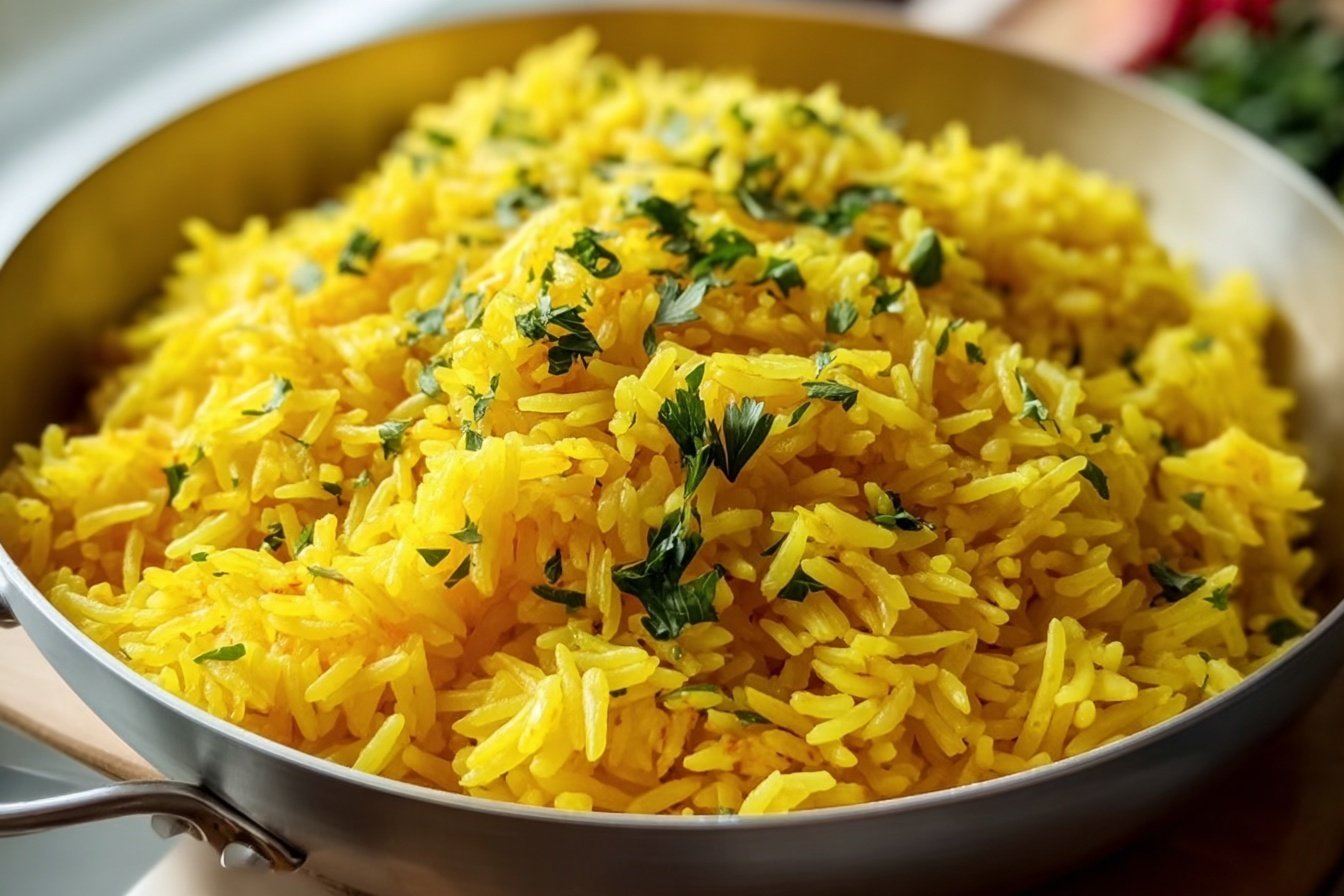
The combination of turmeric and garlic creates a unique taste profile that stands out from plain white rice. Turmeric provides a mild, earthy flavor with subtle warm notes, while garlic adds aromatic depth. When freshly minced garlic is sautéed or cooked with the rice, it releases compounds that give the dish an inviting fragrance. The golden hue from the turmeric makes this rice visually appealing, brightening up any plate it accompanies.
Jump To
- 1. Why You’ll Love This Garlic Turmeric Rice
- 2. Essential Ingredients for Garlic Turmeric Rice
- 3. How to Prepare the Perfect Garlic Turmeric Rice: Step-by-Step Guide
- 4. Dietary Substitutions to Customize Your Garlic Turmeric Rice
- 5. Mastering Garlic Turmeric Rice: Advanced Tips and Variations
- 6. How to Store Garlic Turmeric Rice: Best Practices
- 7. FAQs: Frequently Asked Questions About Garlic Turmeric Rice
- 8. Garlic Turmeric Rice
Essential Ingredients for Garlic Turmeric Rice
Creating the perfect Garlic Turmeric Rice starts with understanding each ingredient’s role in the final dish. Below is a comprehensive list of everything you need, along with the exact measurements for a recipe that yields 6 servings.
Main Ingredients List
- 2 cups white rice (basmati or jasmine recommended), rinsed – These long-grain varieties produce fluffy, separate grains that hold up beautifully during cooking. Rinsing removes excess starch and prevents gummy texture.
- 2 cups water (for electric pressure cooker) – This ratio works specifically for pressure cooking. Use 3 cups for rice cooker or 3.5-4 cups for stove-top methods, adjusting based on your preferred moisture level.
- 1 tablespoon olive oil – Helps separate the grains and adds a subtle richness to the finished dish. Brush it on the pot bottom to prevent sticking.
- 2 cloves garlic, finely minced or diced (for electric pressure cooker) or 1 clove (for rice cooker and stove-top) – Fresh garlic creates the aromatic base. Use more for pressure cooking since some flavor concentrates, less for other methods.
- ½ teaspoon turmeric – This powdered spice provides the signature golden color and earthy flavor. Powdered turmeric disperses evenly throughout the rice during cooking.
- ¾ teaspoon salt, or to taste – Enhances all the flavors in the dish. Start with this amount and adjust according to your preference.
- ¼ – ½ teaspoon ground black pepper, or to taste – Essential for helping your body absorb the beneficial compounds in turmeric. The pepper also adds a subtle warmth to each bite.
Special Dietary Options
This recipe already accommodates several dietary preferences without any modifications:
- Vegan: This dish is naturally plant-based, using olive oil instead of butter. No animal products are involved in the preparation.
- Gluten-free: All ingredients are naturally free from gluten. White rice, turmeric, garlic, and seasonings contain no wheat or gluten proteins.
- Low-calorie: At only 236 calories per serving, this side dish fits well into calorie-conscious meal plans while still providing satisfying flavor.
Pro Tip: Always use powdered turmeric rather than fresh for this recipe. Fresh turmeric does not disperse well in the cooking water and will leave you with uneven coloring and flavor distribution.
How to Prepare the Perfect Garlic Turmeric Rice: Step-by-Step Guide
Follow these detailed instructions to achieve perfectly cooked Garlic Turmeric Rice every time. The method you choose depends on your available equipment and time constraints. Each technique produces slightly different results, so read through all options before deciding which works best for your situation.
Electric Pressure Cooker Method
This is the fastest and most hands-off approach, ideal for busy weeknights when you need a reliable side dish with minimal attention.
Step 1: Prepare Your Equipment
Start by brushing 1 tablespoon of olive oil on the bottom of your electric pressure cooker pot. This thin coating prevents the rice from sticking and helps create those delicious slightly crispy bits at the bottom. Make sure your sealing ring is properly installed and the vent is clear.
Step 2: Add Ingredients
Add the 2 cups of rinsed rice to the oiled pot. Pour in 2 cups of water. Add the 2 cloves of minced garlic, ½ teaspoon of turmeric, ¾ teaspoon of salt, and ¼ to ½ teaspoon of ground black pepper. Give everything a good stir to combine and distribute the spices evenly throughout the mixture.
Step 3: Cook Under Pressure
Seal the lid according to your manufacturer’s instructions. Set the pressure cooker to high pressure for 4 minutes. The pot will take several minutes to come to pressure before the cooking time begins counting down.
Step 4: Natural Release
Once the cooking time is complete, allow the pressure to release naturally for 10 to 15 minutes. This gradual release helps the rice finish cooking gently and prevents it from becoming mushy or sticky. After the natural release period, quick release any remaining pressure by carefully turning the vent knob.
Step 5: Fluff and Serve
Open the lid carefully, angling it away from you to avoid steam burns. Use a wooden spoon or rice paddle to gently fluff the rice. This separates the grains and releases excess moisture. For best results, remove the inner pot from the pressure cooker and place it on a trivet to prevent the rice from continuing to cook and stick to the bottom.
Rice Cooker Method
The rice cooker method offers convenience and consistent results with virtually no monitoring required.
Step 1: Combine Ingredients
Add the rinsed rice to your rice cooker inner pot. Pour in 3 cups of water, which is more than the pressure cooker method since rice cookers lose more moisture during the longer cooking cycle. Add 1 clove of minced garlic (reduced from the pressure cooker amount since the longer cooking time concentrates flavors), the turmeric, salt, pepper, and olive oil.
Step 2: Start the Cycle
Stir everything together until well combined. Close the lid and start the regular rice cooking cycle according to your manufacturer’s instructions. Most rice cookers automatically switch to warm mode when the rice is done.
Step 3: Rest and Fluff
When the cycle completes, let the rice rest for 5 to 10 minutes with the lid closed. This resting period allows the moisture to redistribute evenly throughout the grains. Open the lid and fluff gently with a rice paddle before serving.
Stove-Top Method
The traditional stove-top method gives you the most control over the cooking process and allows for adjustments as you go.
Step 1: Boil Water
Bring 3.5 to 4 cups of water to a boil in a medium saucepan. The exact amount depends on how moist you prefer your rice and how much evaporation occurs with your pot. A tight-fitting lid helps reduce water loss during cooking.
Step 2: Add Ingredients
Once the water reaches a rolling boil, stir in all ingredients: the rinsed rice, 1 clove of minced garlic, turmeric, salt, pepper, and olive oil. Stir once to combine and ensure the turmeric is evenly distributed throughout the water.
Step 3: Simmer Covered
Cover the pot with a tight-fitting lid and immediately reduce the heat to low. The rice should simmer gently, not boil vigorously. Simmer for 15 to 20 minutes until all the water is absorbed. Avoid lifting the lid during cooking, as this releases steam and interrupts the cooking process.
Step 4: Rest and Serve
Once the water is absorbed, remove the pot from heat but keep the lid on. Let it rest for 5 minutes to allow the grains to firm up slightly. Remove the lid and fluff with a fork before serving.
Cooking Time Comparison
| Method | Prep Time | Cook Time | Total Time | Water Needed |
|---|---|---|---|---|
| Electric Pressure Cooker | 5 minutes | 4 minutes + 15 min release | ~25 minutes | 2 cups |
| Rice Cooker | 5 minutes | 20-25 minutes | ~30 minutes | 3 cups |
| Stove-Top | 5 minutes | 15-20 minutes | ~25 minutes | 3.5-4 cups |

Dietary Substitutions to Customize Your Garlic Turmeric Rice
One of the best things about this Garlic Turmeric Rice recipe is how easily it adapts to different dietary preferences and ingredient availability. Whether you want to change the base grain or add more vegetables and seasonings, these substitutions keep the dish delicious and interesting.
Protein and Main Component Alternatives
While this recipe shines as a side dish, you can transform it into a complete meal with simple additions. Consider pairing it with smothered chicken and rice for a hearty dinner that combines protein and grains in one satisfying meal.
For those wanting to incorporate more plant-based protein, adding legumes works beautifully. Stir in 1 cup of cooked chickpeas or lentils during the last 5 minutes of cooking. These proteins absorb the turmeric and garlic flavors while adding texture and nutrients. Each half-cup serving of chickpeas contributes about 6 grams of protein and 5 grams of fiber.
If you prefer brown rice for its nutritional benefits, the recipe adapts easily. Brown rice contains more fiber and provides a nuttier flavor that complements the earthy turmeric. Use 3 cups of water per 2 cups of brown rice, and cook for 25 minutes in an electric pressure cooker or 40-45 minutes on the stove-top. The longer cooking time breaks down the bran layer, resulting in tender grains with a pleasant chew.
Vegetable, Sauce, and Seasoning Modifications
The flavor possibilities for Garlic Turmeric Rice extend far beyond the basic recipe. Each modification brings new dimensions while maintaining the signature golden color.
Vegetable Add-ins: Stir in 1-2 cups of frozen vegetables like peas, corn, carrots, or lima beans right before cooking. They cook perfectly alongside the rice without any additional steps. For fresh vegetables, use sturdy options like broccoli florets or green beans, adding them midway through cooking to prevent overcooking. According to nutritional research on garlic and other vegetables, combining multiple plant foods increases the overall antioxidant content of your meal.
Spice Variations: Toasted cumin seeds add a warm, aromatic note that pairs wonderfully with turmeric. Add 1 teaspoon to the rice before cooking. Green cardamom pods (2-3 whole pods) bring a subtle floral sweetness. Simply remove them before serving, similar to how you would handle bay leaves.
Fresh Finishes: Brighten the finished dish with fresh cilantro leaves or a squeeze of lime juice. These additions complement the earthy turmeric and aromatic garlic beautifully, adding layers of fresh flavor that cut through the richness.
Mastering Garlic Turmeric Rice: Advanced Tips and Variations
Once you master the basic Garlic Turmeric Rice recipe, you can take your cooking to the next level with these professional techniques and creative variations. These tips help you achieve restaurant-quality results at home.
Pro Cooking Techniques
The secret to perfectly fluffy rice lies in the details. First, always rinse your rice until the water runs clear. This removes surface starch that causes grains to stick together. A fine-mesh strainer works best for this task.
When using an electric pressure cooker, resist the urge to quick release immediately after cooking. The natural release period of 10-15 minutes is essential for proper texture. Quick releasing too soon can cause the rice to become gummy or uneven in texture.
After cooking, removing the inner pot from the pressure cooker or stove prevents residual heat from continuing to cook the bottom layer. Place the pot on a trivet or cooling rack. This simple step prevents the rice at the bottom from becoming crunchy or stuck.
Flavor Variations
Create entirely different flavor profiles by adjusting seasonings and additions:
- Indian-Style: Add 1 teaspoon of garam masala and a cinnamon stick during cooking. Finish with toasted cashews and fresh mint.
- Mediterranean: Stir in ½ cup of diced sun-dried tomatoes and 2 tablespoons of chopped olives after cooking. Top with crumbled feta cheese.
- Mexican-Inspired: Add 1 teaspoon of cumin and a pinch of cayenne pepper. Mix in corn and black beans for a hearty side that pairs perfectly with grilled proteins.
For a complete meal idea, consider serving this rice alongside a Mediterranean ground beef stir fry for a fusion of flavors that complement each other beautifully.
Presentation Tips
Visual appeal matters as much as taste. Transfer the cooked rice to a serving bowl and garnish with fresh herbs like cilantro or parsley. A sprinkle of paprika over the top adds a contrasting color accent. For dinner parties, mold the rice in a small bowl and invert onto individual plates for an elegant restaurant-style presentation.
Make-Ahead Options
Garlic Turmeric Rice works wonderfully for meal prep. Cook a double batch on Sunday and portion it into containers for the week. The rice reheats beautifully in a skillet with a splash of water, returning to its original fluffy texture. Store cooked rice in airtight containers for up to 4 days in the refrigerator or up to 1 month in the freezer.
How to Store Garlic Turmeric Rice: Best Practices
Proper storage ensures your Garlic Turmeric Rice remains fresh and safe to eat for future meals. Follow these guidelines to maintain quality and flavor.
Refrigeration Guidelines
Allow the rice to cool to room temperature before storing, but never leave it out for more than 2 hours. Transfer to an airtight container and refrigerate promptly. Properly stored rice keeps for 3 to 4 days in the refrigerator. Label the container with the date to track freshness.
Freezing for Long-Term Storage
For longer storage, freeze the rice in portion-sized containers or freezer bags. Remove as much air as possible from bags to prevent freezer burn. Frozen rice maintains good quality for up to 1 month. Thaw overnight in the refrigerator before reheating, or reheat directly from frozen using the microwave method.
Reheating Without Drying
The key to reheating rice without drying it out is adding moisture. Place the rice in a skillet over medium-low heat with 1-2 tablespoons of water or broth per cup of rice. Cover and heat for 5-7 minutes, stirring occasionally, until steaming hot throughout. For microwave reheating, place rice in a covered dish with a splash of water. Heat for 1-2 minutes per cup, stirring halfway through.
Meal Prep Considerations
When meal prepping, consider cooking extra rice for use throughout the week. Use the same batch for different meals by adding different seasonings or mix-ins each time. One batch of Garlic Turmeric Rice can serve as a side dish one night, transform into fried rice the next, and become a base for a grain bowl later in the week.
FAQs: Frequently Asked Questions About Garlic Turmeric Rice
Can I use fresh turmeric instead of powdered in garlic turmeric rice?
Fresh turmeric can work as a substitute in garlic turmeric rice, but powdered turmeric is best for even color and flavor distribution. Fresh turmeric doesn’t dissolve fully in the cooking water, so the rice won’t turn vibrant yellow. If using fresh, peel and grate about 1 tablespoon per 2 cups of rice directly into the water before cooking. This adds a fresh, earthy taste but may leave small flecks. Powdered turmeric (1-2 teaspoons) mixes seamlessly for that classic golden hue. Both options keep the anti-inflammatory benefits intact. Test a small batch first to match your preferred look and taste. Store fresh turmeric in the fridge for up to two weeks.
Can I use garlic powder instead of fresh garlic for garlic turmeric rice?
Yes, garlic powder is a convenient substitute for fresh garlic in garlic turmeric rice. For every 2-4 fresh cloves (about 1-2 teaspoons minced), use ½ teaspoon of garlic powder. Stir it into the rice water with the turmeric and other seasonings before cooking. It provides a consistent, milder garlic flavor without the chopping, and it disperses evenly. Fresh garlic offers more pungency and aroma from sautéing, but powder saves time for busy weeknights. Adjust to taste—start low to avoid overpowering the turmeric. This swap works in stovetop, rice cooker, or Instant Pot methods without changing cook times.
How do I make garlic turmeric rice with brown rice?
You can easily adapt garlic turmeric rice for brown rice, though it requires adjustments for longer cooking. Use a 1:1.5 rice-to-water ratio—for 2 cups brown rice, add 3 cups water, plus garlic, turmeric, salt, and oil. In an Instant Pot, cook on manual high pressure for 25 minutes, followed by a 10-minute natural release. On stovetop, simmer covered for 40-45 minutes until tender. Brown rice gives a nuttier flavor and more fiber (about 3.5g per cup cooked), but skip adding vegetables as they may turn mushy. Rinse rice first to remove excess starch. Fluff and rest 5 minutes post-cooking for best texture.
Can I add vegetables to garlic turmeric rice?
Absolutely, adding vegetables turns garlic turmeric rice into a one-pot meal. Stir in 1-2 cups frozen mix like peas, corn, carrots, or lima beans right before cooking—no thawing needed. They cook perfectly with the rice in about 20-25 minutes on stovetop or Instant Pot. For fresh veggies, use sturdy ones like broccoli florets or green beans, adding them midway to avoid overcooking. This boosts nutrition—peas add 5g protein per half-cup. Season with extra salt if needed. Avoid delicate greens like spinach until after cooking to prevent wilting. Pairs great with proteins for a balanced dish.
How do I reheat garlic turmeric rice without drying it out?
Reheat garlic turmeric rice in a skillet over medium-low heat with 1-2 tablespoons water or broth per cup of rice. Cover and stir every 1-2 minutes for 5-7 minutes until steaming hot (internal temp 165°F). Microwave works too: place in a covered dish with a splash of water, heat 1-2 minutes per cup, stirring halfway. Avoid high heat to prevent sticking. For best flavor, add a pat of butter or fresh herbs at the end. Store leftovers in an airtight container in the fridge up to 4 days or freeze for 1 month. This method restores moisture and keeps the garlic-turmeric taste vibrant.
Garlic Turmeric Rice
- Total Time: 25 minutes
- Yield: 6 servings
- Diet: Vegan, Gluten-Free
Description
🍚 Golden garlic turmeric rice – fragrant, antioxidant-rich vegan side with earthy spice boost!
🌿 25-min gluten-free effortless dish, perfect flavorful pairing for curries, grilled meats or veggies.
Ingredients
– 2 cups white rice (basmati or jasmine recommended), rinsed
– 2 cups water (for electric pressure cooker)
– 1 tablespoon olive oil
– 2 cloves garlic, finely minced or diced (for electric pressure cooker) or 1 clove (for rice cooker and stove-top)
– ½ teaspoon turmeric
– ¾ teaspoon salt, or to taste
– ¼ – ½ teaspoon ground black pepper, or to taste
Instructions
1-Step 1: Prepare Your Equipment Start by brushing 1 tablespoon of olive oil on the bottom of your electric pressure cooker pot. This thin coating prevents the rice from sticking and helps create those delicious slightly crispy bits at the bottom. Make sure your sealing ring is properly installed and the vent is clear.
2-Step 2: Add Ingredients Add the 2 cups of rinsed rice to the oiled pot. Pour in 2 cups of water. Add the 2 cloves of minced garlic, ½ teaspoon of turmeric, ¾ teaspoon of salt, and ¼ to ½ teaspoon of ground black pepper. Give everything a good stir to combine and distribute the spices evenly throughout the mixture.
3-Step 3: Cook Under Pressure Seal the lid according to your manufacturer’s instructions. Set the pressure cooker to high pressure for 4 minutes. The pot will take several minutes to come to pressure before the cooking time begins counting down.
4-Step 4: Natural Release Once the cooking time is complete, allow the pressure to release naturally for 10 to 15 minutes. This gradual release helps the rice finish cooking gently and prevents it from becoming mushy or sticky. After the natural release period, quick release any remaining pressure by carefully turning the vent knob.
5-Step 5: Fluff and Serve Open the lid carefully, angling it away from you to avoid steam burns. Use a wooden spoon or rice paddle to gently fluff the rice. This separates the grains and releases excess moisture. For best results, remove the inner pot from the pressure cooker and place it on a trivet to prevent the rice from continuing to cook and stick to the bottom.
6-Step 1: Combine Ingredients Add the rinsed rice to your rice cooker inner pot. Pour in 3 cups of water, which is more than the pressure cooker method since rice cookers lose more moisture during the longer cooking cycle. Add 1 clove of minced garlic (reduced from the pressure cooker amount since the longer cooking time concentrates flavors), the turmeric, salt, pepper, and olive oil.
7-Step 2: Start the Cycle Stir everything together until well combined. Close the lid and start the regular rice cooking cycle according to your manufacturer’s instructions. Most rice cookers automatically switch to warm mode when the rice is done.
8-Step 3: Rest and Fluff When the cycle completes, let the rice rest for 5 to 10 minutes with the lid closed. This resting period allows the moisture to redistribute evenly throughout the grains. Open the lid and fluff gently with a rice paddle before serving.
9-Step 1: Boil Water Bring 3.5 to 4 cups of water to a boil in a medium saucepan. The exact amount depends on how moist you prefer your rice and how much evaporation occurs with your pot. A tight-fitting lid helps reduce water loss during cooking.
10-Step 2: Add Ingredients Once the water reaches a rolling boil, stir in all ingredients: the rinsed rice, 1 clove of minced garlic, turmeric, salt, pepper, and olive oil. Stir once to combine and ensure the turmeric is evenly distributed throughout the water.
11-Step 3: Simmer Covered Cover the pot with a tight-fitting lid and immediately reduce the heat to low. The rice should simmer gently, not boil vigorously. Simmer for 15 to 20 minutes until all the water is absorbed. Avoid lifting the lid during cooking, as this releases steam and interrupts the cooking process.
12-Step 4: Rest and Serve Once the water is absorbed, remove the pot from heat but keep the lid on. Let it rest for 5 minutes to allow the grains to firm up slightly. Remove the lid and fluff with a fork before serving.
Notes
🧂 Powdered turmeric disperses evenly for vibrant golden hue.
🧄 Fresh minced garlic maximizes aroma; use less for rice cooker/stovetop.
🌾 Brown rice: 3 cups water, 25 min high pressure.
- Prep Time: 5 minutes
- Natural Release: 15 minutes
- Cook Time: 4 minutes
- Category: Side Dish
- Method: Pressure Cooker
- Cuisine: Indian
Nutrition
- Serving Size: 3/4 cup
- Calories: 236 kcal
- Sugar: 0g
- Sodium: 298mg
- Fat: 3g
- Saturated Fat: 0.4g
- Unsaturated Fat: 2.6g
- Trans Fat: 0g
- Carbohydrates: 47g
- Fiber: 1g
- Protein: 5g
- Cholesterol: 0mg
Keywords: Garlic Turmeric Rice Recipe, Turmeric Rice Side Dish, Easy Flavorful Rice, Garlic Rice Recipe