Benefits and Advantages of garlic parmesan cheeseburgers
- Ease of Preparation: Garlic parmesan cheeseburgers are quick and straightforward to make, requiring minimal ingredients and cooking in just about 30 minutes. This makes them perfect for busy weeknights or last-minute meals.
- Health Benefits: Garlic is known for its immune-boosting and anti-inflammatory qualities, while parmesan cheese offers a rich source of calcium and protein that supports bone health and muscle maintenance.
- Versatility: This recipe easily adapts to various dietary requirements such as gluten-free, low-calorie, or vegan diets by substituting ingredients like buns, cheese, and protein sources.
- Distinctive Flavor: The combination of savory garlic and nutty parmesan gives a unique and rich flavor to the cheeseburgers, differentiating them from traditional burger recipes.
Jump To
- 1. Benefits and Advantages of garlic parmesan cheeseburgers
- 2. Essential Ingredients for garlic parmesan cheeseburgers
- 3. Dietary Substitutions to Customize Your garlic parmesan cheeseburgers
- 4. How to Prepare the Perfect garlic parmesan cheeseburgers: Step-by-Step Guide
- 5. Mastering garlic parmesan cheeseburgers: Advanced Tips and Variations
- 6. How to Store garlic parmesan cheeseburgers: Best Practices
- 7. FAQs: Frequently Asked Questions About garlic parmesan cheeseburgers
- 8. garlic parmesan cheeseburgers
Essential Ingredients for garlic parmesan cheeseburgers
- 1 pound ground beef – juicy, protein-rich base for the burgers
- 2 cloves garlic, minced (or 1 teaspoon garlic powder) – imparts robust, aromatic flavor
- ½ cup grated parmesan cheese – adds nutty richness and enhances cheeseburger depth
- 1 cup shredded cheddar or American cheese – melts for creamy cheeseburger texture
- 1 package refrigerated biscuit dough (8–10 biscuits) – acts as a soft, flaky bun alternative for enrobing the filling
- 2 tablespoons unsalted butter, melted – used to brush tops for golden color and added richness
- Salt and black pepper to taste – essential seasoning to balance flavors
- 1 teaspoon onion powder (optional) – adds mild savory sweetness
- Fresh parsley, chopped (optional) – for garnish and freshness
Dietary options:
- Vegan: Replace ground beef with plant-based crumbles, use vegan parmesan and cheese alternatives, and substitute biscuit dough with a vegan-friendly type.
- Gluten-Free: Use gluten-free biscuit dough and check that all seasonings and cheeses are certified gluten-free.
- Low-Calorie: Swap ground beef for lean turkey or chicken meat, and use reduced-fat cheese and butter substitutes.

Dietary Substitutions to Customize Your garlic parmesan cheeseburgers
Protein and Burger Base Alternatives:
- Ground turkey or chicken for leaner, lower-fat burgers.
- Plant-based meat substitutes or mushroom-lentil blends for vegan or vegetarian options.
Vegetable, Sauce, and Seasoning Modifications:
- Switch out lettuce for nutrient-rich kale or spinach as burger toppings.
- Replace traditional mayonnaise with creamy avocado spread or vegan mayo.
- Experiment with adding smoked paprika, cayenne pepper, or fresh herbs like rosemary and thyme to tune flavors.
How to Prepare the Perfect garlic parmesan cheeseburgers: Step-by-Step Guide
- Gather Ingredients: Prepare all ingredients including ground beef, minced garlic, shredded parmesan, cheddar cheese, biscuit dough, and seasonings for efficient workflow.
- Mix Fillings: In a bowl, combine ground beef with garlic, parmesan, breadcrumbs if desired, egg, salt, and pepper. Mix gently to combine without overworking the meat.
- Form Patties or Bombs: Flatten each biscuit dough piece and place a spoonful of the beef-cheese mixture in the center. Fold and seal edges tightly to form “bombs.”
- Preheat Cooking Surface: Heat a grill or skillet over medium-high heat or preheat oven to 375°F (190°C) if baking.
- Cook Cheeseburgers: For skillet or grill, cook bombs or patties 4–5 minutes per side until internal temperature reaches 160°F (71°C). If baking, arrange bombs on a parchment-lined tray, brush tops with melted butter, and bake for 12–20 minutes until golden and cooked through.
- Melting Cheese: Add cheddar or desired cheese on top during the last minute of cooking to melt perfectly over the meat filling.
- Toast Buns: Lightly toast any accompanying buns or biscuit tops to enhance texture.
- Assemble and Serve: Place cooked bombs or patties in buns, add desired toppings and sauces. Garnish with fresh parsley if desired and serve warm.
For additional flavor inspiration, check out Garlic Parmesan Chicken or satisfy your comfort food cravings with Good Ole Fashion Mac and Cheese.
Learn detailed preparation tips at How to Make Garlic Parmesan Burgers and explore the Nutritional Benefits of Parmesan Cheese.
Mastering garlic parmesan cheeseburgers: Advanced Tips and Variations
Pro cooking techniques: For the best results, cook your garlic parmesan cheeseburger patties in a well-seasoned cast-iron skillet to achieve even heat distribution and a crisp, flavorful crust. Allow the patties to rest for a few minutes after cooking to help retain their juices and keep them tender and moist.
Flavor variations: Try mixing fresh herbs like rosemary or thyme into the beef mixture for added aroma. Swap out the Parmesan cheese for aged gouda or Asiago to introduce a smoky or nutty flavor. Adding caramelized onions or sautéed mushrooms to your burgers can also bring extra depth and richness.
Presentation tips: Serve your garlic parmesan cheeseburgers on artisan buns with fresh leafy greens such as arugula or baby spinach. Top with a sprinkle of chopped parsley or drizzle with a touch of balsamic glaze for an appealing finish.
Make-ahead options: Prepare the burger patties ahead of time and freeze them individually on a tray. Once frozen, transfer to an airtight container or bag for easy storage. Thaw before cooking to save time on busy days while ensuring fresh, delicious burgers.
How to Store garlic parmesan cheeseburgers: Best Practices
- Refrigeration: Store cooked garlic parmesan cheeseburgers in an airtight container in the refrigerator for up to 3 days to maintain freshness and flavor.
- Freezing: Wrap individual patties tightly in plastic wrap, then place them in freezer bags and freeze for up to 3 months. Thaw overnight in the fridge before reheating.
- Reheating: Reheat patties gently in a skillet over medium heat to preserve texture. Alternatively, warm them in an oven preheated to 350°F (175°C) for 10–15 minutes for even heating without drying out.
- Meal prep tips: Cook patties in batches, cool completely, and store portions separately for easy grab-and-go meals throughout the week.
FAQs: Frequently Asked Questions About garlic parmesan cheeseburgers
Can I prepare garlic parmesan cheeseburgers ahead of time?
Yes, you can prepare the beef mixture and cheese filling in advance and store them in the refrigerator for up to 24 hours. For best texture, assemble the burgers and bake them just before serving. If you prefer to freeze, assemble them first, freeze individually on a tray, then store in an airtight container. Bake from frozen, adding a few extra minutes to the baking time to ensure they cook through.
What type of cheese works best for garlic parmesan cheeseburgers?
Parmesan combined with a melty cheese like mozzarella or cheddar creates a great balance of flavor and gooey texture in these cheeseburgers. Freshly grated Parmesan gives a sharper taste compared to pre-grated types. You can also substitute with other semi-hard cheeses like Asiago or Fontina if preferred, but avoid processed cheese slices for best results.
How can I prevent the cheese from leaking out during baking?
To keep the cheese inside, make sure to seal the edges of the biscuit dough completely and press firmly to close any gaps. Avoid overfilling the burgers, as too much cheese or beef can cause leakage. Chilling the formed burgers before baking also helps maintain their shape and reduces cheese runoff.
Can I add extra ingredients to customize the flavor?
Absolutely. Ingredients like finely diced onions, crispy bacon, sautéed mushrooms, or roasted garlic can add depth to your cheeseburgers. Just be careful to avoid adding watery ingredients that may make the biscuit dough soggy. Drain any excess moisture from vegetables before mixing them in.
What is the best way to store leftover garlic parmesan cheeseburgers?
Store leftovers in an airtight container in the refrigerator for up to 3 days. To reheat, use an oven or toaster oven at 350°F (175°C) for 10 to 15 minutes to keep the biscuit crust crisp. Avoid microwaving, as it can make the crust chewy or soggy. You can also freeze cooked cheeseburgers wrapped well for up to 2 months.

garlic parmesan cheeseburgers
- Total Time: 30 minutes
- Yield: 8 to 10 bombs
- Diet: Contains Dairy and Meat
Description
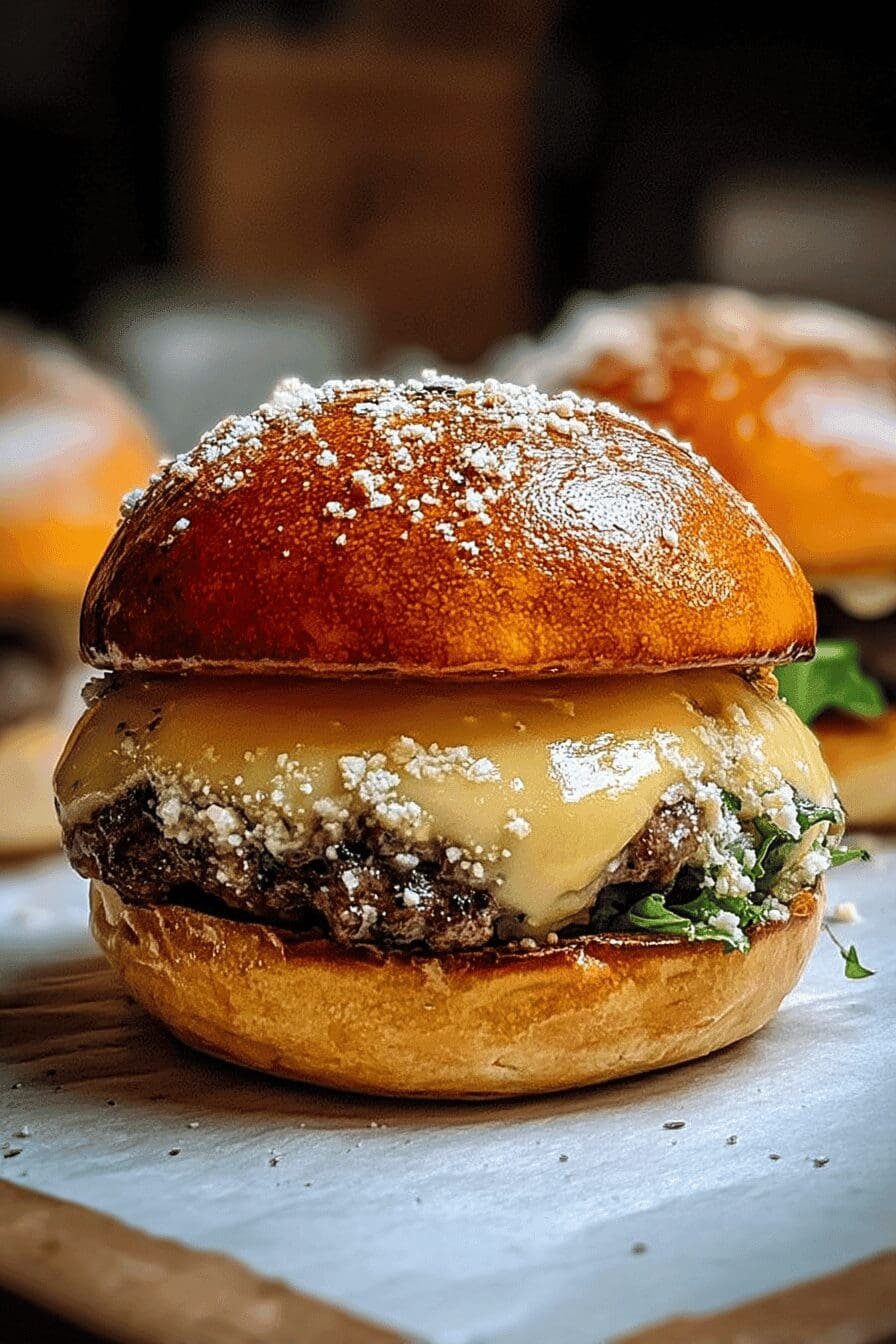
🍔 Garlic Parmesan Cheeseburgers combine savory garlic and rich Parmesan cheese for a flavorful twist on a classic favorite.
🧄 These cheeseburger bombs are easy to prepare and bake, perfect for quick family meals or entertaining guests with delightful bite-sized treats.
Ingredients
– 1 pound ground beef
– 2 cloves garlic, minced (or 1 teaspoon garlic powder)
– ½ cup grated parmesan cheese
– 1 cup shredded cheddar or American cheese
– 1 package refrigerated biscuit dough (8–10 biscuits)
– 2 tablespoons unsalted butter, melted
– Salt and black pepper to taste
– 1 teaspoon onion powder (optional)
– Fresh parsley, chopped (optional)
Instructions
1-Gather Ingredients: Prepare all ingredients including ground beef, minced garlic, shredded parmesan, cheddar cheese, biscuit dough, and seasonings for efficient workflow.
2-Mix Fillings: In a bowl, combine ground beef with garlic, parmesan, breadcrumbs if desired, egg, salt, and pepper. Mix gently to combine without overworking the meat.
3-Form Patties or Bombs: Flatten each biscuit dough piece and place a spoonful of the beef-cheese mixture in the center. Fold and seal edges tightly to form “bombs.”
4-Preheat Cooking Surface: Heat a grill or skillet over medium-high heat or preheat oven to 375°F (190°C) if baking.
5-Cook Cheeseburgers: For skillet or grill, cook bombs or patties 4–5 minutes per side until internal temperature reaches 160°F (71°C). If baking, arrange bombs on a parchment-lined tray, brush tops with melted butter, and bake for 12–20 minutes until golden and cooked through.
6-Melting Cheese: Add cheddar or desired cheese on top during the last minute of cooking to melt perfectly over the meat filling.
7-Toast Buns: Lightly toast any accompanying buns or biscuit tops to enhance texture.
8-Assemble and Serve: Place cooked bombs or patties in buns, add desired toppings and sauces. Garnish with fresh parsley if desired and serve warm.
Notes
🧈 Use large, flaky buttermilk biscuits to ensure easy folding and a perfect texture.
🥫 Prepare the meat filling ahead of time to speed up assembly and meal prep.
❄️ Freeze cooked bombs for up to two months and reheat in the oven for a quick meal.
- Prep Time: 15 minutes
- Baking Time: 15 minutes
- Cook Time: 15 minutes
- Category: Main Course
- Method: Baking
- Cuisine: American
Nutrition
- Serving Size: 1 bomb
- Calories: 380 kcal
- Sugar: 1 g
- Sodium: 500 mg
- Fat: 22 g
- Saturated Fat: 10 g
- Unsaturated Fat: 8 g
- Trans Fat: 0 g
- Carbohydrates: 28 g
- Fiber: 1 g
- Protein: 18 g
- Cholesterol: 60 mg
Keywords: Garlic Parmesan Cheeseburgers, Cheeseburger Bombs, Savory Biscuits, Comfort Food
Just made these burgers for my family, and they were a hit! 🍔 The garlic and parmesan combo is genius. Next time, I’m thinking of adding a little crispy bacon for extra flavor. Any other topping suggestions?
★★★★★