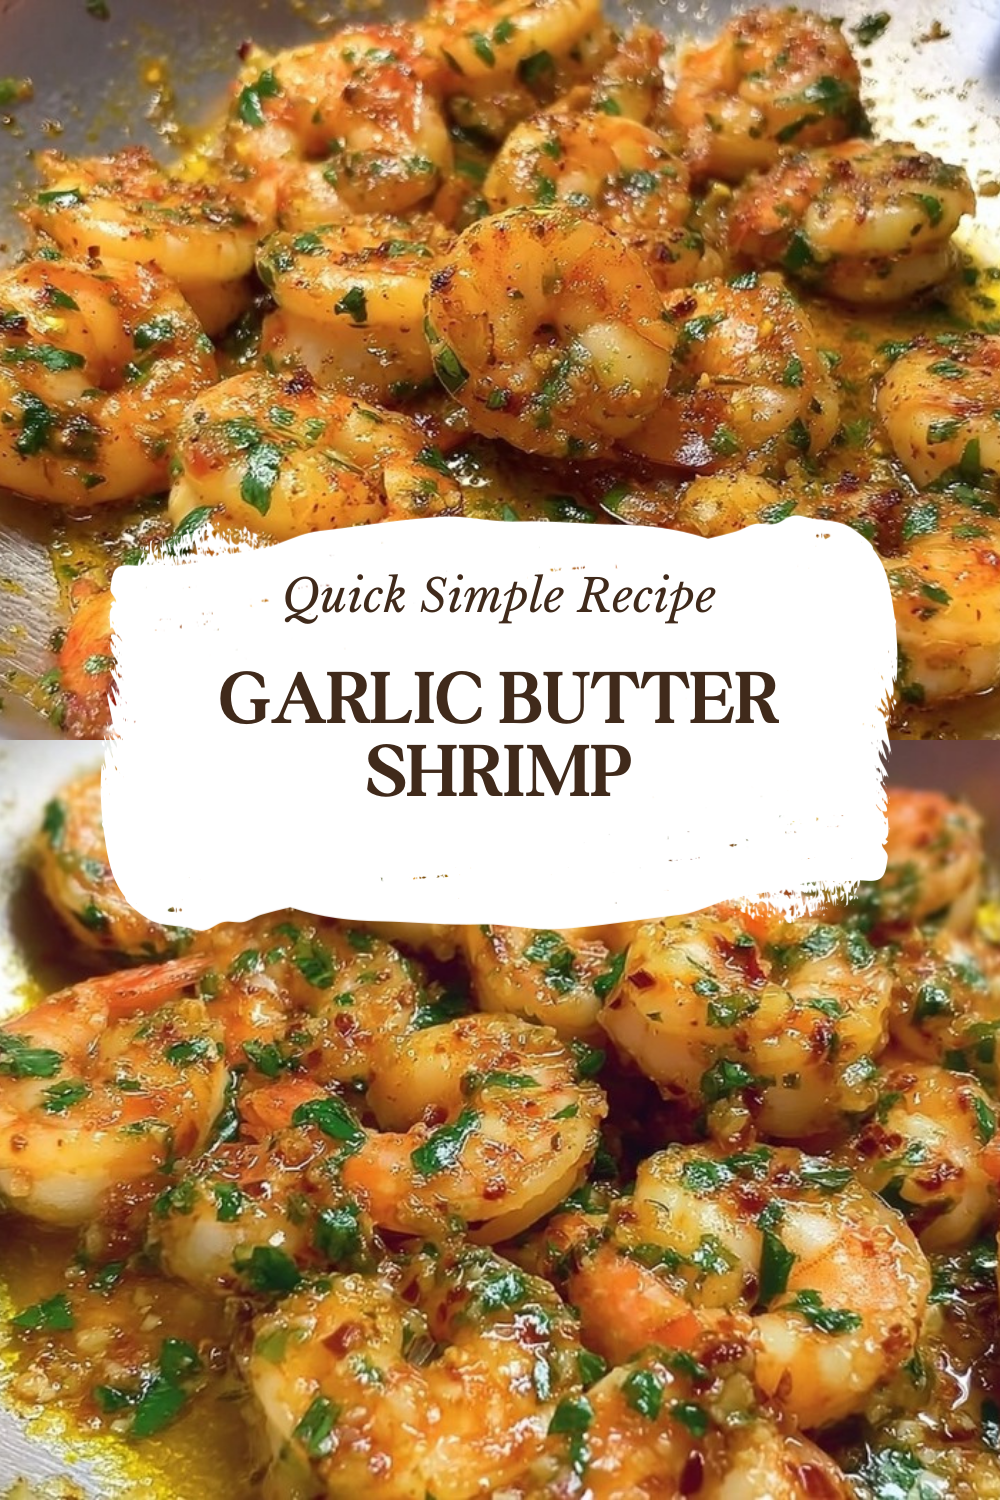
Why You’ll Love This Garlic Butter Shrimp
Garlic butter shrimp is one of those recipes that feels like a treat but comes together with almost no effort. Whether you’re cooking for yourself after a long day or impressing guests at a dinner party, this dish delivers restaurant-quality flavor right from your home kitchen. It’s the kind of meal that makes you wonder why you ever considered takeout when something this delicious is just minutes away.
Ease of Preparation
If you’re pressed for time but want a tasty meal, this garlic butter shrimp comes together in just 10 minutes total, with only 5 minutes of prep and 5 minutes of cooking. The simplicity is hard to beat. You need just one pan and a handful of ingredients you probably already have in your kitchen. No complicated techniques, no hard-to-find items, just straightforward cooking that anyone can master on the first try. It’s perfect for those busy weeknights when you need something satisfying without the fuss.
Health Benefits
Shrimp is a nutritional powerhouse that fits beautifully into many healthy eating plans. Each serving of this garlic butter shrimp packs about 23 grams of protein with only 215 calories, making it an excellent choice for anyone watching their intake. Shrimp is also rich in selenium, vitamin B12, and omega-3 fatty acids that support heart health. When you pair that with the immune-boosting properties of garlic, you’ve got a meal that nourishes your body while satisfying your taste buds. According to WebMD, shrimp offers numerous health benefits including antioxidants and anti-inflammatory properties.
Versatility
One of the best things about this garlic butter shrimp is how easily it adapts to your needs. Serve it over pasta for a hearty dinner, alongside rice for a simple weeknight meal, or as an elegant appetizer at your next gathering. It works for low-carb diets, keto lifestyles, or anyone looking for a lighter protein option. The recipe doubles easily for crowds and scales down for a quick solo lunch.
Distinctive Flavor
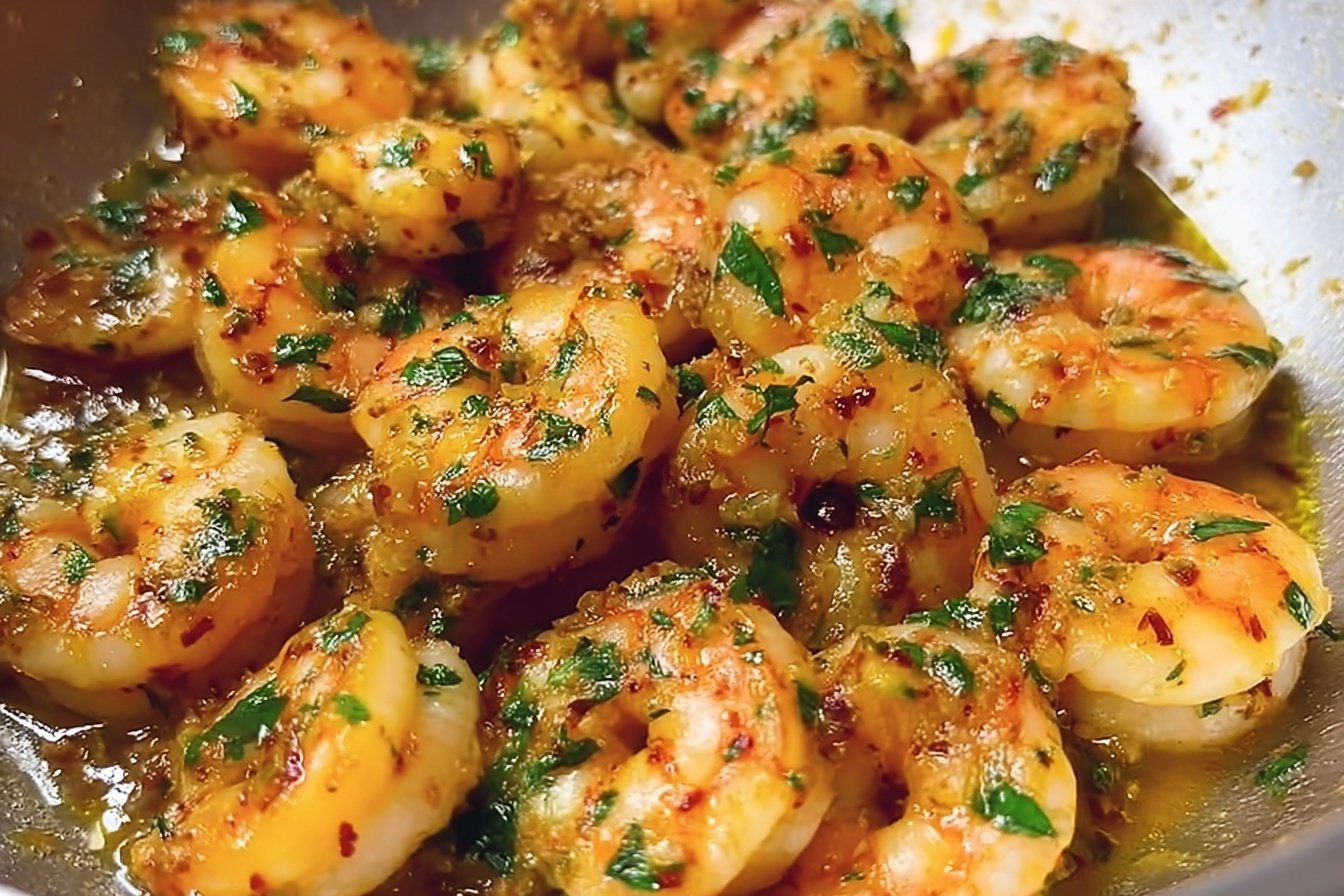
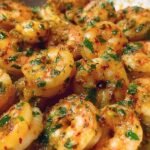
The combination of rich butter, aromatic garlic, bright lemon, and fragrant Italian seasoning creates a flavor profile that’s both sophisticated and deeply comforting. The butter creates a silky sauce that clings to each shrimp, while the lemon juice cuts through the richness with a pop of freshness. Fresh parsley adds a subtle herbaceous note and a splash of color. It’s the kind of dish that tastes like you spent hours in the kitchen, even though it took less time than waiting for delivery.
Jump To
- 1. Why You’ll Love This Garlic Butter Shrimp
- 2. Essential Ingredients for Garlic Butter Shrimp
- 3. How to Prepare the Perfect Garlic Butter Shrimp: Step-by-Step Guide
- 4. Dietary Substitutions to Customize Your Garlic Butter Shrimp
- 5. Mastering Garlic Butter Shrimp: Advanced Tips and Variations
- 6. How to Store Garlic Butter Shrimp: Best Practices
- 7. FAQs: Frequently Asked Questions About Garlic Butter Shrimp
- 8. Garlic Butter Shrimp
Essential Ingredients for Garlic Butter Shrimp
The beauty of garlic butter shrimp lies in its short ingredient list. Each component plays a vital role in building layers of flavor, so using quality ingredients makes a noticeable difference in your final dish.
Main Ingredients List
- 4 tablespoons butter – The foundation of the sauce, butter adds richness and helps the garlic and seasonings coat each shrimp beautifully. Use unsalted butter if you prefer more control over the salt level.
- 1 pound large shrimp (16-20 count size, peeled and deveined, tails optional) – The star of the show. Large shrimp (16-20 per pound) offer the best texture and won’t overcook as quickly as smaller ones. They stay plump and tender with a satisfying bite.
- Salt and pepper to taste – Essential seasonings that wake up all the other flavors. Start with a pinch of each and adjust at the end.
- 1 teaspoon Italian seasoning – A blend of dried herbs like oregano, basil, and thyme that adds depth and an Italian-inspired flair without requiring multiple spice jars.
- 2-3 teaspoons minced garlic (adjust to taste) – Fresh garlic is key here. It infuses the butter with its pungent, savory aroma and provides that signature garlic punch. Garlic also brings impressive health benefits, including compounds that may help reduce blood pressure.
- Juice of 1 lemon – Fresh lemon juice brightens the rich butter sauce and balances the savory elements with gentle acidity. It cuts through the richness and makes the flavors pop.
- 1 tablespoon chopped parsley – Fresh parsley adds color and a mild herbal note that ties everything together. It also makes the dish look restaurant-worthy with minimal effort.
Special Dietary Options
Garlic butter shrimp is naturally gluten-free, making it a safe choice for those with celiac disease or gluten sensitivity. For a dairy-free version, swap the butter for a high-quality olive oil or your favorite plant-based butter alternative. Those watching their saturated fat intake can use a combination of butter and olive oil to lighten the dish. The recipe is also naturally low-carb and keto-friendly, perfect for anyone following those eating styles. If you’re looking for more seafood inspiration, try this creamy crab and shrimp seafood bisque for another restaurant-style dish at home.
How to Prepare the Perfect Garlic Butter Shrimp: Step-by-Step Guide
Making garlic butter shrimp is wonderfully straightforward, but a few key techniques will take your results from good to outstanding. Follow these steps for perfectly cooked, restaurant-quality shrimp every time.
Step 1: Gather and Prepare Your Ingredients
Before you turn on the stove, take 5 minutes to get everything ready. This is called your mise en place, and it makes the actual cooking process smooth and stress-free. Start by measuring out your 4 tablespoons of butter. If you’re using salted butter, keep that in mind when adding additional salt later. Next, check that your 1 pound of shrimp is fully thawed if you bought frozen. Pat them thoroughly dry with paper towels. This step is crucial because excess moisture will steam the shrimp instead of letting them develop that beautiful golden sear. After patting dry, give them another quick press with fresh paper towels and let them sit for a minute or two.
While the shrimp rest, mince your garlic. You’ll need 2-3 teaspoons, which typically comes from about 4-6 medium cloves. Fresh garlic makes a real difference here, so avoid the pre-minced jars if possible. The oils in freshly cut garlic are what give this dish its aromatic punch. Roll your lemon on the counter while pressing down firmly with your palm. This breaks up the internal membranes and makes it easier to extract maximum juice. Cut it in half and have it ready to squeeze at the end. Finally, chop your fresh parsley and set it aside with your Italian seasoning, salt, and pepper within arm’s reach of the stove.
Step 2: Melt the Butter and Begin Cooking
Place a large skillet or frying pan over medium-high heat. You want a pan that’s big enough to hold all the shrimp in a single layer without crowding. If they’re packed too tightly, they’ll steam rather than sear. Add your 4 tablespoons of butter and let it melt completely. Swirl it around the pan as it melts so it coats the surface evenly. The butter should foam slightly and become hot but not brown. If it starts to sizzle aggressively or smell nutty, your heat is too high.
Once the butter is melted and hot, add your shrimp to the pan in a single layer. Work quickly but carefully, arranging them so they all have contact with the pan surface. Immediately season with salt, pepper, and the 1 teaspoon of Italian seasoning. Sprinkle the seasonings evenly over the shrimp rather than dumping them all in one spot. This ensures each piece gets properly flavored. The moment the shrimp hit that sizzling butter, you’ll hear that satisfying cooking sound that tells you things are going well.
Step 3: Cook the Shrimp to Perfection
Let the shrimp cook undisturbed for about 2-3 minutes on the first side. You’re looking for them to turn pink on the bottom edges and start curling slightly. Resist the urge to constantly stir or flip them. Getting a nice sear on that first side adds tremendous flavor through the Maillard reaction, the same process that gives seared steaks and toasted bread their delicious depth.
Once the bottoms are pink and slightly golden, flip each shrimp over. You can use tongs or a spatula, whichever feels comfortable. The second side will cook faster, usually about 1-2 minutes. Watch carefully because shrimp go from perfectly done to rubbery in a matter of seconds. Perfectly cooked shrimp turn from gray to pink and opaque throughout. They should curl into a loose C shape. If they curl into a tight O, they’re overcooked. If they’re still straight with gray patches, they need more time.
The total cooking time for 16-20 count shrimp is typically 3-5 minutes, but this can vary based on your pan, stove, and exact shrimp size. Trust your eyes over the timer. Look for that pink color and opaque appearance throughout. For more flavorful dinner ideas that come together quickly, check out this garlic butter steak lightning noodles recipe that uses similar techniques.
Step 4: Add the Garlic
Here’s a crucial technique that many home cooks miss: add your garlic AFTER the shrimp are nearly cooked, not before. Garlic burns quickly, and burnt garlic tastes bitter and unpleasant. By adding the minced garlic when the shrimp are almost done, you give it just enough time to cook through and release its aromatic oils without risking burning.
Once your shrimp are pink and just cooked through, add your 2-3 teaspoons of minced garlic directly to the pan. Toss everything together so the garlic gets distributed throughout the butter and coats the shrimp. Cook for just 1 more minute, stirring constantly. The garlic should become fragrant and slightly softened but not brown. You’ll smell that gorgeous garlic aroma filling your kitchen. This brief cooking time mellows the raw bite while preserving all that wonderful garlic flavor.
Step 5: Finish and Serve
Remove the pan from the heat source entirely. Off the heat, squeeze the juice of one lemon over the shrimp. The residual heat will warm the juice without cooking away its bright flavor. Add your 1 tablespoon of chopped fresh parsley and toss everything together one final time. The parsley adds a fresh note and beautiful flecks of green that make the dish look as good as it tastes.
Serve immediately while everything is hot and the butter sauce is still silky. Garlic butter shrimp doesn’t wait well, so have your plates ready and any sides prepared before you start cooking. The dish is best enjoyed right away when the shrimp are at their most tender and the sauce is perfectly emulsified.

Dietary Substitutions to Customize Your Garlic Butter Shrimp
One of the wonderful things about this garlic butter shrimp recipe is how easily it adapts to different dietary needs and preferences. Whether you’re cooking for someone with restrictions or simply want to switch things up, there are plenty of ways to make this dish your own.
Protein and Main Component Alternatives
While shrimp is the star of this recipe, the garlic butter technique works beautifully with other proteins. If you’re avoiding shellfish due to allergies, scallops make an excellent substitute with a similar cooking time and sweet, delicate flavor. For a heartier option, bite-sized pieces of chicken breast or thigh work well, though they’ll need a few extra minutes of cooking time. Salmon fillets cut into chunks also pair wonderfully with garlic butter, adding healthy omega-3 fatty acids.
For those following a plant-based diet, extra-firm tofu or thick slices of king oyster mushrooms can stand in for shrimp. Press the tofu for at least 30 minutes to remove excess moisture, then cut into cubes. King oyster mushrooms have a naturally chewy, almost seafood-like texture when sliced and seared. Both options soak up that garlic butter sauce beautifully. Just remember that these alternatives may need slightly different cooking times, so watch carefully and test for doneness.
Vegetable, Sauce, and Seasoning Modifications
The flavor base of this dish is incredibly flexible. If you don’t have Italian seasoning on hand, any combination of dried oregano, basil, thyme, or rosemary works well. For a spicier kick, add a pinch of red pepper flakes when you season the shrimp. This gives the dish a Fra Diavolo-style heat that pairs beautifully with the rich butter.
Fresh herbs can transform the dish entirely. Try swapping the parsley for fresh basil, chives, or cilantro for completely different flavor profiles. A sprinkle of grated Parmesan cheese at the end adds a savory umami boost. For a more Mediterranean vibe, add some halved cherry tomatoes and kalamata olives during the last minute of cooking. They’ll warm through and release their juices into the butter sauce, creating an even more complex dish. A splash of white wine added with the lemon juice brings another layer of sophistication to the finished sauce.
Mastering Garlic Butter Shrimp: Advanced Tips and Variations
Once you’ve mastered the basic technique, there are plenty of ways to take your garlic butter shrimp to the next level. These tips will help you achieve consistently excellent results and give you ideas for variations to keep things interesting.
Pro Cooking Techniques
The single most important tip for perfect shrimp is to start with dry shrimp. After thawing, spread them on paper towels and pat thoroughly. For extra insurance, sprinkle lightly with salt and let them sit for 5-10 minutes, then pat dry again. This draws out even more moisture and also seasons the shrimp from within. The drier the shrimp, the better they’ll sear and the more flavorful they’ll become.
Another pro technique is to get your pan properly hot before adding the butter. A properly preheated pan ensures the shrimp sear immediately upon contact rather than slowly warming up. Test the heat by flicking a few drops of water into the pan. They should sizzle and evaporate instantly. Only then add your butter. Watch it carefully though, as a too-hot pan can burn butter quickly.
Consider finishing with a small pat of cold butter off the heat. This technique, called mounting, creates an even silkier, more luxurious sauce. Just stir in about a teaspoon of cold butter pieces at the very end until they melt and emulsify into the pan juices.
Flavor Variations
The basic garlic butter shrimp recipe is a canvas for endless variations. For a Cajun twist, replace the Italian seasoning with Cajun or Creole seasoning blend. Add some diced andouille sausage during the cooking process for a hearty, spicy version. For an Asian-inspired take, add a splash of soy sauce and a drizzle of sesame oil at the end. A sprinkle of toasted sesame seeds adds nice texture and visual appeal.
Lemon garlic butter shrimp scampi is just a step away. Serve your finished shrimp over angel hair pasta and add a splash of white wine to the sauce. Toss everything together so the pasta gets coated in that garlicky, buttery goodness. For a tropical touch, add some diced mango or pineapple at the end. The sweetness plays beautifully against the savory garlic butter.
Presentation Tips
They say we eat with our eyes first, and a few simple touches make garlic butter shrimp look like it came from a restaurant kitchen. Keep the tails on for an elegant presentation that also gives diners a built-in handle for eating. Serve in warmed shallow bowls or on rimmed plates to catch all that delicious sauce. A final sprinkle of parsley just before serving keeps it looking fresh and vibrant. For a pop of color, add a few lemon wedges on the side or some thin lemon slices as garnish.
Make-Ahead Options
While garlic butter shrimp is best served immediately, you can do some prep work ahead of time. The shrimp can be thawed, cleaned, and dried up to 24 hours in advance. Store them covered in the refrigerator with paper towels to absorb any moisture. You can also mince your garlic and chop your parsley a day ahead. Keep the garlic in a small airtight container and the parsley wrapped in damp paper towels in a sealed bag. When it’s time to cook, everything comes together in just minutes.
How to Store Garlic Butter Shrimp: Best Practices
Garlic butter shrimp tastes best fresh from the pan, but sometimes you have leftovers. Proper storage keeps them safe and maintains as much quality as possible.
Refrigeration Guidelines
Allow leftover shrimp to cool to room temperature, but don’t leave them out longer than 2 hours. Transfer to an airtight container and refrigerate promptly. Properly stored, cooked shrimp will keep for 2-3 days in the refrigerator. The butter sauce may solidify and look less appetizing when cold, but it will melt again when reheated. For best quality, try to consume leftovers within the first day or two.
Freezing Recommendations
While you can freeze cooked shrimp, the texture may become slightly softer upon thawing. If you must freeze them, place cooled shrimp in a freezer-safe container or heavy-duty freezer bag. Press out as much air as possible before sealing. Label with the date and use within 2-3 months for best quality. Thaw overnight in the refrigerator before reheating. The butter sauce helps protect the shrimp from freezer burn, so include as much of the sauce as possible.
Reheating Best Practices
Reheating requires care to avoid turning tender shrimp rubbery. The gentlest method is to warm them in a skillet over medium-low heat with a small extra pat of butter. This takes just 2-3 minutes. You can also microwave at 50% power in 30-second intervals, though the texture won’t be quite as good. Avoid high heat or extended cooking times, as these will toughen the shrimp quickly.
Meal Prep Considerations
For meal prep, consider cooking the shrimp slightly less than you normally would so they don’t overcook when reheated. Store the shrimp and sauce together so the flavors can continue to meld. When packing, include some of the cooking juices to keep everything moist. These shrimp pair well with pre-cooked rice, pasta, or vegetables for complete ready-to-eat meals throughout the week.
FAQs: Frequently Asked Questions About Garlic Butter Shrimp
Is garlic butter shrimp healthy?
Garlic butter shrimp can be a nutritious meal when enjoyed in moderation. Shrimp is low in calories (about 85 per 3-ounce serving) and packed with protein (18 grams per serving), plus selenium, vitamin B12, and omega-3s for heart health. It has cholesterol (around 160mg per serving), but recent studies show dietary cholesterol has minimal impact on blood levels for most people. The butter adds saturated fat and calories (roughly 200 extra per tablespoon), so use less or swap for olive oil. Pair with veggies like zucchini noodles or a salad for a balanced 300-400 calorie dish. Opt for wild-caught shrimp to minimize contaminants. Limit to 1-2 times weekly if watching cholesterol.
Do you pat thawed shrimp dry before cooking garlic butter shrimp?
Yes, always pat thawed shrimp dry with paper towels before cooking garlic butter shrimp. Excess moisture causes steaming instead of browning, leading to rubbery texture. After thawing in the fridge overnight or under cold water for 10-15 minutes, spread shrimp on a clean towel, sprinkle lightly with salt, and press gently for 5 minutes. This draws out water and seasons lightly. Dry shrimp sear in 2-3 minutes per side in hot butter-garlic mix, developing a golden crust. Pro tip: Refrigerate uncovered for 30 minutes post-thaw for extra dryness. Results in plump, flavorful shrimp every time.
Should I remove shrimp tails before cooking garlic butter shrimp?
Removing shrimp tails before cooking garlic butter shrimp is optional and depends on your preference. Keep tails on for an elegant presentation—they make shrimp easier to eat neatly and add visual appeal on plates or skewers. Tails off speeds up eating, ideal for quick weeknight meals or kids. To remove, pinch base firmly and twist-pull after deveining thawed shrimp. Either way, pat dry first. Cooking time stays 4-6 minutes total in sizzling garlic butter. If tails on, hold by tail to flip. Serve over pasta or rice; tails add fun for appetizers. Test both for your style.
How long does it take to cook garlic butter shrimp?
Garlic butter shrimp cooks in just 5-7 minutes total, making it a 15-minute meal. Use medium-high heat in a skillet: melt 4 tablespoons butter with 4 minced garlic cloves for 1 minute until fragrant. Add 1 pound peeled, deveined shrimp in a single layer; season with salt, pepper, and red pepper flakes. Cook 2-3 minutes per side until pink, opaque, and curled into a C-shape (avoid overcooking to prevent toughness). Squeeze fresh lemon juice and toss in parsley at end. Test doneness by cutting one—juicy inside. Rest 1 minute off heat. Perfect for busy nights; scale up for crowds.
Can you make garlic butter shrimp with frozen shrimp?
Yes, frozen shrimp works great for garlic butter shrimp—buy raw, peeled, deveined bags for convenience. Thaw safely in fridge 8-12 hours or cold water 20-30 minutes (change water twice, sealed bag). Pat very dry to avoid watery sauce. Cook straight from partial thaw if rushed: add to hot garlic butter, stir 1 minute to release ice, then 3-4 minutes total. Frozen shrimp shrinks less if not overthawed. Avoid fully cooked frozen varieties—they turn chewy. Yields same buttery, garlicky results. Store leftovers in airtight container up to 2 days; reheat gently in skillet with extra butter to revive crispness. Quick hack for impromptu dinners.
Garlic Butter Shrimp
- Total Time: 10 minutes
- Yield: 4 servings
- Diet: Low-Carb, High-Protein, Gluten-Free
Description
🦐 Succulent garlic butter shrimp bursting with lemony garlic flavor – high-protein low-carb delight in 10 minutes!
🧈 Quick pan-seared seafood perfection, ideal appetizer or main over pasta/rice for effortless dinners.
Ingredients
– 4 tablespoons butter
– 1 pound large shrimp (16-20 count size, peeled and deveined, tails optional)
– Salt and pepper to taste
– 1 teaspoon Italian seasoning
– 2-3 teaspoons minced garlic (adjust to taste)
– Juice of 1 lemon
– 1 tablespoon chopped parsley
Instructions
1-Step 1: Gather and Prepare Your Ingredients Before you turn on the stove, take 5 minutes to get everything ready. This is called your mise en place, and it makes the actual cooking process smooth and stress-free. Start by measuring out your 4 tablespoons of butter. If you’re using salted butter, keep that in mind when adding additional salt later. Next, check that your 1 pound of shrimp is fully thawed if you bought frozen. Pat them thoroughly dry with paper towels. This step is crucial because excess moisture will steam the shrimp instead of letting them develop that beautiful golden sear. After patting dry, give them another quick press with fresh paper towels and let them sit for a minute or two. While the shrimp rest, mince your garlic. You’ll need 2-3 teaspoons, which typically comes from about 4-6 medium cloves. Fresh garlic makes a real difference here, so avoid the pre-minced jars if possible. The oils in freshly cut garlic are what give this dish its aromatic punch. Roll your lemon on the counter while pressing down firmly with your palm. This breaks up the internal membranes and makes it easier to extract maximum juice. Cut it in half and have it ready to squeeze at the end. Finally, chop your fresh parsley and set it aside with your Italian seasoning, salt, and pepper within arm’s reach of the stove.
2-Step 2: Melt the Butter and Begin Cooking Place a large skillet or frying pan over medium-high heat. You want a pan that’s big enough to hold all the shrimp in a single layer without crowding. If they’re packed too tightly, they’ll steam rather than sear. Add your 4 tablespoons of butter and let it melt completely. Swirl it around the pan as it melts so it coats the surface evenly. The butter should foam slightly and become hot but not brown. If it starts to sizzle aggressively or smell nutty, your heat is too high. Once the butter is melted and hot, add your shrimp to the pan in a single layer. Work quickly but carefully, arranging them so they all have contact with the pan surface. Immediately season with salt, pepper, and the 1 teaspoon of Italian seasoning. Sprinkle the seasonings evenly over the shrimp rather than dumping them all in one spot. This ensures each piece gets properly flavored. The moment the shrimp hit that sizzling butter, you’ll hear that satisfying cooking sound that tells you things are going well.
3-Step 3: Cook the Shrimp to Perfection Let the shrimp cook undisturbed for about 2-3 minutes on the first side. You’re looking for them to turn pink on the bottom edges and start curling slightly. Resist the urge to constantly stir or flip them. Getting a nice sear on that first side adds tremendous flavor through the Maillard reaction, the same process that gives seared steaks and toasted bread their delicious depth. Once the bottoms are pink and slightly golden, flip each shrimp over. You can use tongs or a spatula, whichever feels comfortable. The second side will cook faster, usually about 1-2 minutes. Watch carefully because shrimp go from perfectly done to rubbery in a matter of seconds. Perfectly cooked shrimp turn from gray to pink and opaque throughout. They should curl into a loose C shape. If they curl into a tight O, they’re overcooked. If they’re still straight with gray patches, they need more time. The total cooking time for 16-20 count shrimp is typically 3-5 minutes, but this can vary based on your pan, stove, and exact shrimp size. Trust your eyes over the timer. Look for that pink color and opaque appearance throughout. For more flavorful dinner ideas that come together quickly, check out this garlic butter steak lightning noodles recipe that uses similar techniques.
4-Step 4: Add the Garlic Here’s a crucial technique that many home cooks miss: add your garlic AFTER the shrimp are nearly cooked, not before. Garlic burns quickly, and burnt garlic tastes bitter and unpleasant. By adding the minced garlic when the shrimp are almost done, you give it just enough time to cook through and release its aromatic oils without risking burning. Once your shrimp are pink and just cooked through, add your 2-3 teaspoons of minced garlic directly to the pan. Toss everything together so the garlic gets distributed throughout the butter and coats the shrimp. Cook for just 1 more minute, stirring constantly. The garlic should become fragrant and slightly softened but not brown. You’ll smell that gorgeous garlic aroma filling your kitchen. This brief cooking time mellows the raw bite while preserving all that wonderful garlic flavor.
5-Step 5: Finish and Serve Remove the pan from the heat source entirely. Off the heat, squeeze the juice of one lemon over the shrimp. The residual heat will warm the juice without cooking away its bright flavor. Add your 1 tablespoon of chopped fresh parsley and toss everything together one final time. The parsley adds a fresh note and beautiful flecks of green that make the dish look as good as it tastes. Serve immediately while everything is hot and the butter sauce is still silky. Garlic butter shrimp doesn’t wait well, so have your plates ready and any sides prepared before you start cooking. The dish is best enjoyed right away when the shrimp are at their most tender and the sauce is perfectly emulsified.
Notes
🦐 Pat shrimp dry for better browning and crispier sear.
🧄 Use fresh minced garlic for maximum aroma and flavor.
🍋 Cook large 16-20 count shrimp quickly to stay juicy.
- Prep Time: 5 minutes
- Cook Time: 5 minutes
- Category: Main Course
- Method: Stovetop
- Cuisine: American
Nutrition
- Serving Size: 1/4 pound
- Calories: 215 kcal
- Sugar: 0g
- Sodium: 481mg
- Fat: 12g
- Saturated Fat: 7g
- Unsaturated Fat: 5g
- Trans Fat: 0g
- Carbohydrates: 2g
- Fiber: 0g
- Protein: 23g
- Cholesterol: 315mg
Keywords: Garlic Butter Shrimp Recipe, Lemon Garlic Shrimp, Garlic Shrimp Recipe, Butter Shrimp