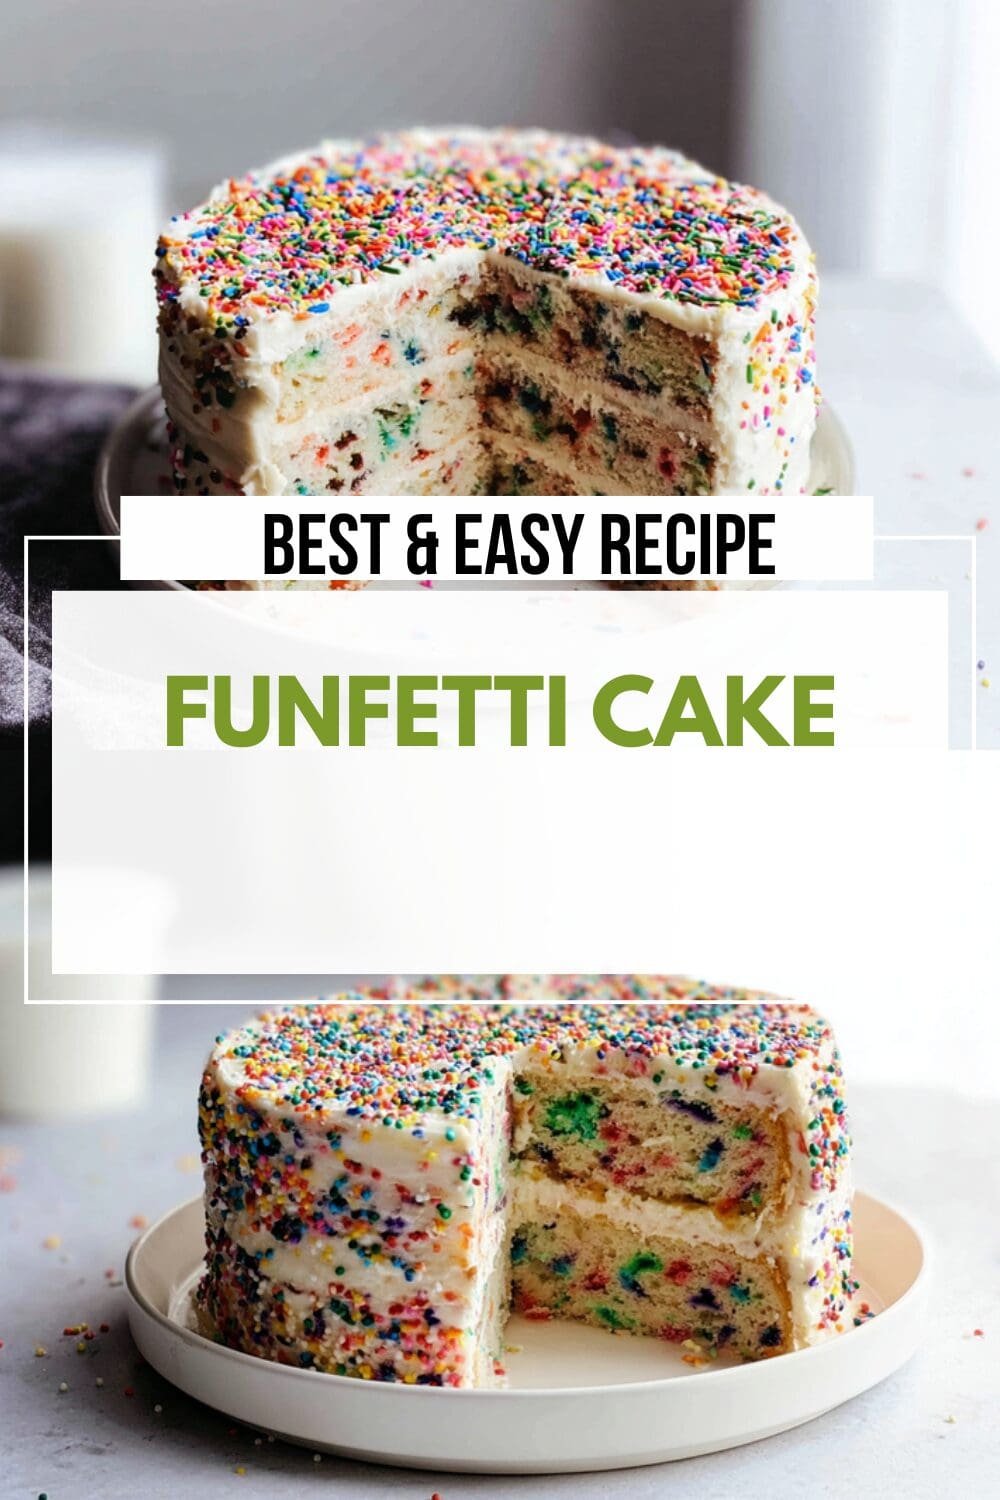
Why You’ll Love This Funfetti Cake
There’s something undeniably joyful about a Funfetti Cake that brings smiles to faces of all ages. This homemade version captures everything wonderful about the classic birthday cake while offering superior flavor and texture that box mixes simply cannot match. Whether you’re celebrating a special milestone or simply want to brighten an ordinary day, this recipe delivers bakery-quality results right from your own kitchen.
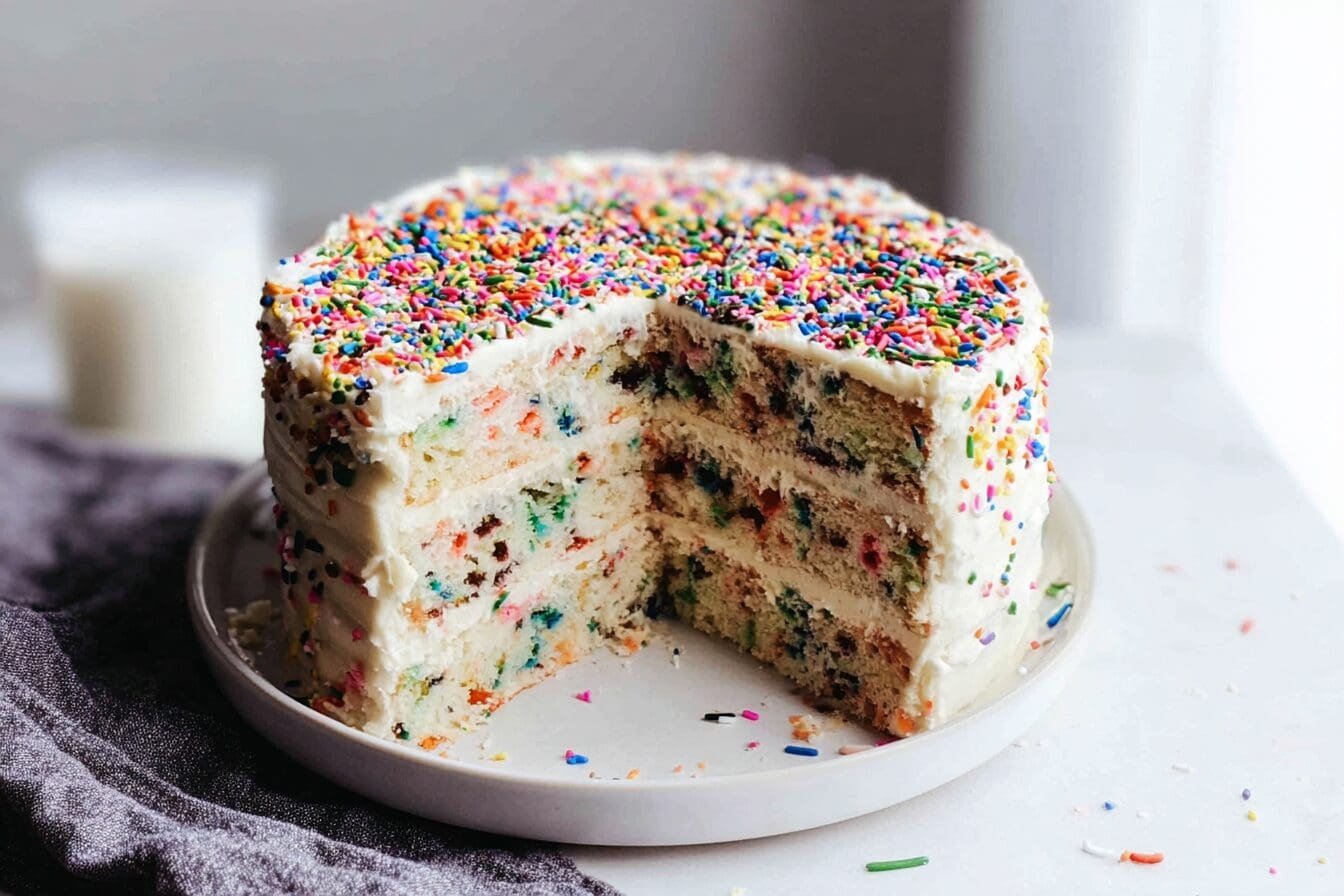
The beauty of this funfetti cake lies in its perfect balance of simplicity and show-stopping appeal. With straightforward techniques and clear instructions, even novice bakers can achieve professional-looking results. The moist, tender crumb studded with colorful rainbow jimmies creates a delightful confetti effect that makes every slice feel like a party.
- Ease of preparation: This recipe uses simple mixing methods that anyone can master. With just 25 minutes of prep time and about 35 minutes in the oven, you’ll have gorgeous cake layers ready for decorating without spending hours in the kitchen.
- Incredible texture: The combination of butter and oil creates a cake that stays moist for days while maintaining a soft, tender crumb that melts in your mouth with every bite.
- Versatility: This funfetti cake adapts beautifully to different occasions. Use it for birthdays, graduations, baby showers, or turn it into cupcakes for easy portioning at parties and gatherings.
- Customization options: Change up the sprinkle colors to match any theme, swap the vanilla buttercream for chocolate frosting, or add different extracts to create your own signature variation.
Jump To
- 1. Why You’ll Love This Funfetti Cake
- 2. Essential Ingredients for Funfetti Cake
- 3. How to Prepare the Perfect Funfetti Cake: Step-by-Step Guide
- 4. Dietary Substitutions to Customize Your Funfetti Cake
- 5. Mastering Funfetti Cake: Advanced Tips and Variations
- 6. How to Store Funfetti Cake: Best Practices
- 7. FAQs: Frequently Asked Questions About Funfetti Cake
- 8. Funfetti Cake
Essential Ingredients for Funfetti Cake
Creating the perfect funfetti cake starts with understanding how each ingredient contributes to the final result. Quality matters here, so gather your ingredients before beginning and make sure everything is at the proper temperature for best results.
For the Cake
- 3¾ cups all-purpose flour (450g) – Forms the structural foundation of the cake, providing the right amount of gluten development for a tender crumb without becoming tough.
- 2½ teaspoons baking powder – The primary leavening agent that helps the cake rise beautifully and creates that light, fluffy texture everyone loves.
- 1 teaspoon salt – Balances the sweetness and brings out the vanilla flavor while strengthening the cake’s structure.
- 2⅓ cups granulated sugar (466g) – Provides sweetness while also helping to create a moist, tender crumb by interfering with gluten formation.
- 1 cup unsalted butter, softened (227g) – Adds rich flavor and creates a fine, even texture when properly creamed with the sugar.
- ⅓ cup vegetable oil (80mL) – Keeps the cake incredibly moist for days after baking, as oil remains liquid at room temperature unlike butter.
- 1 tablespoon vanilla extract – The primary flavoring that gives this funfetti cake its classic, comforting taste.
- 1⅓ cups buttermilk, room temperature (320mL) – Adds tanginess and tenderness while the acidity reacts with baking powder for extra lift.
- 7 large egg whites, room temperature – Provides structure without the fat of yolks, keeping the cake white and allowing the sprinkles to really pop.
- ⅔ cup rainbow jimmies (100g) – The signature element that transforms this from a simple white cake into a festive funfetti celebration.
For the Frosting
- 1 pound unsalted butter (450g) – The base of American buttercream, providing richness and a creamy mouthfeel when properly whipped.
- 2 pounds powdered sugar (900g) – Sweetens and stabilizes the frosting while creating that smooth, spreadable consistency.
- ½ teaspoon salt – Cuts through the sweetness and rounds out the flavor profile.
- 1 tablespoon vanilla extract – Infuses the frosting with classic vanilla flavor that complements the cake perfectly.
- 3 to 4 tablespoons heavy cream – Adjusts the frosting consistency to your preference, making it easier to spread and pipe.
- Rainbow sprinkles for decoration – Adds that final festive touch to the finished funfetti cake.
Special Dietary Options
For those with dietary restrictions, this funfetti cake can be adapted with several substitutions. For a gluten-free version, replace the all-purpose flour with a quality gluten-free flour blend designed for baking. Vegan bakers can substitute the butter with vegan butter sticks, use plant-based milk mixed with lemon juice in place of buttermilk, and replace egg whites with aquafaba (the liquid from canned chickpeas). Those watching their sugar intake can explore sugar substitutes designed for baking, though this may affect the texture slightly.
How to Prepare the Perfect Funfetti Cake: Step-by-Step Guide
Making a stunning funfetti cake is easier than you might think. Follow these detailed steps, and you’ll have a beautiful, delicious cake that rivals any bakery creation. Taking the time to properly prepare and measure your ingredients will make the entire process smoother and more enjoyable.
Step 1: Prepare Your Equipment and Ingredients
Before you begin mixing, preheat your oven to 350°F (175°C). This temperature allows the cake to bake evenly without developing a thick crust or drying out. While the oven heats, prepare three 8-inch round cake pans by thoroughly greasing them with butter or cooking spray, dusting with flour, and lining the bottoms with parchment paper rounds. This triple layer of protection ensures your cake layers release cleanly every time.
For perfectly flat cake layers, consider wrapping wet cake strips around the outside of your pans. These fabric bands insulate the edges, helping the cake bake evenly from edge to center and preventing the dreaded dome that requires leveling later.
Step 2: Sift and Combine Dry Ingredients
In a large bowl, sift together the all-purpose flour, baking powder, and salt. Sifting isn’t just about removing lumps it aerates the flour and distributes the leavening agent evenly throughout, which translates to a more uniform rise and tender texture. Once sifted, whisk the mixture gently to ensure everything is well combined, then set it aside while you prepare the wet ingredients.
Step 3: Cream Butter, Oil, and Sugar
In the bowl of a stand mixer fitted with the paddle attachment, combine the softened butter, vegetable oil, and granulated sugar. Beat on medium-high speed for 4 to 5 minutes until the mixture becomes noticeably lighter in color and fluffy in texture. This creaming process incorporates tiny air bubbles into the batter, which helps the cake rise and creates that beautiful, tender crumb everyone loves in a perfect funfetti cake.
The combination of butter and oil might seem unusual, but it’s actually a brilliant technique. Butter provides rich flavor and helps with structure, while oil keeps the cake incredibly moist. Together, they create the best of both worlds a flavorful cake that stays fresh for days.
Step 4: Add Egg Whites and Vanilla
With the mixer running on low speed, add the egg whites in three separate additions, allowing each portion to fully incorporate before adding the next. This gradual approach prevents the batter from curdling and ensures a smooth, emulsified mixture. Once all the egg whites are combined, add the vanilla extract and beat on medium speed for another 2 to 3 minutes until the batter looks fluffy and voluminous.
Step 5: Alternate Adding Dry and Wet Ingredients
Now comes the crucial step that determines your funfetti cake’s final texture. With the mixer on low speed, add the flour mixture and buttermilk in alternating batches, beginning and ending with the flour. A good pattern is: one-third of the flour, half the buttermilk, another third of flour, remaining buttermilk, and finally the remaining flour.
Mix only until each addition is just incorporated, stopping to scrape down the sides and bottom of the bowl as needed. Overmixing at this stage develops too much gluten, resulting in a tough, dense cake rather than the tender, delicate crumb you want.
Step 6: Fold in the Rainbow Jimmies
Remove the bowl from the mixer and add the rainbow jimmies. Using a silicone spatula, gently fold them into the batter with just a few turns enough to distribute them evenly without overworking the batter. The goal is to keep those colorful sprinkles intact so they create the beautiful confetti pattern throughout your baked cake.
Step 7: Divide and Bake
Divide the batter evenly among your three prepared pans, using a kitchen scale for precision if you have one. The batter should fill each pan about two-thirds full. Gently tap the pans on the counter two or three times to release any large air bubbles that could create holes in your finished cake layers.
Bake at 350°F for 32 to 38 minutes, rotating the pans front to back after 20 minutes for even browning. Your funfetti cake is done when the tops spring back lightly when touched, the edges have pulled slightly away from the sides of the pans, and a toothpick inserted in the center comes out clean or with just a few moist crumbs.
Step 8: Cool the Cake Layers
Let the cake layers cool in their pans for exactly 10 minutes long enough to set their structure but not so long that they stick. Run a thin knife around the edges to loosen any spots that might be sticking, then carefully invert the layers onto wire cooling racks. Gently peel away the parchment paper and allow the cakes to cool completely before frosting, which typically takes about an hour.
Step 9: Prepare the Vanilla Buttercream
While the cakes cool, make the frosting. Beat the butter and salt in a clean mixing bowl on medium speed until very soft and creamy, about 3 to 4 minutes. With the mixer on low speed, gradually add the powdered sugar about one cup at a time, adding a tablespoon of heavy cream between additions to maintain a creamy consistency.
Once all the sugar is incorporated, add the vanilla extract and beat on medium speed for 3 to 5 minutes until the frosting is light, fluffy, and spreadable. If the frosting feels too stiff, add more cream one tablespoon at a time. If it’s too soft, add more powdered sugar or refrigerate briefly to firm it up.
Step 10: Assemble and Decorate
Place one completely cooled cake layer on your serving plate or cake stand. Spread approximately one cup of frosting evenly over the top, then place the second layer on top and repeat. Add the third layer and apply a thin crumb coat of frosting over the entire cake this initial thin layer seals in the crumbs so your final coat will be clean and smooth. Refrigerate for 15 minutes to set the crumb coat.
Apply the remaining frosting to the top and sides of the cake using an offset spatula or bench scraper for smooth sides. For the signature funfetti cake look, gently press rainbow sprinkles onto the lower portion of the cake’s sides. Pipe decorative dollops of frosting around the top edge and finish with a generous sprinkle of rainbow jimmies on top.

Dietary Substitutions to Customize Your Funfetti Cake
Not everyone can enjoy the classic funfetti cake recipe as written, but that doesn’t mean you have to miss out on this festive treat. With thoughtful substitutions, you can adapt this recipe to accommodate various dietary needs while still delivering on flavor and texture.
Protein and Main Component Alternatives
The egg whites in this recipe serve as both a binding agent and a source of structure. For an egg-free version, aquafaba works remarkably well as a substitute. Use 2 tablespoons of aquafaba per egg white called for in the recipe. Whip it slightly before adding to help incorporate air, just as you would with traditional egg whites. Another option is commercial egg replacer products, which are designed specifically for baking and provide reliable results.
If you prefer a richer cake with a slightly different flavor profile, you can substitute the 7 egg whites with 4 whole eggs. The result will be a cake with a faint yellow tint rather than pure white, but many bakers actually prefer this version for its more complex flavor and moister crumb. The choice between egg whites and whole eggs ultimately comes down to your preference for appearance versus richness.
Dairy, Flour, and Seasoning Modifications
For those avoiding dairy, several substitutions work well in funfetti cake. Replace the butter with high-quality vegan butter sticks designed for baking avoid tub margarines, which contain too much water. For the buttermilk, create a plant-based version by combining your favorite non-dairy milk with a tablespoon of lemon juice or vinegar per cup. Let it sit for 5 to 10 minutes until it slightly thickens and curdles, mimicking the acidity and texture of traditional buttermilk.
Gluten-free bakers can substitute the all-purpose flour with a one-to-one gluten-free flour blend. Look for blends that contain xanthan gum, which helps replicate the binding properties of gluten. The texture may be slightly different, but modern gluten-free flours produce excellent results. If you prefer a lighter texture, cake flour can replace all-purpose flour by weight in the original recipe just be sure to weigh rather than measure by volume, as cake flour packs differently.
Looking for more incredible cake recipes? Try this decadent triple chocolate cake for chocolate lovers or explore this silky Italian meringue buttercream as an alternative frosting for your funfetti creation.
Mastering Funfetti Cake: Advanced Tips and Variations
Once you’ve mastered the basic funfetti cake, you might want to experiment with different techniques and flavor combinations. These advanced tips will help you take your baking skills to the next level and create truly memorable desserts.
Pro Baking Techniques
Temperature matters more than most home bakers realize. Bringing all your ingredients to room temperature before mixing butter, eggs, and buttermilk allows them to emulsify properly, creating a smooth, cohesive batter that bakes evenly. Cold ingredients can cause the batter to curdle, leading to a dense or uneven texture. Plan ahead and set your ingredients out 1 to 2 hours before you plan to bake.
For professional-looking results, invest in cake strips that wrap around your pans. These fabric bands, which you soak in water before using, insulate the edges of the pan and help the cake bake evenly from edge to center. This prevents doming and eliminates the need to level your cake layers, giving you more height and a more polished final product.
Creative Flavor Variations
While classic vanilla funfetti cake is always a hit, don’t be afraid to experiment with different flavors. Add lemon or almond extract alongside the vanilla for a more complex flavor profile. For a chocolate funfetti variation, replace ¾ cup of the flour with cocoa powder and increase the sugar by ½ cup. You can also experiment with different sprinkle colors to match specific occasions red and pink for Valentine’s Day, green and white for St. Patrick’s Day, or team colors for a sports-themed party.
According to Sally’s Baking Addiction, one of the most trusted baking resources online, the key to a perfect funfetti cake is using quality sprinkles that won’t bleed their color into the batter. Rainbow jimmies (the long, cylindrical sprinkles) work best because they hold their shape and color during baking.
Presentation and Garnishing Ideas
The way you present your funfetti cake can make it look like it came from a professional bakery. Try a semi-naked finish by applying a thin layer of frosting and scraping most of it away to reveal the cake layers beneath. For a drip cake effect, make a white chocolate ganache with candy melts and heavy cream, then drizzle it over the top edge so it runs down the sides. Top with extra sprinkles, or add decorative elements like meringue kisses, macarons, or fresh flowers for an extra-special occasion.
If you’re looking for convenience without sacrificing the homemade taste, Pillsbury’s Funfetti products offer ready-made options that have become a household favorite, though nothing quite compares to a from-scratch funfetti cake made with premium ingredients and lots of love.
Make-Ahead Strategies
For busy schedules, you can bake the cake layers up to two days ahead and store them wrapped tightly in plastic wrap at room temperature. For longer storage, wrap each cooled layer individually in plastic wrap and foil, then freeze for up to three months. Thaw frozen layers in the refrigerator overnight before frosting. The buttercream can also be made ahead and refrigerated for up to a week or frozen for three months just bring it to room temperature and re-whip before using.
How to Store Funfetti Cake: Best Practices
Proper storage ensures your homemade funfetti cake stays fresh and delicious for as long as possible. Understanding how to store your cake correctly means you can enjoy it over several days without sacrificing quality or safety.
Room Temperature Storage
Because this funfetti cake is frosted with American buttercream, which contains a high amount of sugar that acts as a preservative, it can safely stay at room temperature for up to 3 days when properly covered. Place a cake dome or large bowl over the cake to protect it from dust and air exposure. If your kitchen is particularly warm, the butter in the frosting may soften too much in this case, refrigeration is a better option.
Refrigeration Guidelines
For longer storage, refrigerate your funfetti cake for up to one week. Cover it well with plastic wrap or place it in an airtight container to prevent the cake from absorbing refrigerator odors and drying out. Before serving refrigerated cake, let it sit at room temperature for 30 to 60 minutes. Cold cake can taste less sweet and have a firmer texture, but bringing it to room temperature restores the soft, tender crumb and full flavor.
Freezing for Long-Term Storage
Freezing works beautifully for funfetti cake, whether you’re saving leftovers or planning ahead for a future celebration. Wrap individual slices or whole cake layers tightly in plastic wrap, then add a layer of aluminum foil for extra protection against freezer burn. Label with the date and freeze for up to 3 months. Thaw wrapped cake in the refrigerator overnight, then bring to room temperature before serving.
| Storage Method | Duration | Best Practices |
|---|---|---|
| Room Temperature | Up to 3 days | Cover with cake dome or bowl |
| Refrigerator | Up to 7 days | Wrap tightly in plastic |
| Freezer | Up to 3 months | Double wrap in plastic and foil |
FAQs: Frequently Asked Questions About Funfetti Cake
What kind of sprinkles work best in funfetti cake batter?
Rainbow jimmies are the top choice for funfetti cake because they stay soft, bake evenly into the batter, and won’t bleed color like nonpareils or sanding sugar. Use about 1/2 to 3/4 cup for a standard recipe to get that classic confetti look without overpowering the texture. Stir them in gently at the end of mixing to keep them intact—add them too early and they might dissolve. For extra pop, mix a few tablespoons into your frosting too. Always taste your sprinkles first; fresh ones prevent any off flavors. This simple swap keeps your homemade funfetti cake vibrant and bakery-style perfect. (87 words)
Can I substitute buttermilk in a funfetti cake recipe?
Yes, make a quick buttermilk substitute for funfetti cake by combining 1 cup whole milk with 1 tablespoon lemon juice or white vinegar. Let it sit for 5-10 minutes until it curdles slightly—this mimics real buttermilk’s tang and tenderness. Avoid using straight milk or water, as they won’t give the same moist crumb. For best results, use room-temperature dairy to blend smoothly into the batter. This hack works in most funfetti recipes and keeps the cake light and fluffy without a trip to the store. (92 words)
Can I use whole eggs instead of egg whites for funfetti cake?
Absolutely, replace the egg whites in your funfetti cake with 4 large whole eggs for the same batter volume. The cake will have a slight yellow tint instead of pure white, but the flavor stays rich and delicious—many bakers prefer it this way for extra richness. Whisk them well before adding to ensure even distribution and a tender crumb. Use room-temperature eggs for smoother mixing and better rise. This substitution is great if you’re short on whites or want simpler prep without separating eggs. (89 words)
How do I bake funfetti cake in 9-inch pans or a sheet pan?
For 9-inch round pans, divide your funfetti cake batter evenly between two greased and floured pans, then bake at 350°F for 25-30 minutes—check 5-10 minutes early since thinner layers bake faster. Toothpick test for doneness. For a sheet cake, pour into a 9×13-inch pan, spread evenly, and bake at 350°F for about 45 minutes; tent with foil after 30 minutes if browning too quickly. Cool completely before frosting. Both methods yield moist, festive cakes—halve the frosting for the sheet version. (96 words)
What are key tips for perfect funfetti cake every time?
Weigh ingredients like flour and sugar for precision to avoid dry or dense funfetti cake. Bring butter, eggs, and dairy to room temperature for seamless blending and maximum rise. Fold in sprinkles last to preserve color and texture. Cool layers fully on wire racks before stacking—chill briefly if needed to prevent sliding. Frost with vanilla buttercream and add extra sprinkles on top for flair. Store covered at room temp for 3 days or freeze wrapped slices up to 3 months. These steps guarantee bakery-quality results. (98 words)

Funfetti Cake
- Total Time: 2 hours
- Yield: 12 servings
- Diet: Vegetarian
Description
🎂 Indulge in this ultra-moist, fluffy funfetti cake loaded with rainbow sprinkles for vibrant color and festive joy at every birthday bash!
🌈 Easy homemade delight with tender crumb, creamy vanilla buttercream, and endless customization – way better than store-bought mixes.
Ingredients
– 3¾ cups all-purpose flour (450g)
– 2½ teaspoons baking powder
– 1 teaspoon salt
– 2⅓ cups granulated sugar (466g)
– 1 cup unsalted butter, softened (227g)
– ⅓ cup vegetable oil (80mL)
– 1 tablespoon vanilla extract
– 1⅓ cups buttermilk, room temperature (320mL)
– 7 large egg whites, room temperature
– ⅔ cup rainbow jimmies (100g)
– 1 pound unsalted butter (450g)
– 2 pounds powdered sugar (900g)
– ½ teaspoon salt
– 1 tablespoon vanilla extract
– 3 to 4 tablespoons heavy cream
– Rainbow sprinkles for decoration
Instructions
1-Step 1: Prepare Your Equipment and Ingredients Before you begin mixing, preheat your oven to 350°F (175°C). This temperature allows the cake to bake evenly without developing a thick crust or drying out. While the oven heats, prepare three 8-inch round cake pans by thoroughly greasing them with butter or cooking spray, dusting with flour, and lining the bottoms with parchment paper rounds. This triple layer of protection ensures your cake layers release cleanly every time. For perfectly flat cake layers, consider wrapping wet cake strips around the outside of your pans. These fabric bands insulate the edges, helping the cake bake evenly from edge to center and preventing the dreaded dome that requires leveling later.
2-Step 2: Sift and Combine Dry Ingredients In a large bowl, sift together the all-purpose flour, baking powder, and salt. Sifting isn’t just about removing lumps it aerates the flour and distributes the leavening agent evenly throughout, which translates to a more uniform rise and tender texture. Once sifted, whisk the mixture gently to ensure everything is well combined, then set it aside while you prepare the wet ingredients.
3-Step 3: Cream Butter, Oil, and Sugar In the bowl of a stand mixer fitted with the paddle attachment, combine the softened butter, vegetable oil, and granulated sugar. Beat on medium-high speed for 4 to 5 minutes until the mixture becomes noticeably lighter in color and fluffy in texture. This creaming process incorporates tiny air bubbles into the batter, which helps the cake rise and creates that beautiful, tender crumb everyone loves in a perfect funfetti cake. The combination of butter and oil might seem unusual, but it’s actually a brilliant technique. Butter provides rich flavor and helps with structure, while oil keeps the cake incredibly moist. Together, they create the best of both worlds a flavorful cake that stays fresh for days.
4-Step 4: Add Egg Whites and Vanilla With the mixer running on low speed, add the egg whites in three separate additions, allowing each portion to fully incorporate before adding the next. This gradual approach prevents the batter from curdling and ensures a smooth, emulsified mixture. Once all the egg whites are combined, add the vanilla extract and beat on medium speed for another 2 to 3 minutes until the batter looks fluffy and voluminous.
5-Step 5: Alternate Adding Dry and Wet Ingredients Now comes the crucial step that determines your funfetti cake’s final texture. With the mixer on low speed, add the flour mixture and buttermilk in alternating batches, beginning and ending with the flour. A good pattern is: one-third of the flour, half the buttermilk, another third of flour, remaining buttermilk, and finally the remaining flour. Mix only until each addition is just incorporated, stopping to scrape down the sides and bottom of the bowl as needed. Overmixing at this stage develops too much gluten, resulting in a tough, dense cake rather than the tender, delicate crumb you want.
6-Step 6: Fold in the Rainbow Jimmies Remove the bowl from the mixer and add the rainbow jimmies. Using a silicone spatula, gently fold them into the batter with just a few turns enough to distribute them evenly without overworking the batter. The goal is to keep those colorful sprinkles intact so they create the beautiful confetti pattern throughout your baked cake.
7-Step 7: Divide and Bake Divide the batter evenly among your three prepared pans, using a kitchen scale for precision if you have one. The batter should fill each pan about two-thirds full. Gently tap the pans on the counter two or three times to release any large air bubbles that could create holes in your finished cake layers. Bake at 350°F for 32 to 38 minutes, rotating the pans front to back after 20 minutes for even browning. Your funfetti cake is done when the tops spring back lightly when touched, the edges have pulled slightly away from the sides of the pans, and a toothpick inserted in the center comes out clean or with just a few moist crumbs.
8-Step 8: Cool the Cake Layers Let the cake layers cool in their pans for exactly 10 minutes long enough to set their structure but not so long that they stick. Run a thin knife around the edges to loosen any spots that might be sticking, then carefully invert the layers onto wire cooling racks. Gently peel away the parchment paper and allow the cakes to cool completely before frosting, which typically takes about an hour.
9-Step 9: Prepare the Vanilla Buttercream While the cakes cool, make the frosting. Beat the butter and salt in a clean mixing bowl on medium speed until very soft and creamy, about 3 to 4 minutes. With the mixer on low speed, gradually add the powdered sugar about one cup at a time, adding a tablespoon of heavy cream between additions to maintain a creamy consistency. Once all the sugar is incorporated, add the vanilla extract and beat on medium speed for 3 to 5 minutes until the frosting is light, fluffy, and spreadable. If the frosting feels too stiff, add more cream one tablespoon at a time. If it’s too soft, add more powdered sugar or refrigerate briefly to firm it up.
10-Step 10: Assemble and Decorate Place one completely cooled cake layer on your serving plate or cake stand. Spread approximately one cup of frosting evenly over the top, then place the second layer on top and repeat. Add the third layer and apply a thin crumb coat of frosting over the entire cake this initial thin layer seals in the crumbs so your final coat will be clean and smooth. Refrigerate for 15 minutes to set the crumb coat. Apply the remaining frosting to the top and sides of the cake using an offset spatula or bench scraper for smooth sides. For the signature funfetti cake look, gently press rainbow sprinkles onto the lower portion of the cake’s sides. Pipe decorative dollops of frosting around the top edge and finish with a generous sprinkle of rainbow jimmies on top.
Notes
🥚 Use room temperature egg whites and buttermilk for superior rise and even texture.
🌈 Gently fold in rainbow jimmies at the end to prevent color bleeding into the batter.
❄️ Cool cakes completely before frosting to avoid melting and slipping layers.
- Prep Time: 25 minutes
- Cooling: 1 hour
- Cook Time: 35 minutes
- Category: Dessert
- Method: Baking
- Cuisine: American
Nutrition
- Serving Size: 1 slice
- Calories: 1129 kcal
- Sugar: 123 g
- Sodium: 446 mg
- Fat: 55 g
- Saturated Fat: 32 g
- Unsaturated Fat: 21 g
- Trans Fat: 2 g
- Carbohydrates: 154 g
- Fiber: 1 g
- Protein: 7 g
- Cholesterol: 129 mg
Keywords: funfetti cake, easy homemade funfetti, colorful sprinkles cake, birthday funfetti cake