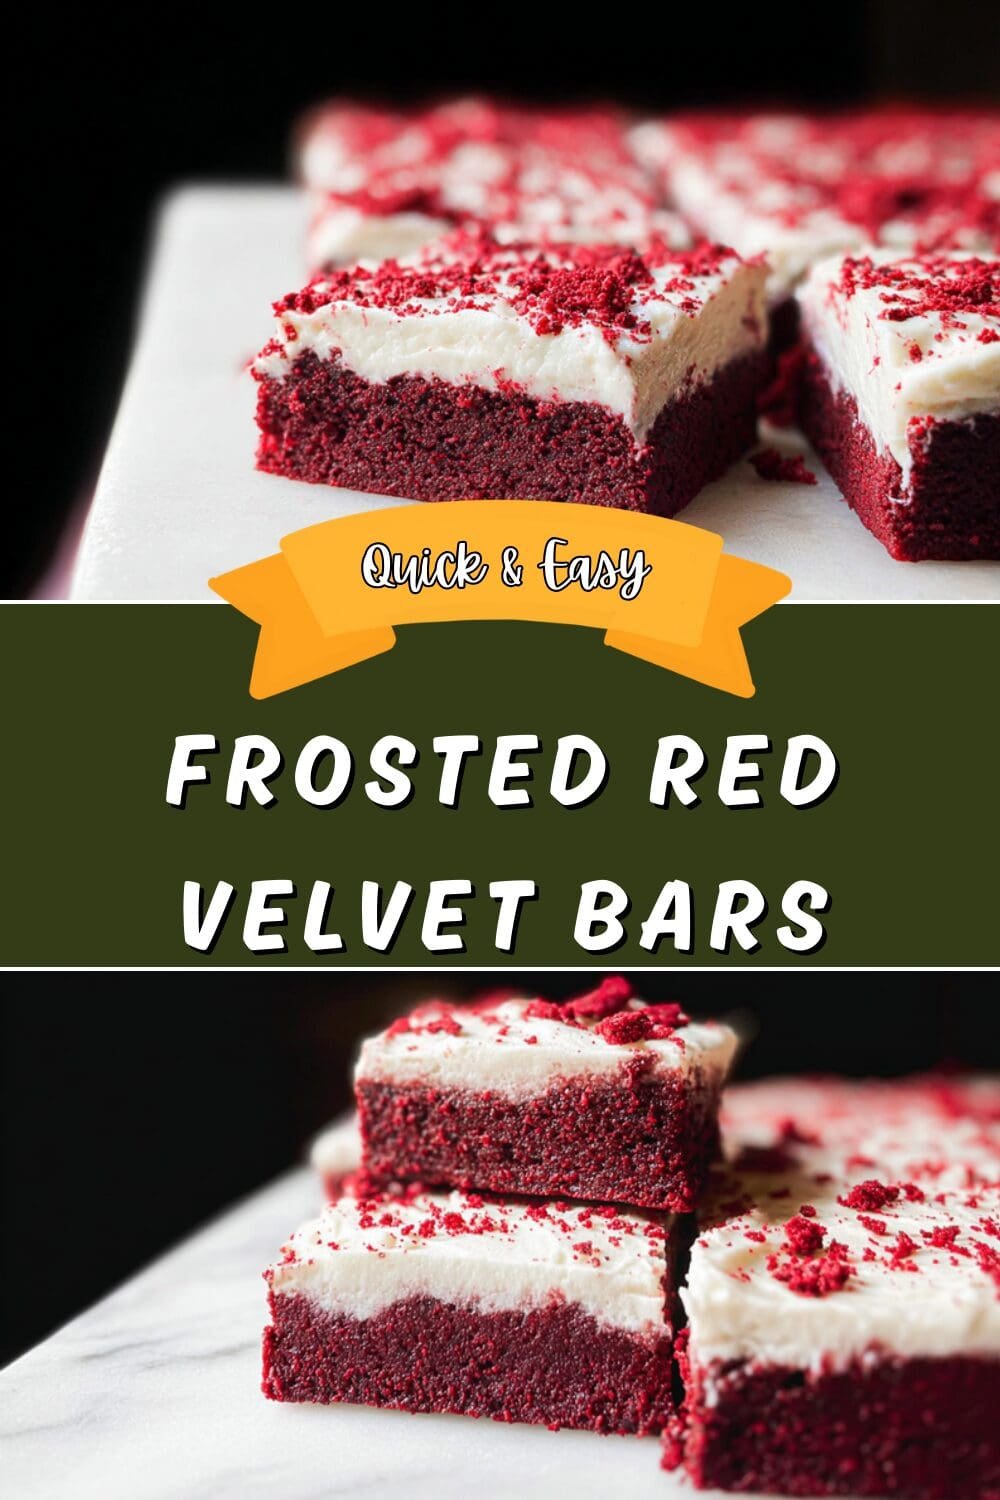
Why You’ll Love This Frosted Red Velvet Bars
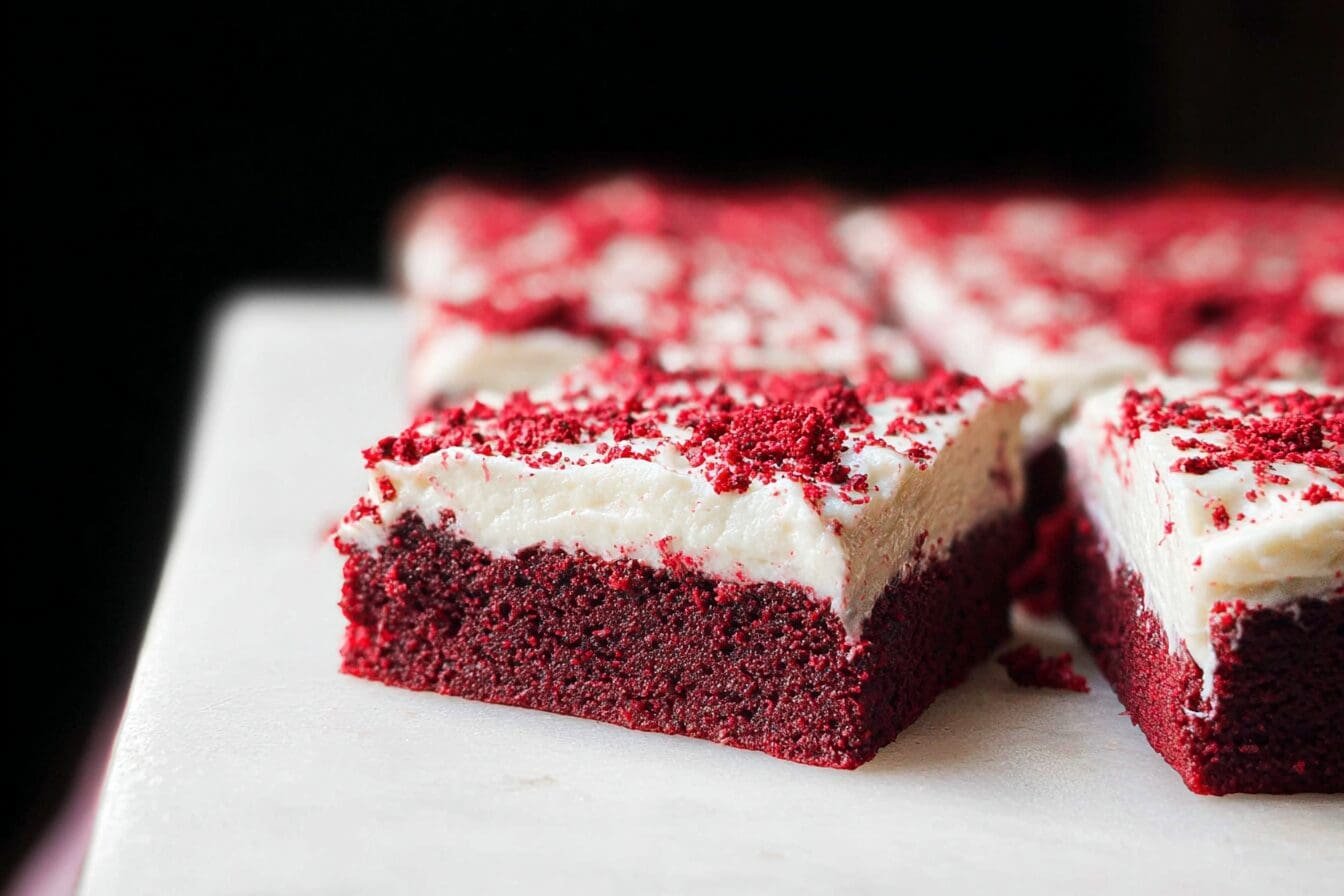
There’s something magical about frosted red velvet bars that makes them disappear faster than any other dessert at gatherings. These irresistible treats combine the classic appeal of red velvet cake with the convenience of bar cookies, creating a dessert that’s both stunning and simple to prepare.
As someone who has tested countless red velvet recipes over the years, I can confidently say this version strikes the perfect balance between moist, tender crumb and rich, tangy cream cheese frosting. Whether you’re a seasoned baker or just starting your kitchen journey, this recipe delivers consistent results every single time.
Here’s why this homemade red velvet bars recipe deserves a permanent spot in your collection:
- Ease of preparation: Unlike traditional layer cakes that require careful stacking and crumb coating, these bars come together in one bowl and bake in a single pan. Total active time is under 20 minutes, with no special equipment needed beyond basic mixing bowls and a hand mixer for the frosting.
- Irresistible texture: The combination of oil and buttermilk creates an incredibly moist, tender crumb that stays soft for days. The addition of vinegar reacts with baking soda for extra lift, giving you that perfect cake-like texture in bar form.
- Stunning presentation: The dramatic contrast between the vibrant crimson bars and snowy white cream cheese frosting makes these bars a showstopper at any event. A sprinkle of white chocolate chips or red velvet crumbs on top adds professional-looking flair.
- Make-ahead friendly: These bars store beautifully in the refrigerator for up to five days or can be frozen unfrosted for up to three months, making them perfect for party prep or holiday baking sessions.
Jump To
- 1. Why You’ll Love This Frosted Red Velvet Bars
- 2. Essential Ingredients for Frosted Red Velvet Bars
- 3. How to Prepare the Perfect Frosted Red Velvet Bars: Step-by-Step Guide
- 4. Dietary Substitutions to Customize Your Frosted Red Velvet Bars
- 5. Mastering Frosted Red Velvet Bars: Advanced Tips and Variations
- 6. How to Store Frosted Red Velvet Bars: Best Practices
- 7. FAQs: Frequently Asked Questions About Frosted Red Velvet Bars
- 8. Frosted Red Velvet Bars
Essential Ingredients for Frosted Red Velvet Bars
Creating the perfect soft red velvet bars frosting starts with understanding each ingredient’s role. Quality matters here, especially when it comes to cocoa powder and food coloring, which define the signature look and taste.
Base Ingredients
- 2 cups all-purpose flour – Provides structure and creates the tender cake-like texture. Spoon the flour into your measuring cup rather than scooping directly for accurate measurement.
- 1 cup granulated sugar – Adds sweetness and helps retain moisture. The sugar also contributes to the bars’ soft, velvety texture.
- 2 tablespoons unsweetened cocoa powder – Gives red velvet its subtle chocolate flavor without overpowering the tangy notes. Use natural, not Dutch-processed, cocoa for best results.
- 1 teaspoon baking soda – Works with the vinegar to create lift and a light, airy crumb.
- 1/2 teaspoon salt – Balances sweetness and deepens all flavors.
- 1 cup buttermilk – The secret ingredient for tangy flavor and tender texture. The acidity activates the baking soda and keeps the crumb moist.
- 1/2 cup vegetable oil – Creates a moister, more tender bar than butter would. Oil keeps the bars soft even when refrigerated.
- 2 large eggs, room temperature – Provide structure and richness. Room temperature eggs blend more smoothly into the batter.
- 2 teaspoons vanilla extract – Enhances the subtle chocolate flavor and adds warmth to every bite.
- 1 ounce red gel food coloring – Delivers that signature vibrant red hue. Gel coloring provides more intensity than liquid varieties.
- 1 teaspoon white vinegar – Reacts with baking soda for extra lift and contributes to the classic red velvet tang.
Cream Cheese Frosting Ingredients
- 8 ounces cream cheese, softened – The star of the frosting, providing tangy richness. Always use full-fat cream cheese for the creamiest texture.
- 1/4 cup unsalted butter, softened – Adds buttery flavor and helps create a fluffy, spreadable consistency.
- 2 cups powdered sugar – Sweetens and stabilizes the frosting for easy spreading.
- 1 teaspoon vanilla extract – Rounds out the flavor profile with warm, aromatic notes.
Special Dietary Options
For those with dietary restrictions, here are simple modifications:
- Gluten-free: Replace all-purpose flour with a 1:1 gluten-free baking flour blend. The texture remains remarkably similar to the original.
- Dairy-free: Substitute buttermilk with a mixture of 1 cup plant-based milk plus 1 tablespoon lemon juice. Use dairy-free cream cheese and butter alternatives for the frosting.
- Reduced sugar: Cut the granulated sugar to 3/4 cup and use a sugar substitute designed for baking. For the frosting, reduce powdered sugar to 1.5 cups for a lighter version.
Pro Tip: If you don’t have buttermilk on hand, make your own by adding 1 tablespoon of white vinegar or lemon juice to 1 cup of regular milk. Let it sit for 5 minutes before using.
How to Prepare the Perfect Frosted Red Velvet Bars: Step-by-Step Guide
Making easy frosted red velvet bars requires careful attention to technique. Follow these detailed steps for bakery-quality results in your own kitchen.
Step 1: Prepare Your Equipment and Oven
Preheat your oven to 350°F (175°C). This temperature ensures even baking without drying out the bars. While the oven heats, prepare your pan properly.
Grease a 9×13-inch baking pan with cooking spray or butter. For foolproof release, line the pan with parchment paper, leaving overhanging edges that act as handles. This technique, often called “creating a sling,” makes removing the entire slab of bars effortless after cooling.
Lightly grease the parchment paper as well. This extra step prevents any sticking along the edges. Having everything ready before mixing ensures you can work quickly once the wet and dry ingredients combine.
Step 2: Mix the Dry Ingredients
In a large mixing bowl, whisk together the dry ingredients until thoroughly combined:
- 2 cups all-purpose flour
- 1 cup granulated sugar
- 2 tablespoons unsweetened cocoa powder
- 1 teaspoon baking soda
- 1/2 teaspoon salt
Whisking serves two purposes: it aerates the flour for a lighter texture and evenly distributes the cocoa powder throughout. Any streaks of cocoa will become dark spots in your finished bars, so take time to blend completely.
Set this bowl aside while you prepare the wet ingredients. Proper ingredient preparation is essential for making red velvet cookie bars with uniform color and consistent texture.
Step 3: Combine the Wet Ingredients
In a separate bowl or large measuring cup, whisk together all wet ingredients:
- 1 cup buttermilk
- 1/2 cup vegetable oil
- 2 large eggs
- 2 teaspoons vanilla extract
- 1 ounce red gel food coloring
- 1 teaspoon white vinegar
Whisk until the eggs are completely broken down and the food coloring is evenly distributed. The mixture should be a uniform deep pink or light red color. If using gel coloring, you may need to whisk slightly longer to dissolve any concentrated bits.
Room temperature ingredients blend more smoothly and create a more even batter. If your eggs are cold from the refrigerator, place them in warm water for 5 minutes before cracking.
Step 4: Create the Batter
Pour the wet mixture into the dry ingredients. Using a spatula or wooden spoon, gently fold the ingredients together until just combined. The keyword here is “just” overmixing develops gluten and results in tough, dense bars.
Stop mixing as soon as no dry flour streaks remain. Small lumps in the batter are perfectly fine and will disappear during baking. The batter should be smooth, glossy, and a vibrant red color.
For the best red velvet bars with cream cheese frosting, work efficiently once the batter comes together. The leavening action begins as soon as wet meets dry.
Step 5: Bake the Bars
Transfer the batter to your prepared pan. Spread it evenly to all corners using your spatula, working from the center outward. Tap the pan gently on the counter twice to release any trapped air bubbles.
Bake at 350°F for 25-30 minutes. Begin checking at the 25-minute mark by inserting a toothpick into the center. It should come out clean or with just a few moist crumbs attached. If wet batter clings to the toothpick, continue baking in 2-minute increments.
The edges will pull slightly away from the pan sides when done, and the top will spring back when lightly touched. Avoid overbaking, as the bars continue cooking slightly after removal from the oven.
Step 6: Cool Completely
Allow the bars to cool in the pan for 10 minutes. Then, using the parchment paper handles, lift the entire slab onto a wire rack to cool completely. This step is crucial even slightly warm bars will melt the frosting and create a mess.
Full cooling typically takes 45-60 minutes. You can speed this process by placing the rack in the refrigerator after the first 20 minutes of room-temperature cooling.
Step 7: Prepare the Cream Cheese Frosting
While the bars cool, make your frosting. In a medium bowl, beat together:
- 8 ounces softened cream cheese
- 1/4 cup softened unsalted butter
Beat on medium speed for 2-3 minutes until completely smooth and creamy. Scrape down the bowl sides halfway through to ensure even mixing.
Gradually add 2 cups powdered sugar, beating on low speed until incorporated. Increase to medium-high speed and beat for another 2 minutes until fluffy. Add 1 teaspoon vanilla extract and beat for 30 seconds more.
The frosting should be spreadable but thick enough to hold its shape. If too thin, add more powdered sugar 1 tablespoon at a time. If too thick, add milk 1 teaspoon at a time.
Step 8: Frost and Serve
Once the bars are completely cool, spread the frosting evenly over the surface. Work from the center outward, creating smooth strokes with your spatula or the back of a spoon.
For a professional touch, create decorative swirls using the tip of your spatula. Or top with red velvet crumbs, white chocolate chips, or a dusting of cocoa powder for visual appeal.
Cut into 24 squares using a sharp knife. Wipe the blade clean between cuts for neat edges. Serve immediately or refrigerate until needed.

Dietary Substitutions to Customize Your Frosted Red Velvet Bars
One of the beauties of this red velvet recipe is its adaptability. Whether you’re accommodating dietary restrictions or simply working with what’s in your pantry, these substitutions help you customize the recipe without sacrificing flavor or texture.
Flour and Sweetener Alternatives
For gluten-sensitive bakers, a high-quality 1:1 gluten-free flour blend works beautifully in this recipe. Look for blends containing xanthan gum, which helps replicate the binding properties of gluten. The bars may be slightly more delicate, so chill them thoroughly before cutting.
Whole wheat pastry flour can replace all-purpose flour for a nuttier, more wholesome version. Use the same amount, but expect a slightly denser texture and more subtle red color due to the flour’s natural tan hue.
For reduced sugar options, coconut sugar substitutes directly for granulated sugar in a 1:1 ratio. The flavor profile shifts toward caramel notes, and the red color deepens to a burgundy shade.
Dairy Modifications
Creating dairy-free cake bars is simpler than you might think. Replace buttermilk with any plant-based milk combined with 1 tablespoon lemon juice per cup. Let it sit for 5 minutes before using.
For the frosting, dairy-free cream cheese and butter alternatives have improved dramatically in recent years. Brands made from cashews or coconut create remarkably similar textures. Note that coconut-based options may add a slight tropical undertone.
If you love the tanginess that traditional cream cheese provides, add 1/2 teaspoon of lemon juice to dairy-free frosting to replicate that signature flavor.
Oil and Fat Substitutions
While vegetable oil creates the moistest bars, you can substitute melted butter for a richer, more traditional flavor. Use the same amount but expect a slightly denser texture.
Coconut oil works as another alternative and adds a subtle coconut undertone that pairs beautifully with cream cheese frosting. Melt it completely and allow it to cool slightly before mixing.
For a lighter version, applesauce can replace up to half the oil. The bars will be slightly less rich but still delicious. This modification reduces calories while maintaining moisture.
Natural Food Coloring Options
Prefer natural ingredients? Beet powder provides beautiful color without artificial dyes. Use 2-3 tablespoons for a subtle pink, or combine with a few drops of natural red coloring for deeper hues.
Freeze-dried strawberries or raspberries, ground to a fine powder, can also tint your bars naturally. Add 1-2 tablespoons to the dry ingredients for a soft pink color and fruity undertones.
Remember that natural colorings may brown slightly during baking, creating a more rust-colored final product. They’re perfect for those prioritizing whole-food ingredients.
Mastering Frosted Red Velvet Bars: Advanced Tips and Variations
Transforming good bar cookies into extraordinary ones requires a few professional techniques. These tips and variations help you take your red velvet bars from homemade to bakery-quality.
Pro Techniques for Perfect Results
Measure flour correctly: The single biggest factor in bar texture is flour measurement. Instead of scooping directly (which packs flour and adds up to 25% extra), spoon flour into your measuring cup and level with a knife. Better yet, use a kitchen scale for precision.
Room temperature matters: Cold eggs and buttermilk can cause the batter to seize or create uneven texture. Pull all refrigerated ingredients out 30 minutes before baking. If you forget, warm eggs in a bowl of tap water and microwave buttermilk for 15 seconds.
Don’t skip the vinegar: Though it might seem strange, white vinegar is essential for authentic red velvet flavor and texture. The acid activates the baking soda, creating a tender, fluffy crumb. You won’t taste it in the finished bars.
Color intensity: For the most vibrant red, use gel food coloring rather than liquid. Liquid coloring can alter the batter consistency and requires more product to achieve the same intensity.
Creative Flavor Variations
Once you’ve mastered the classic recipe, try these delicious variations that build on the easy frosted red velvet bars foundation:
| Variation | Modification | Best Occasion |
|---|---|---|
| Double Chocolate | Add 1/2 cup mini chocolate chips to batter | Chocolate lovers’ birthdays |
| Red Velvet Cheesecake | Swirl 1 cup cheesecake filling into batter before baking | Elegant dinner parties |
| Spiced Velvet | Add 1/2 tsp cinnamon and 1/4 tsp nutmeg | Holiday gatherings |
| Orange Velvet | Add 1 tsp orange zest to frosting | Spring celebrations |
| Peppermint | Add crushed candy canes on top of frosting | Christmas parties |
Presentation Ideas
Beautiful presentation transforms simple bars into a celebration-worthy dessert. Consider these garnishing options:
- Classic finish: A light dusting of cocoa powder through a stencil creates elegant patterns.
- Crumb topping: Reserve 1/4 cup of baked crumbs and sprinkle over fresh frosting for texture and visual interest.
- White chocolate drizzle: Melt white chocolate chips and drizzle in a zigzag pattern for a dramatic finish.
- Fresh berries: Top each square with a fresh raspberry or strawberry slice just before serving.
Make-Ahead Strategies
For busy schedules, these preparation strategies help you stay organized:
- Batter prep: Mix dry ingredients up to a week in advance and store in an airtight container. Wet ingredients can be combined the night before and refrigerated.
- Bake now, frost later: Bake the bars up to 2 days ahead, wrap tightly, and store unfrosted at room temperature. Frost on serving day for the freshest presentation.
- Complete ahead: Fully assembled bars can be made 2 days in advance and stored in the refrigerator. Add garnishes just before serving.
Expert Secret: For perfectly clean cuts, refrigerate the frosted bars for 30 minutes before slicing. Wipe your knife between each cut, and dip it in hot water for extra-smooth edges.
Looking for another creamy dessert idea? Check out these decadent cannoli cheesecake bars that bring Italian bakery flavors to your home kitchen.
How to Store Frosted Red Velvet Bars: Best Practices
Proper storage keeps your frosted red velvet bars tasting fresh and looking beautiful. Because cream cheese frosting contains dairy, these bars require slightly different handling than other bar cookies.
Refrigeration Guidelines
Always refrigerate frosted red velvet bars due to the cream cheese content. Place cut bars in an airtight container with a tight-fitting lid. If stacking is necessary, place parchment paper or wax paper between layers to prevent the frosting from sticking.
Properly stored bars remain fresh in the refrigerator for up to 5 days. The cake base actually improves after 24 hours as flavors meld and moisture distributes evenly. For the best taste and texture, remove bars from the refrigerator 15-20 minutes before serving. This allows the frosting to soften slightly and the cake to reach its optimal texture.
Freezing for Long-Term Storage
Freezing extends the life of your homemade red velvet bars significantly. For best results, freeze the bars unfrosted:
- Bake and cool the bars completely.
- Wrap the entire slab tightly in plastic wrap, then aluminum foil.
- Place in a freezer bag, removing as much air as possible.
- Label with the date and freeze for up to 3 months.
Thaw overnight in the refrigerator, then frost fresh when ready to serve. This method preserves the moist texture perfectly.
If you’ve already frosted the bars, flash-freeze them on a baking sheet for 1 hour until the frosting hardens. Then wrap individually and store in a freezer bag. Thaw in the refrigerator to prevent condensation from making the topping soggy.
Reheating and Serving Tips
Frosted bars taste best cold or at room temperature, so reheating isn’t recommended. However, if you prefer a warm dessert, microwave individual unfrosted bars for 8-10 seconds. Add fresh frosting separately after warming.
Meal Prep Considerations
For those who enjoy batch cooking, these bars are ideal. The recipe doubles easily for large gatherings or extended meal prep. Here’s a simple strategy for weekly treat preparation:
- Weekend baking: Make a double batch on Saturday, leaving half unfrosted in the freezer.
- Weekly portions: Cut the frosted slab into 24 squares and store in containers of 6 for easy grab-and-go portions.
- Fresh frosting: Make frosting on demand in small batches for the best flavor.
FAQs: Frequently Asked Questions About Frosted Red Velvet Bars
What is a frosted red velvet bar?
A frosted red velvet bar is a chewy, cake-like dessert bar inspired by classic red velvet cake. It features a moist base made with cocoa powder, buttermilk, and red food coloring for that signature crimson hue and subtle chocolate flavor. The bars are baked in a pan, cut into squares, and topped with a creamy cream cheese frosting. They’re easier to make than layer cakes—no stacking or crumb coating required. Perfect for parties or holiday treats, one batch yields about 24 bars. Key ingredients include flour, sugar, eggs, oil or butter, vanilla, and white vinegar for tenderness. Bake at 350°F for 25-30 minutes until a toothpick comes out clean.
How do you make frosted red velvet bars from scratch?
Start by preheating your oven to 350°F and greasing a 9×13-inch pan. Whisk together 2 cups flour, 1 cup sugar, 2 tbsp cocoa, 1 tsp baking soda, and 1/2 tsp salt. In another bowl, mix 1 cup buttermilk, 1/2 cup oil, 2 eggs, 2 tsp vanilla, 1 oz red food coloring, and 1 tsp vinegar. Combine wet and dry ingredients until smooth, pour into pan, and bake 25-30 minutes. Cool completely. For frosting, beat 8 oz cream cheese, 1/4 cup butter, 2 cups powdered sugar, and 1 tsp vanilla until fluffy. Spread over bars, cut, and serve. Total time: 45 minutes plus cooling. Store in fridge up to 5 days.
Do frosted red velvet bars need to be refrigerated?
Yes, frosted red velvet bars should be refrigerated due to the cream cheese frosting, which contains dairy and can spoil at room temperature. Keep them in an airtight container in the fridge for up to 5 days. For best texture, let them sit out for 15-20 minutes before serving to soften. If stacking layers, place parchment paper between bars to prevent sticking. Avoid leaving them out longer than 2 hours to prevent bacterial growth. For longer storage, freeze unfrosted bars in a zip-top bag for up to 3 months; thaw and frost as needed. This keeps the moist crumb intact without sogginess.
Can you freeze frosted red velvet bars?
Frosted red velvet bars freeze well, but for best results, freeze the unfrosted bars first. Bake and cool completely, then wrap individually in plastic wrap and place in a freezer bag for up to 3 months. Thaw overnight in the fridge, then frost fresh for optimal creaminess. If freezing frosted bars, flash-freeze on a tray first to set the frosting, then transfer to bags—thaw in fridge to avoid condensation softening the top. Label with dates. Freezing preserves the tender texture and vibrant color. One reader tip: add a sprinkle of white chocolate chips post-thaw for extra crunch.
Why are my red velvet bars dense and how can I fix it?
Dense red velvet bars often result from overmixing the batter, which develops gluten, or inaccurate measurements like too much flour. Fix it by sifting dry ingredients, measuring flour by spooning into the cup (not scooping), and mixing just until combined—lumps are okay. Ensure buttermilk is fresh and room temperature for even rising. Don’t overbake; check at 25 minutes. Use oil over butter for moister bars. If still dense, reduce flour by 2 tbsp next time or add 1/4 tsp baking powder. Test doneness with a toothpick. These tweaks yield light, fudgy bars every time, perfect for slicing and sharing.

Frosted Red Velvet Bars
- Total Time: 1 hour 45 minutes
- Yield: 24 bars
- Diet: Vegetarian
Description
❤️ Dive into moist, cocoa-rich red velvet bars topped with creamy tangy cream cheese frosting – a crowd-pleasing twist on the classic cake!
🧁 Easy to bake in one pan, perfect portions for sharing at parties or potlucks without the hassle of layers.
Ingredients
– 2 cups all-purpose flour
– 1 cup granulated sugar
– 2 tablespoons unsweetened cocoa powder
– 1 teaspoon baking soda
– 1/2 teaspoon salt
– 1 cup buttermilk
– 1/2 cup vegetable oil
– 2 large eggs, room temperature
– 2 teaspoons vanilla extract
– 1 ounce red gel food coloring
– 1 teaspoon white vinegar
– 8 ounces cream cheese, softened
– 1/4 cup unsalted butter, softened
– 2 cups powdered sugar
– 1 teaspoon vanilla extract
Instructions
1-Step 1: Prepare Your Equipment and Oven Preheat your oven to 350°F (175°C). This temperature ensures even baking without drying out the bars. While the oven heats, prepare your pan properly. Grease a 9×13-inch baking pan with cooking spray or butter. For foolproof release, line the pan with parchment paper, leaving overhanging edges that act as handles. This technique, often called “creating a sling,” makes removing the entire slab of bars effortless after cooling. Lightly grease the parchment paper as well. This extra step prevents any sticking along the edges. Having everything ready before mixing ensures you can work quickly once the wet and dry ingredients combine.
2-Step 2: Mix the Dry Ingredients In a large mixing bowl, whisk together the dry ingredients until thoroughly combined: Whisking serves two purposes: it aerates the flour for a lighter texture and evenly distributes the cocoa powder throughout. Any streaks of cocoa will become dark spots in your finished bars, so take time to blend completely. Set this bowl aside while you prepare the wet ingredients. Proper ingredient preparation is essential for making red velvet cookie bars with uniform color and consistent texture.
3-Step 3: Combine the Wet Ingredients In a separate bowl or large measuring cup, whisk together all wet ingredients: Whisk until the eggs are completely broken down and the food coloring is evenly distributed. The mixture should be a uniform deep pink or light red color. If using gel coloring, you may need to whisk slightly longer to dissolve any concentrated bits. Room temperature ingredients blend more smoothly and create a more even batter. If your eggs are cold from the refrigerator, place them in warm water for 5 minutes before cracking.
4-Step 4: Create the Batter Pour the wet mixture into the dry ingredients. Using a spatula or wooden spoon, gently fold the ingredients together until just combined. The keyword here is “just” overmixing develops gluten and results in tough, dense bars. Stop mixing as soon as no dry flour streaks remain. Small lumps in the batter are perfectly fine and will disappear during baking. The batter should be smooth, glossy, and a vibrant red color. For the best red velvet bars with cream cheese frosting, work efficiently once the batter comes together. The leavening action begins as soon as wet meets dry.
5-Step 5: Bake the Bars Transfer the batter to your prepared pan. Spread it evenly to all corners using your spatula, working from the center outward. Tap the pan gently on the counter twice to release any trapped air bubbles. Bake at 350°F for 25-30 minutes. Begin checking at the 25-minute mark by inserting a toothpick into the center. It should come out clean or with just a few moist crumbs attached. If wet batter clings to the toothpick, continue baking in 2-minute increments. The edges will pull slightly away from the pan sides when done, and the top will spring back when lightly touched. Avoid overbaking, as the bars continue cooking slightly after removal from the oven.
6-Step 6: Cool Completely Allow the bars to cool in the pan for 10 minutes. Then, using the parchment paper handles, lift the entire slab onto a wire rack to cool completely. This step is crucial even slightly warm bars will melt the frosting and create a mess. Full cooling typically takes 45-60 minutes. You can speed this process by placing the rack in the refrigerator after the first 20 minutes of room-temperature cooling.
7-Step 7: Prepare the Cream Cheese Frosting While the bars cool, make your frosting. In a medium bowl, beat together: Beat on medium speed for 2-3 minutes until completely smooth and creamy. Scrape down the bowl sides halfway through to ensure even mixing. Gradually add 2 cups powdered sugar, beating on low speed until incorporated. Increase to medium-high speed and beat for another 2 minutes until fluffy. Add 1 teaspoon vanilla extract and beat for 30 seconds more. The frosting should be spreadable but thick enough to hold its shape. If too thin, add more powdered sugar 1 tablespoon at a time. If too thick, add milk 1 teaspoon at a time.
8-Step 8: Frost and Serve Once the bars are completely cool, spread the frosting evenly over the surface. Work from the center outward, creating smooth strokes with your spatula or the back of a spoon. For a professional touch, create decorative swirls using the tip of your spatula. Or top with red velvet crumbs, white chocolate chips, or a dusting of cocoa powder for visual appeal. Cut into 24 squares using a sharp knife. Wipe the blade clean between cuts for neat edges. Serve immediately or refrigerate until needed.
Notes
❤️ Use gel food coloring for intense red hue without thinning the batter.
🧀 Let cream cheese and butter come fully to room temperature for silky frosting.
❄️ Chill frosted bars before cutting for clean, neat edges.
- Prep Time: 15 minutes
- Cooling: 1 hour
- Cook Time: 30 minutes
- Category: Dessert
- Method: Baking
- Cuisine: American
Nutrition
- Serving Size: 1 bar
- Calories: 280 kcal
- Sugar: 25 g
- Sodium: 220 mg
- Fat: 14 g
- Saturated Fat: 8 g
- Unsaturated Fat: 5 g
- Trans Fat: 0 g
- Carbohydrates: 37 g
- Fiber: 1 g
- Protein: 3 g
- Cholesterol: 55 mg
Keywords: red velvet bars, cream cheese frosting bars, easy red velvet dessert, moist red velvet recipe