Description
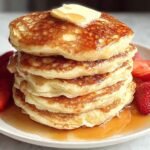
🥞 Indulge in the fluffiest pancakes you’ve ever tasted – light, airy, and perfectly golden for an epic breakfast treat!
🧈 Easy homemade recipe with simple ingredients that rises tall and stays tender – a must-try family favorite!
Ingredients
– 1 ½ cups all-purpose flour
– 2 ½ teaspoons aluminum-free baking powder
– ½ teaspoon salt
– 2 tablespoons sugar
– 1 ¼ cups milk (any kind)
– 1 egg
– 3 tablespoons melted butter (or neutral oil)
– 2 teaspoons vanilla extract
Instructions
1-Step 1: Prepare Your Dry Ingredients Start by grabbing a large mixing bowl. You want plenty of room to work without ingredients spilling over the sides. Add your 1 ½ cups all-purpose flour, measuring it lightly without packing it down into the cup. Packed flour creates dense, heavy pancakes nobody wants. Add the 2 ½ teaspoons of aluminum-free baking powder, ½ teaspoon of salt, and 2 tablespoons of sugar to the bowl. Use a whisk or fork to combine everything evenly, making sure the baking powder and salt get distributed throughout the flour. This takes about 30 seconds and prevents any concentrated pockets of salt or leavening.
2-Step 2: Create the Well and Add Wet Ingredients This is where the “volcano” technique comes into play. Use your spoon or the back of a measuring cup to create a deep well in the center of your dry ingredients. Think of it like building a tiny crater in a flour mountain. Pour 1 ¼ cups of milk into this well, then crack in 1 egg, add 3 tablespoons of melted butter (or neutral oil), and splash in 2 teaspoons of vanilla extract. Here’s a game-changer technique: take a fork and gently break up the egg yolk right there in the well, mixing it with the other liquid ingredients before you start incorporating the flour. This makes the mixing process faster and more even, reducing the temptation to overmix later.
3-Step 3: Mix the Batter Gently Now comes the most critical step in creating fluffy pancakes. Working from the outside of the bowl inward, use a spoon or spatula to gradually pull the dry ingredients into the wet mixture. Use gentle folding motions rather than aggressive stirring. Mix just until the flour disappears and the batter is mostly smooth with perhaps a few small lumps remaining. Resist the urge to keep mixing! Overmixing develops gluten strands that make pancakes chewy and tough instead of tender and fluffy. The batter should be thick, similar to brownie batter consistency, and it won’t spread much when you pour it. This thickness is exactly what you want for tall, pillowy stacks.
4-Step 4: Rest the Batter For the fluffiest results, let your batter rest for 5-7 minutes before cooking. This resting period allows the flour to fully absorb the liquid and gives the baking powder time to start working its magic. You might notice small bubbles forming on the surface, which is exactly what you want to see. While the batter rests, you can preheat your cooking surface.
5-Step 5: Heat and Prepare Your Griddle or Pan Heat a non-stick griddle or large pan over medium heat until hot. The ideal temperature falls between 300-350°F for even cooking. Test your griddle by flicking a few drops of water onto the surface. The droplets should dance and sizzle gently, not evaporate instantly (too hot) or just sit there (not hot enough). Grease the surface with butter, oil, or cooking spray immediately before pouring your batter. The type of fat you use affects the pancake’s surface texture and browning. Butter creates a beautiful golden color and rich flavor but can brown quickly, while oil gives a more even browning.
6-Step 6: Cook Your Pancakes Pour ¼ cup of batter onto the griddle for each pancake. Because this batter is thick and doesn’t spread much, you may need to use the back of a spoon or your measuring scoop to gently shape it into a circle. Don’t worry about making them perfectly round; rustic shapes have charm! Watch for the telltale signs that it’s time to flip. After approximately 2 minutes, you’ll see bubbles appearing on the surface and the edges will start to look set and slightly defined. The surface should look somewhat matte rather than shiny and wet. Slide your spatula underneath and flip with confidence. Critical tip: Never press down on your pancakes after flipping! This squeezes out the precious air bubbles that make them fluffy, resulting in dense, undercooked centers. Cook the second side for a little less time than the first, usually 1-1½ minutes, until golden brown.
7-Step 7: Serve or Keep Warm Transfer cooked pancakes to plates and serve immediately with syrup and your favorite toppings. If you’re cooking for a crowd and want everyone to eat together, keep the finished pancakes warm by placing them on a baking sheet in a 200°F oven. You can also cover the stack loosely with a clean kitchen towel to retain warmth.
Notes
🥄 Spoon flour lightly into the measuring cup without packing for the fluffiest texture.
⏳ Let batter rest 5-7 minutes before cooking to fully hydrate flour and activate leavening.
❌ Never overmix batter or press pancakes after flipping to avoid dense, chewy results.
- Prep Time: 5 minutes
- Cook Time: 10 minutes
- Category: Breakfast
- Method: Stovetop
- Cuisine: American
Nutrition
- Serving Size: 2 pancakes
- Calories: 190
- Sugar: 2g
- Sodium: 450mg
- Fat: 7g
- Saturated Fat: 4g
- Unsaturated Fat: 3g
- Trans Fat: 0.2g
- Carbohydrates: 27g
- Fiber: 1g
- Protein: 4g
- Cholesterol: 42mg
Keywords: fluffy pancakes, best pancake recipe, homemade pancakes, breakfast pancakes