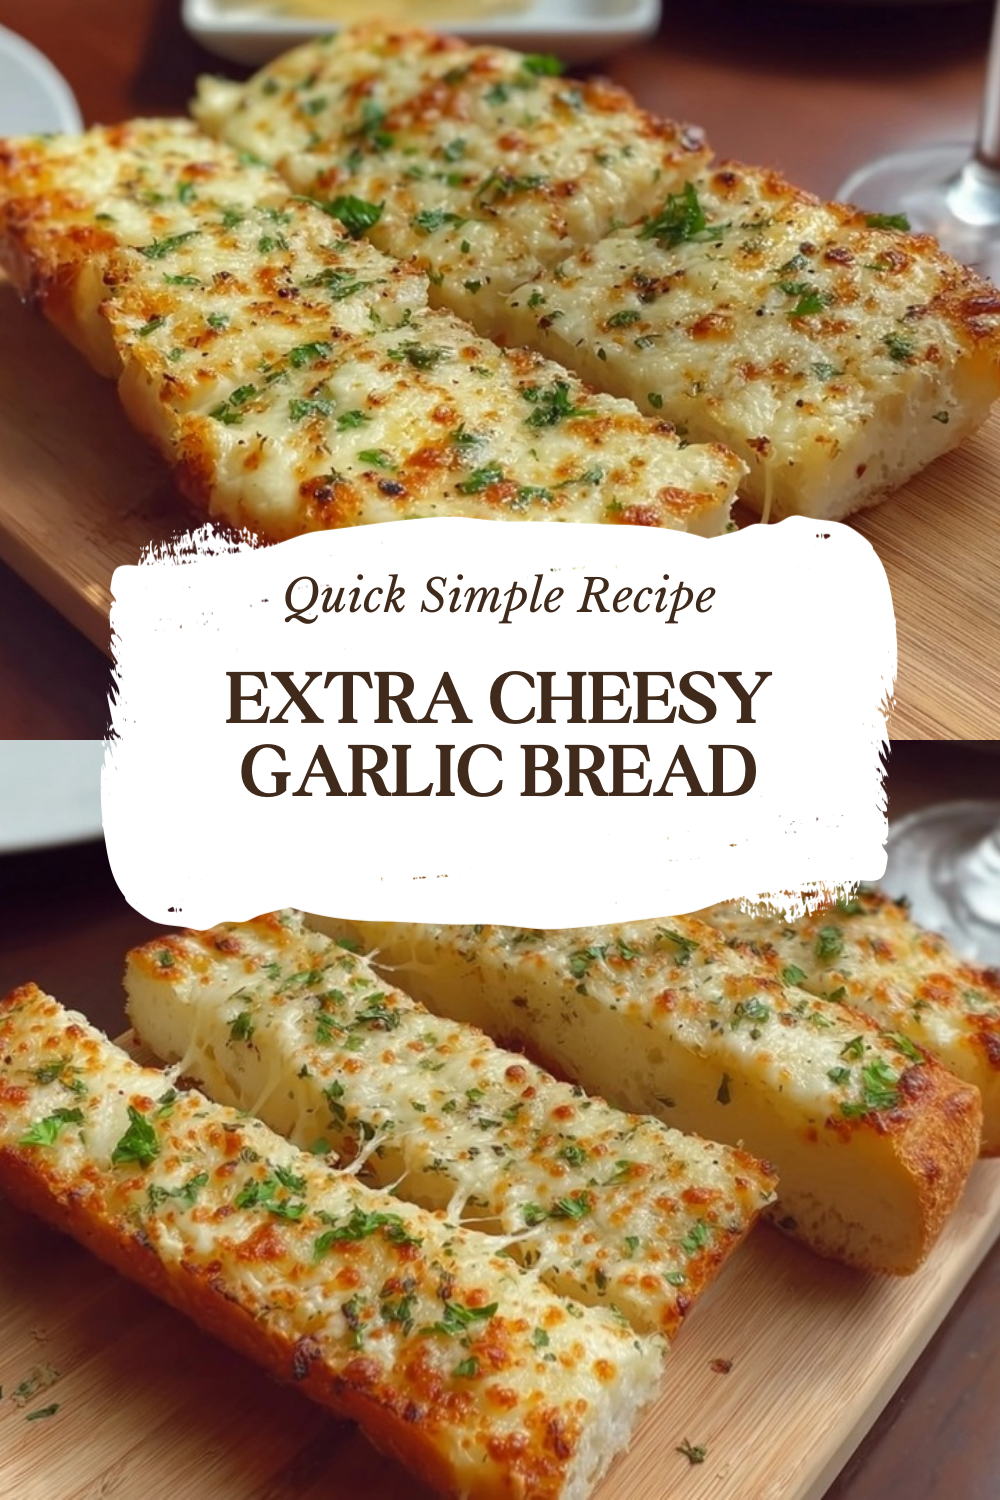
Why You’ll Love This Extra Cheesy Garlic Bread
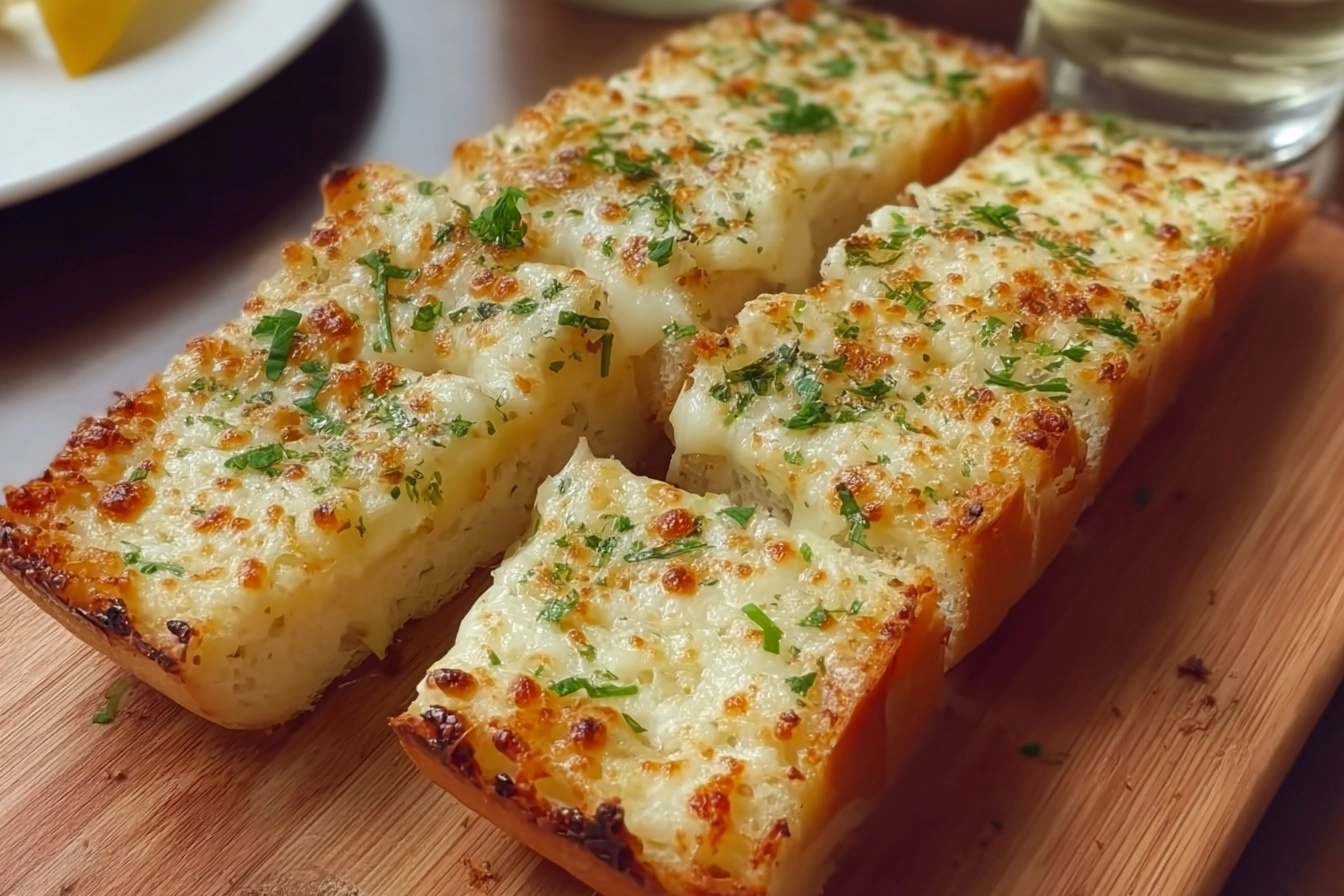
There’s something truly magical about pulling a tray of extra cheesy garlic bread from the oven. The golden, bubbling cheese, the irresistible aroma of garlic, and that satisfying crunch when you take the first bite it’s pure comfort food at its finest. Whether you’re serving it alongside pasta, soup, or enjoying it as a snack, this recipe delivers on every level.
Here’s why this cheesy garlic bread deserves a permanent spot in your recipe collection:
- Ease of preparation: This recipe comes together in just 15 minutes, making it perfect for busy weeknights or last-minute gatherings. You only need five simple ingredients and basic kitchen tools. No complicated techniques or fancy equipment required just mix, spread, and broil your way to deliciousness.
- Irresistible flavor: The combination of shredded and grated cheese creates layers of flavor and texture. Mayonnaise replaces butter in this recipe, giving the topping a richer, creamier consistency that melts beautifully. The garlic powder infuses every bite with savory goodness, and you can easily adjust the amount to suit your taste.
- Versatility: This extra cheesy garlic bread works as a side dish, appetizer, or even a main course when paired with a fresh salad. You can customize it with herbs, spices, tomatoes, or pesto to match any meal. It pairs wonderfully with everything from spaghetti marinara to grilled chicken.
- Budget-friendly: With affordable ingredients like Italian or French bread and everyday cheeses, this recipe feeds 4-6 people without breaking the bank. It’s a crowd-pleaser that looks and tastes impressive but costs very little to make.
Pro tip: This recipe uses mayonnaise instead of butter, which creates an ultra-creamy texture and helps the cheese melt into a perfectly gooey layer. Don’t knock it until you try it the results speak for themselves!
Garlic also offers several health benefits, from supporting heart health to boosting immunity. According to research on garlic’s health benefits, compounds in garlic may help reduce blood pressure and improve cholesterol levels. So while this bread is undeniably indulgent, at least you’re getting some goodness along with all that cheese.
Jump To
- 1. Why You’ll Love This Extra Cheesy Garlic Bread
- 2. How to Prepare the Perfect Extra Cheesy Garlic Bread: Step-by-Step Guide
- 3. Dietary Substitutions to Customize Your Extra Cheesy Garlic Bread
- 4. Mastering Extra Cheesy Garlic Bread: Advanced Tips and Variations
- 5. How to Store Extra Cheesy Garlic Bread: Best Practices
- 6. FAQs: Frequently Asked Questions About Extra Cheesy Garlic Bread
- 7. Extra Cheesy Garlic Bread
How to Prepare the Perfect Extra Cheesy Garlic Bread: Step-by-Step Guide
Making this extra cheesy garlic bread couldn’t be simpler. Follow these detailed steps to achieve perfectly melted, golden, bubbly cheese every single time.
Ingredients You’ll Need
Before you begin, gather these ingredients. Each one plays a key role in creating the ultimate cheesy experience:
| Ingredient | Amount |
|---|---|
| Shredded cheese | 1 cup |
| Grated cheese | 1 cup |
| Mayonnaise | 1 cup |
| Garlic powder | 1/2 teaspoon (adjust to taste) |
| Italian bread or French bread | 1 loaf, split lengthwise |
Step 1: Preheat Your Oven to Broil
Start by setting your oven to the broil setting. Broiling gives the cheese that gorgeous golden-brown top and crispy edges while keeping the inside soft and gooey. Most ovens have a broil option, usually located at the top of the oven settings. If your oven offers low and high broil options, choose high for the best results.
While the oven preheats, position your oven rack about 6 inches from the heating element. This distance allows the cheese to melt and brown without burning. If your bread is particularly thick, you might want to move the rack down one level to prevent over-browning before the cheese fully melts.
Step 2: Prepare the Cheese Mixture
In a large mixing bowl, combine the shredded cheese, grated cheese, mayonnaise, and garlic powder. Stir everything together until well blended. The mayonnaise might seem like an unusual ingredient, but it creates a creamy base that helps the cheeses meld together and spread smoothly onto the bread.
Use a fork or spatula to mix thoroughly, making sure the garlic powder is evenly distributed throughout the cheese mixture. Taste a tiny bit and adjust the garlic if you prefer a stronger flavor some people love using a full teaspoon or more for an extra garlicky kick.
For best results, use freshly grated cheese rather than pre-shredded varieties. Pre-shredded cheese contains anti-caking agents that can prevent it from melting as smoothly. A combination of mozzarella for stretchiness and a sharper cheese like cheddar or parmesan for flavor works beautifully.
Step 3: Split the Bread Lengthwise
Take your loaf of Italian or French bread and slice it in half lengthwise using a serrated bread knife. A sawing motion works best to get clean cuts without squishing the bread. You’ll end up with two long halves, each ready to be loaded with cheesy goodness.
If you’re using a particularly wide loaf, you can cut each half into narrower strips for easier serving later. Some people prefer to score the bread in a crosshatch pattern before adding the topping, which helps the mixture seep into the nooks and crannies for even more flavor in every bite.
Step 4: Spread the Mixture Generously
Now comes the fun part spreading that glorious cheese mixture onto your bread halves. Use a butter knife or spatula to spread the mixture evenly across both cut sides of the bread. Don’t be shy here; pile it on and spread it all the way to the edges for maximum cheesiness in every bite.
Work methodically from one end to the other, making sure the coverage is even. Some areas shouldn’t be thick while others are sparse aim for a consistent layer across the entire surface. If you have extra mixture, feel free to add a second layer for an ultra-cheesy experience.
Step 5: Broil Until Golden and Bubbly
Place your prepared bread halves on a baking sheet and slide them under the broiler. Broil for just a few minutes typically 3 to 5 minutes until the cheese turns golden brown and starts to bubble. Keep a close eye on the bread during this step because broilers work fast, and nobody wants burnt cheese.
You’ll know it’s ready when you see the cheese melting into pools, with spots of golden brown forming on top. The edges of the bread should also get slightly crispy and toasted. If you like extra crispy edges, you can leave it under the broiler for another minute, but watch carefully.
Step 6: Slice and Serve Immediately
Remove the baking sheet from the oven and let the bread cool for just a minute long enough so you don’t burn your mouth, but not so long that the cheese starts to firm up. Use a sharp knife to slice each half into serving-sized pieces, typically about 2 inches wide.
Serve your extra cheesy garlic bread warm for the best experience. The cheese should still be molten and stringy when you pull the slices apart. This bread makes an excellent companion to pasta dishes like creamy beef and bowtie pasta or a hearty million dollar lasagna for a complete Italian-inspired meal.
Optional Additions for Extra Flavor
Want to take your garlic bread to the next level? Consider these optional additions:
- Fresh herbs: Sprinkle chopped parsley, basil, or oregano on top after broiling for a fresh, aromatic finish.
- Spices: Add red pepper flakes, paprika, or Italian seasoning to the cheese mixture for extra depth.
- Tomatoes: Layer thin slices of fresh tomato under the cheese for a burst of freshness.
- Pesto: Spread a thin layer of pesto on the bread before adding the cheese mixture for an herby, savory twist.

Dietary Substitutions to Customize Your Extra Cheesy Garlic Bread
One of the best things about this recipe is how easily it adapts to different dietary needs and preferences. Whether you’re cooking for someone with food restrictions or simply want to switch things up, here are some smart substitutions that maintain all the deliciousness.
Protein and Main Component Alternatives
While extra cheesy garlic bread doesn’t traditionally contain meat, you can easily add protein to make it more substantial. Try layering thinly sliced ham, cooked bacon bits, or prosciutto under the cheese mixture for a heartier version. These additions work beautifully and turn a side dish into a satisfying main course.
For those avoiding dairy, plant-based cheese alternatives have come a long way. Many vegan cheese shreds melt reasonably well and can be substituted 1:1 in this recipe. Pair them with vegan mayonnaise for a completely dairy-free version that still satisfies those cheesy cravings.
Vegetable, Sauce, and Seasoning Modifications
Vegetables can add nutrition and flavor to your garlic bread. Finely chopped spinach, sun-dried tomatoes, or roasted red peppers can be mixed into the cheese spread or layered on top. These additions bring color, texture, and extra nutrients to each serving.
For sauce variations, consider spreading a thin layer of marinara, Alfredo, or pesto on the bread before adding the cheese mixture. Each creates a distinct flavor profile that pairs well with different main dishes. A white sauce base works beautifully with chicken dishes, while marinara complements pasta perfectly.
Seasoning substitutions offer endless possibilities:
- For heat lovers: Add cayenne pepper, red pepper flakes, or diced jalapeños to the cheese mixture.
- For Italian flair: Mix in dried oregano, basil, and rosemary for classic pizza-inspired flavors.
- For smoky notes: A pinch of smoked paprika adds depth and complexity.
- For garlic lovers: Replace garlic powder with fresh minced garlic for a more intense flavor.
Low-Carb and Gluten-Free Options
Watching your carb intake? You can still enjoy the flavors of cheesy garlic bread with a few modifications. Use low-carb bread alternatives like cloud bread or cheese-based breads. Alternatively, serve the cheese mixture on top of roasted vegetables like zucchini slices or portobello mushroom caps.
For gluten-free needs, simply substitute the Italian or French bread with a gluten-free alternative. Many grocery stores now carry gluten-free baguettes and rolls that work perfectly in this recipe. Just check that your mayonnaise is also gluten-free, as some brands may contain gluten-based thickeners.
Research has shown that making informed ingredient choices can support overall wellness. A study published in PMC discusses how dietary patterns affect health outcomes, reminding us that moderation and quality ingredients matter in any eating plan.
Mastering Extra Cheesy Garlic Bread: Advanced Tips and Variations
Ready to take your extra cheesy garlic bread from great to absolutely unforgettable? These advanced tips and creative variations will help you master this crowd-pleasing dish and make it your own signature recipe.
Pro Cooking Techniques
The difference between good garlic bread and amazing garlic bread often comes down to technique. Here are some insider tips that professional cooks use:
Temperature management: Let your cheese come to room temperature before mixing. Cold cheese doesn’t spread as smoothly and takes longer to melt evenly. Room temperature ingredients blend better and create a more uniform topping.
Even distribution: Use the back of a spoon to spread the mixture, pressing it gently into any crevices in the bread. This ensures every bite has the perfect cheese-to-bread ratio.
Watch the broiler: Never walk away from broiling bread. The difference between perfectly golden and completely burnt can be just 30 seconds. Stay close, watch through the oven door, and remove the bread the moment it reaches your desired level of doneness.
Flavor Variations Worth Trying
Once you’ve mastered the basic recipe, experiment with these flavor combinations:
- Supreme garlic bread: Add cooked, crumbled bacon, chopped green onions, and diced jalapeños to the cheese mixture.
- Mediterranean style: Mix in crumbled feta, sun-dried tomatoes, and dried oregano for Greek-inspired flavors.
- Buffalo chicken: Top with shredded cooked chicken tossed in buffalo sauce before adding the cheese mixture.
- French onion: Caramelize onions and layer them under the cheese for rich, savory depth.
- Everything bagel: Sprinkle everything bagel seasoning on top after broiling for an extra flavor punch.
Presentation Tips
How you present your cheesy garlic bread matters, especially when entertaining. These tips will make your dish look as good as it tastes:
Slice the bread on a diagonal for a more elegant presentation. The angled cuts look professional and make each piece feel special. Arrange the slices on a wooden cutting board or rustic platter for a homey, inviting look.
Garnish with fresh herbs right before serving. A sprinkle of chopped parsley, basil, or chives adds a pop of color and freshness that contrasts beautifully with the golden cheese. For extra flair, serve with a small bowl of warm marinara or garlic butter on the side for dipping.
Make-Ahead Options
Hosting a party? You can prepare extra cheesy garlic bread ahead of time to save yourself stress. Mix the cheese spread up to three days in advance and store it in an airtight container in the refrigerator. When you’re ready to serve, simply spread it on the bread and broil.
For even more advance prep, assemble the entire loaf with the cheese spread, wrap it tightly in plastic wrap and foil, and freeze for up to one month. Thaw overnight in the refrigerator before broiling as directed. This method works beautifully for busy holidays or unexpected guests.
How to Store Extra Cheesy Garlic Bread: Best Practices
Sometimes you might have leftovers (though with this recipe, that’s rarely the case!). Knowing how to properly store your extra cheesy garlic bread ensures it stays fresh and tasty for later enjoyment.
Refrigeration Guidelines
For short-term storage, place cooled leftover bread in an airtight container or wrap it tightly in aluminum foil. Store in the refrigerator for up to 3 days. The bread will soften in the fridge as it absorbs moisture from the cheese, but it will still taste delicious when reheated properly.
To maintain the best texture, store the bread halves separately from any sauces or dips. This prevents sogginess and keeps each component at its best until serving time.
Freezing for Long-Term Storage
Freezing works well for longer storage. Wrap individual slices or the entire loaf in plastic wrap, then add a layer of aluminum foil for extra protection against freezer burn. Label with the date and store for up to 3 months.
For best results, freeze the bread before broiling. Assemble the bread with the cheese spread, wrap it well, and freeze uncooked. When you’re ready to serve, thaw overnight in the refrigerator and broil as directed. This method preserves the bread’s texture better than freezing already-broiled bread.
Reheating for Best Results
The key to reheating cheesy garlic bread is restoring that crispy texture. Skip the microwave, which makes bread soggy, and use these methods instead:
- Oven method: Preheat to 350°F (175°C). Place bread on a baking sheet and heat for 8-10 minutes until the cheese re-melts and the crust crisps up.
- Broiler method: For faster reheating, place under the broiler for 2-3 minutes. Watch carefully to prevent burning.
- Skillet method: Heat a non-stick skillet over medium heat. Place the bread cheese-side down for 2-3 minutes until crispy, then flip briefly to warm the other side.
- Air fryer method: Set to 350°F for 3-4 minutes. This method works great for restoring crispness without heating up your whole oven.
Meal Prep Considerations
If you’re planning meals ahead, consider these strategies:
Prepare the cheese mixture up to a week in advance and store it in the refrigerator. The flavors will actually meld and intensify over time. Keep fresh bread on hand, and you can have hot, fresh garlic bread ready in under 10 minutes any night of the week.
For busy families, this bread makes an excellent side dish to prep alongside other meals. Pair it with a crack chicken penne or any pasta dish for a complete, satisfying dinner that comes together quickly on hectic weeknights.
FAQs: Frequently Asked Questions About Extra Cheesy Garlic Bread
How do I make extra cheesy garlic bread at home?
To make extra cheesy garlic bread, start with a French baguette or Italian loaf, sliced lengthwise. Mix 1/2 cup softened butter, 4 minced garlic cloves, 2 tbsp chopped parsley, and a pinch of salt. Spread generously on both cut sides. Top with 2 cups shredded mozzarella, 1 cup cheddar, and 1/2 cup parmesan for maximum cheesiness. Bake at 400°F (200°C) for 10-12 minutes until cheese melts and bubbles, then broil 1-2 minutes for golden edges. Slice into pieces and serve warm. This recipe serves 6-8 and takes about 20 minutes total. For extra flavor, add red pepper flakes or garlic powder. Store leftovers in the fridge for up to 2 days; reheat in the oven to crisp up. (92 words)
What cheese works best for extra cheesy garlic bread?
The best cheeses for extra cheesy garlic bread combine meltability and flavor. Use mozzarella for stretchy texture, cheddar for sharpness, and parmesan for a nutty crust. A 2:1:0.5 ratio of shredded mozzarella (2 cups), sharp cheddar (1 cup), and grated parmesan (1/2 cup) creates the perfect gooey layer. Avoid pre-shredded cheese with anti-caking agents; grate fresh for better melt. For variety, mix in gouda for creaminess or provolone for mildness. Pro tip: sprinkle extra parmesan on top before baking to form a crispy top. This combo yields about 3.5 cups of cheese, enough for a standard loaf. Experiment based on preference, but these deliver authentic Italian-American taste. (112 words)
How long do I bake extra cheesy garlic bread?
Bake extra cheesy garlic bread at 400°F (200°C) for 10-12 minutes on a parchment-lined baking sheet. The butter-garlic spread should be golden, and cheese fully melted and bubbly. Switch to broil for 1-2 minutes to brown the top, watching closely to avoid burning. Total time from prep to done is 18-22 minutes. Factors like oven type or loaf thickness may vary it by 1-2 minutes—check at 10 minutes. For air fryer: 375°F for 5-7 minutes. Use a meat thermometer if needed; internal temp around 165°F ensures it’s hot throughout. Let rest 2 minutes before slicing for clean cuts. Perfect for quick dinners or parties. (104 words)
Can I make extra cheesy garlic bread ahead of time?
Yes, prepare extra cheesy garlic bread up to 24 hours ahead. Assemble by spreading garlic butter on the bread, adding cheese, and wrapping tightly in plastic wrap or foil. Refrigerate until ready. Bake straight from fridge at 400°F for 12-15 minutes, adding 2-3 extra minutes due to chilling. For longer storage, freeze assembled loaves up to 1 month; thaw overnight in fridge before baking. This method saves time for gatherings. Avoid freezing after baking, as texture suffers. Reheat day-old baked bread at 350°F for 5-7 minutes. Keeps fresh flavor intact with minimal effort. (98 words)
What’s a good side dish for extra cheesy garlic bread?
Extra cheesy garlic bread pairs well with pasta dishes like spaghetti marinara or fettuccine alfredo, as the cheese complements tomato or creamy sauces. Serve with soups such as minestrone or tomato basil for dipping. For salads, a crisp Caesar or Italian chopped adds balance to the richness. At barbecues, it goes great with grilled chicken or steak. Portion 1-2 slices per person; one loaf feeds 6-8. Nutrition tip: it adds carbs and calcium—a 1-slice serving has about 250 calories, 12g fat, 8g protein. Link it to your pasta recipes for full meals. Keeps gatherings simple and satisfying. (102 words)
Extra Cheesy Garlic Bread
- Total Time: 15 minutes
- Yield: 6 servings
- Diet: Vegetarian
Description
🧀🥖 Dive into gooey, golden layers of extra cheese melted over garlicky bread for irresistible crunch and melt.
🔥🍞 Ready in just 15 minutes, customizable with herbs or pesto, the perfect crowd-pleasing appetizer or side.
Instructions
1-Step 1: Preheat Your Oven to Broil Start by setting your oven to the broil setting. Broiling gives the cheese that gorgeous golden-brown top and crispy edges while keeping the inside soft and gooey. Most ovens have a broil option, usually located at the top of the oven settings. If your oven offers low and high broil options, choose high for the best results. While the oven preheats, position your oven rack about 6 inches from the heating element. This distance allows the cheese to melt and brown without burning. If your bread is particularly thick, you might want to move the rack down one level to prevent over-browning before the cheese fully melts.
2-Step 2: Prepare the Cheese Mixture In a large mixing bowl, combine the shredded cheese, grated cheese, mayonnaise, and garlic powder. Stir everything together until well blended. The mayonnaise might seem like an unusual ingredient, but it creates a creamy base that helps the cheeses meld together and spread smoothly onto the bread. Use a fork or spatula to mix thoroughly, making sure the garlic powder is evenly distributed throughout the cheese mixture. Taste a tiny bit and adjust the garlic if you prefer a stronger flavor some people love using a full teaspoon or more for an extra garlicky kick. For best results, use freshly grated cheese rather than pre-shredded varieties. Pre-shredded cheese contains anti-caking agents that can prevent it from melting as smoothly. A combination of mozzarella for stretchiness and a sharper cheese like cheddar or parmesan for flavor works beautifully.
3-Step 3: Split the Bread Lengthwise Take your loaf of Italian or French bread and slice it in half lengthwise using a serrated bread knife. A sawing motion works best to get clean cuts without squishing the bread. You’ll end up with two long halves, each ready to be loaded with cheesy goodness. If you’re using a particularly wide loaf, you can cut each half into narrower strips for easier serving later. Some people prefer to score the bread in a crosshatch pattern before adding the topping, which helps the mixture seep into the nooks and crannies for even more flavor in every bite.
4-Step 4: Spread the Mixture Generously Now comes the fun part spreading that glorious cheese mixture onto your bread halves. Use a butter knife or spatula to spread the mixture evenly across both cut sides of the bread. Don’t be shy here; pile it on and spread it all the way to the edges for maximum cheesiness in every bite. Work methodically from one end to the other, making sure the coverage is even. Some areas shouldn’t be thick while others are sparse aim for a consistent layer across the entire surface. If you have extra mixture, feel free to add a second layer for an ultra-cheesy experience.
5-Step 5: Broil Until Golden and Bubbly Place your prepared bread halves on a baking sheet and slide them under the broiler. Broil for just a few minutes typically 3 to 5 minutes until the cheese turns golden brown and starts to bubble. Keep a close eye on the bread during this step because broilers work fast, and nobody wants burnt cheese. You’ll know it’s ready when you see the cheese melting into pools, with spots of golden brown forming on top. The edges of the bread should also get slightly crispy and toasted. If you like extra crispy edges, you can leave it under the broiler for another minute, but watch carefully.
6-Step 6: Slice and Serve Immediately Remove the baking sheet from the oven and let the bread cool for just a minute long enough so you don’t burn your mouth, but not so long that the cheese starts to firm up. Use a sharp knife to slice each half into serving-sized pieces, typically about 2 inches wide. Serve your extra cheesy garlic bread warm for the best experience. The cheese should still be molten and stringy when you pull the slices apart. This bread makes an excellent companion to pasta dishes like creamy beef and bowtie pasta or a hearty million dollar lasagna for a complete Italian-inspired meal.
Notes
🌿 Customize with fresh herbs like parsley or oregano mixed into the cheese spread.
🍅 Add sliced tomatoes or a layer of pesto under the cheese for extra flavor.
👀 Watch closely while broiling to avoid burning the cheesy topping.
- Prep Time: 5 minutes
- Cook Time: 10 minutes
- Category: Appetizer
- Method: Broil
- Cuisine: American
Nutrition
- Serving Size: 1 slice
- Calories: 350 kcal
- Sugar: 2g
- Sodium: 600mg
- Fat: 25g
- Saturated Fat: 7g
- Unsaturated Fat: 18g
- Trans Fat: 0g
- Carbohydrates: 25g
- Fiber: 1g
- Protein: 10g
- Cholesterol: 30mg
Keywords: cheesy garlic bread, extra cheese loaded, quick broil bread, mayonnaise cheese spread