Why You’ll Love This Ermine Frosting
This ermine frosting, also known as boiled milk frosting or flour buttercream, stands out in any baker’s toolkit. Home cooks, busy parents, and baking enthusiasts appreciate its straightforward approach that fits right into everyday baking routines. Pair it with your favorite cakes for a touch of vintage charm.
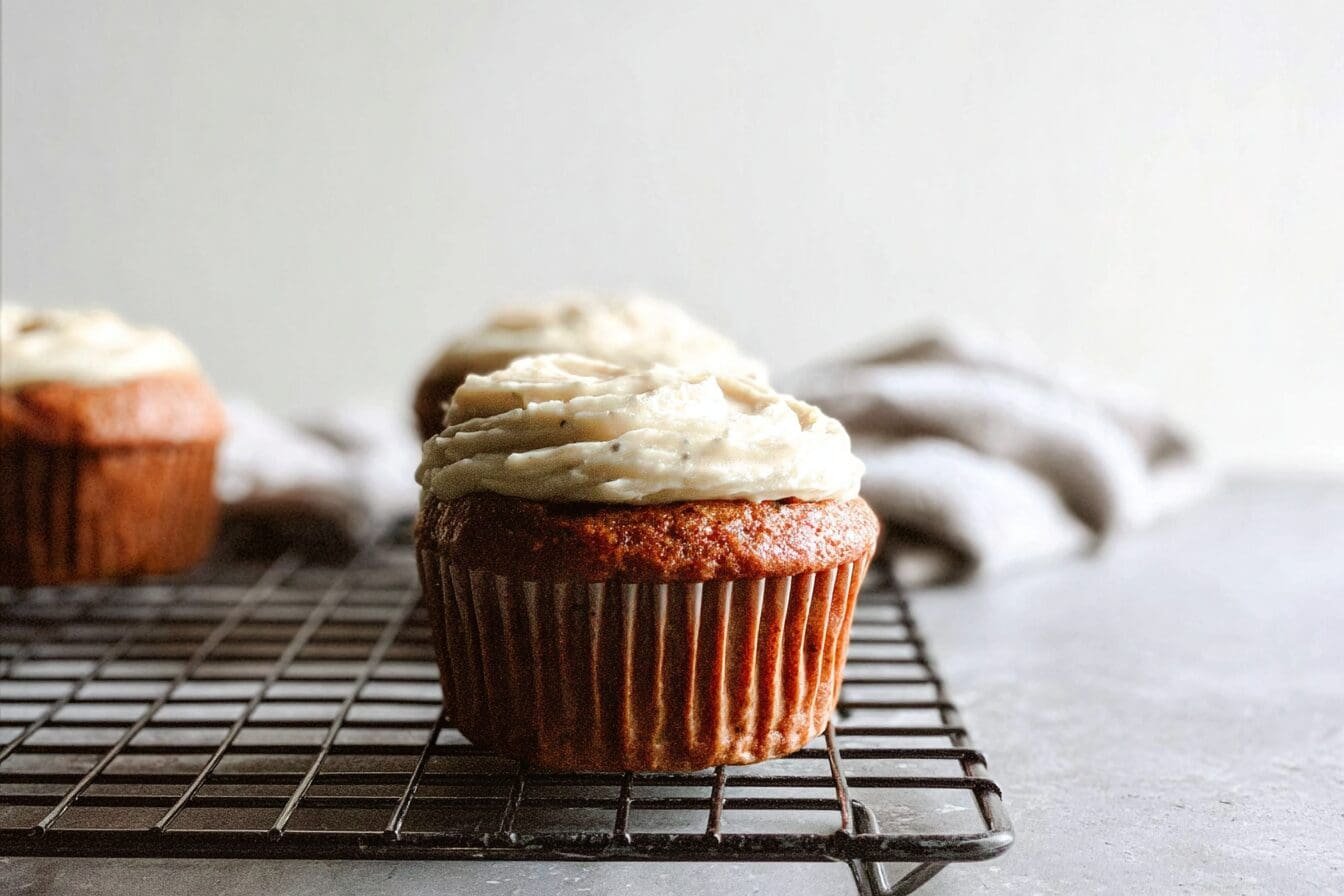
Ermine frosting offers a silky texture that transforms simple cakes into showstoppers, perfect for creating joyful moments around the table.
Check out this classic ermine frosting recipe for more inspiration from fellow bakers.
- Ease of preparation: Whip up this cooked milk frosting with basic pantry staples and a short stovetop cook time of just 10 minutes. No candy thermometer needed, and the cooling step happens passively in the fridge. Busy parents and working professionals love how it comes together without fancy equipment, ready to frost cakes in under 30 active minutes.
- Health benefits: Made with whole milk and real butter, it provides calcium and vitamin D from dairy. Skip shortening for a natural option that feels lighter. Diet-conscious individuals note its lack of powdered sugar reduces that heavy sweetness. Learn more about milk benefits that support bone health and more.
- Versatility: Adapt this vintage buttercream for vegan, gluten-free, or low-sugar needs with simple swaps. Students and newlyweds find it pipes well for cupcakes or spreads smoothly on sheet cakes. Travelers can pack it stable for picnics since it resists melting.
- Distinctive flavor: The subtle milky taste and fluffy consistency set ermine icing apart from overly sweet options. Seniors and food enthusiasts enjoy its nostalgic appeal on layer cakes without greasiness.
These qualities make the ermine frosting recipe a go-to for memorable desserts.
Jump To
- 1. Why You’ll Love This Ermine Frosting
- 2. Essential Ingredients for Ermine Frosting
- 3. How to Prepare the Perfect Ermine Frosting: Step-by-Step Guide
- 4. Dietary Substitutions to Customize Your Ermine Frosting
- 5. Mastering Ermine Frosting: Advanced Tips and Variations
- 6. How to Store Ermine Frosting: Best Practices
- 7. FAQs: Frequently Asked Questions About Ermine Frosting
- 8. Ermine Frosting
Essential Ingredients for Ermine Frosting
Gather these items for your how to make ermine frosting session. Each plays a key role in achieving that signature smooth, stable texture.
Main Ingredients
- 1/4 cup all-purpose flour – Forms the thickening roux base, creating structure without grittiness once cooked and cooled.
- 1 cup whole milk – Provides creaminess and cooks into a pudding-like paste; use full-fat for richest flavor.
- 2 cups unsalted butter, softened – Delivers buttery richness and aeration when whipped; room temperature ensures even mixing.
- 2 cups granulated sugar – Adds sweetness gradually beaten in for a fine, non-grainy dissolve unlike powdered sugar.
- 1 tsp vanilla extract – Boosts flavor depth, rounding out the milky notes for a classic taste.
Special Dietary Options
- Vegan: Swap whole milk for almond or oat milk and use vegan butter sticks.
- Gluten-free: Replace all-purpose flour with a 1:1 gluten-free blend.
- Low-calorie: Cut butter to 1.5 cups and sugar to 1.5 cups, or use half stevia blend.
This lineup keeps your boiled milk buttercream recipe accessible for all.
How to Prepare the Perfect Ermine Frosting: Step-by-Step Guide
Follow this detailed classic ermine frosting guide for foolproof results. Total time includes cooling, so plan ahead. Yields enough for two 9-inch layer cakes.
First Step: Prepare the Roux (Mise en Place)
Measure ingredients precisely. In a medium saucepan, whisk together 1/4 cup all-purpose flour and 1 cup whole milk over medium heat. Stir constantly to avoid lumps, bringing it to a gentle bubble. Cook for 8-10 minutes until it thickens to pudding consistency, coating the back of a spoon. This roux is the heart of ermine frosting with flour. Remove from heat, press plastic wrap directly on the surface to prevent a skin, and cool fully in the fridge (2 hours or overnight). Patience here prevents butter separation later.
Second Step: Soften and Cream the Butter and Sugar
While roux chills, cut 2 cups unsalted butter into tablespoon pieces and let soften to room temperature (about 65°F). In a stand mixer with paddle attachment (or hand mixer), beat butter on medium speed for 1 minute until smooth. Gradually add 2 cups granulated sugar, 1/2 cup at a time, beating 5-7 minutes total until pale, fluffy, and sugar fully dissolves. Scrape bowl often. This step aerates the mixture, mimicking whipped cream texture. Test by rubbing a bit between fingers; it should feel smooth, not gritty.
Third Step: Incorporate the Cooled Roux
Ensure roux is fully cooled (fridge-cold but not hard). With mixer on low, add roux one tablespoon at a time, mixing until combined before next addition. This gradual approach prevents curdling. Once all in, increase to medium-high and whip 8-10 minutes. Frosting transforms from curdled-looking to silky and voluminous. If it looks split, keep beating; it will come together with persistence.
Fourth Step: Add Flavor and Final Whip
Beat in 1 tsp vanilla extract on low, then high for 1-2 minutes. Taste and adjust if needed (pinch of salt balances sweetness). If too soft, chill 15 minutes and re-whip. For piping firmness, refrigerate 30 minutes. Your vintage buttercream now holds peaks perfectly.
Final Step: Frost and Serve
Spread or pipe onto cooled cakes immediately or store. It sets firm yet creamy, cutting clean slices. Ideal for red velvet or chocolate layers. Clean tools with warm soapy water as it washes off easily before setting.
Common pitfalls: Hot roux melts butter, so always chill fully. Undercooked roux tastes floury; cook till thick. Overbeating risks graininess, so watch closely. With practice, this yields pro-level results every time.
| Step | Time | Tip |
|---|---|---|
| Roux Cook | 10 min | Whisk vigorously |
| Cooling | 2+ hrs | Plastic wrap on top |
| Whipping | 15 min | Room temp butter |
Master these for consistent ermine frosting success.

Dietary Substitutions to Customize Your Ermine Frosting
Protein and Main Component Alternatives
Butter and milk form the base. For dairy-free, use plant-based butter like coconut oil blend and coconut milk for roux. These keep structure while suiting vegans. Low-fat milk works but may thin slightly; compensate with extra flour teaspoon.
Vegetable, Sauce, and Seasoning Modifications
Add pureed cooked sweet potato (1/4 cup) to roux for natural color and subtle sweetness in fall bakes. Swap vanilla for almond extract or citrus zest. For spice, mix in cinnamon (1/2 tsp) post-whip. These tweaks fit seasons or preferences without altering core texture.
- Nut-free: Skip almonds, use clear vanilla.
- Sugar-free: Monk fruit granular 1:1.
Customize freely for your crowd.
Mastering Ermine Frosting: Advanced Tips and Variations
Take your boiled milk frosting further with these pro moves.
Pro cooking techniques: Double boiler prevents scorching roux. Strain if tiny lumps form. Whip in cold bowl for extra volume.
Flavor variations:
| Variation | Add-Ins |
|---|---|
| Chocolate | 1/2 cup cocoa to roux |
| Strawberry | 1/4 cup puree, less milk |
| Coffee | 1 tbsp espresso powder |
Try it on our triple chocolate cake for decadence.
Presentation tips: Chill piped designs for sharp edges. Dust with cocoa for contrast.
Make-ahead options: Roux freezes 3 months; thaw overnight. Full batch fridge-stable 2 weeks.
Compare to Italian meringue buttercream for lighter options.
How to Store Ermine Frosting: Best Practices
- Refrigeration: Airtight container up to 2 weeks. Firm when cold; soften 30 min before use.
- Freezing: Portion in freezer bags, 3 months. Thaw fridge overnight, re-whip smooth.
- Reheating: Room temp beating revives texture; avoid microwave to prevent separation.
- Meal prep considerations: Frost cakes ahead, slice and wrap individually for grab-and-go.
Safe storage keeps it fresh for busy weeks.

FAQs: Frequently Asked Questions About Ermine Frosting
What is ermine frosting?
Ermine frosting, also called boiled milk frosting or flour buttercream, is a vintage American icing made by cooking a flour-milk roux until thick, then cooling it and whipping in butter and sugar. Popular in the early 20th century, it has a light, fluffy texture that’s less sweet than traditional buttercream and holds up well in warm weather without melting easily. Unlike shortening-based frostings, it uses real butter for rich flavor and a silky mouthfeel. It’s ideal for layer cakes like red velvet or chocolate, pipeable for decorations, and naturally gluten-free if using plain flour. This stable frosting revives old-school recipes and avoids the greasiness of some modern icings. (92 words)
How do you make ermine frosting step by step?
To make ermine frosting, start with a roux: whisk 1/4 cup flour into 1 cup milk in a saucepan over medium heat until bubbling and thick like pudding (about 10 minutes). Cool completely (2+ hours or overnight in fridge). In a stand mixer, beat 2 cups softened unsalted butter with 2 cups granulated sugar on medium until creamy (5 minutes). Gradually add cooled roux, beating until fluffy (8-10 minutes). Add 1 tsp vanilla. Frosts two 9-inch cakes. Tip: Room-temp ingredients prevent lumps; chill briefly if too soft. Yields smooth, spreadable results. (104 words)
What’s the difference between ermine frosting and buttercream?
Ermine frosting uses a cooked flour-milk base whipped with butter and sugar, creating a lighter, less sweet taste and stable texture that doesn’t weep in humidity. American buttercream is just butter, powdered sugar, and flavorings—thicker, sweeter, and prone to crusting or melting. Ermine has a velvety feel like whipped cream, holds peaks for piping, and cuts cleanly on cakes. Buttercream pipes sharper edges but can taste grainy if under-mixed. Choose ermine for vintage cakes or hot climates; buttercream for quick jobs. Both dairy-based, but ermine avoids powdered sugar’s chalkiness. (98 words)
How long does ermine frosting last and how do you store it?
Fresh ermine frosting lasts 3-5 days at room temperature in an airtight container, up to 2 weeks in the fridge, or 3 months frozen. It firms up when chilled but whips back to fluffy with room-temp beating. On a frosted cake, it stays fresh 4-7 days at cool room temp; refrigerate longer storage to prevent butter separation. Thaw frozen frosting overnight in fridge, then re-whip. Avoid high humidity to prevent softening. Pro tip: Double-wrap frosted cake slices for freezing to retain moisture and texture. Always label with dates for safety. (96 words)
Can you pipe ermine frosting and what are tips for best results?
Yes, ermine frosting pipes beautifully with its firm yet creamy consistency, perfect for borders, rosettes, or swirls on cupcakes and cakes. Chill the frosting 30 minutes before piping for stiffness, then use a medium piping bag with tips like #1M or #808. Pipe at room temp to avoid cracking. If too soft, add powdered sugar (1/4 cup at a time) or beat longer. For color, mix gel paste gradually during whipping. It holds shape better than Swiss meringue in heat. Practice on parchment first for smooth designs. (92 words)

Ermine Frosting
- Total Time: 2 hours 25 minutes
- Yield: About 3 cups 1x
- Diet: Vegetarian
Description
🧁 Create a silky-smooth ermine frosting that’s less sweet than traditional buttercream with a light, velvety texture that perfectly complements classic cakes like red velvet
🥛 Master this vintage boiled milk buttercream that was popular in the early 1900s and offers superior stability without the heavy richness of modern frostings
Ingredients
1/4 cup all-purpose flour for thickening roux base
1 cup whole milk for creaminess
2 cups unsalted butter for buttery richness and aeration
2 cups granulated sugar for sweetness
1 tsp vanilla extract for flavor
Instructions
1-First Step: Prepare the Roux (Mise en Place) Measure ingredients precisely. In a medium saucepan, whisk together 1/4 cup all-purpose flour and 1 cup whole milk over medium heat. Stir constantly to avoid lumps, bringing it to a gentle bubble. Cook for 8-10 minutes until it thickens to pudding consistency, coating the back of a spoon. This roux is the heart of ermine frosting with flour. Remove from heat, press plastic wrap directly on the surface to prevent a skin, and cool fully in the fridge (2 hours or overnight). Patience here prevents butter separation later.
2-Second Step: Soften and Cream the Butter and Sugar While roux chills, cut 2 cups unsalted butter into tablespoon pieces and let soften to room temperature (about 65°F). In a stand mixer with paddle attachment (or hand mixer), beat butter on medium speed for 1 minute until smooth. Gradually add 2 cups granulated sugar, 1/2 cup at a time, beating 5-7 minutes total until pale, fluffy, and sugar fully dissolves. Scrape bowl often. This step aerates the mixture, mimicking whipped cream texture. Test by rubbing a bit between fingers; it should feel smooth, not gritty.
3-Third Step: Incorporate the Cooled Roux Ensure roux is fully cooled (fridge-cold but not hard). With mixer on low, add roux one tablespoon at a time, mixing until combined before next addition. This gradual approach prevents curdling. Once all in, increase to medium-high and whip 8-10 minutes. Frosting transforms from curdled-looking to silky and voluminous. If it looks split, keep beating; it will come together with persistence.
4-Fourth Step: Add Flavor and Final Whip Beat in 1 tsp vanilla extract on low, then high for 1-2 minutes. Taste and adjust if needed (pinch of salt balances sweetness). If too soft, chill 15 minutes and re-whip. For piping firmness, refrigerate 30 minutes. Your vintage buttercream now holds peaks perfectly.
5-Final Step: Frost and Serve Spread or pipe onto cooled cakes immediately or store. It sets firm yet creamy, cutting clean slices. Ideal for red velvet or chocolate layers. Clean tools with warm soapy water as it washes off easily before setting.
Notes
🥛 Make sure the milk paste is completely cooled before adding to the butter – warm paste will melt the butter and create a greasy, separated frosting
🧁 Use room temperature butter for best results – cold butter won’t incorporate properly and will create a lumpy texture
⏰ Don’t skip the flour cooking step – undercooked flour will leave a raw taste while overcooked flour can make the frosting grainy
- Prep Time: 15 minutes
- Cooling time: 2 hours
- Cook Time: 10 minutes
- Category: Frosting
- Method: Cooking and Mixing
- Cuisine: American
Nutrition
- Serving Size: 2 tablespoons
- Calories: 120
- Sugar: 8g
- Sodium: 75mg
- Fat: 9g
- Saturated Fat: 5.5g
- Unsaturated Fat: 3g
- Trans Fat: 0g
- Carbohydrates: 10g
- Fiber: 0g
- Protein: 0g
- Cholesterol: 25mg
Keywords: undefined