Why You’ll Love This Cruffins
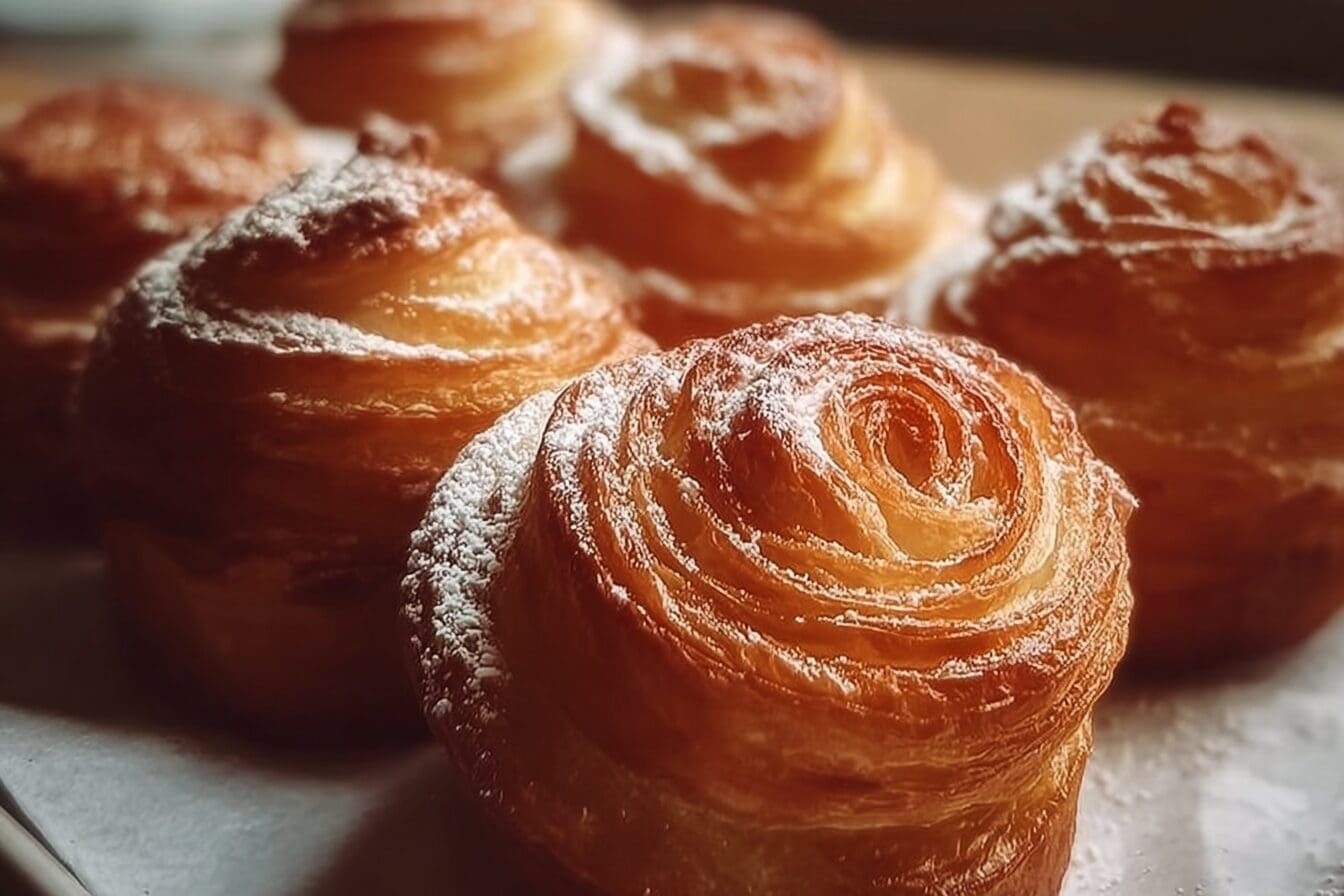
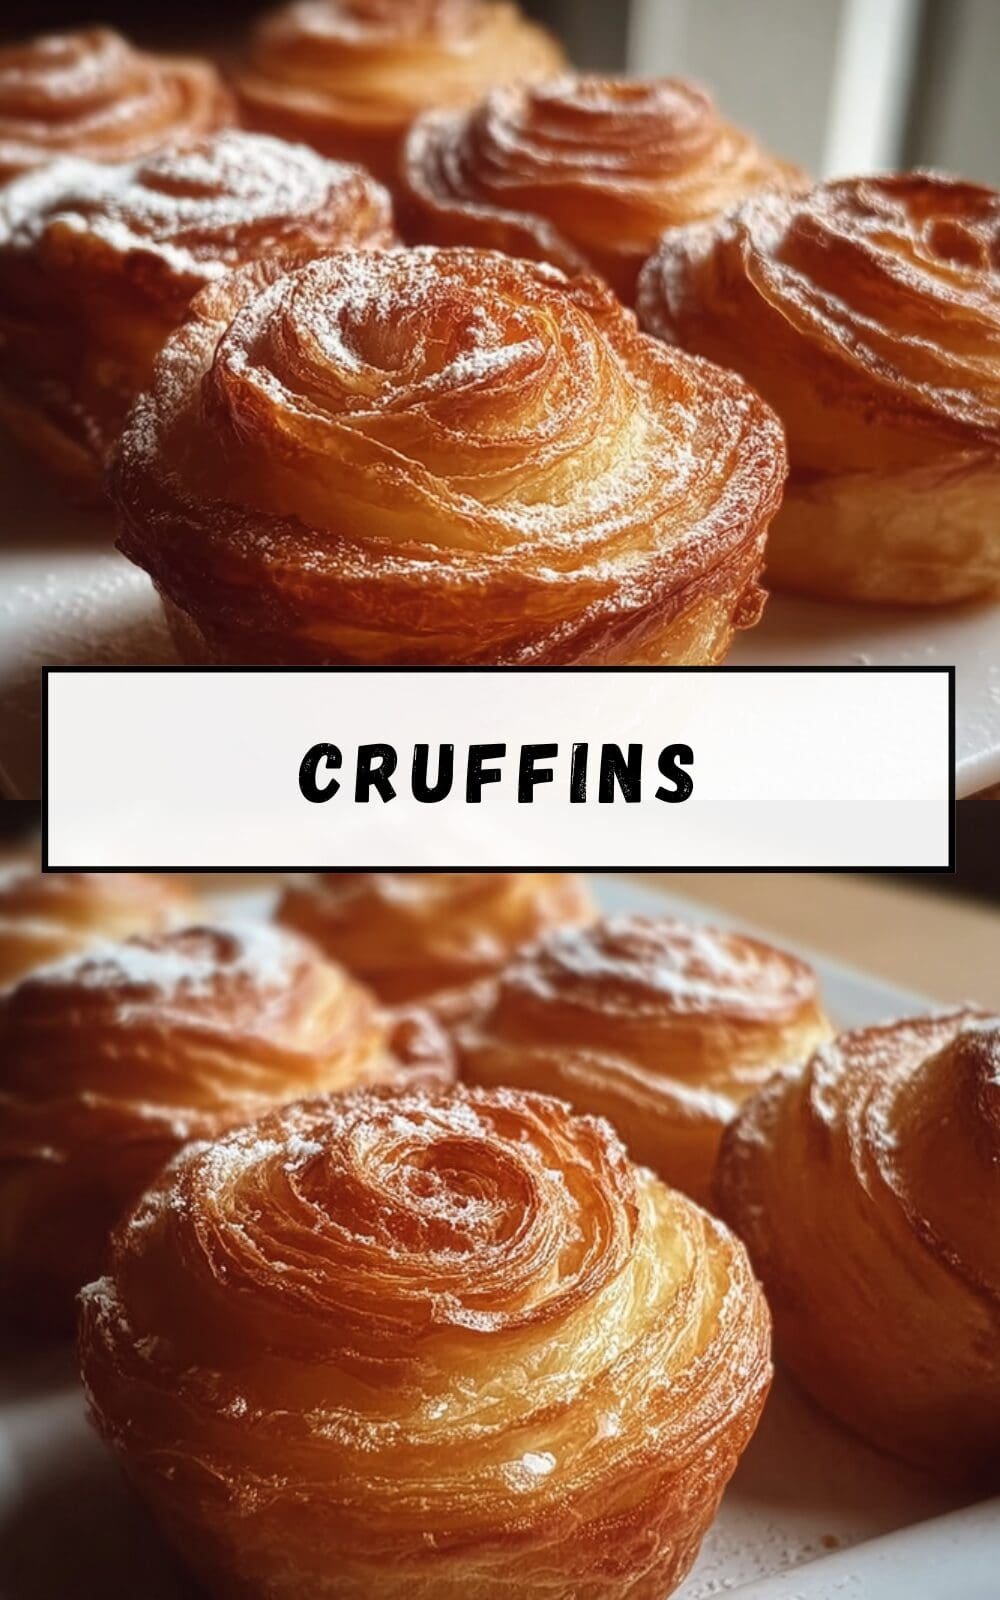
There’s something magical about cruffins that brings joy to any kitchen table. This homemade cruffins recipe combines the buttery, flaky texture of a croissant with the comforting shape of a muffin. If you’re a home cook looking to impress friends and family with your baking skills, this pastry is the perfect choice. The process might seem involved at first, but I’ll walk you through each step so you can create bakery-quality treats right in your own kitchen.
What makes these cruffins truly special is their versatility. You can enjoy them plain or fill them with your favorite spreads like Nutella, jam, or custard. The flaky pastry layers create a delightful texture that’s both tender and crispy. For busy parents, this recipe can be started the day before and finished in the morning for fresh breakfast pastries. Students will love how impressive these treats look while being surprisingly approachable to make.
The beauty of this recipe lies in its simplicity. Despite their fancy appearance, these cruffins require just basic ingredients that you likely already have in your pantry. The lamination technique might sound intimidating, but it’s actually quite straightforward once you understand the process. Plus, the aroma of freshly baked cinnamon and butter wafting through your home is worth every minute of effort.
What Makes This Recipe Special
Unlike other complicated pastries, this cruffins recipe is designed with home bakers in mind. The dough is forgiving and the instructions are detailed, making it perfect for both beginners and experienced bakers. Each bite offers a perfect balance of sweet cinnamon sugar and rich buttery pastry that will have everyone reaching for seconds.
Jump To
- 1. Why You’ll Love This Cruffins
- 2. Essential Ingredients for Cruffins
- 3. How to Prepare the Perfect Cruffins: Step-by-Step Guide
- 4. Dietary Substitutions to Customize Your Cruffins
- 5. Mastering Cruffins: Advanced Tips and Variations
- 6. How to Store Cruffins: Best Practices
- 7. FAQs: Frequently Asked Questions About Cruffins
- 8. Cruffins
Essential Ingredients for Cruffins
To create the perfect cruffins, you’ll need to gather the following ingredients. Each component plays a crucial role in achieving that signature flaky texture and delicious flavor. Before you begin, make sure all your ingredients are measured accurately for consistent results.
Dough Ingredients
- 1 cup whole milk warmed to about 110°F (43°C)
- 2 1/4 teaspoons instant or active dry yeast
- 3 tablespoons granulated sugar
- 3 tablespoons unsalted or salted butter cut into pieces
- 3 cups all-purpose flour plus more as needed
- 1 1/4 teaspoons salt
Lamination Ingredients
- 1 cup salted butter slightly softened to 60-64°F (15-18°C)
- 1 tablespoon all-purpose flour
Filling and Coating
- 3/4 cup granulated sugar
- 1 tablespoon ground cinnamon
- Optional fillings include Nutella, jam, or other desired spreads
For the best results, I recommend using European-style butter for both the dough and lamination. Its higher fat content creates superior flaky layers and richer flavor that truly makes these cruffins shine.
Ingredient Substitutions
If you need to accommodate dietary restrictions, you can make these substitutions:
- Vegan option: Use plant-based butter and almond or soy milk
- Gluten-free: Replace all-purpose flour with a certified gluten-free flour blend
- Low-calorie: Opt for sugar substitutes and reduced-fat butter alternatives
Remember that these substitutions might slightly alter the texture and taste of your cruffins. For the authentic experience, try to use the recommended ingredients when possible.
How to Prepare the Perfect Cruffins: Step-by-Step Guide
Creating homemade cruffins is a rewarding process that requires some patience but yields incredible results. This step-by-step guide will help you master the technique and achieve bakery-quality pastries in your own kitchen. The entire process takes approximately 5 hours and 45 minutes, including 4 hours and 45 minutes for rising and chilling and 25 minutes for baking.
Preparing the Dough
Start by mixing warm milk, yeast, and sugar in a large bowl. Let this mixture sit for about 5-10 minutes until it becomes foamy, indicating that the yeast is active. Next, add the butter pieces, part of the flour, and salt to the mixture. Mix well until combined, then gradually add the remaining flour. Continue mixing until a soft dough forms.
Knead the dough by hand or with a mixer for 5 minutes until it becomes soft and elastic. This step develops the gluten structure, which is essential for creating those beautiful flaky layers later. Place the dough in a greased bowl, cover with plastic wrap or a clean towel, and let it rise for about 2 hours until nearly doubled in size.
Laminating the Dough
After the first rise, punch down the dough to release air bubbles. Roll it out to a 10×14-inch rectangle on a floured surface, then place it in the refrigerator for 20 minutes to chill. While the dough chills, prepare the lamination butter by beating the softened salted butter with flour until smooth.
Now comes the crucial lamination process. Remove the dough from the refrigerator and spread the butter mixture evenly over its surface. Fold the dough into thirds like a letter, then roll it out again to a 9×12-inch rectangle. Return it to the refrigerator for 20 minutes. Repeat this process two more times for a total of three folds, chilling for 20 minutes after each fold. This technique creates the distinct layers that make cruffins so special.
Remember to keep your butter and dough temperatures between 60-64°F for effective lamination. If the butter gets too warm, it will melt into the dough, and if it’s too cold, it will break through the dough, both of which will affect your final result.
Shaping and Baking
After completing the final fold and chilling, divide the dough into 3 equal portions. Roll each portion to 8×12 inches. Sprinkle the cinnamon sugar mixture (3/4 cup sugar mixed with 1 tablespoon cinnamon) evenly over the dough surface. Cut the dough into 1-inch strips, then layer and roll the strips into spirals. Place each spiral in a greased muffin cup.
Let the shaped cruffins rise for 1 hour until they look puffy. Optionally, you can apply an egg wash for a golden finish. Preheat your oven to 350°F (177°C) and bake the cruffins for 25-28 minutes until the internal temperature reaches 200°F (93°C). They should be golden brown with deliciously crisp edges.
Cool the cruffins briefly, then coat them in the remaining cinnamon sugar while still warm. This step adds an extra layer of flavor and that signature cruffin crunch. Optionally, you can fill them with your desired spreads using a piping bag after baking for an extra special treat.
| Step | Time Required |
|---|---|
| Dough preparation | 15 minutes |
| First rise | 2 hours |
| Lamination | 1 hour 30 minutes |
| Second rise | 1 hour |
| Baking | 25-28 minutes |

Dietary Substitutions to Customize Your Cruffins
One of the wonderful things about this cruffins recipe is its adaptability. Whether you have dietary restrictions or simply want to experiment with different flavors, there are numerous substitutions you can try. These modifications allow you to enjoy delicious cruffins while accommodating various needs and preferences.
Protein and Main Component Alternatives
For those following a vegan diet, you can easily substitute regular butter with vegan margarine or coconut oil. Both options work well, though coconut oil will impart a subtle coconut flavor. When using plant-based butter, look for one with a high fat content similar to dairy butter for the best lamination results.
If you need to avoid gluten, replace all-purpose flour with a certified gluten-free flour blend. Make sure the blend contains xanthan gum or add a small amount yourself to help with structure. Keep in mind that gluten-free doughs can be stickier, so you may need to adjust the amount of flour during rolling.
For those with lactose intolerance or following a vegan diet, you can swap dairy milk with soy, almond, or oat milk. These alternatives provide similar moisture content and will activate the yeast just as effectively as dairy milk would.
Vegetable, Sauce, and Seasoning Modifications
While traditional cruffins are sweet, you can create savory versions by incorporating seasonal vegetables like spinach or bell peppers as fillings. These add nutrition and create a completely different flavor profile perfect for brunch or as appetizers.
If you’re watching your sugar intake, consider using natural sweeteners like stevia or monk fruit instead of granulated sugar. These alternatives provide sweetness without the calories. You can also reduce the amount of sugar in both the dough and coating for a less sweet version.
For unique flavor variations, try adding herbs and spices like cardamom, nutmeg, or vanilla to enhance taste without added sugars or fats. These aromatic ingredients can transform the flavor profile and create something truly special. If you enjoy experimenting with flavors, you might also like trying our rhubarb muffins recipe for another creative baking adventure.
Mastering Cruffins: Advanced Tips and Variations
Once you’ve mastered the basic cruffins recipe, you might want to take your baking to the next level. These advanced tips and variations will help you refine your technique and create even more impressive pastries. With practice, you’ll develop the confidence to experiment and make this recipe truly your own.
Pro Baking Techniques
The secret to achieving perfectly flaky layers lies in temperature control. Use cold butter and cold dough during the folding process for optimal results. The contrast between the cold butter and room temperature dough during baking creates steam, which separates the layers and produces that signature flaky texture.
Allow sufficient resting between folds to relax the gluten in the dough. This prevents the dough from shrinking back when you roll it out and makes the process much easier. If you find the dough difficult to roll, don’t hesitate to let it rest for an additional 10-15 minutes in the refrigerator.
Flour your work surface and rolling pin generously to prevent sticking, but be careful not to incorporate too much extra flour into the dough. This can make the cruffins tough rather than tender. If you notice air bubbles in your dough during rolling, don’t worry these are normal and will be eliminated through the folding process.
Remember that lamination requires patience. Each fold builds upon the previous one, creating more layers and developing the texture. Rushing this process is one of the most common mistakes that leads to less-than-perfect results.
Flavor Variations
While the classic cinnamon sugar filling is delicious, you can experiment with numerous other flavor combinations. Chocolate lovers can fill their cruffins with chocolate ganache or spread hazelnut chocolate between the layers before rolling. Fruit preserves such as raspberry, apricot, or lemon curd add a bright contrast to the buttery pastry.
For savory options, try filling the cruffins with herbs, cheese, or caramelized onions. These variations make excellent appetizers or brunch items. You can even create a breakfast version with scrambled eggs and bacon filling for a hearty morning meal.
Presentation and Make-Ahead Options
For an elegant presentation, dust your finished cruffins with powdered sugar or drizzle them with a simple glaze made from powdered sugar and milk. Serve them with fresh fruit or whipped cream for an impressive dessert. Taller, more dramatic cruffins can be achieved by using popover pans and creating wider strips that are twisted together before rolling.
The beauty of this recipe is that it can be prepared in advance. You can make the dough the day before and refrigerate it overnight, which actually deepens the flavor. Shaped cruffins can be refrigerated for up to 12 hours before baking, making them perfect for special occasions when you want to serve fresh pastries without the morning prep work.
How to Store Cruffins: Best Practices
Proper storage is essential for maintaining the quality and freshness of your homemade cruffins. Unlike store-bought pastries that contain preservatives, homemade cruffins are best enjoyed fresh, but with the right storage techniques, you can extend their shelf life and enjoy them over several days.
Short-Term Storage
For short-term storage, place your cruffins in an airtight container at room temperature. They will maintain their texture and flavor for up to 24 hours. If you need to keep them longer, store them in the refrigerator in an airtight container for up to 3 days. However, be aware that refrigeration may cause them to lose some of their crispness.
To refresh refrigerated cruffins, warm them in a preheated oven at 325°F (165°C) for 5-7 minutes. This will help restore their crisp exterior without drying out the interior. Avoid microwaving them, as this will make them soggy rather than crispy.
Long-Term Storage
For longer storage, freezing is your best option. Wrap each cruffin individually in plastic wrap, then place them in a freezer-safe bag or container. They can be frozen for up to 3 months without significant loss of quality. It’s important to freeze them once they have completely cooled to prevent ice crystals from forming.
Thaw frozen cruffins at room temperature for about 2-3 hours before serving. Once thawed, refresh them in a 325°F (165°C) oven for 5-7 minutes to restore their texture. For best results, consume them within 24 hours of thawing. If you enjoy planning breakfast ahead, our blueberry cottage cheese breakfast bake is another great make-ahead option.
It’s important to note that you should not freeze the dough or unbaked shaped cruffins. The yeast structure can be compromised during freezing, resulting in poor rise and dense texture. Only freeze fully baked and cooled cruffins for the best results.
FAQs: Frequently Asked Questions About Cruffins
How can I adjust my cruffin recipe if I want to make a larger batch?
It’s best to prepare cruffins in separate smaller batches rather than doubling the recipe all at once. Doubling the dough ingredients might affect the texture and rise, making it harder to achieve the flaky layers. Mixing smaller batches ensures even kneading and consistent fermentation, leading to better results.
What’s the best way to add apple filling to cruffins without affecting baking?
If your apple filling is smooth and thin enough, use a piping bag to insert it into the cruffins after baking by making a small hole. For thicker fillings, cut a hole in the cruffin after baking and gently spoon in the filling. Adding filling before baking can cause sogginess or uneven cooking.
Can I use store-bought apple pie filling to stuff cruffins?
Yes, store-bought apple pie filling works well in cruffins. Make sure to drain any excess liquid to prevent sogginess. If the filling is thick enough, it can be piped or spooned in after baking for a balanced flavor without compromising the cruffin’s texture.
What type of butter should I use for the best cruffin layers?
European-style butter is preferred for cruffins because it has higher fat content and less water, which helps create flaky, rich layers. Regular butter can be used but may result in less distinct layering and a drier texture, so it’s a good backup if European-style is unavailable.
Which yeast is better for cruffin dough – active dry or instant yeast?
Both active dry and instant yeast work for cruffin dough. Instant yeast dissolves faster and can shorten rise times, while active dry yeast requires proofing and may need longer rises. Choose based on what you have; just allow extra time when using active dry yeast for proper fermentation.

Cruffins
- Total Time: 5 hours 45 minutes
- Yield: 12 cruffins
Description
🥐 Experience the delight of homemade cruffins with flaky, buttery layers perfect for any pastry lover.
🍯 These flaky, buttery pastry treats combine the best of croissants and muffins for an irresistible breakfast or snack.
Ingredients
– 1 cup whole milk warmed to about 110°F (43°C)
– 2 1/4 teaspoons instant or active dry yeast
– 3 tablespoons granulated sugar
– 3 tablespoons unsalted or salted butter cut into pieces
– 3 cups all-purpose flour plus more as needed
– 1 1/4 teaspoons salt
– 1 cup salted butter slightly softened to 60-64°F (15-18°C)
– 1 tablespoon all-purpose flour
– 3/4 cup granulated sugar
– 1 tablespoon ground cinnamon
– Nutella optional filling
– jam optional filling
– other desired spreads optional filling
Instructions
1-Preparing the Dough: Start by mixing warm milk, yeast, and sugar in a large bowl. Let this mixture sit for about 5-10 minutes until it becomes foamy, indicating that the yeast is active. Next, add the butter pieces, part of the flour, and salt to the mixture. Mix well until combined, then gradually add the remaining flour. Continue mixing until a soft dough forms.
2-Knead the dough: Knead the dough by hand or with a mixer for 5 minutes until it becomes soft and elastic. This step develops the gluten structure, which is essential for creating those beautiful flaky layers later. Place the dough in a greased bowl, cover with plastic wrap or a clean towel, and let it rise for about 2 hours until nearly doubled in size.
3-Laminating the Dough: After the first rise, punch down the dough to release air bubbles. Roll it out to a 10×14-inch rectangle on a floured surface, then place it in the refrigerator for 20 minutes to chill. While the dough chills, prepare the lamination butter by beating the softened salted butter with flour until smooth.
4-Crucial lamination process: Now comes the crucial lamination process. Remove the dough from the refrigerator and spread the butter mixture evenly over its surface. Fold the dough into thirds like a letter, then roll it out again to a 9×12-inch rectangle. Return it to the refrigerator for 20 minutes. Repeat this process two more times for a total of three folds, chilling for 20 minutes after each fold. This technique creates the distinct layers that make cruffins so special.
5-Shaping and Baking: After completing the final fold and chilling, divide the dough into 3 equal portions. Roll each portion to 8×12 inches. Sprinkle the cinnamon sugar mixture (3/4 cup sugar mixed with 1 tablespoon cinnamon) evenly over the dough surface. Cut the dough into 1-inch strips, then layer and roll the strips into spirals. Place each spiral in a greased muffin cup.
6-Second rise and baking: Let the shaped cruffins rise for 1 hour until they look puffy. Optionally, you can apply an egg wash for a golden finish. Preheat your oven to 350°F (177°C) and bake the cruffins for 25-28 minutes until the internal temperature reaches 200°F (93°C). They should be golden brown with deliciously crisp edges.
7-Final coating and optional filling: Cool the cruffins briefly, then coat them in the remaining cinnamon sugar while still warm. This step adds an extra layer of flavor and that signature cruffin crunch. Optionally, you can fill them with your desired spreads using a piping bag after baking for an extra special treat.
Notes
🧈 Use European-style butter for enhanced flavor and pliability.
🌡 Maintain butter and dough temperatures between 60-64°F for best lamination results.
🍽 Rest dough if it becomes difficult to roll and flour surfaces to prevent sticking.
- Prep Time: 1 hour
- Rising and chilling time: 4 hours 45 minutes
- Cook Time: 25 minutes
- Category: Breakfast, Dessert
- Method: Laminating, Baking
- Cuisine: American, French-inspired
Nutrition
- Serving Size: 1 cruffin
- Calories: 320 calories
- Sugar: 12g
- Sodium: 150mg
- Fat: 18g
- Saturated Fat: 11g
- Unsaturated Fat: 6g
- Trans Fat: 0g
- Carbohydrates: 32g
- Fiber: 1g
- Protein: 5g
- Cholesterol: 50mg
Keywords: Homemade Cruffins,Flaky Pastry,Croissant Muffin Hybrid,Buttery Pastry Treats