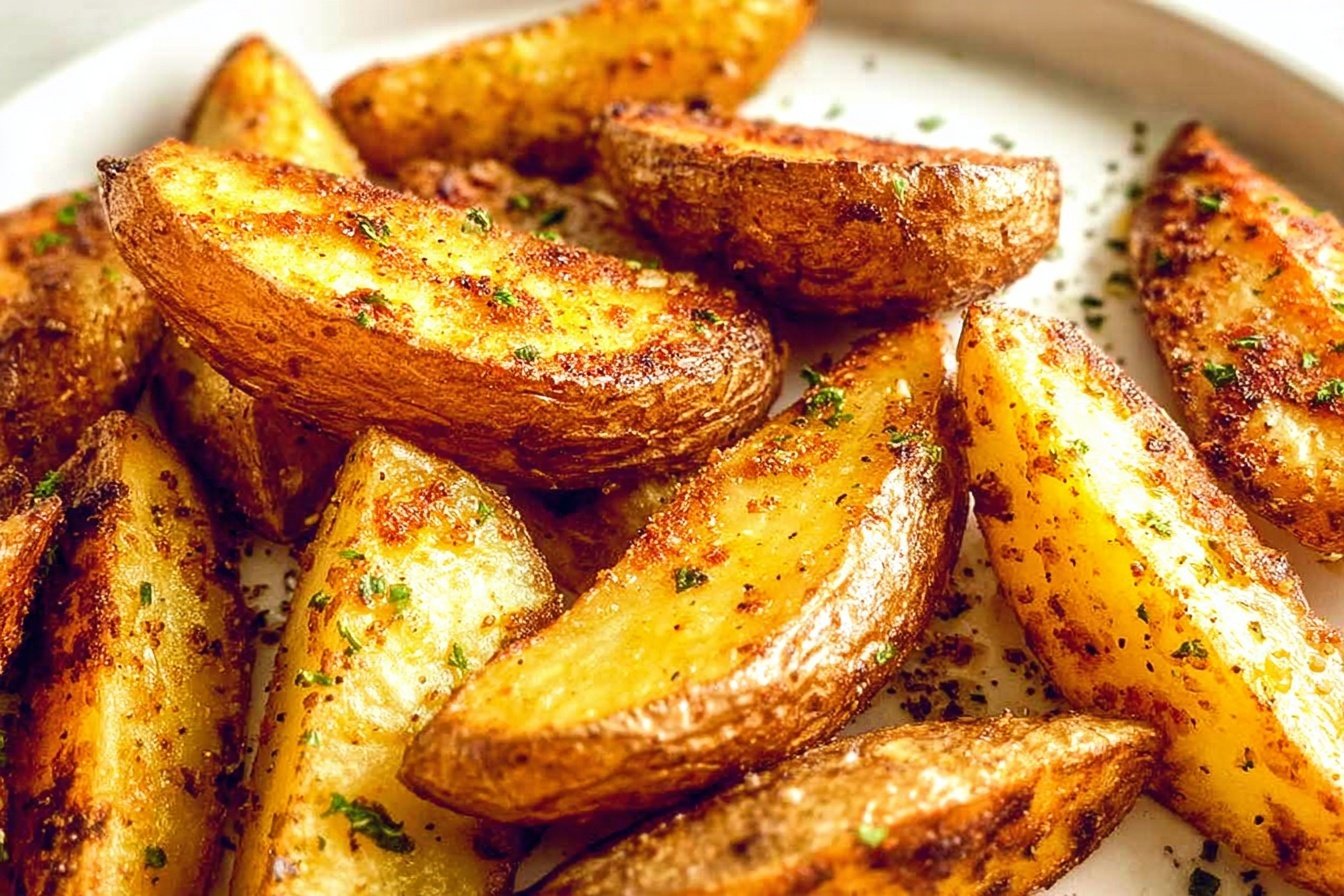
Why You’ll Love This Crispy Potato Wedges
There’s something undeniably satisfying about biting into a perfectly crispy potato wedge with a fluffy, tender interior. These crispy potato wedges deliver that restaurant-quality texture right from your home oven, and they’ve become a family favorite for good reason. Whether you’re serving them as a weeknight side dish or a crowd-pleasing party appetizer, this recipe hits all the right notes without the fuss of deep frying.
Let me share why this recipe has earned a permanent spot in my kitchen rotation:
- Ease of preparation: With just 20 minutes of hands-on prep time and simple ingredients you likely already have in your pantry, these wedges come together effortlessly. No fancy equipment needed just a baking sheet, parchment paper, and basic seasonings. The oven does all the heavy lifting while you focus on the rest of your meal.
- Health benefits: Unlike deep-fried alternatives that soak up excessive oil, these baked wedges use just 3 tablespoons of heart-healthy olive oil for the entire batch. Potatoes are packed with essential nutrients like potassium, vitamin C, and fiber, especially when you leave the skins on. According to health experts at UC Davis, potatoes offer numerous health benefits that make them a smart addition to a balanced diet.
- Versatility: These wedges play well with virtually any seasoning blend or dietary preference. Keep them simple with garlic and onion powder, or spice things up with paprika, rosemary, or even a Cajun blend. They pair beautifully with everything from grilled chicken to burgers, or enjoy them alongside our crispy baked parmesan chicken for a complete meal.
- Distinctive flavor: The combination of garlic powder and onion powder creates a subtle complexity that enhances the natural potato flavor without overpowering it. That golden, crispy exterior develops a slight caramelization during baking that adds depth you simply cannot get from boiling or microwaving.
Pro tip: The secret to ultra-crispy wedges lies in the soaking step don’t skip it! Those 10 minutes make all the difference between soggy and spectacular.
Jump To
- 1. Why You’ll Love This Crispy Potato Wedges
- 2. How to Prepare the Perfect Crispy Potato Wedges: Step-by-Step Guide
- 3. Dietary Substitutions to Customize Your Crispy Potato Wedges
- 4. Mastering Crispy Potato Wedges: Advanced Tips and Variations
- 5. How to Store Crispy Potato Wedges: Best Practices
- 6. FAQs: Frequently Asked Questions About Crispy Potato Wedges
- 7. Crispy Potato Wedges
How to Prepare the Perfect Crispy Potato Wedges: Step-by-Step Guide
Creating the ultimate crispy potato wedges at home is easier than you might think. The key lies in understanding a few simple techniques that transform ordinary potatoes into golden, crunchy perfection. Let me walk you through every step to ensure your wedges turn out perfectly every single time.
Gather Your Ingredients
Before you begin, make sure you have everything measured and ready. Quality ingredients matter here, so let’s review what you’ll need:
- 2 pounds Russet potatoes (6 smallish or 4 medium), scrubbed clean, unpeeled
- 3 tablespoons olive oil
- 2 teaspoons garlic powder
- 2 teaspoons onion powder
- 1 teaspoon fine sea salt
- Freshly ground black pepper, to taste
- 2 tablespoons finely chopped fresh parsley (optional)
Step 1: Preheat and Prepare Your Baking Sheet
Start by preheating your oven to 400 degrees Fahrenheit. This temperature is crucial it’s hot enough to create that crispy exterior while allowing the inside to cook through completely. While the oven heats, line a large, rimmed baking sheet with parchment paper. The parchment prevents sticking and makes cleanup a breeze, plus it helps the wedges crisp up evenly on all sides.
Step 2: Cut Your Potatoes Into Even Wedges
Take each scrubbed potato and cut it into 8 wedges. Here’s how: first, cut the potato in half lengthwise. Then cut each half lengthwise again, creating quarters. Finally, cut each quarter in half lengthwise, giving you 8 wedges per potato. The goal is uniform thickness and size so every wedge cooks at the same rate. Uneven pieces mean some will be overdone while others remain undercooked.
Keeping the skin on is not only easier but adds nutritional value and helps the wedges hold their shape during baking. Plus, that crispy skin is one of the best parts!
Step 3: Soak the Wedges for Maximum Crispiness
This step is the game-changer that separates mediocre wedges from truly crispy ones. Place your cut wedges in a large bowl and cover them with hot water. Let them soak for 10 minutes. The hot water helps remove excess surface starch that can prevent crisping and cause the wedges to stick together.
After soaking, drain the water and pat the wedges completely dry using clean kitchen towels or paper towels. This step cannot be rushed wet potatoes will steam instead of roast, resulting in a soggy exterior. Take an extra minute to ensure every wedge is thoroughly dried.
Step 4: Season and Oil Your Wedges
Transfer your dried wedges to the prepared baking sheet. Drizzle with 3 tablespoons of olive oil, then sprinkle evenly with 2 teaspoons garlic powder, 2 teaspoons onion powder, 1 teaspoon fine sea salt, and freshly ground black pepper to taste.
Now comes the fun part get your hands in there and toss everything together! Make sure every single wedge is coated evenly with oil and seasonings. This hands-on approach guarantees no bland spots and ensures that beautiful, even browning. Olive oil isn’t just for cooking olive oil offers proven health benefits that make it an excellent choice for roasting vegetables.
Step 5: Arrange for Optimal Roasting
Once seasoned, arrange the wedges in a single layer on the baking sheet with a cut side facing down. This positioning allows the flat surface to make direct contact with the hot pan, creating that irresistible crispy bottom. If your wedges are crowded, use two baking sheets instead of overcrowding one proper air circulation is essential for crisping rather than steaming.
| Baking Temperature | First Bake Time | Second Bake Time | Total Time |
|---|---|---|---|
| 400°F | 30 minutes | 25-30 minutes | 55-60 minutes |
Step 6: Bake and Flip for Even Crispiness
Place your baking sheet in the preheated oven and bake for 30 minutes. When the timer goes off, remove the sheet and use a spatula to flip each wedge over. Rearrange them evenly on the pan to ensure all sides get equal exposure to the heat. This flipping step is essential for achieving consistent crispness on all sides.
Return the wedges to the oven and continue baking for another 25 to 30 minutes. You’ll know they’re done when they’re deeply golden brown, crispy on the outside, and fork-tender inside. Don’t be tempted to remove them early that extra time is what creates the crunchiest exterior.
Step 7: Finish and Serve
Remove the baking sheet from the oven and let the wedges rest for just a minute or two. If desired, sprinkle with 2 tablespoons of finely chopped fresh parsley for a pop of color and fresh flavor. Serve immediately while they’re at their crispiest best.
The total time from start to finish is about 1 hour 20 minutes, but most of that is hands-off oven time. The prep takes just 20 minutes, making this an approachable recipe even on busy weeknights.
Nutritional Note: Nutrition details are estimates from an online calculator and are not a substitute for professional dietary advice. Always consult with a healthcare provider for specific nutritional guidance.

Dietary Substitutions to Customize Your Crispy Potato Wedges
One of the best things about this recipe is how easily it adapts to different dietary needs and preferences. Whether you’re cooking for someone with specific restrictions or simply want to change things up, these substitutions keep the delicious results while meeting various requirements.
Protein and Main Component Alternatives
While potatoes are naturally plant-based and gluten-free, you might want to experiment with other root vegetables for variety. Sweet potatoes make an excellent alternative, offering a different flavor profile and additional nutrients. Just note that sweet potatoes contain more natural sugar and will caramelize faster, so reduce the baking time by about 10 minutes and watch them closely to prevent burning.
For a lower-carb option, try this same seasoning blend on rutabaga or turnip wedges. These vegetables have a similar texture when roasted but contain fewer carbohydrates. Cut them into similar-sized wedges and follow the same soaking and baking instructions.
If you’re looking to turn this side dish into a heartier meal, consider topping your finished wedges with protein-rich additions. Our loaded baked potato chicken casserole inspiration can guide you toward creating a complete one-pan meal by adding cooked ground beef, shredded chicken, or black beans to your wedge bake during the final 10 minutes.
Vegetable, Sauce, and Seasoning Modifications
The seasoning possibilities for crispy potato wedges are nearly endless. While garlic and onion powder create a classic flavor profile, consider these variations based on your mood or menu:
- Smoky Paprika Blend: Replace half the onion powder with smoked paprika for a BBQ-ready flavor.
- Herb-Crusted: Add dried rosemary, thyme, or oregano to the seasoning mix for an Italian-inspired twist.
- Spicy Kick: Include cayenne pepper or chili powder for wedges with heat.
- Everything Bagel Style: Toss finished wedges with everything bagel seasoning for a savory, onion-garlic punch.
For dipping sauces, think beyond ketchup. Homemade garlic aioli, chipotle mayo, or a simple mixture of Greek yogurt with fresh herbs pairs beautifully with these wedges. The cool, creamy contrast highlights that crispy exterior perfectly.
Those following vegan or dairy-free diets can enjoy these wedges exactly as written they’re naturally free of animal products. For a cheesy twist without dairy, nutritional yeast adds a savory, umami flavor when sprinkled over the wedges after baking.
Mastering Crispy Potato Wedges: Advanced Tips and Variations
Ready to take your wedge game from great to extraordinary? These professional techniques and creative variations will help you achieve consistently perfect results and keep this side dish exciting no matter how often you make it.
Pro Cooking Techniques for Better Results
The difference between good wedges and amazing ones often comes down to a few professional tricks. First, always choose firm, organic Russet potatoes when possible they typically have less pesticide residue and better texture. The high starch content in Russets is exactly what creates that fluffy interior while maintaining a crisp exterior.
Temperature control matters more than you might think. If your oven runs hot, check the wedges at 25 minutes during the first bake. Conversely, if your oven runs cool, you might need the full 60 minutes total baking time. Using an oven thermometer helps you understand your appliance’s actual temperature.
For ultra-crispy results, consider par-boiling the wedges for 3-4 minutes instead of just soaking. This technique, borrowed from professional kitchens, creates a rough surface on the potatoes that crisps up beautifully. After par-boiling, drain well, return to the pot, and shake vigorously to rough up the edges before seasoning.
Creative Flavor Variations
Transform your wedges into something special with these inspired variations:
Loaded Cheese Wedges: After baking, sprinkle with 1-2 cups of shredded cheddar cheese and return to the oven for 5-10 minutes until bubbly. Top with crumbled bacon, green onions, and a dollop of sour cream for a loaded fry experience.
Buffalo-Style: Toss baked wedges in buffalo wing sauce and serve with blue cheese or ranch dressing. The crispy potato base holds up beautifully to the saucy coating.
Mediterranean Herb: Add dried oregano and a sprinkle of lemon zest to your seasoning mix, then finish with crumbled feta and fresh dill after baking.
Presentation and Serving Tips
A great dish deserves great presentation. Serve wedges in a rustic wooden bowl or cast iron skillet for that pub-style feel. The fresh parsley garnish isn’t just decorative it adds a bright, fresh element that balances the rich, savory potatoes. For entertaining, set up a wedge bar with various dipping sauces and toppings so guests can customize their portions.
Make-Ahead Strategies
Busy schedules demand smart prep strategies. You can soak and dry the potatoes up to 24 hours ahead store them covered in the refrigerator until ready to season and bake. For even more convenience, cut and season the wedges in the morning, refrigerate, and bake directly from chilled when you’re ready to cook. Just add 5 extra minutes to the first baking time if the wedges are cold going into the oven.
How to Store Crispy Potato Wedges: Best Practices
Let’s be honest these wedges are so delicious that leftovers aren’t usually a problem. But when you do have extras or want to meal prep ahead, proper storage ensures they maintain their quality and taste just as good reheated.
Refrigeration Guidelines
Allow leftover wedges to cool completely before storing. Place them in an airtight glass container lined with paper towels to absorb any excess moisture. The paper towel trick is essential it prevents that dreaded sogginess that ruins leftover potatoes. Properly stored, they’ll keep in the refrigerator for up to 3 days.
Freezing for Longer Storage
For longer storage, freezing works surprisingly well. Arrange cooled wedges in a single layer on a baking sheet and freeze until solid, about 2 hours. Then transfer to a freezer-safe bag, removing as much air as possible. This two-step process prevents the wedges from sticking together. Frozen wedges maintain quality for up to 1 month.
Reheating for Best Results
The microwave might be tempting, but resist it’s the enemy of crispiness. Instead, reheat wedges in an air fryer at 375°F for 5-7 minutes, flipping halfway through. No air fryer? A toaster oven at 400°F for 8-10 minutes works beautifully. You can also use a regular oven at 400°F for about 10-12 minutes. These methods restore nearly all of the original crunch.
Meal Prep Considerations
If you’re planning to meal prep, consider baking a double batch. The time investment is nearly the same, and you’ll have ready-to-reheat sides for multiple meals throughout the week. Pair these wedges with protein options like grilled chicken or baked fish for complete, easy lunches. They also make an excellent base for breakfast hash just cube and sauté with eggs and vegetables.

FAQs: Frequently Asked Questions About Crispy Potato Wedges
How do I make crispy potato wedges in the oven?
Start with Russet potatoes for the best texture. Wash and cut them into even wedges: quarter each potato lengthwise, then halve each quarter. Soak the wedges in hot water for 10 minutes to remove excess starch, pat dry thoroughly, and toss with 2-3 tablespoons of oil, garlic powder, onion powder, sea salt, and black pepper. Arrange in a single layer on a parchment-lined baking sheet, cut side down. Bake at 400°F for 30 minutes, flip, then bake another 25-30 minutes until golden and crisp. This method yields restaurant-quality results with fluffy insides and crunchy outsides. Serves 4 as a side. Total time: about 1 hour. (78 words)
What kind of potatoes are best for crispy potato wedges?
Russet potatoes are ideal for crispy potato wedges due to their high starch content, which creates a fluffy interior and crisp exterior when baked. Choose firm, smooth ones, preferably organic, around 6-8 ounces each for even cooking. Avoid waxy varieties like red or Yukon Gold, as they hold more moisture and won’t crisp as well. For 4 servings, use 4 medium Russets. This simple swap makes a big difference in texture—test it next time for perfectly crunchy results. (92 words)
Should I soak potato wedges before baking for crispiness?
Yes, soaking raw potato wedges in hot water for 10 minutes is key to ultra-crispy results. It rinses away surface starch, allowing better oil absorption and moisture release for crunchy outsides with soft centers. Skip it if short on time, but expect 20% less crispiness. After soaking, rinse, pat very dry with towels, and season. This step takes just minutes but transforms basic wedges into crowd-pleasers. Pro tip: Use near-boiling water for fastest starch removal. Pairs perfectly with oven baking at 400°F. (98 words)
How do I store and reheat leftover crispy potato wedges?
Cool leftovers completely, then store in an airtight glass container lined with a paper towel to absorb moisture—keeps them crisp up to 3 days in the fridge or 1 month in the freezer (in a single layer first, then bag). Reheat in an air fryer at 375°F for 5-7 minutes or a toaster oven at 400°F for 8-10 minutes, flipping halfway; avoid microwaves to prevent sogginess. This method restores nearly all original crunch. Great for meal prep or quick snacks. (89 words)
Can I turn baked potato wedges into cheese fries?
Absolutely—baked crispy potato wedges make perfect cheese fries. After baking, sprinkle with 1-2 cups shredded cheddar (or your favorite melty cheese) right on the hot pan. Broil or return to 400°F oven for 5-10 minutes until bubbly and golden. Add toppings like bacon bits, green onions, or sour cream. Serves 4 as an appetizer. This easy upgrade takes under 15 extra minutes and uses the same base recipe. Link to our loaded fries variations for more ideas. Kid-approved and game-day ready. (94 words)

Crispy Potato Wedges
- Total Time: 1 hour 20 minutes
- Yield: 6 servings
- Diet: Vegan
Description
🥔 Ultra-crispy baked potato wedges with fluffy insides – healthier fry alternative, loaded with garlic-onion flavor!
🍟 Ready in 1 hour 20 min, perfect side for burgers or steaks, customizable and crowd-pleasing.
Instructions
1-Step 1: Preheat and Prepare Your Baking Sheet Start by preheating your oven to 400 degrees Fahrenheit. This temperature is crucial it’s hot enough to create that crispy exterior while allowing the inside to cook through completely. While the oven heats, line a large, rimmed baking sheet with parchment paper. The parchment prevents sticking and makes cleanup a breeze, plus it helps the wedges crisp up evenly on all sides.
2-Step 2: Cut Your Potatoes Into Even Wedges Take each scrubbed potato and cut it into 8 wedges. Here’s how: first, cut the potato in half lengthwise. Then cut each half lengthwise again, creating quarters. Finally, cut each quarter in half lengthwise, giving you 8 wedges per potato. The goal is uniform thickness and size so every wedge cooks at the same rate. Uneven pieces mean some will be overdone while others remain undercooked. Keeping the skin on is not only easier but adds nutritional value and helps the wedges hold their shape during baking. Plus, that crispy skin is one of the best parts!
3-Step 3: Soak the Wedges for Maximum Crispiness This step is the game-changer that separates mediocre wedges from truly crispy ones. Place your cut wedges in a large bowl and cover them with hot water. Let them soak for 10 minutes. The hot water helps remove excess surface starch that can prevent crisping and cause the wedges to stick together. After soaking, drain the water and pat the wedges completely dry using clean kitchen towels or paper towels. This step cannot be rushed wet potatoes will steam instead of roast, resulting in a soggy exterior. Take an extra minute to ensure every wedge is thoroughly dried.
4-Step 4: Season and Oil Your Wedges Transfer your dried wedges to the prepared baking sheet. Drizzle with 3 tablespoons of olive oil, then sprinkle evenly with 2 teaspoons garlic powder, 2 teaspoons onion powder, 1 teaspoon fine sea salt, and freshly ground black pepper to taste. Now comes the fun part get your hands in there and toss everything together! Make sure every single wedge is coated evenly with oil and seasonings. This hands-on approach guarantees no bland spots and ensures that beautiful, even browning. Olive oil isn’t just for cooking olive oil offers proven health benefits that make it an excellent choice for roasting vegetables.
5-Step 5: Arrange for Optimal Roasting Once seasoned, arrange the wedges in a single layer on the baking sheet with a cut side facing down. This positioning allows the flat surface to make direct contact with the hot pan, creating that irresistible crispy bottom. If your wedges are crowded, use two baking sheets instead of overcrowding one proper air circulation is essential for crisping rather than steaming.
6-Step 6: Bake and Flip for Even Crispiness Place your baking sheet in the preheated oven and bake for 30 minutes. When the timer goes off, remove the sheet and use a spatula to flip each wedge over. Rearrange them evenly on the pan to ensure all sides get equal exposure to the heat. This flipping step is essential for achieving consistent crispness on all sides. Return the wedges to the oven and continue baking for another 25 to 30 minutes. You’ll know they’re done when they’re deeply golden brown, crispy on the outside, and fork-tender inside. Don’t be tempted to remove them early that extra time is what creates the crunchiest exterior.
7-Step 7: Finish and Serve Remove the baking sheet from the oven and let the wedges rest for just a minute or two. If desired, sprinkle with 2 tablespoons of finely chopped fresh parsley for a pop of color and fresh flavor. Serve immediately while they’re at their crispiest best. The total time from start to finish is about 1 hour 20 minutes, but most of that is hands-off oven time. The prep takes just 20 minutes, making this an approachable recipe even on busy weeknights.
Notes
🥔 Soak wedges in hot water 10 min to remove starch for ultimate crispiness.
🔄 Flip halfway through baking and use two pans if needed for even cooking.
🧀 Bake till deeply golden – don’t underbake for max crunch!
- Prep Time: 20 minutes
- Cook Time: 55-60 minutes
- Category: Side Dishes
- Method: Baking
- Cuisine: American
Nutrition
- Serving Size: 8 wedges
- Calories: 280 kcal
- Sugar: 2 g
- Sodium: 400 mg
- Fat: 10 g
- Saturated Fat: 1.5 g
- Unsaturated Fat: 8.5 g
- Trans Fat: 0 g
- Carbohydrates: 40 g
- Fiber: 4 g
- Protein: 4 g
- Cholesterol: 0 mg
Keywords: crispy baked potato wedges, potato wedges recipe, oven baked fries, seasoned potato wedges